
Turning animal manure into rich compost seems like hard work. Yet the right approach can actually transform waste into soil gold that feeds your crops for seasons to come. Did you know the ideal compost pile can reach internal temperatures of 160 degrees Fahrenheit, hotter than most ovens? Most folks focus on just piling up manure and hoping for the best. The real secret is in the careful balance, mixing, and frequent attention that produces safe, odorless, and nutrient-packed compost in record time.
Table of Contents
- Step 1: Gather Necessary Materials For Composting
- Step 2: Create A Composting Area For Manure
- Step 3: Mix Green And Brown Materials Effectively
- Step 4: Monitor Temperature And Moisture Levels
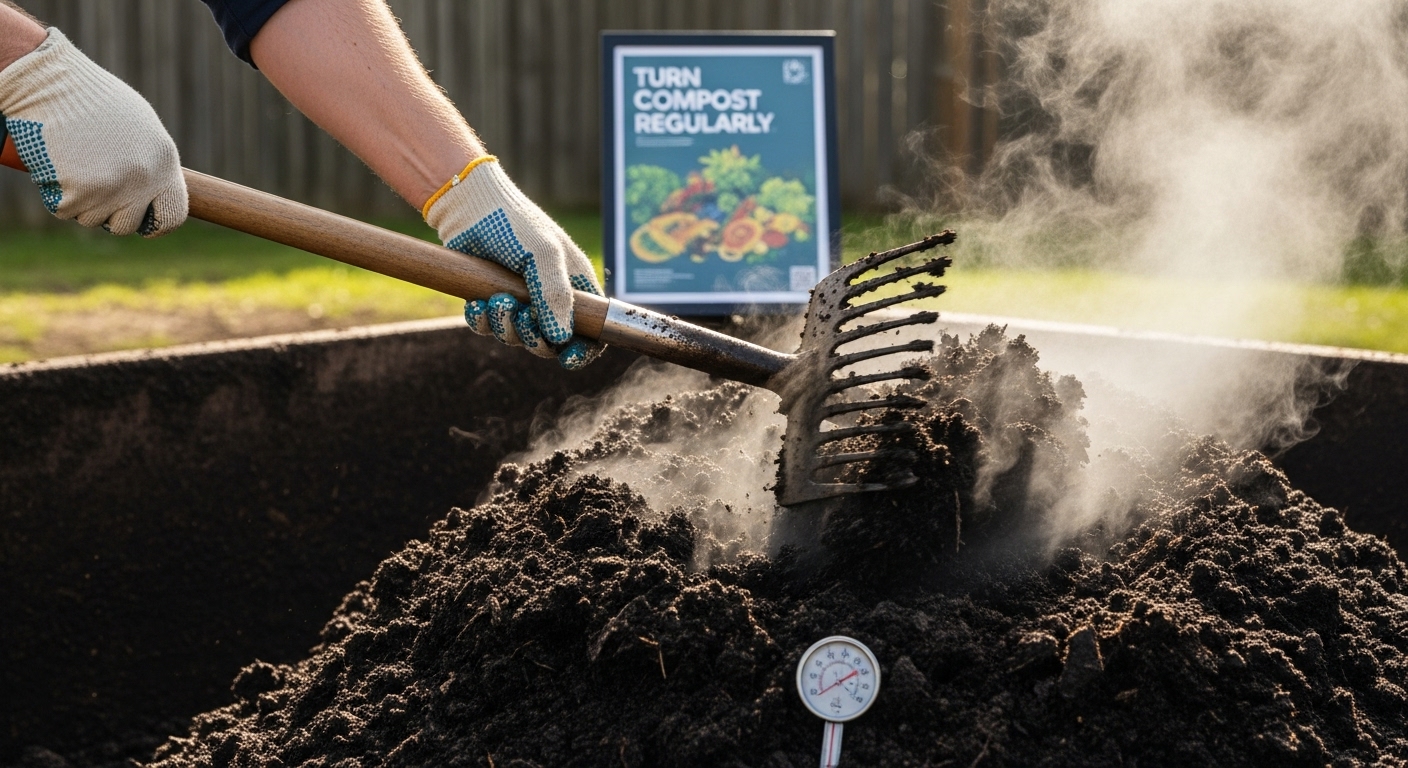
- Step 5: Turn Compost Regularly For Aeration
- Step 6: Test Finished Compost For Quality
Quick Summary
| Key Point | Explanation |
|---|---|
| 1. Gather key composting materials | Collect fresh animal manure and carbon-rich materials like dry leaves and straw for effective composting. |
| 2. Establish a proper composting area | Choose a well-drained location with good sun exposure for optimal compost pile conditions. |
| 3. Maintain the right carbon-to-nitrogen ratio | Mix approximately 3 parts carbon materials to 1 part manure to support microbial activity. |
| 4. Monitor temperature and moisture levels | Use a thermometer and squeeze test to maintain ideal temperatures (130-160°F) and moisture (40-60%). |
| 5. Turn compost regularly for aeration | Turn the compost every 3-5 days to introduce oxygen and promote even decomposition. |
Step 1: Gather Necessary Materials for Composting
Successful composting animal manure begins with careful preparation and gathering the right materials. Before you start transforming animal waste into nutrient-rich soil amendment, you will need to collect several essential components that will support the decomposition process.
Core Materials for Manure Composting
The foundation of effective manure composting requires a strategic collection of organic materials. You will need fresh animal manure from livestock such as horses, cattle, chickens, or other farm animals. Collect manure that is free from excessive bedding materials and contamination. Additionally, you will want to gather carbon-rich materials to balance the nitrogen-heavy manure. These carbon sources typically include:
- Dry leaves
- Straw
- Wood shavings
- Sawdust
- Dried grass clippings
Tools and Equipment Needed
Preparing for composting also means assembling the right tools. A sturdy pitchfork or compost turning tool will help you mix and aerate the composting pile. You will need a wheelbarrow for transporting manure and carbon materials, work gloves to protect your hands, and a reliable water source for maintaining proper moisture levels. A compost thermometer can help you monitor the internal temperature of your composting pile, which is crucial for effective decomposition.
According to Michigan State University’s Extension, the proper ratio of materials is critical. Aim for a mix of approximately 3 parts carbon-rich materials to 1 part manure. This balance helps create an optimal environment for beneficial microorganisms that break down organic matter.
Choose a well-drained location for your composting area, preferably on level ground with good sun exposure and protection from excessive wind. The site should be easily accessible and close to your animal housing to simplify manure collection. Ensure the area has enough space to accommodate your composting pile and allows for easy turning and maintenance.
By carefully gathering these materials and preparing your composting site, you are setting the stage for successful transformation of animal manure into valuable soil nutrition.
Below is a table summarizing the essential tools and materials required for effective animal manure composting, along with their key purposes.
| Item | Type | Purpose |
|---|---|---|
| Animal manure | Green material | Primary nitrogen source for compost pile |
| Dry leaves | Brown material | Carbon-rich material to balance manure |
| Straw | Brown material | Adds carbon and helps maintain pile structure |
| Wood shavings | Brown material | Provides carbon, absorbs excess moisture |
| Sawdust | Brown material | Absorbs moisture and increases carbon content |
| Pitchfork/turning tool | Tool | Used for mixing and aerating compost pile |
| Wheelbarrow | Tool | Transports materials to and from compost site |
| Work gloves | Tool | Protects hands during handling and turning |
| Water source | Resource | Maintains moisture level in the compost pile |
| Compost thermometer | Tool | Monitors internal pile temperature for proper composting |
Step 2: Create a Composting Area for Manure
Creating a strategic composting area is crucial for successful manure composting. This step transforms an ordinary space into an efficient organic waste management zone that will support nutrient cycling and soil health.
Location and Site Preparation
Choosing the right location for your composting area requires careful consideration. Your site should be on level ground with good drainage, positioned away from water sources and residential areas. Ideal locations have partial sun exposure and protection from strong winds. Clear the selected area of grass, rocks, and debris, creating a clean workspace approximately 10 to 15 square feet in size. Consider nearby accessibility for tractors or wheelbarrows to simplify material transportation.
Composting Area Construction
Construct a designated composting zone using materials that support proper decomposition. Many farmers opt for wooden pallets or wire mesh to create open-sided bins that allow airflow while containing materials. If using wooden structures, select untreated wood to prevent chemical leaching. Your composting bin should be approximately 3 to 4 feet tall and wide, providing sufficient space for turning and mixing materials.
According to University of Massachusetts Amherst, proper site selection is critical to prevent potential groundwater contamination. Ensure your composting area is:
- At least 400 feet from drinking water wells
- Located where groundwater is more than 4 feet below the surface
- Positioned on well-drained soil
- Protected from direct runoff
Create a solid foundation for your composting area by laying down a layer of coarse wood chips or gravel. This base helps with drainage and prevents direct ground contact, which can impede decomposition and potentially contaminate soil. Consider adding a slight slope to the ground underneath your composting bin to encourage water runoff and maintain optimal moisture levels.
By meticulously preparing your composting area, you establish a robust environment that supports efficient manure decomposition and produces high-quality organic soil amendment.
Step 3: Mix Green and Brown Materials Effectively
Successful composting animal manure relies on understanding and implementing the right balance between green and brown materials. This critical step transforms raw organic waste into a nutrient-rich soil amendment through strategic material combination.
Understanding Material Balance
Green materials represent nitrogen-rich components like fresh animal manure, grass clippings, and food scraps. Brown materials are carbon-rich substances including dry leaves, straw, sawdust, and wood chips. The key to effective composting is achieving the right proportion of these materials. Experienced farmers typically aim for a 3:1 ratio of brown to green materials, which creates an optimal environment for microorganisms that break down organic matter.
Begin by spreading a foundational layer of brown materials across your composting area. This base helps absorb moisture and provides initial structure for your compost pile. Gradually add your animal manure as the green material, mixing it thoroughly with the brown components. Use a pitchfork or compost turning tool to ensure even distribution. The goal is to create a uniform mixture where no single material dominates the composition.
According to the Environmental Protection Agency, proper mixing is essential for decomposition efficiency. As you combine materials, pay attention to moisture levels. The ideal composting mixture should feel like a wrung-out sponge - damp but not soaking wet. If the mixture appears too dry, add small amounts of water. Conversely, if it seems too wet, incorporate additional brown materials to absorb excess moisture.
Your materials should be chopped or shredded before mixing to accelerate decomposition. Smaller particle sizes increase surface area, allowing microorganisms to break down organic matter more quickly. Large chunks of material will slow the composting process and create uneven decomposition.
![]()
Verify your mixture’s effectiveness by checking its consistency and smell. A well-mixed compost pile should have a pleasant, earthy odor. Avoid any strong ammonia-like smells, which indicate an imbalance in your green and brown material ratio. By carefully mixing and monitoring your composting materials, you create an optimal environment for transforming animal manure into valuable soil nutrition.
Step 4: Monitor Temperature and Moisture Levels
Temperature and moisture are the critical indicators of successful composting animal manure. This step transforms your organic materials from raw waste into nutrient-rich soil amendment through careful environmental management.
Understanding Temperature Dynamics
A compost thermometer becomes your most valuable tool in this process. Active composting generates significant internal heat, typically ranging between 130 to 160 degrees Fahrenheit. This heat range indicates robust microbial activity breaking down organic materials. During the first week, expect temperatures to rise quickly. Check your compost pile daily, inserting the thermometer at least 12 inches deep into multiple locations to ensure uniform heating.
As microorganisms consume organic matter, temperature will naturally fluctuate. When temperatures drop below 110 degrees Fahrenheit, it signals a need to turn the pile and potentially add more green materials to reinvigorate microbial activity. Professional farmers recommend turning the compost every 3 to 5 days during the active decomposition phase to maintain optimal temperature and distribute heat evenly.
According to the Environmental Protection Agency, maintaining proper moisture is equally crucial. Your compost mixture should feel like a wrung-out sponge - damp but not saturated. Moisture content between 40 to 60 percent supports effective decomposition.
Moisture Management Techniques
To assess moisture levels, perform a simple squeeze test. Grab a handful of compost material and squeeze. If water drips out, the mixture is too wet. If the material crumbles and no moisture appears, it is too dry. When the material holds together without releasing water, you have achieved the ideal moisture balance.
If your compost becomes too dry, add water sparingly using a garden hose with a fine spray nozzle. For overly wet compost, incorporate additional dry brown materials like straw or sawdust. These materials absorb excess moisture while introducing more carbon to your decomposition process.
Consistent monitoring transforms composting from a guessing game into a precise agricultural technique. By paying close attention to temperature and moisture, you create an optimal environment for converting animal manure into valuable organic fertilizer.
Step 5: Turn Compost Regularly for Aeration
Turning your compost pile is a critical process that breathes life into the decomposition cycle. This step introduces oxygen, redistributes materials, and accelerates the transformation of animal manure into nutrient-rich soil amendment.
Turning Techniques and Frequency
Effective turning requires more than simply moving materials around. Strategic rotation ensures even decomposition and prevents anaerobic conditions that can slow down the composting process. Use a sturdy pitchfork or specialized compost turning tool to lift and mix materials thoroughly. Begin at the pile’s edges, moving materials from the outside toward the center, which helps incorporate cooler outer materials into the warmer interior zone.
The frequency of turning depends on your specific composting conditions. During the active decomposition phase, aim to turn your compost every 3 to 5 days. In cooler temperatures or with slower-decomposing materials, you might reduce turning to once a week. Watch for visual and sensory cues that indicate when turning is necessary: a drop in internal temperature, compacted appearance, or a musty odor suggesting limited oxygen circulation.
According to the Environmental Protection Agency, maintaining an aerobic environment is crucial for efficient composting. Each time you turn the pile, you accomplish multiple objectives:
- Redistribute moisture evenly
- Break up compacted materials
- Introduce fresh oxygen
- Mix partially decomposed materials
- Prevent potential odor development
Turning Strategies for Optimal Results
During turning, pay attention to the material’s consistency. If the compost appears too dry, sprinkle water lightly to maintain moisture. Conversely, if it seems waterlogged, incorporate additional dry brown materials like straw or wood chips. The goal is creating a loose, crumbly texture that allows air to circulate freely.
Professional farmers recommend turning the entire pile to a depth of at least 12 to 18 inches. This ensures that materials from the pile’s bottom receive exposure to oxygen and heat. Wear sturdy gloves and use a long-handled tool to protect yourself from potential heat and microorganism activity within the decomposing materials.
By mastering the art of turning, you transform composting from a passive process into an active, dynamic method of converting animal manure into valuable organic fertilizer.
Step 6: Test Finished Compost for Quality
Testing your finished compost represents the culmination of your careful composting process, ensuring the organic material you have created is safe, nutritious, and ready for agricultural use. This critical evaluation confirms that your animal manure has successfully transformed into a valuable soil amendment.
Visual and Physical Evaluation
Begin your quality assessment through careful visual inspection. Finished compost should resemble rich, dark soil with a crumbly texture similar to coffee grounds. The material will look completely different from the original manure and carbon materials, indicating successful decomposition. Run the compost through your fingers checking for uniform particle size. Large chunks or recognizable pieces of original materials suggest the compost needs additional decomposition time.
Temperature provides another crucial indicator of compost maturity. After months of active decomposition, your compost pile should return to ambient temperature. When you place your hand near the pile, it should feel cool rather than generating heat. This temperature stabilization signals that microbial activity has significantly decreased, marking the end of the active composting phase.
Advanced Quality Testing Methods
For more precise evaluation, consider conducting several specialized tests. pH levels should ideally range between 6.5 and 7.5, indicating a neutral environment suitable for most plants. Moisture content is another critical factor. Squeeze a handful of compost - it should hold together without releasing water, demonstrating ideal moisture retention.
According to the U.S. Environmental Protection Agency, professional compost testing can reveal critical insights. Look for these key quality indicators:
- Consistent dark brown or black color
- Earthy soil-like smell
- No recognizable original materials
- Neutral pH between 6.5 and 7.5
- Moisture content around 40-60%
For farmers requiring precise nutrient analysis, agricultural extension offices and specialized laboratories offer comprehensive compost testing. These tests can evaluate nitrogen, phosphorus, and potassium levels, helping you understand the exact nutritional profile of your finished compost.
A simple germination test provides a practical final verification. Place a few seeds in a small container with your finished compost. Healthy, vigorous seedling growth confirms your compost is mature and ready for agricultural application. By meticulously testing your compost, you ensure a high-quality soil amendment that will nourish your fields and gardens.
Here is a checklist table to help you evaluate when your compost is mature and ready for use, based on the quality indicators mentioned in the guide.
| Maturity Indicator | How to Check | Ideal Result |
|---|---|---|
| Appearance | Look for color and texture | Dark brown/black, crumbly |
| Smell | Sniff compost | Earthy, natural odor |
| Temperature | Touch or use a thermometer | Feels cool, same as ambient air |
| Presence of original materials | Inspect for visible pieces | None visible |
| Moisture level | Squeeze a handful | Holds together, no free water |
| pH level | Test with a pH kit (optional) | Between 6.5 and 7.5 |
| Germination test | Seed germination in compost | Seeds sprout and thrive |
Turn Manure into Power: Let FenceFast.ca Help You Elevate Your Composting Success
You know how rewarding composting animal manure can be. Still, dealing with proper site setup, efficient material handling, and livestock management tools can slow your progress or lower your results. Whether you are ensuring a safe composting spot away from water sources or looking to streamline manure collection and turning, the right equipment and reliable supplies make all the difference. If you want less stress, more safety, and healthier animals through every composting step, discover how reasoned solutions make every job smoother.

Step up your composting project today. Visit FenceFast.ca for the gear and expertise you need for superior animal management and efficient composting. Get everything from fencing tools to livestock care products and consult with our specialists. Moving from manure to fertile soil is easy when you click shop livestock management solutions now. Do not wait until the season is in full swing. Equip yourself for success right now.
Frequently Asked Questions
What materials do I need for composting animal manure?
To successfully compost animal manure, gather fresh manure, carbon-rich materials such as dry leaves, straw, wood shavings, and sawdust. Tools like a pitchfork, wheelbarrow, and compost thermometer are also essential for the process.
How do I create a composting area for manure?
Choose a well-drained location away from water sources and prepare a clean space of about 10 to 15 square feet. Construct open-sided bins from untreated wood or wire mesh to allow airflow while containing the materials.
What is the ideal ratio of green to brown materials in composting?
Aiming for a 3:1 ratio of brown (carbon-rich) to green (nitrogen-rich) materials, such as animal manure, helps create an optimal environment for microorganisms that decompose organic matter.
How can I tell when my compost is ready to use?
Finished compost should resemble dark, crumbly soil without recognizable original materials. It should feel cool to the touch, have an earthy smell, and pass a germination test with healthy seedling growth.

