
Troubleshooting a Gallagher electric fence can seem like an endless guessing game. Surprisingly, most electric fences fail not because of faulty gadgets but due to basics like broken or sagging wires and improper grounding, which experts say account for the majority of system failures. Fixing these simple issues often restores full power faster than any fancy device could.
Table of Contents
- Step 1: Inspect The Electric Fence Components
- Step 2: Determine Electrical Output From The Energizer
- Step 3: Check For Grounding Issues
- Step 4: Identify Physical Damage On The Fence Line
- Step 5: Test For Proper Functionality After Repairs
Quick Summary
| Key Point | Explanation |
|---|---|
| 1. Inspect all fence components thoroughly | Begin troubleshooting with a detailed visual and functional inspection of the fence. Look for wire damage, loose connections, and broken insulators, which can affect performance. |
| 2. Measure the energizer’s voltage output | Use a digital voltmeter to check the energizer’s output after isolation from the fence. Ensure readings are between 2,000 and 10,000 volts for effective operation. |
| 3. Verify grounding system integrity | Check ground rods for installation, corrosion, and poor soil conditions. Resistance should be below 500 ohms for optimal electrical performance. |
| 4. Identify physical damages on the fence | Walk the fence line to detect any damage such as broken wires or sagging sections. Promptly address these issues to maintain electrical continuity. |
| 5. Test functionality post-repairs | After repairs, reconnect and test the entire system for consistent voltage above 3,000 volts under load. Monitor for any unexpected fluctuations to ensure reliability. |
Step 1: Inspect the Electric Fence Components
Successful Gallagher electric fence troubleshooting begins with a comprehensive visual and functional inspection of all system components. This critical first step helps you identify potential issues before they escalate into more complex problems that could compromise your fence’s performance and animal containment capabilities.
Start by systematically examining the entire fence perimeter, paying close attention to each section’s physical condition. Look for signs of wear, damage, or disconnection in your electric fence wires, which can significantly impact the system’s effectiveness. Broken or sagging wires, loose connections, and damaged insulators are common culprits that can disrupt electrical continuity.
Carefully check each insulator to ensure they are securely mounted and intact. Cracked or damaged insulators can create short circuits or allow electricity to ground unexpectedly, reducing the fence’s shock potential. Run your hand along the wire connections, feeling for any loose or corroded joints that might interrupt the electrical current. Learn more about essential fence building tools that can help you perform a thorough inspection.
Your energizer represents the heart of the electric fence system. Inspect its housing for any visible damage, corrosion, or moisture intrusion. Check that all connection terminals are clean, tight, and free from rust or oxidation. Most modern energizers have built-in indicator lights or diagnostic features that can quickly signal potential issues. Look for warning lights or unusual behavior that might suggest internal problems.
Verify the grounding system’s integrity, as poor grounding can render even a perfectly constructed fence ineffective. Examine ground rods for proper installation, ensuring they are deeply and securely placed in consistently moist soil. Clean the ground rod connections and check for any signs of corrosion or looseness that could compromise electrical conductivity.
Key verification criteria for a successful component inspection include:
- No visible wire damage or significant rust
- Insulators firmly attached without cracks
- Energizer connections clean and secure
- Ground system properly installed and corrosion-free
- No unexpected resistance or interruption in electrical flow
By meticulously performing this initial inspection, you set the stage for effective Gallagher electric fence troubleshooting, addressing potential issues before they become significant problems that could compromise your fence’s reliability and performance.
The table below summarizes the key verification criteria for each Gallagher electric fence troubleshooting step, creating an easy reference checklist for optimal repair results.
| Step | Verification Criteria |
|---|---|
| Inspect Components | No visible wire damage or significant rust; insulators firmly attached; energizer connections clean and secure; ground system properly installed; no unexpected resistance |
| Test Energizer Output | Consistent voltage within 2,000–10,000 volts; no fluctuations; clean connections; battery/power supply functioning; no internal damage |
| Check Grounding | Ground resistance below 500 ohms; multiple rods installed; clean/tight connections; moist soil; no corrosion or damage |
| Inspect Fence Line | No broken/rusted wires; consistent tension; intact insulators; solid posts; vegetation cleared |
| Functionality Test | Voltage at 3,000–5,000 volts under load; consistent readings; proper grounding below 500 ohms; no interruptions; stable in all conditions |
![]()
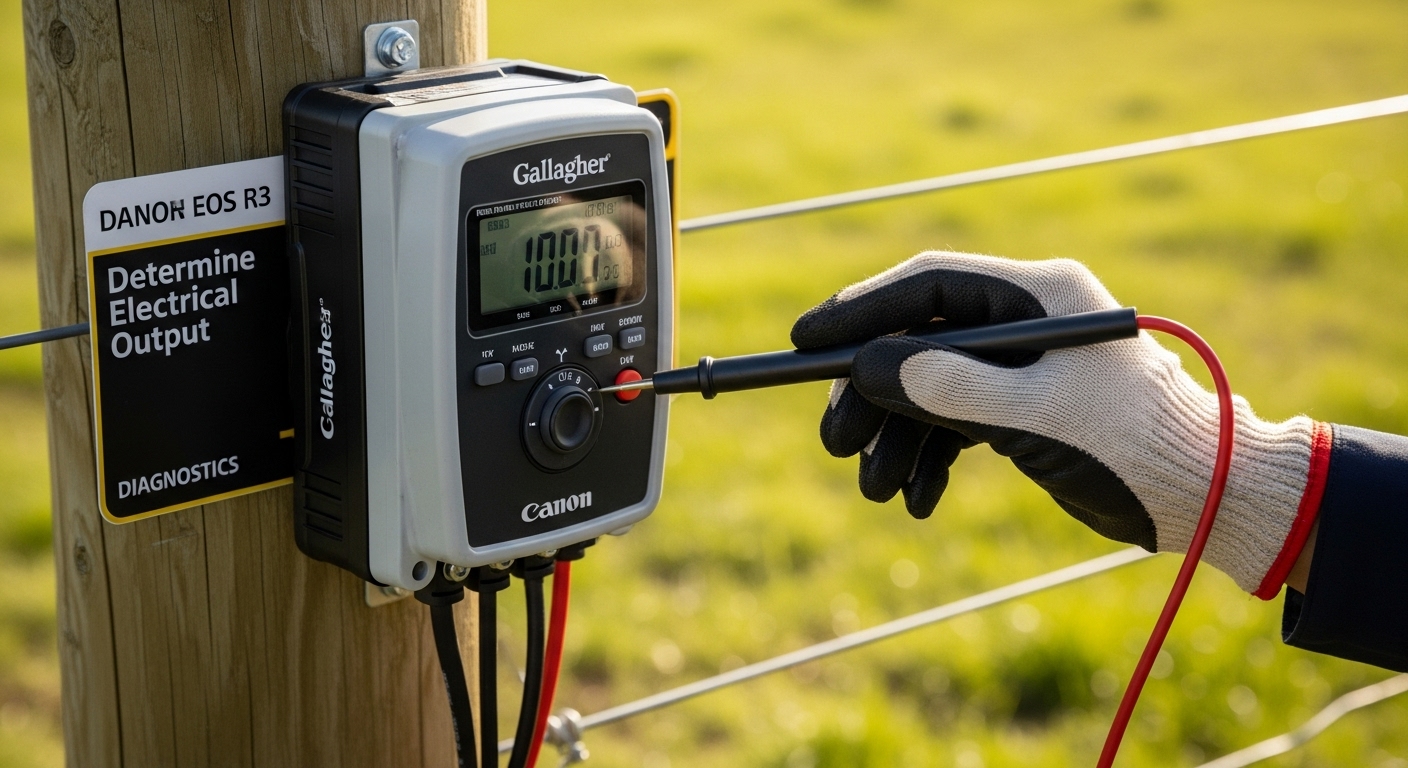
Step 2: Determine Electrical Output from the Energizer
After completing the initial visual inspection, the next critical step in Gallagher electric fence troubleshooting involves precisely measuring and verifying the electrical output from your energizer. This step ensures that the heart of your electric fence system is functioning correctly and delivering the necessary voltage to maintain an effective barrier.
Voltage testing is fundamental to understanding your fence’s performance and potential issues. Modern electric fence systems require specialized voltage testing tools that can safely and accurately measure electrical output. A digital voltmeter designed specifically for electric fences provides the most reliable readings. When selecting a testing device, opt for one with high impedance to prevent false readings and ensure accurate measurements.
Begin by carefully disconnecting the fence from the energizer, which eliminates potential interference from the entire fence system. This isolation allows you to test the energizer’s direct output without external variables. Connect your digital voltmeter directly to the energizer’s positive and negative terminals, following the manufacturer’s specific instructions for your particular model. Explore our guide on choosing the best livestock fence to understand the importance of proper electrical performance.
Typical voltage requirements vary depending on the specific livestock and fence design, but most agricultural electric fences operate effectively between 2,000 and 10,000 volts. Readings below 2,000 volts indicate potential problems that could compromise fence effectiveness. Pay close attention to the meter’s readings, noting any significant fluctuations or inconsistencies that might suggest internal energizer issues.
If your voltage test reveals unexpectedly low output, systematically investigate potential causes. Check battery connections for corrosion or looseness, verify power supply functionality, and examine internal components for signs of wear or damage. Some energizers include built-in diagnostic features that can help pinpoint specific electrical performance problems.
Key verification criteria for electrical output testing include:
- Consistent voltage reading within expected range
- No significant fluctuations during testing
- Clean and secure electrical connections
- Battery or power supply functioning correctly
- No visible internal energizer damage
Remember that environmental factors like moisture, vegetation contact, and ground conditions can impact electrical performance. Conducting these tests under consistent conditions provides the most reliable assessment of your energizer’s functionality. By meticulously measuring electrical output, you establish a crucial baseline for effective electric fence troubleshooting and maintenance.
Step 3: Check for Grounding Issues
Proper grounding represents the most critical yet often overlooked aspect of electric fence performance. A compromised grounding system can render even the most sophisticated electric fence ineffective, dramatically reducing shock potential and animal containment capabilities. Inadequate grounding transforms your electric fence from a reliable barrier into little more than a decorative wire.
Begin your grounding investigation by examining the ground rod system. Typical electric fence installations require multiple ground rods spaced approximately 10 feet apart, driven at least 6-8 feet into consistently moist soil. Inspect each ground rod for signs of corrosion, mechanical damage, or improper installation. The rods should be made of galvanized steel or copper and maintain direct contact with soil that retains consistent moisture.
Utilize a specialized ground tester or multimeter to measure the electrical resistance of your grounding system. Ideal ground resistance should measure below 500 ohms, with lower readings indicating more effective grounding performance. If your measurements consistently exceed this threshold, you’ll need to implement corrective measures. Learn more about electric fence systems for livestock to understand the importance of proper grounding.
When troubleshooting ground rod effectiveness, consider environmental factors that might compromise performance. Dry, rocky, or sandy soil can significantly reduce electrical conductivity. In such conditions, consider adding ground enhancement materials like bentonite clay or creating a more elaborate grounding system with additional rods. Ensure all ground rod connections remain clean, tight, and free from oxidation or corrosive buildup.
Pay special attention to ground wire connections, checking for any signs of wear, fraying, or unexpected resistance.
Use dielectric grease on connection points to prevent corrosion and maintain optimal electrical conductivity. Loose or corroded ground connections can create intermittent electrical performance that disrupts fence effectiveness.
Key verification criteria for effective grounding include:
- Ground resistance below 500 ohms
- Multiple ground rods installed correctly
- Clean and secure ground wire connections
- Consistent soil moisture around ground rods
- No visible corrosion or mechanical damage
Remember that grounding issues can manifest subtly. Inconsistent shock performance, reduced electrical output, and unexpected animal behavior near the fence might indicate underlying grounding problems. By systematically addressing these potential complications, you ensure your electric fence maintains maximum effectiveness and reliability across various environmental conditions.
Step 4: Identify Physical Damage on the Fence Line
Identifying physical damage along your electric fence line is a critical step in Gallagher electric fence troubleshooting that demands meticulous attention and systematic investigation. Physical damage can compromise your fence’s integrity, reducing its effectiveness and potentially creating safety risks for your livestock. Comprehensive fence line inspection requires a methodical approach and keen observational skills.
Begin your inspection by walking the entire fence perimeter, moving slowly and deliberately to examine every section of the wire, insulators, and supporting structures. Look for subtle signs of wear, damage, or interference that might not be immediately obvious from a distance. Pay special attention to areas where vegetation grows close to the fence, as branches, weeds, and tall grasses can create unexpected electrical shorts or physical stress on the wire. Explore our guide on best fencing for small farms to understand comprehensive fence maintenance strategies.
Broken or sagging wires represent significant vulnerabilities in your electric fence system. Carefully check wire tension, looking for sections that have stretched, snapped, or become disconnected from insulators. Rust, corrosion, and metal fatigue can weaken wire over time, creating potential breaking points. Use wire cutters and replacement wire to address any damaged sections immediately, ensuring you maintain consistent electrical conductivity throughout the fence line.
Inspect each insulator thoroughly, checking for cracks, breaks, or signs of detachment from supporting posts. Damaged insulators can create electrical leakage, reducing the fence’s shock potential and compromising its containment capabilities. Replace any compromised insulators with new, high-quality components that match your specific fence design. Look for signs of animal damage, such as chewing or rubbing, which can gradually weaken insulators and supporting structures.
Pay close attention to corner posts and gate areas, as these locations experience more mechanical stress and are more prone to damage. Verify that all supporting posts remain vertical and firmly anchored, with no signs of leaning, rotting, or structural weakness. Loose or damaged posts can cause wire misalignment and reduce overall fence performance.
Key verification criteria for physical damage inspection include:
- No broken or severely rusted wire sections
- Consistent wire tension across entire fence line
- Intact and secure insulators
- Sturdy, vertically aligned supporting posts
- No vegetation interference with wire
Remember that preventing physical damage is as important as identifying it. Regular maintenance, timely repairs, and proactive monitoring will help ensure your electric fence remains a reliable barrier for livestock containment and management.
Step 5: Test for Proper Functionality After Repairs
After completing repairs and modifications to your electric fence, comprehensive functionality testing becomes the ultimate validation of your troubleshooting efforts. This critical final step transforms your repair work from theoretical fixes into a confirmed, reliable livestock containment system. Proper testing ensures that all previous diagnostic and repair steps have successfully restored your fence’s optimal performance.
Begin by reconnecting all fence components and restoring the full electrical system. Use a high-quality digital voltage meter specifically designed for electric fence testing, which provides precise measurements under real-world conditions. Verify voltage performance standards for livestock management to understand the importance of accurate electrical output.
Carefully measure the fence’s voltage output across multiple sections, paying special attention to areas where repairs were recently completed. Consistent voltage readings between 3,000 and 5,000 volts indicate a properly functioning electric fence. According to agricultural research documentation, maintaining voltage above 3,000 volts ensures effective animal containment and deterrence.
When conducting your functionality test, simulate real-world conditions by testing voltage under load. Walk the entire fence line, checking for consistent electrical performance and observing how voltage might fluctuate with vegetation contact or environmental variations. Look for any unexpected voltage drops or inconsistent readings that might suggest underlying issues not addressed during initial repairs.
Pay particular attention to previously problematic sections, verifying that your repairs have completely resolved earlier electrical continuity challenges. Use a grounding tester to confirm that ground resistance remains within acceptable parameters, typically below 500 ohms. Inconsistent grounding can undermine even the most meticulously repaired electric fence system.
Key verification criteria for functionality testing include:
- Consistent voltage readings across entire fence line
- Minimum voltage of 3,000 volts under load
- No unexpected electrical interruptions
- Proper grounding with resistance below 500 ohms
- Stable performance across different environmental conditions
Remember that electric fence functionality is dynamic. What works perfectly during initial testing might require periodic re-evaluation. Developing a routine maintenance schedule that includes regular voltage checks and visual inspections will help maintain your fence’s long-term reliability and effectiveness in livestock management.
Restore Your Fence’s Power with Trusted Gallagher Solutions from FenceFast.ca
Every step of Gallagher electric fence troubleshooting comes with stress and uncertainty. When you are dealing with broken wires, weak voltage, or unreliable grounding, each small problem can put your livestock at risk. You want rapid answers and proven equipment that restores confidence with every connection. If you find yourself repairing worn components or chasing unexplained power drops, remember that compromise is not an option for those relying on containment and safety.
Explore our full selection of electric fencing components and see how easy it is to upgrade or repair your system with reliable Gallagher parts. Solve grounding issues, replace damaged insulators, and find high-quality voltage testers—all in one place. Our expert team supports farmers and rural property owners across Canada, offering consulting, product advice, and shipping right to your door.

Your animals deserve the best and so does your peace of mind. Shop Gallagher-certified components at FenceFast.ca now. Complete your repair checklist today and keep your fence strong for every season ahead.
Frequently Asked Questions
How do I perform an initial inspection of my Gallagher electric fence?
Begin by inspecting the entire fence perimeter for visible damage, loose connections, and compromised insulators. Pay special attention to the physical condition of wires and the energizer, checking for corrosion, moisture, and connectivity issues.
What voltage should I expect from my Gallagher electric fence energizer?
Most agricultural electric fences operate effectively between 2,000 and 10,000 volts. Ensure that your voltage measurement is above 2,000 volts to confirm the system’s effectiveness.
How can I test the grounding system of my electric fence?
Use a ground tester or multimeter to measure the ground resistance. Ideal resistance should be below 500 ohms. Ensure ground rods are properly installed and connections are clean and tight to maintain effective grounding.
What steps should I take if I discover physical damage on the fence line?
Inspect and repair any broken or sagging wires, replacing compromised insulators and ensuring all posts are sturdy and vertical. Regularly check for vegetation interference and address any damage promptly to maintain fence performance.

