
Planning to build a fence? Most people grab a shovel and start digging without a second thought. Yet missing just one local regulation can mean tearing down hundreds of feet of new fencing and losing thousands of dollars. Before you lift a single tool, a smart approach starts somewhere completely different.
Table of Contents
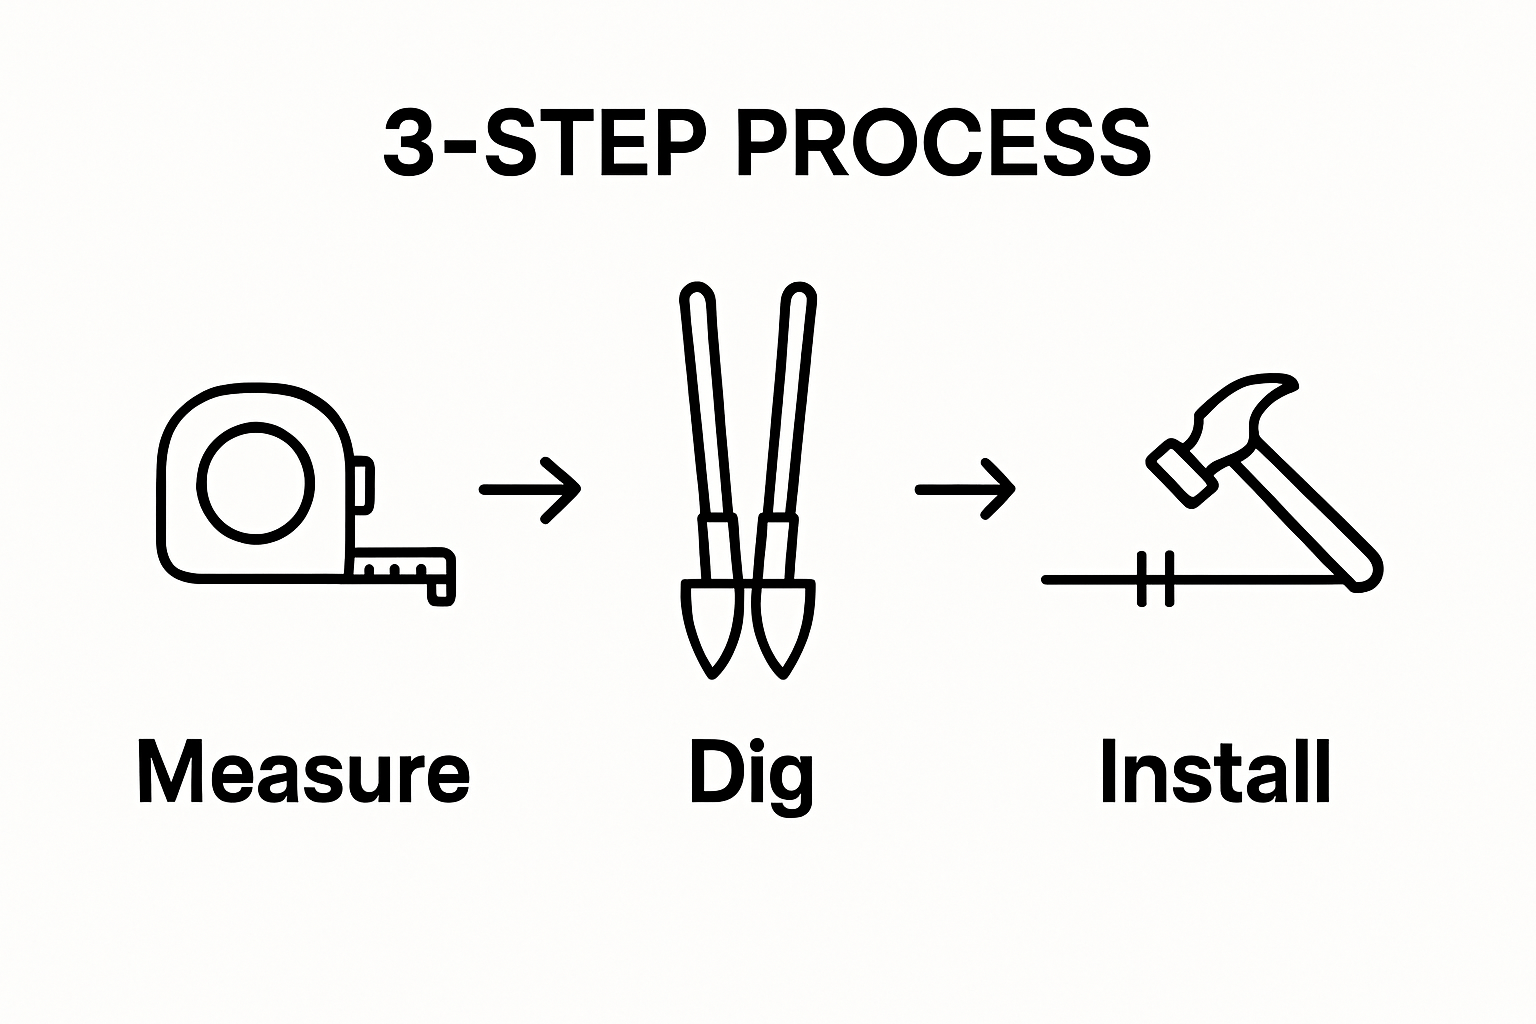
- Step 1: Identify Your Fence Design Requirements
- Step 2: Gather Essential Tools And Materials
- Step 3: Prepare Your Worksite For Fence Installation
- Step 4: Build The Fence Structure Using Proper Techniques
- Step 5: Inspect And Test The Completed Fence For Durability
Quick Summary
| Key Point | Explanation |
|---|---|
| 1. Clearly define your fence purpose | Understanding whether your fence is for security, aesthetics, or livestock will guide your design choices effectively. |
| 2. Measure property boundaries accurately | Precise measurements prevent costly design errors and ensure compliance with local regulations, saving time and money. |
| 3. Gather all necessary tools and materials first | Having a complete inventory of required tools and appropriate materials streamlines the installation process and prevents delays. |
| 4. Prepare the worksite thoroughly | Clearing the area and marking utility lines avoids future obstacles and ensures a safer, more efficient installation. |
| 5. Inspect fence durability post-construction | Conduct a detailed inspection to assess stability and material integrity, ensuring your fence stands strong against the elements. |
Step 1: Identify Your Fence Design Requirements
Choosing the right fence design is the foundation of a successful fencing project. Before you start purchasing tools or gathering materials, you need to carefully evaluate your specific requirements and property characteristics. This initial planning stage will save you significant time, money, and frustration down the line.
Begin by conducting a thorough assessment of your property’s unique needs. Consider the primary purpose of your fence - are you aiming to contain livestock, mark property boundaries, enhance security, or create a decorative landscape feature? Each purpose demands a different approach to design and construction. For agricultural properties, functionality and durability are paramount. Livestock fencing requires robust materials and specific structural considerations that differ from residential decorative fencing.
Measure your property boundaries precisely. Use a measuring tape or laser distance meter to map out exact fence line distances. Take careful note of terrain variations, including slopes, rocky areas, or potential obstacles like trees and existing structures. These landscape features will significantly impact your fence design and the tools you’ll need for installation. Read our comprehensive guide on marking property boundaries for more detailed insights into accurate property measurement.
Next, research local zoning regulations and potential homeowner association requirements. Some areas have strict guidelines about fence height, material types, and setback distances from property lines. Failing to comply with these regulations can result in costly modifications or even mandatory fence removal. Contact your local municipal office or review their website to obtain specific fencing guidelines relevant to your area.
Documenting your design requirements is crucial. Create a detailed sketch or digital plan that includes:
- Exact fence length and planned route
- Proposed fence height
- Material specifications
- Number and locations of gates
- Specific terrain challenges
This documentation will serve as your blueprint throughout the entire fencing project, helping you make informed decisions about tools, materials, and installation techniques. By investing time in thorough planning, you’ll create a roadmap that minimizes unexpected challenges and ensures a successful fence construction process.
Step 2: Gather Essential Tools and Materials
With your fence design requirements carefully mapped out, the next critical phase is gathering the right tools and materials. This step transforms your blueprint into a concrete action plan, ensuring you have everything needed for a successful fence construction project. Proper preparation prevents poor performance, especially in fence building where missing a single tool can halt your entire project.
Start by creating a comprehensive inventory based on your specific fence design. Professional fence builders understand that different fencing projects require unique tool sets. For wooden post fences, you’ll need post hole diggers, a sturdy shovel, level, measuring tape, hammer, saw, and safety equipment like work gloves and protective eyewear. If you’re planning an electric or wire fence, additional specialized tools like wire stretchers, fence pliers, and tension tools become essential. Learn more about launching your agricultural project with the right equipment to ensure you’re fully prepared.
Material selection is equally crucial. Choose materials that match your design requirements and local environmental conditions. Wood posts should be pressure-treated to resist rot and insect damage, while metal T-posts work well for temporary or lightweight fencing. For permanent installations, consider concrete for setting posts, providing superior stability and longevity. Quality materials might cost more upfront but save significant money in long-term maintenance and replacement.
Before purchasing, double-check your measurements and design specifications. Calculate exact quantities of materials needed, adding a 10% buffer for potential mistakes or unexpected terrain challenges. This approach prevents multiple trips to the hardware store and reduces project delays. Your material list should typically include:
- Fence posts (wooden or metal)
- Concrete mix for post setting
- Fencing material (wire, wooden panels, electric wire)
- Fasteners like nails, staples, or specialized clips
- Gate hardware if applicable
Safety cannot be overlooked when gathering tools. Invest in quality personal protective equipment, including safety glasses, work gloves, steel-toed boots, and hearing protection if using power tools. Organize your tools in a portable container or wheelbarrow for easy transportation across your property, streamlining your workflow and reducing physical strain during the installation process.
By meticulously gathering the right tools and materials before starting, you’ll set the stage for a smooth, efficient fence construction project that meets your specific agricultural or property management needs.
Here is a table summarizing the essential tools and materials required for common types of fence building as described in the article.
| Tool/Material | Purpose | Fence Type | Notes |
|---|---|---|---|
| Post hole digger | Digging holes for fence posts | All types | Auger or manual, depending on the soil |
| Sturdy shovel | Moving soil, clearing debris | All types | Essential for post and trench work |
| Level | Ensuring posts are vertical | All types | Check multiple sides for accuracy |
| Measuring tape/laser meter | Measuring distances accurately | All types | Prevents design errors |
| Hammer or saw | Driving fasteners/cutting material | Wooden fences | Choose type according to material used |
| Wire stretcher/tension tool | Applying tension to fencing | Wire/electric fences | Prevents sagging and loose sections |
| Safety equipment | Personal protection (gloves, eyewear, boots) | All types | Do not overlook, especially with power tools |
| Concrete mix | Securing fence posts in ground | Permanent fences | Adds stability, especially for corners |
| Fasteners and gate hardware | Securing rails/fencing & gate use | All types | Nails, staples, clips, latches |
| Fencing material | Main barrier (wire, wood, panels) | All types | Match to design and purpose |
Step 3: Prepare Your Worksite for Fence Installation
Preparing your worksite is a critical step that can make or break your entire fence installation project. This phase transforms your carefully drafted plans into a practical, executable strategy. Proper site preparation minimizes potential obstacles and ensures a smooth, efficient installation process.
Begin by thoroughly clearing the designated fence line. Remove all vegetation, rocks, debris, and potential obstructions that might interfere with post placement or fence alignment. Use a combination of hand tools like pruning shears, a landscaping rake, and potentially a small motorized brush cutter for dense vegetation. Pay special attention to root systems that could impede post hole digging or cause future fence instability.
VIDEO:video_content] [Check out our comprehensive guide on land preparation for agricultural projects for additional insights into managing your work area.
Next, conduct a comprehensive underground utility check. Contact your local utility location service to mark underground cables, water lines, and electrical conduits. This crucial step prevents potentially dangerous and expensive accidents during excavation. Most regions offer free utility marking services, typically requiring just a phone call or online request a few days before your planned installation. Never assume the ground is clear - even seemingly empty land can harbor hidden infrastructure.
Accurate boundary marking becomes your next priority. Use bright marking paint, wooden stakes, and a string line to create a precise, straight fence line that matches your original design measurements. This visual guide helps maintain alignment and provides a clear reference point during installation. For properties with challenging terrain, consider using a laser level to ensure consistent height and straightness across uneven ground.
Prepare your work area for efficient movement and material staging. Create a staging zone near your fence line where you can store materials, tools, and equipment. This approach minimizes unnecessary walking and reduces potential safety risks. Ensure the area is level and has sufficient space for your tools, materials, and potential machinery like post hole diggers or concrete mixers.
Key site preparation checklist:
- Clear vegetation and debris from fence line
- Mark underground utilities
- Establish precise boundary markers
- Create a dedicated tool and material staging area
- Verify ground conditions and potential obstacles
Finally, assess ground conditions carefully. Different soil types require different installation approaches. Sandy or loose soil might need additional stabilization techniques, while rocky terrain could require specialized digging equipment. Moisture levels and potential drainage issues should also be considered, as they can significantly impact post stability and long-term fence integrity.
By investing time in thorough worksite preparation, you create a solid foundation for a successful fence installation that will serve your property’s needs efficiently and effectively.
Step 4: Build the Fence Structure Using Proper Techniques
Building your fence structure demands precision, patience, and a systematic approach. This critical phase transforms your carefully planned design into a tangible barrier that will protect and define your property for years to come. Proper technique is the difference between a fence that stands strong and one that fails prematurely.
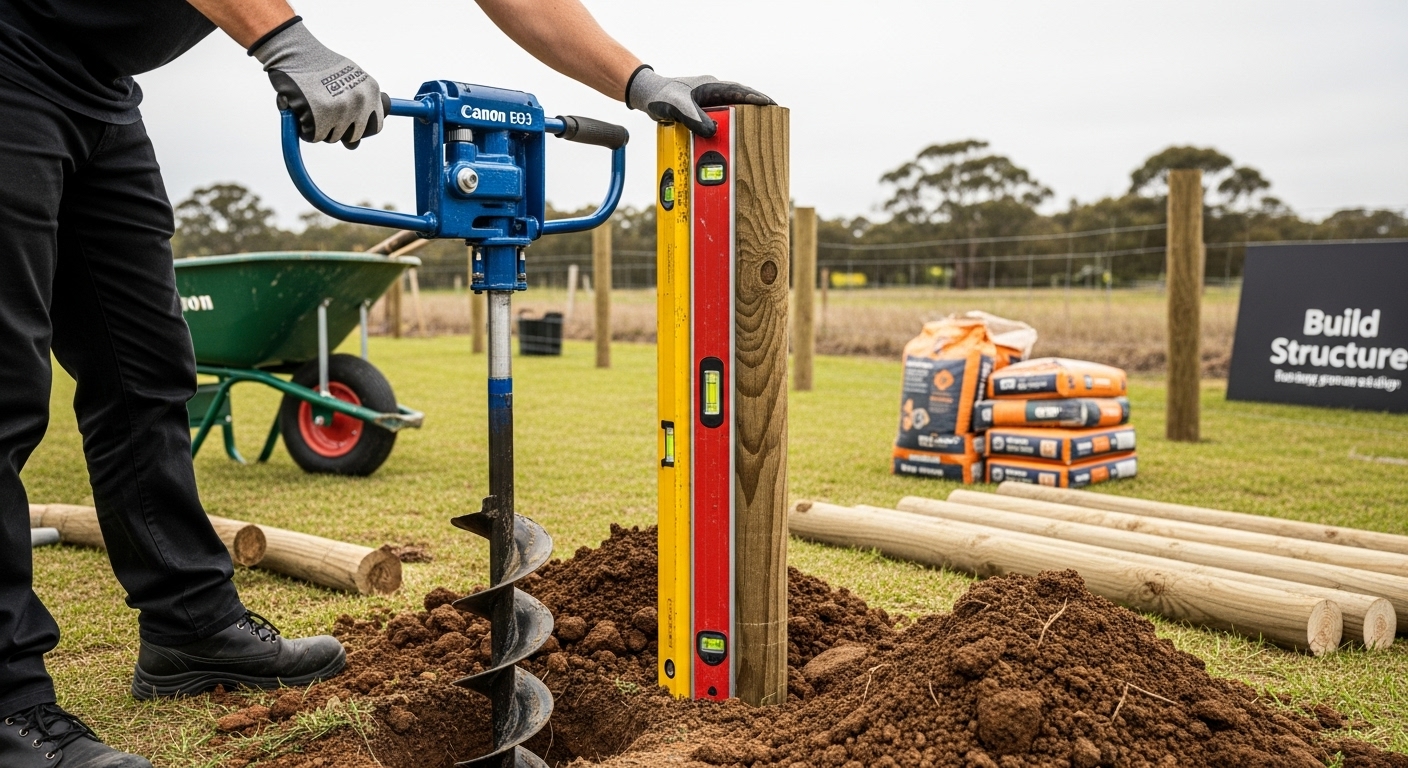
Start by setting your corner and end posts first, as these will serve as the fundamental reference points for your entire fence line. Dig post holes approximately one-third the length of the post deep, ensuring they extend below the frost line in colder regions. For most agricultural and rural applications, this means digging 24 to 36 inches deep. Use a post hole digger or power auger to create consistent, straight holes. Add a layer of gravel at the bottom of each hole to provide drainage and prevent water accumulation that could cause wood rot or metal corrosion.
When setting posts, absolute verticality is crucial. Use a carpenter’s level on multiple sides to confirm each post is perfectly straight. Temporary bracing can help maintain alignment while the concrete sets. Pour quick-setting concrete around each post, creating a slight slope away from the post to prevent water pooling. Allow the concrete to cure completely before proceeding with additional fence construction. Learn more about advanced agricultural infrastructure techniques to refine your approach.
Intermediate post placement requires equal attention to detail. Maintain consistent spacing between posts - typically 8 to 12 feet apart, depending on your specific fencing material and terrain. Use a string line stretched between corner posts to ensure a straight, uniform line. This visual guide helps prevent gradual misalignment that can compromise the entire fence structure. For uneven terrain, use step techniques where posts follow the ground’s natural contours while maintaining overall structural integrity.
For wire or mesh fencing, proper tension is paramount. Unroll fencing material carefully, avoiding kinks or unexpected twists. Use fence stretchers to create uniform tension, preventing sagging or loose sections that could compromise the fence’s effectiveness. Secure the fencing to posts using appropriate fasteners - staples for wooden posts, specialized clips for metal posts.
Key structural building considerations:
- Maintain consistent post depth and alignment
- Use quick-setting concrete for post stabilization
- Create proper drainage around post bases
- Ensure uniform tension in fencing material
- Check verticality and straightness continuously
As you progress, periodically step back and assess your work from multiple angles. Small adjustments during construction can prevent significant issues later.
 Pay attention to gate placement, ensuring smooth operation and proper alignment with adjacent fence sections. Test the strength of your connections, and don’t rush the process - a well-built fence is an investment in your property’s security and functionality.
Step 5: Inspect and Test the Completed Fence for Durability
With your fence structure now complete, the final critical step is comprehensive inspection and durability testing. This phase transforms your construction project from a physical structure into a reliable, long-term boundary solution. A thorough evaluation ensures your fence will withstand environmental challenges and provide the protection your property demands.
Begin with a comprehensive visual inspection, walking the entire fence line systematically. Look for subtle imperfections that might compromise structural integrity. Check each post for vertical alignment, examining whether they remain straight or have begun to lean. Probe the ground around post bases, feeling for any signs of soil erosion or instability that could undermine your fence’s foundation. Pay special attention to areas with challenging terrain or potential water drainage issues.
Test the fence’s structural strength through deliberate but careful physical assessments. Apply moderate pressure at various points along the fence, checking for unexpected flexibility or weakness. Wire fences should demonstrate consistent tension without significant sagging, while wooden fences should resist lateral movement. Gates require particular scrutiny - open and close them multiple times, verifying smooth operation and proper alignment. Discover more about maintaining agricultural infrastructure in our comprehensive guide to enhance your long-term property management skills.
Material-specific testing is crucial for durability assessment. For wooden fences, inspect for early signs of rot, insect damage, or wood splitting. Use a screwdriver to gently probe wooden posts, checking for soft spots that might indicate internal decay. Metal components should be examined for rust, particularly at connection points and near ground level. Electric fences demand specialized testing of voltage consistency and grounding systems to ensure reliable performance.
Key durability inspection criteria:
- Verify post verticality and ground stability
- Check fence tension and structural integrity
- Test gate functionality and alignment
- Inspect for material degradation
- Assess overall structural performance
Document your inspection findings meticulously. Take photographs of any areas of concern, creating a baseline record for future maintenance.
The following checklist table organizes key inspection criteria for assessing fence durability after construction, based directly on the article’s guidance.
| Inspection Criteria | What to Check For | Action if Issue Detected |
|---|---|---|
| Post verticality | Leaning or misaligned posts | Re-align or reinforce as needed |
| Ground stability | Signs of soil erosion or loose footing | Compact soil or improve drainage |
| Fence tension/integrity | Sagging, loose wire, or flexible panels | Tighten fasteners or adjust tension |
| Gate operation | Difficult movement or misalignment | Adjust hinges or realign gate |
| Material condition | Rot, rust, insect or weather damage | Repair or replace compromised sections |
| Structural performance | Overall strength against pressure | Add reinforcements if instability found |
Remember that fence durability is an ongoing process. Plan for periodic inspections, ideally twice annually - once after winter and again before harsh seasonal changes. By investing time in thorough initial testing and establishing a regular maintenance routine, you’ll ensure your fence remains a reliable, long-lasting asset for your property.
Ready to Build a Fence That Stands the Test of Time?
You know how crucial it is to have the right tools and reliable materials before you dig the first post. No one wants wasted time, damaged equipment, or a fence that falls short. From mapping out your property line to selecting durable fasteners and livestock-safe wire, every detail matters. The good news is you do not have to hunt for supplies or worry about missing essentials. FenceFast.ca puts every tool and component you need for farm fencing in one trusted place.

Whether you are installing posts, setting up electric fencing, or gearing up for your first livestock project, our intuitive catalog is designed for real world challenges like yours. Browse and order with confidence knowing our team serves working ag customers nationwide. Take the next step in your fencing project now and explore FenceFast.ca today to get high quality supplies shipped directly to your rural property. Your fence will be built to last—start now while motivation is high.
Frequently Asked Questions
What essential tools do I need for building a fence?
You will need tools such as post hole diggers, a sturdy shovel, a level, measuring tape, a hammer, saw, safety equipment like work gloves and protective eyewear, and additional tools like wire stretchers and tension tools if planning to install an electric or wire fence.
How do I ensure my fence posts are properly aligned and spaced?
Set your corner and end posts first, digging holes approximately one-third the length of the post deep. Use a string line stretched between corner posts to maintain a straight line and make sure to space the posts consistently, typically 8 to 12 feet apart.
Why is proper preparation of the worksite important in fence building?
Proper worksite preparation minimizes obstacles and allows for a smoother installation process. This includes clearing debris, marking underground utilities, and creating a staging area for tools and materials to enhance efficiency and safety during the building process.
How can I test the durability of my completed fence?
Conduct a visual inspection to check for any weak or unstable areas, test post alignment, assess tension in wire or mesh materials, and verify that gates operate smoothly. Regular maintenance checks can also help catch issues early to extend the fence’s lifespan.
Recommended
- Marking Property Boundaries: A Step-by-Step Guide – FenceFast Ltd.
- How to Start a Farm: A Step-by-Step Guide for Success – FenceFast Ltd.
- Understanding Homesteading Essentials for Sustainable Living – FenceFast Ltd.
- Gallagher Earth Ground Stake KIWITAH – FenceFast Ltd.

