

TL;DR:
- The best insulators for round posts are screw-tight models that fit specific diameter ranges and are UV-stabilized. Proper measurement, wire clearance, and matching wire type ensure reliable fence performance and prevent failures. Using a measurement jig and selecting high-quality materials extend insulator lifespan and reduce maintenance needs.
For most round posts, a screw-tight insulator is the right call. It fits rod posts within a small diameter range suitable for standard fiberglass T-posts, installs without tools, and you can adjust it while the fence is still energized. Before you order, run through three quick checks:
- Measure your post diameter at the height where each insulator will sit. Rough-cut timber varies, so measure at multiple points.
- Confirm fit range and wire clearance. A good screw-tight unit holds the hot wire a safe distance off the post, which is enough to prevent arcing on most livestock fences.
- Verify UV-stabilized material (or a strain rating for corner posts). The product spec or part number should state this explicitly. If it doesn’t, keep looking.
Table of Contents
- What types of electric fence insulators fit round posts?
- How to measure round posts and match insulator fit ranges
- What material should you choose for round post insulators?
- How to install insulators on round posts safely and consistently
- How far apart should you space insulators on round posts?
- Troubleshooting and maintenance: signs an insulator is failing
- Expert tips most product pages don’t tell you
- Key Takeaways
- The detail that actually determines fence performance
- Fencefast has the insulators and the know-how to get it right
- Useful sources to check before buying
What types of electric fence insulators fit round posts?
Round posts come in more profiles than most product pages acknowledge, and the insulator style has to match the post type, the wire type, and the load at that point in the fence.
Screw-tight / snap-on clip insulators are the workhorses. They wrap around small-diameter rod or fiberglass posts, tighten with a plastic nut, and hold the wire in a claw or channel. No tools, no drilling. These are the right choice for line posts on most livestock operations.
Collar and cuff insulators are built for larger round timber posts, sometimes up to roughly 6" in diameter. They clamp around the post and are better suited to multi-strand setups where you need consistent wire spacing across a thick post.
Pin, nail-on, and screw-in insulators give you a more permanent anchor on wood posts. Use these at corners, gate posts, and brace assemblies where the insulator will take real lateral force. They’re not ideal for line posts because they don’t let the wire float.
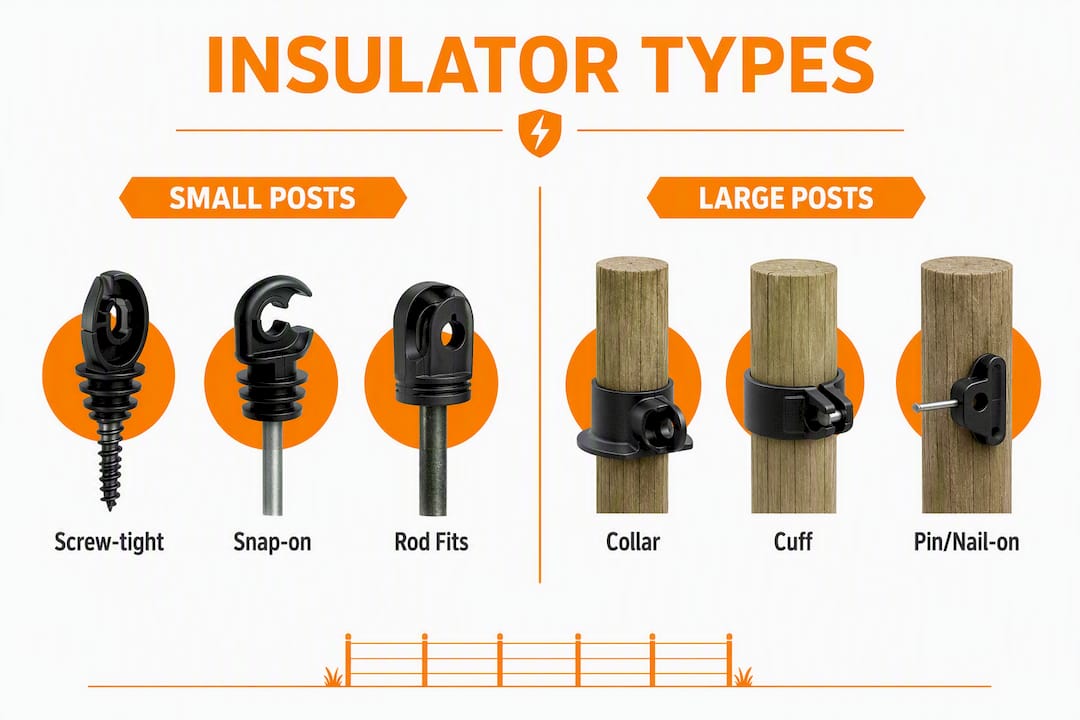
Here’s a quick use-case reference:
| Post type | Recommended insulator style | Typical use |
|---|---|---|
| Rod post (1/4"–9/16") | Screw-tight / snap-on | Line posts |
| 5/8" fiberglass T-post | Screw-tight clip | Line posts |
| Large round timber (up to ~6") | Collar / cuff | Line and brace posts |
| Corner / end wood post | Screw-in or nail-on | Corners, gates, strainers |
One thing many product pages skip: some screw-tight insulators are explicitly labeled “not designed for tape.” If you’re running polytape or polywire, check that note before you add anything to your cart.
How to measure round posts and match insulator fit ranges
Getting the fit right is a five-minute job that saves a frustrating return shipment.
- Measure post diameter at insulator height. Use a caliper or a flexible tape measure wrapped around the post, then divide the circumference by 3.14. Do this at the actual height where the insulator will sit, not at the base.
- Account for variability in rough-cut timber. A post labeled “4-inch” may run 3.75" to 4.25" depending on where you measure. Note the range, not just one reading.
- Match your measurement to the insulator’s stated fit range. Screw-tight units for rod posts cover a specific narrow diameter range; collar-style insulators for timber typically fit moderate to larger post diameters. If your post falls outside the stated range, the insulator will either spin freely or crack under stress.
- Check wire clearance in the spec. The standard for most round post insulators is a clearance of about an inch between the wire and the post face. Less than that and you risk arcing, especially on wet wood.
- Verify compatibility with your wire type. Clip-on insulators must fit tightly to prevent rotation; if you can spin the insulator by hand after fitting, switch to a screw-on model. And confirm the unit handles your wire type, whether that’s high-tensile, polywire, or polytape.
Pro Tip: When buying online, look for vendors who publish the full fit range in millimeters or fractions of an inch in the product spec, not just “fits most round posts.” A part number you can search later is worth more than a vague description.
What material should you choose for round post insulators?
UV-stabilized polyethylene is the right default for most line posts. It’s affordable, easy to install, and holds up well through normal seasonal cycles. The key word is “UV-stabilized.” Virgin polyethylene with UV inhibitors built in will outlast a non-stabilized version by years in direct sun.
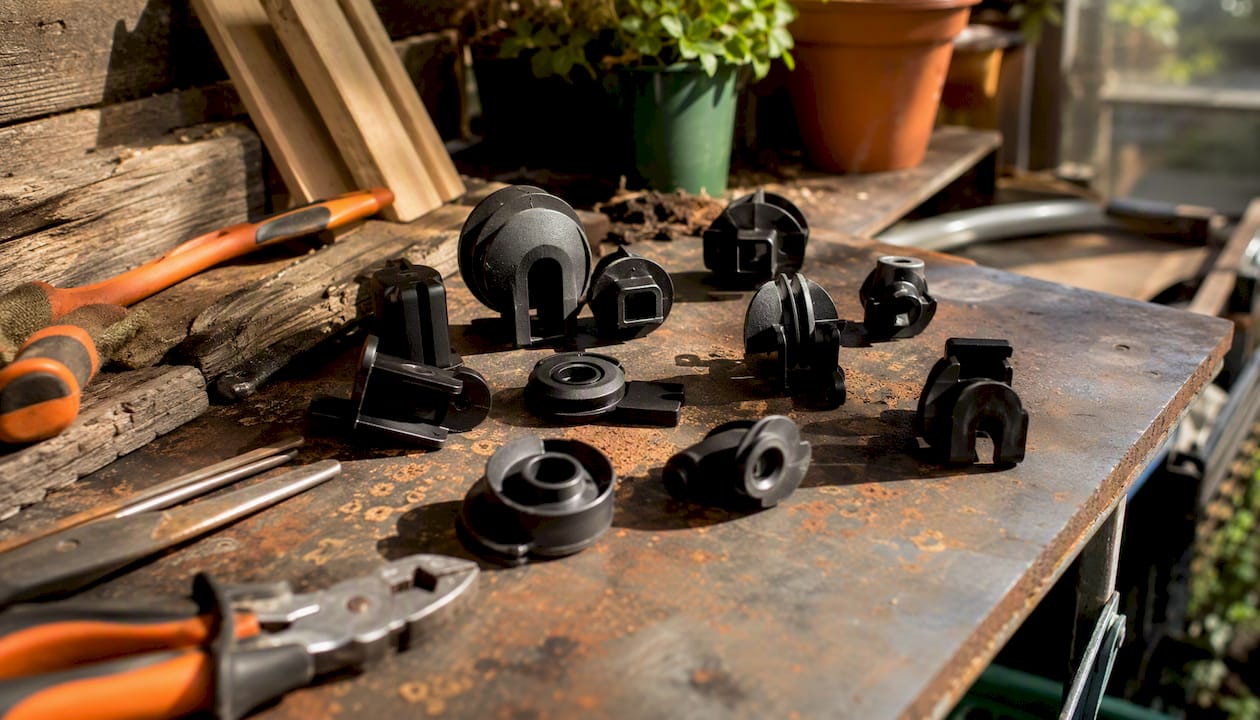
Cheap, non-UV-stabilized plastic is a false economy. It goes brittle within a season or two in high-UV regions, cracks under tension, and creates shorts you’ll spend hours chasing. The cost difference per insulator is small. The cost difference in replacement labor is not.
Porcelain and ceramic insulators are worth the premium at corners, end posts, and any permanent high-tension installation. They don’t degrade under UV, handle higher mechanical loads, and are the professional standard for braced corners on permanent fences. For line posts on a 40-acre pasture, porcelain is overkill. For the four corners of that same pasture, it’s the right call.
Pro Tip: Once a year, walk your fence line and flex each insulator by hand. UV-degraded plastic loses its spring before it visibly cracks. If it feels stiff or powdery rather than slightly flexible, replace it before it fails mid-season.
How to install insulators on round posts safely and consistently
A clean install takes less time than a sloppy one, and it prevents the shorts and sagging that show up three months later.
- De-energize the fence before installing new insulators or repositioning existing ones. Adjustments on screw-tight units can technically be made while energized, but working near a live fence with metal tools is a risk not worth taking.
- Mark your insulator heights before you start. Use a marked jig or a notched stick cut to the correct height for each strand. Hold it against the post, mark the spot, move to the next post. This takes two minutes per post and prevents the uneven wire height that causes chronic vegetation contact.
- Position the insulator and secure it. For screw-tight units, thread it onto the post and tighten the plastic nut until it grips firmly without cracking the housing. For collar styles, confirm the post is seated fully in the collar before tightening.
- Insert the wire so it floats in the channel. On line posts, the wire should sit in the insulator’s groove or claw without being tied or clamped. Floating wire at line posts lets it move with temperature changes and animal impact. Rigid attachment at line posts concentrates stress and breaks wire.
- Tension and anchor only at corners and end posts. That’s where strain-rated insulators go. Line posts carry the wire; corners hold the tension.
Pro Tip: Cut your jig stick from scrap lumber and mark each strand height with a permanent marker. One stick handles an entire fence run and keeps every insulator at exactly the same height across 50 posts.
How far apart should you space insulators on round posts?
Spacing depends on wire type, terrain, and animal pressure. These are the practical ranges:
- Polywire and polytape: Space insulators every 8–12 feet on flat ground. These lighter conductors sag more than steel wire, so tighter spacing keeps them at the right height.
- High-tensile steel wire: Every 30–50 feet on flat terrain is workable. The wire’s stiffness carries itself between posts.
- Hilly or uneven ground: Shorten spacing at any point where the wire changes direction vertically. A wire that dips into a gully and rises again needs insulators close to the transition points to prevent ground contact.
- High animal pressure areas: Gates, water sources, and feeding areas see more fence contact. Drop spacing to 6–8 feet in those zones regardless of wire type.
- Corners and end posts: Use strain-rated heavy-duty insulators here, not standard line-post clips. The tensile load at a corner can reach hundreds of pounds. A standard screw-tight unit will fail.
For wood post installations, pin-lock and nail-on styles give you a more permanent anchor at these high-load points.
Troubleshooting and maintenance: signs an insulator is failing
Most fence faults trace back to a single bad insulator. Finding it quickly is the skill.
- Hairline cracks and brittle edges are the first sign of UV degradation. The insulator may still hold the wire, but one cold snap or animal hit will finish it.
- Burn marks or carbon tracking on the insulator surface mean arcing has already occurred. Replace immediately; a burned insulator won’t hold a reliable charge.
- Loose fit on the post means the insulator is spinning or sliding. On rod posts, this usually means the wrong size was installed or the tightening nut has backed off.
- Discoloration (yellowing or chalking) on white or colored plastic is a UV warning sign, especially in high-altitude or coastal regions.
To isolate a fault, walk the fence with a voltage tester and check readings every 10–15 posts. A sudden voltage drop tells you the short is between that reading and the last good one. Replace the suspect insulator, retest.
Keep a field kit stocked with a sufficient number of screw-tight line-post insulators and some heavy-duty corner units. Running out of the right insulator mid-repair costs more time than the parts cost money.
Expert tips most product pages don’t tell you
A few things that separate a fence that runs clean for a decade from one that needs constant attention:
- Never route wire straight through both holes of a double-hole insulator. Cross the wires so they load the bridge in compression. This crossing pattern extends service life significantly compared to straight-through routing, which puts the bridge in tension and cracks it faster.
- Coastal and high-UV regions need a higher grade. Standard UV-stabilized polyethylene is fine for most of the country. In Florida, the Southwest desert, or within a mile of saltwater, step up to a higher-grade plastic or porcelain at all posts, not just corners.
- Use a counting worksheet before ordering. Installation manuals provide formulas: multiply your number of strands by corner and end posts, then add line post counts. Ordering short means a second shipment and a fence that’s down longer than it needs to be.
- Save the part number. Product descriptions change; part numbers don’t. Write the part number on a piece of tape inside your fence toolbox so reorders take 30 seconds instead of 30 minutes of cross-referencing.
Purchase checklist before you click “Add to Cart”:
- Fit range stated in fractions or millimeters (not just “fits most posts”)
- UV-stabilized material confirmed in the product spec
- Wire clearance of at least 1" noted
- Wire type compatibility confirmed (tape, polywire, or steel)
- Part number recorded for reorders
For a broader look at insulator types across post styles, Fencefast’s guide covers screw-tight and snap-on options in more detail.
Key Takeaways
The right round post insulator comes down to three decisions: correct fit range, UV-stable material, and floating wire at line posts with strain-rated anchors only at corners.
| Point | Details |
|---|---|
| Match fit range first | Measure post diameter at insulator height; screw-tight units cover 1/4"–9/16" rod and 5/8" fiberglass posts. |
| UV-stabilized material only | Virgin polyethylene with UV inhibitors outlasts non-stabilized plastic; use porcelain at corners and permanent high-tension points. |
| Float wire at line posts | Only anchor wire rigidly at corners and end posts; floating at line posts prevents wire breakage and insulator failure. |
| Fencefast for sourcing | Fencefast carries insulators and electric fence accessories with compatibility support and design consulting for rural operations. |
The detail that actually determines fence performance
Most fence problems aren’t energizer problems or wire problems. They’re insulator problems that nobody caught early enough.
The floating-wire rule is the one most DIY installers get wrong. Tying wire tight at every post feels more secure, but it turns every temperature swing and every animal hit into a concentrated stress point. The fence that looks tightest in October is often the one with three broken wires by March.
The same logic applies to material choice. Spending an extra few cents per insulator on UV-stabilized virgin polyethylene versus the cheapest bag on the shelf is the kind of decision that looks trivial at purchase and enormous two summers later when half your line posts are cracked and you’re re-stringing wire in August heat.
The jig tip is underused. Professionals who install hundreds of posts a season use one automatically. Property owners doing their own fences rarely do, and they spend the next five years adjusting wire height on posts that were never quite right. Cut the stick once, use it for the whole run.
Fencefast has the insulators and the know-how to get it right
Getting the right insulator for your round posts shouldn’t mean three browser tabs and a guessing game on diameter ranges. Fencefast carries electric fence insulators and post accessories suited to rod posts, fiberglass posts, and large timber, with product specs that actually tell you the fit range, wire clearance, and material grade before you order.

If you’re planning a new installation or replacing a run of failing insulators, Fencefast’s design consulting service can help you confirm compatibility across your post types and wire configuration before anything ships. No second-guessing fit ranges, no mismatched orders. Browse the full product catalog at fencefast.ca and check fit specs directly, or reach out for compatibility support on mixed-post fences.
Useful sources to check before buying
Before finalizing your insulator order, these references are worth bookmarking for fit specs, installation guidance, and material claims:
- Agcare Products: Round Post Rod Insulator spec sheet — confirms fit range (1/4"–9/16"), wire clearance, and tool-free install details for screw-tight units.
- Dare Products: Western Screw-Tight Round Post Insulator — manufacturer spec page with part number and fiberglass T-post compatibility note.
- ElectroBraid Installation Manual (RAMM Fence) — covers jig use, insulator counting worksheets, and placement guidance for multi-strand systems.
- Cattlefencewire.com: Insulator Selection and Installation — practitioner-level guidance on floating wire, corner loads, UV material trade-offs, and double-hole crossing technique.
- Fencefast: Complete Guide to Electric Fence Post Insulators — product-selection checklist and maintenance tips for agricultural operations.
- Save the part number from whichever insulator you order. If you’re adding an energizer or planning a solar-powered system, check the energizer’s runtime and output specs separately — battery runtime is its own calculation and not covered by insulator specs.

