

TL;DR:
- Proper insulator selection for polytape fences depends on post type, tape width, and tension load. Using the correct insulators and following installation rules prevent wire breaks and voltage loss. Durable materials like UV-stabilized HDPE and reinforcement at corners ensure long-lasting, reliable fencing.
For polytape fences, snap-on clip insulators work best on T-posts, screw-in or nail-on insulators with a locking face belong on wood posts, and heavy-duty strain insulators are mandatory at corners and end posts. The single most important installation rule: let line post insulators float so the tape can move freely, and anchor the tape only at corners and ends. That one rule prevents most wire breaks and pulled insulators.
Quick checklist before you buy:
- Match the insulator’s tape slot to your tape width (most accept polytape up to 1.5 inches wide; some lines list 2-inch compatibility—confirm the spec sheet)
- Confirm at least a 2-inch standoff so tape clears the post and reduces arcing risk
- Choose UV-stabilized HDPE or porcelain for high-stress and permanent installations
TL;DR: Buy locking-face insulators sized to your tape, use stainless screws on wood, and never rigidly anchor line posts.
Table of Contents
- What types of electric fence tape insulators do you actually need?
- How do you choose the right insulator before you buy?
- How to install electric fence insulators by post type
- Spacing and height: how to avoid shorts and sagging tape
- Diagnosing and fixing common polytape insulator problems
- What to budget and where to buy
- Key Takeaways
- What experienced installers get wrong about polytape insulators
- Fencefast has the insulators and accessories you need
- Useful sources
What types of electric fence tape insulators do you actually need?
The insulator market looks crowded until you sort it by post type. There are really four categories worth knowing.
Snap-on / clip insulators for T-posts are the most common starting point. They require no tools and attach by pressing onto the T-post flange. The catch: snap-on insulators must fit the T-post profile tightly. A loose fit rotates under load, and a rotated insulator eventually lets tape contact the grounded steel post. Most snap-on designs fit common standard T-post sizes; confirm the spec before ordering.
Screw-in, nail-on, and pin-lock insulators for wood posts give you a more permanent mount. Screw-in versions thread directly into the post face. Nail-on types are faster to install but harder to reposition. Pin-lock designs use a spring-loaded gate to insert and release tape quickly, which is useful on horse fences where you open and close runs often. All three styles are molded from UV-stabilized HDPE and typically provide about a 2-inch standoff to keep tape off the post surface.
Wrap-around, W-channel, and tube-style insulators suit round rail, pipe, and fiberglass posts. They loop around the post rather than threading into it. Gate fittings in this category often include a built-in insulated handle, so the gate itself becomes part of the circuit without extra hardware.
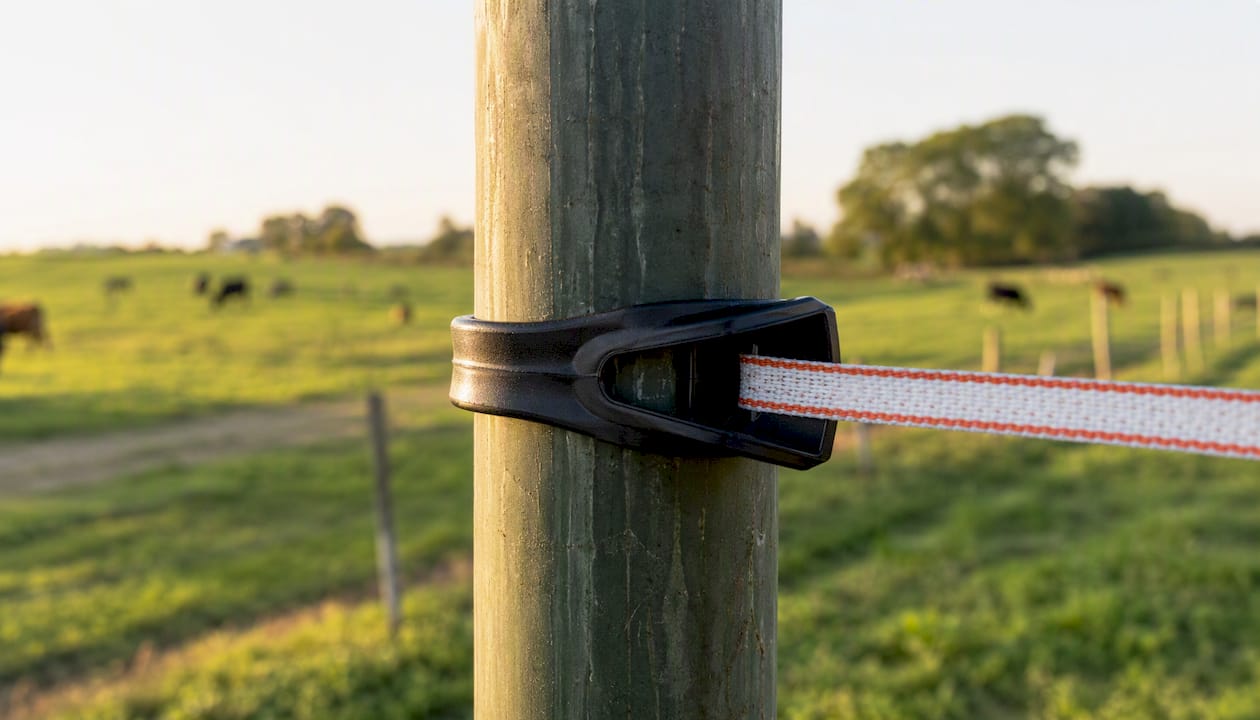
Strain and corner insulators are the heavy-duty category. Double-hole reinforced designs are mandatory at corners, end posts, and anywhere the tape changes direction under tension. A standard line post insulator will fail at these points under sustained load.
| Insulator Type | Best Post | Key Feature |
|---|---|---|
| Snap-on clip | T-post | Tool-free; must fit profile tightly |
| Screw-in / nail-on | Wood, vinyl | Permanent mount; use stainless screws |
| Wrap-around / tube | Rail, pipe, fiberglass | No fasteners needed |
| Strain / corner | End posts, corners | Reinforced for high tension |
Material matters more than most buyers expect. UV-stabilized virgin HDPE handles most climates and costs less than porcelain. Porcelain earns its higher price only on permanent, high-impact installations where decades of service are expected. Standard nylon and recycled plastic degrade faster under UV and are worth avoiding on any fence that stays up year-round.
How do you choose the right insulator before you buy?
Run through these five checks at the product page before adding anything to your cart.
- Tape width compatibility. Most insulators accept tape up to 1.5 inches wide; some product lines list 2-inch compatibility, while others top out at 0.5 inch. Confirm the spec sheet matches your tape width before ordering.
- Standoff distance. Look for at least a few inches of clearance between the tape and the post face. Less than that and arcing becomes a real problem, especially on wet wood.
- Locking face. A locking-face insulator grips the tape and reduces wind vibration, which protects the conductive filaments inside the tape from fatigue wear. Open-slot designs are fine for temporary setups; locking face is worth the small price premium for anything permanent.
- Post compatibility. Snap-on clips are not universal. A clip designed for a 1.25" T-post will wobble on a 1.33" post. Check the listed post profile dimensions, not just the product photo.
- UV and weather rating. The product description should say “UV-stabilized” explicitly. If it does not, assume it will chalk and crack within two to three seasons.
| Spec to Check | What to Look For | Red Flag |
|---|---|---|
| Tape width range | Matches your tape (e.g., 1.5") | Listed as “universal” with no dimension |
| Standoff distance | 2 inches or more | Less than 1.5 inches |
| Material | UV-stabilized HDPE or porcelain | “Plastic” with no UV rating |
| Post fit | Matches your T-post profile | Generic snap-on with no profile spec |
How to install electric fence insulators by post type
T-posts
- Slide the snap-on clip onto the T-post flange at the target height.
- Try to rotate the insulator by hand. If it moves more than a few degrees, the fit is too loose. Switch to a screw-on T-post insulator that bolts through the post hole instead.
- Thread the tape through the slot or locking face. Do not staple or tie the tape to the insulator at line posts. Let it float.
- Check that the tape face sits at least 2 inches clear of the post steel.
For more on T-post insulator fit and rotation checks, Fencefast covers the most common profile mismatches in detail.
Wood posts
- Mark your height on each post with chalk or a marker before drilling.
- Pre-drill a pilot hole slightly smaller than the screw diameter to avoid splitting dry wood.
- Drive a stainless steel screw into the pilot hole. Galvanized screws corrode and loosen within a few seasons; stainless holds indefinitely.
- Seat the insulator body against the post face and thread the tape through the locking gate.
For wood post-specific fastener guidance, Fencefast’s wood post insulator guide covers screw sizing and anti-splitting tips.
Rail, pipe, and fiberglass posts
Wrap-around or tube-style insulators loop around the post and lock with a tab or clip. No fasteners required. For double-hole insulators at high-tension points, run the tape in a figure-eight pattern so the insulator body works in compression against the post. Running tape straight through a double-hole insulator concentrates tensile stress and can cut service life significantly. The figure-eight distributes that load and extends the insulator’s life.
Pro Tip: After seating any insulator, try to rotate it by hand. If it moves, it will eventually short. Fix the fit before stringing tape.
Spacing and height: how to avoid shorts and sagging tape
Polytape needs closer post spacing than high-tensile wire. A moderate spacing between line posts works for most polytape applications. High-tensile wire can span longer distances on flat ground, but polytape sags more under its own weight and wind load, so tighter spacing keeps it taut.
- Set tape heights based on the animal. For cattle, a single strand at mid-height is common; horses typically need two strands at progressively higher levels. Smaller livestock like sheep and goats need strands lower.
- Keep sufficient vertical separation between hot strands to prevent arcing between conductors.
- Use a string line or laser level to maintain consistent height across all posts before installing insulators. Mark each post at the correct height first, then mount insulators to the marks.
- Tighten spacing around gates, corners, and rough terrain where sag is most likely.
Pro Tip: Spending extra time on layout before you string a single foot of tape prevents the majority of shorts. Mark all posts first, check alignment, then install insulators.
Diagnosing and fixing common polytape insulator problems
Most fence failures trace back to one of four causes.
- Vegetation contact. Grass and weeds touching the tape drain voltage. Trim a clear zone below and around the tape line. If the fence runs low voltage after rain, vegetation is almost always the culprit.
- Loose snap-on clips. A clip that rotates lets tape drift toward the post. Re-seat the clip or replace it with a screw-on model that anchors through the post hole.
- Cracked or chalky plastic. UV-degraded insulators develop hairline cracks that arc internally. Replace any insulator that shows surface chalking, visible cracks, or discoloration around the tape slot.
- Tape wear at the insulator slot. Wind vibration against an open-slot insulator frays the conductive filaments inside the tape over time. Locking-face insulators reduce this wear by holding the tape steady. If you see frayed tape at insulator contact points, switch to locking-face models.
Inspection checklist (twice a year minimum): check for rotation on every snap-on clip; look for cracked plastic on all insulators; test voltage at the far end of the fence; trim vegetation within 6 inches of the tape line; replace any insulator showing visible wear at the tape slot.
What to budget and where to buy
A rough shopping list for 100 feet of polytape fence:
- Line post insulators: about half a dozen to nearly a dozen units at typical spacing
- Corner/strain insulators: at least two per corner
- Stainless screws or appropriate fasteners: one box per 25 insulators
- Tape tensioner or in-line strainer: one per run
Retail price ranges vary by brand and pack size. Snap-on T-post insulators typically sell in packs of 25. Wood post screw-in insulators come in similar pack sizes. Heavy-duty corner and strain insulators cost more per unit because of reinforced construction, because the reinforced construction is more material-intensive. Stainless screw packs add a few dollars but last the life of the fence.
Buy from manufacturer product pages (Zareba, Gallagher) for exact SKU compatibility data, or from agricultural retailers that stock full product lines. Confirm tape width fit and standoff distance on the spec sheet before ordering, especially if you are mixing brands.
Key Takeaways
The right electric fence tape insulator comes down to three decisions: post type, tape width, and corner load. Get those right and the fence stays energized.
| Point | Details |
|---|---|
| Match tape width and standoff | Verify the insulator accepts your tape width (up to 1.5 inches for most models) and provides at least 2 inches of clearance from the post. |
| Use locking-face on T-posts, stainless screws on wood | Locking-face snap-ons prevent rotation; stainless screws on wood posts resist corrosion and stay tight for years. |
| Reserve strain insulators for corners | Standard line post insulators fail under corner tension; use reinforced double-hole or strain-rated designs at every end post and direction change. |
| Let line posts float | Anchor tape only at corners and ends; rigid attachment at line posts concentrates stress and breaks wires. |
| Fencefast for purchasing | Fencefast carries electric fencing accessories including insulators and fasteners suited to polytape systems for agricultural use. |
What experienced installers get wrong about polytape insulators
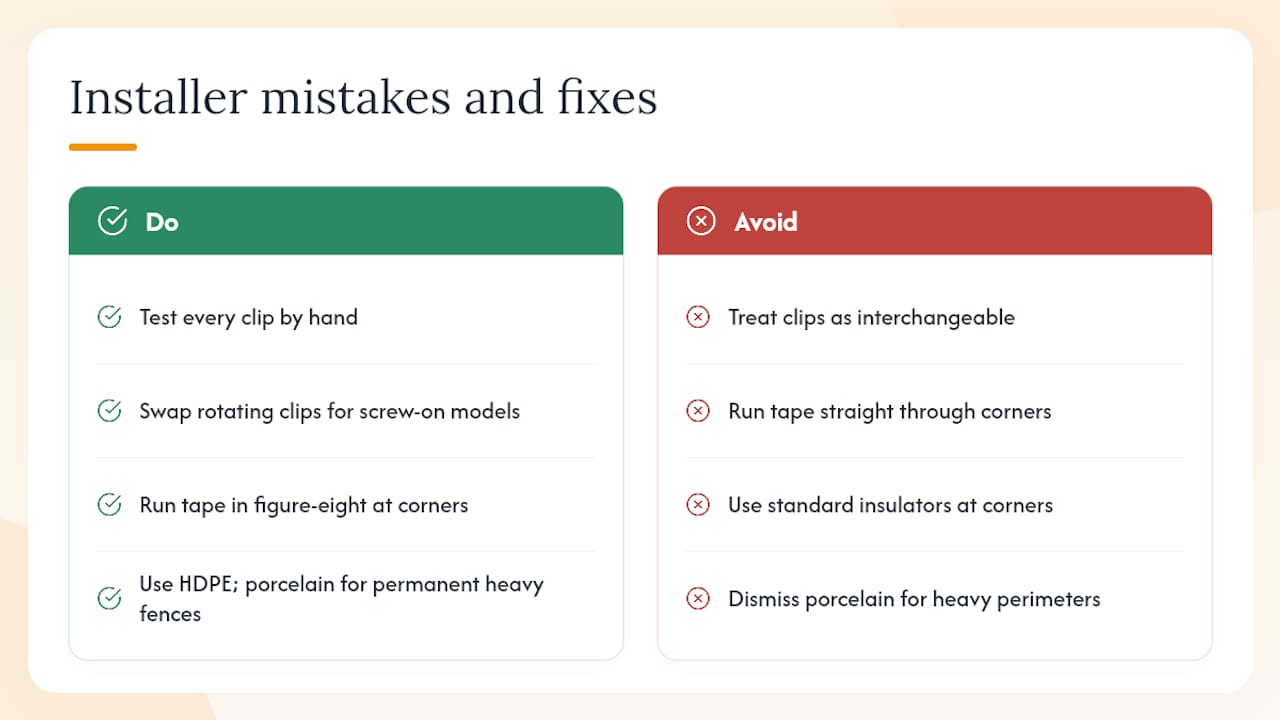
The mistake that costs the most time is treating all insulators as interchangeable. A snap-on clip that fits one T-post brand loosely will rotate, short, and drain your fence voltage within weeks. Experienced installers test every clip by hand before stringing tape. If it rotates, they swap it for a screw-on model. That five-second check saves hours of fault-finding later.
The second common error is running tape straight through double-hole insulators at corners. The straight-through method looks cleaner, but it puts the insulator body in tension rather than compression. The figure-eight pattern is the correct approach because it loads the insulator against the post, which is how the part was designed to carry load.
The third mistake is underestimating corner loads. Farmers often use the same line post insulator at corners to save money. Under sustained tape tension, especially in temperature swings where tape contracts and expands, a standard insulator at a corner will eventually pull free or crack. Reinforced strain-rated insulators, or stacked double-hole insulators for redundancy, are the right call at every corner. The cost difference per corner is small. The cost of re-stringing a failed corner is not.
Porcelain gets dismissed as old-fashioned, but on a permanent perimeter fence with heavy animal pressure, it earns its price. HDPE is the right default for most applications. Porcelain is the right call when the fence will be there for decades and the animals pushing on it are large.
Fencefast has the insulators and accessories you need

Fencefast carries a full range of electric fencing accessories for polytape systems, including snap-on T-post insulators, screw-in wood post models, and heavy-duty corner and strain insulators. If you are setting up a new polytape fence or replacing worn hardware on an existing one, Fencefast stocks the components that match the specs covered in this guide: UV-stabilized HDPE construction, locking-face designs, and stainless fastener options.
The catalog is organized by post type and tape width, so you can find compatible insulators without cross-referencing multiple spec sheets. Visit Fencefast to browse insulators, tensioners, and polytape accessories, or contact the team for help matching insulators to your post type and tape width before you order.
Useful sources
- Zareba® Polytape Wood Post Insulator | IWTNY-ZC: product specs including standoff distance and UV-stabilized HDPE material details
- Gallagher Heavy Duty Wood Post Tape Insulator: staple/screw mount options and tape width compatibility for polytape up to 1.5"
- Universal Post 1.5" Tape Insulators | RAMM Fence: locking-face design details and stainless fastener recommendations
- Electric Fence Insulator Selection and Installation Guide | CattleFenceWire: post spacing, alignment methods, figure-eight wiring technique, and corner load guidance
- Complete Guide to Electric Fence Insulator Sizes and Materials | eLifeFence: material comparisons (HDPE vs. porcelain) and tape width compatibility conventions
- Fencefast electric fencing insulator guide: practical selection and installation guidance for livestock containment applications

