
Over 80 percent of American livestock owners cite fence failures as their top concern for animal safety and property protection. A fence that meets your specific needs is an essential investment, whether you manage a small hobby farm or acres of pastureland. Learning how to assess, plan, and build a reliable field fence can make all the difference in keeping your animals safe and your boundaries secure for years to come.
Table of Contents
- Step 1: Assess Fencing Needs And Gather Materials
- Step 2: Mark Fence Line And Prepare The Site
- Step 3: Set Corner And Line Posts Securely
- Step 4: Attach And Tension Field Fence Wire
- Step 5: Inspect And Reinforce Fence Integrity
Quick Summary
| Essential Insight | Explanation |
|---|---|
| 1. Assess Fencing Needs Thoroughly | Evaluate terrain, livestock type, and specific needs before selecting materials for effective fencing solutions. |
| 2. Mark and Prepare Fence Line Accurately | Measure and mark your fence line using stakes and survey strings to ensure straightness and clear installation paths. |
| 3. Secure Corner and Line Posts Properly | Install posts deeply and braced correctly to enhance structural integrity and prevent shifting over time. |
| 4. Properly Attach and Tension Wire | Keep wire straight and taut using correct techniques to avoid sagging or damage, ensuring secure containment of livestock. |
| 5. Conduct Regular Fence Inspections | Check for damage and reinforce weaknesses bi-annually to ensure long-term durability and safety for your livestock. |
Step 1: Assess Fencing Needs and Gather Materials
Building an effective field fence requires careful planning and strategic material selection. Your goal in this initial stage is to evaluate your property’s specific livestock management requirements and prepare the necessary tools and supplies for a successful installation.
Start by carefully examining your property’s terrain, livestock type, and specific containment needs. Different fencing systems are essential for managing grazing areas and animal movement. Cattle ranches, horse pastures, and small livestock enclosures each demand unique fencing approaches. Consider factors like property boundaries, potential predator risks, terrain challenges (hills, rocky ground, wetlands), and the specific behaviors of your animals.
Materials gathering involves selecting appropriate fence components based on your assessment. Typical field fence materials include wooden posts, metal T posts, wire mesh, barbed wire, electric wire, corner braces, and necessary fastening hardware. Measure your total fencing perimeter carefully and add 10% extra for unexpected terrain variations or installation complexity. Quality fencing materials will differ depending on your specific livestock type livestock and environmental conditions.
Here’s a quick comparison of common fencing materials for different types of livestock:
| Material Type | Best For | Durability | Common Considerations |
|---|---|---|---|
| Wooden Posts | Cattle, Horses | High if treated | Requires periodic maintenance |
| Metal T Posts | Sheep, Goats | Very high | Easy to install, resists rot |
| Wire Mesh | Small Livestock | Moderate to High | Prevents escapes, deters predators |
| Barbed Wire | Cattle | High | Hazardous for horses and small stock |
| Electric Wire | Multi-species | Varies | Effective with training, needs power source |
Pro tip: Create a detailed sketch of your proposed fencing layout before purchasing materials, noting exact measurements, terrain features, and potential challenging installation areas. This preliminary planning can save significant time and money during the actual fencing project.
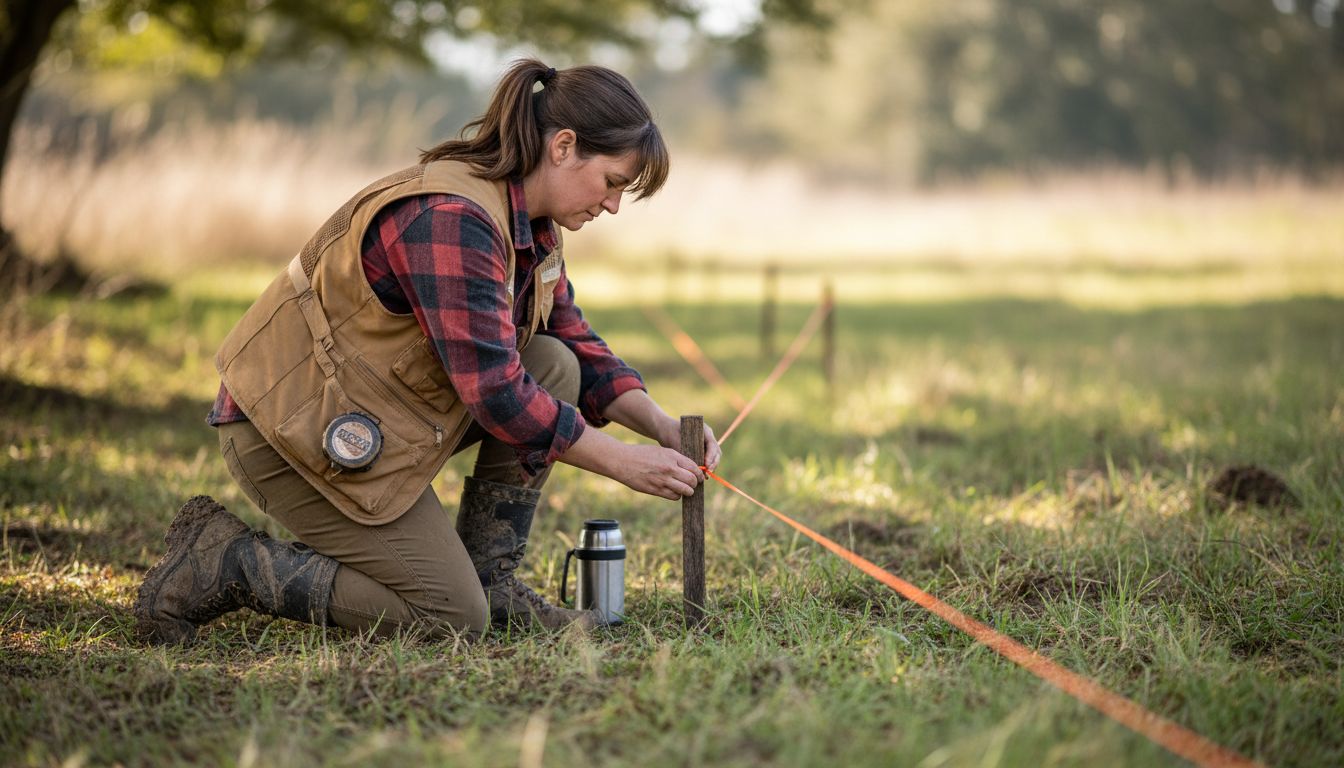
Step 2: Mark Fence Line and Prepare the Site
Marking your fence line and preparing the site are critical steps that will determine the overall success and durability of your field fence. In this stage, you will establish precise boundaries and create a clear path for your fencing installation.
Careful site preparation involves accurately measuring and marking the proposed fence line, ensuring a straight and efficient installation. Begin by using sturdy stakes and bright survey string or line to mark your intended fence route. Walk the entire proposed path, identifying and noting any terrain challenges such as slopes, rocks, tree roots, or existing structures that might complicate installation. Clear vegetation along the fence line, removing grass, brush, and small obstacles that could interfere with post placement or fence integrity.
Precision is key when establishing your fence line. Use a measuring tape or surveying tools to confirm exact distances and maintain consistent alignment. Check property boundaries and local regulations to ensure your fence placement meets legal requirements. For uneven terrain, you may need to create a slightly stepped fence line that follows the natural contours of the ground while maintaining a relatively straight overall path.
Pro tip: Take photographs of your marked fence line from multiple angles before beginning installation. These images can serve as a valuable reference point during the project and help you track your progress and identify potential challenges.
Step 3: Set Corner and Line Posts Securely
Setting corner and line posts correctly is fundamental to creating a strong, durable field fence that will protect your livestock and property for years to come. This critical stage determines the overall structural integrity and performance of your entire fencing system.
Proper post installation requires careful selection of materials and precise placement techniques. Begin by choosing high quality posts appropriate for your terrain and livestock type wooden posts work well for most applications, while metal T posts provide additional durability. For corner posts, which bear the most structural load, select thicker and stronger posts. Dig post holes at least 3 feet deep for corner posts and 2 feet deep for line posts, ensuring they extend below the frost line in colder regions. Use quick setting concrete to stabilize posts, creating a solid foundation that resists shifting and maintains alignment.
Each post must be precisely positioned and thoroughly braced to withstand environmental pressures. Use a level to ensure posts are perfectly vertical, checking from multiple angles. For corner posts, install diagonal braces using sturdy timber or metal bracing to prevent lateral movement and distribute tension across the fence line. Space line posts consistently approximately 8 to 12 feet apart, depending on your specific fencing material and terrain characteristics. Compact the soil around each post carefully, eliminating air pockets that could compromise stability.
Pro tip: Before setting posts permanently, create a string line between corner posts to guarantee absolute straightness and consistent alignment throughout your entire fence installation.
Step 4: Attach and Tension Field Fence Wire
Attaching and tensioning field fence wire is a critical step that ensures your livestock remain securely contained and your fence maintains structural integrity. This process requires precision, patience, and the right techniques to create a reliable barrier.
Proper wire attachment involves carefully aligning and securing the fencing material to your installed posts. Start by unrolling your wire fencing along the prepared fence line, keeping the material as straight and taut as possible. Use heavy duty fence clips or staples to secure the wire to each post, ensuring consistent spacing and alignment. For wooden posts, use galvanized fence staples driven at a slight angle to prevent the wire from slipping. With metal T posts, utilize wire clips or tension bands that wrap around the post and hold the wire firmly in place.
Tensioning the wire is perhaps the most crucial aspect of this installation. Begin at one corner post and gradually stretch the wire using a professional fence stretcher or come along tool. Apply even tension across the entire fence line, avoiding excessive slack or overly tight sections that could cause wire breakage or post damage. For multiple wire strands, tension each wire separately starting from the bottom wire and working upward. Check your tension by gently pressing the wire midway between posts it should have minimal give without sagging. After initial stretching, secure the wire at corner and end posts using specialized wire anchoring techniques that distribute tension evenly and prevent wire slippage.
The following table summarizes key site preparation and installation tips for a successful field fence:
| Step | Main Goal | Key Tip |
|---|---|---|
| Marking Fence Line | Ensure accurate boundaries | Use survey string and stakes for straight lines |
| Clearing Path | Smooth installation | Remove all vegetation and obstructions |
| Setting Corner Posts | Provide strong anchors | Use concrete for maximum stability |
| Attaching Wire | Secure animal containment | Maintain correct tension to prevent sagging |

Pro tip: Always wear heavy leather gloves when handling and stretching wire to protect your hands from sharp edges and potential wire splinters during the installation process.
Step 5: Inspect and Reinforce Fence Integrity
Fence maintenance is crucial for protecting your livestock and property, requiring systematic inspection and timely reinforcement. A well maintained fence prevents animal escape, protects against predators, and ensures the long term safety of your agricultural investment.
Comprehensive fence inspection involves a methodical approach to identifying and addressing potential structural weaknesses. Begin with a thorough visual examination of your entire fence line, checking for signs of damage such as loose wires, bent posts, rust, wood rot, or areas where animals might have compromised the fence structure. Pay special attention to corner posts and high stress areas where tension and environmental factors can cause gradual deterioration. Look for loose staples, broken wire connections, and signs of animal damage or attempted breaches.
Reinforcement requires a proactive strategy targeting identified vulnerabilities. Replace any damaged posts, tighten loose wire sections, and repair or replace broken wire mesh or strands. For wooden posts showing signs of decay, consider treating them with wood preservative or replacing them entirely. Check wire tension and re apply it if sagging occurs, ensuring consistent pressure across the entire fence line. Address any ground erosion around post bases that might compromise structural stability, potentially adding gravel or concrete to stabilize shifting posts.
Pro tip: Conduct a comprehensive fence inspection at least twice a year once in early spring and again in late fall to catch and address potential issues before they become major problems.
Build Stronger Field Fences with Expert Supplies from FenceFast
Building a reliable field fence for your livestock and property involves careful planning, quality materials, and proper installation techniques. If you want to avoid common challenges like weak posts, loose wire, or ineffective containment, turn to a trusted partner who understands these critical needs. At FenceFast.ca, we offer everything you need—from sturdy wooden and metal posts to durable wire mesh, barbed wire, and electric fencing components—to help you create a fence that lasts and protects.

Don’t risk delays or weak fencing that leaves your livestock vulnerable. Visit FenceFast.ca now to explore our comprehensive selection of fencing supplies and expert resources. Whether you are marking your fence line, setting posts securely, or tensioning wire, our quality products and nationwide shipping make your project smoother and faster. Take control of your livestock management today and build with confidence using our reliable fencing solutions.
Frequently Asked Questions
What materials do I need to build a field fence for livestock?
You need wooden posts, metal T posts, wire mesh, barbed wire, electric wire, corner braces, and fastening hardware. Gather high-quality materials suitable for your specific livestock and environment to ensure durability.
How do I mark the fence line before installation?
Accurately mark the fence line using sturdy stakes and bright survey string or line to define your intended route. Walk the entire path to identify any challenges, and clear vegetation along the way to facilitate a smoother installation.
How deep should I dig post holes for my field fence?
Dig post holes at least 3 feet deep for corner posts and 2 feet deep for line posts, ensuring the holes extend below the frost line in colder areas. This depth provides stability and prevents shifting over time.
What is the best way to tension the wire on my field fence?
Start tensioning the wire from one corner post and use a fence stretcher or come along tool to gradually stretch it evenly across the entire fence line. Ensure there is minimal sag by checking tension midway between posts and adjust as necessary.
How can I maintain my field fence and ensure its integrity?
Conduct thorough inspections of your fence at least twice a year, checking for signs of damage like loose wires and bent posts. Reinforce any vulnerabilities by tightening wires, replacing damaged sections, and treating wooden posts to prolong their lifespan.
What should I do if my fence shows signs of sagging or wear?
If your fence shows sagging or wear, start by tightening any loose wire sections and check the post alignment. Replace damaged posts and consider applying wood preservative to treat decay, ensuring your fence remains effective and durable.

