

For most home gardens, the right answer is a portable solar energizer paired with electric netting or a polywire kit, sized to your fence length and vegetation load. Small, temporary vegetable or flower beds do fine with a light 0.1 to 0.3 joule energizer and netting you can move each season. Larger plots or spots with real deer and raccoon pressure need 0.5 to 1.0 joules or more, often on a permanent multi-strand layout.
- Small or temporary garden: light energizer (0.1 to 0.3J) plus portable netting.
- Larger or wildlife-heavy garden: 0.5 to 1.0J or higher, often permanent multi-strand wire.
- Size by output joules and recommended powered fence length first, then follow a short installation checklist to get it running the same day.
Key Takeaways
A garden solar electric fence works reliably when the energizer’s output joules match the fence length and vegetation load, the ground system is solid, and the battery type suits the local climate.
| Point | Details |
|---|---|
| Match joules to fence length | Use 0.1 to 0.3J for small clean lines and 0.5 to 1.0J or more for longer or weedy runs. |
| Ground it properly | Drive at least one 3-foot rod, adding more in dry or sandy soil. |
| Manage vegetation weekly | Clear weeds and branches from the wire since contact is the top cause of voltage loss. |
| Choose lithium for reliability | Lithium batteries with adaptive charge control hold output through cloudy stretches better than SLA. |
| Get sized guidance from Fencefast | Fencefast’s Gallagher expertise helps match energizer joules and kit components to your exact garden. |
Table of Contents
- Types of Solar Electric Fencing for Gardens
- How to Size a Solar Energizer for a Garden Fence
- How to Install a Solar Electric Fence for Garden Protection
- Solar Fence Maintenance and Troubleshooting
- Safety Basics for a Garden Solar Fence
- Why Battery Type and Adaptive Charging Actually Matter
- Buying Checklist: What to Look for in a Garden Solar Fence Kit
- Choosing a Fence for My Own Garden
- How Fencefast Helps You Choose the Right Solar Fence
- Frequently Asked Questions
- Sources
Types of Solar Electric Fencing for Gardens
Three physical setups cover almost every garden scenario, and picking the wrong one is the most common expensive mistake people make.
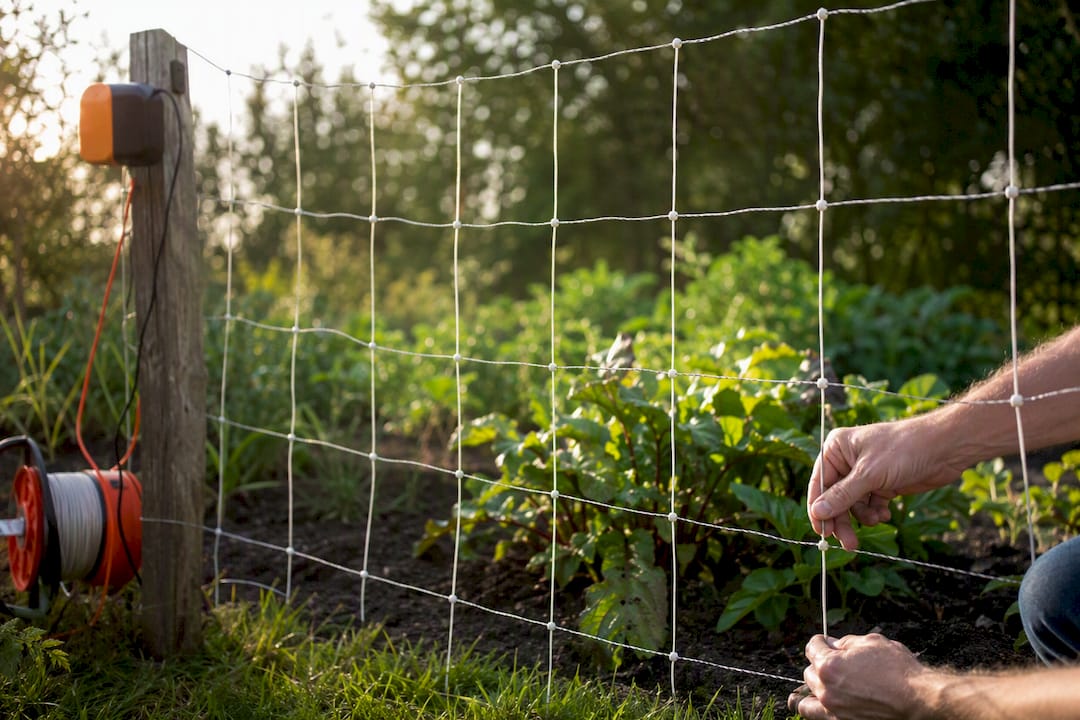
Portable electric netting is the go-to for raised beds, rotating vegetable plots, or anyone renting their property. You can pull up a 100-foot section, move it 20 feet, and have it back online in ten minutes. It’s the best match for rabbits, groundhogs, and loose neighborhood dogs, since the netting’s tight vertical spacing blocks animals that would just duck under a bare wire.
Polywire or polytape multi-wire kits suit gardens with moderate, mixed pest pressure and irregular layouts, wrapping around trees, sheds, or oddly shaped beds without much fuss. Three or four strands, spaced from six inches up to about knee height, handle raccoons and woodchucks reasonably well.
Permanent multi-strand fencing earns its keep against persistent deer, especially on larger properties or orchard-adjacent plots where you’re not moving the fence line every year. Five to seven strands running up to 7 or 8 feet high is standard for serious deer deterrence.
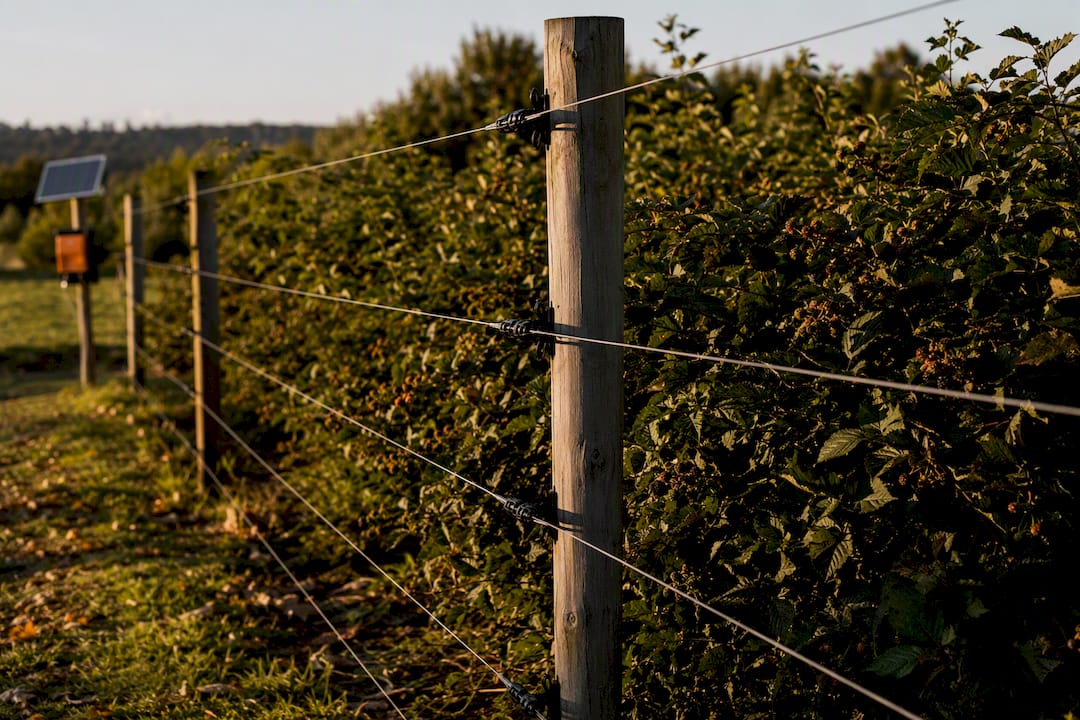
Whichever route you take, expect the same core parts list: an energizer/charger, a solar panel (built-in or separate), a battery, a ground rod system, posts with netting or wire, and insulated connectors to tie it all together.
Pro Tip: Don’t buy fencing components before you’ve picked the pest. A wire spacing that stops rabbits does nothing against deer, and vice versa.
How to Size a Solar Energizer for a Garden Fence
Every solar energizer is rated in output joules and stored joules, and confusing the two leads to a lot of disappointed buyers. Output joules is the energy delivered per pulse to the fence line, which is what actually determines how far the charge travels through vegetation and wire resistance. Stored joules describes battery reserve, which matters more for cloudy stretches than for daily performance.
As a rule of thumb:
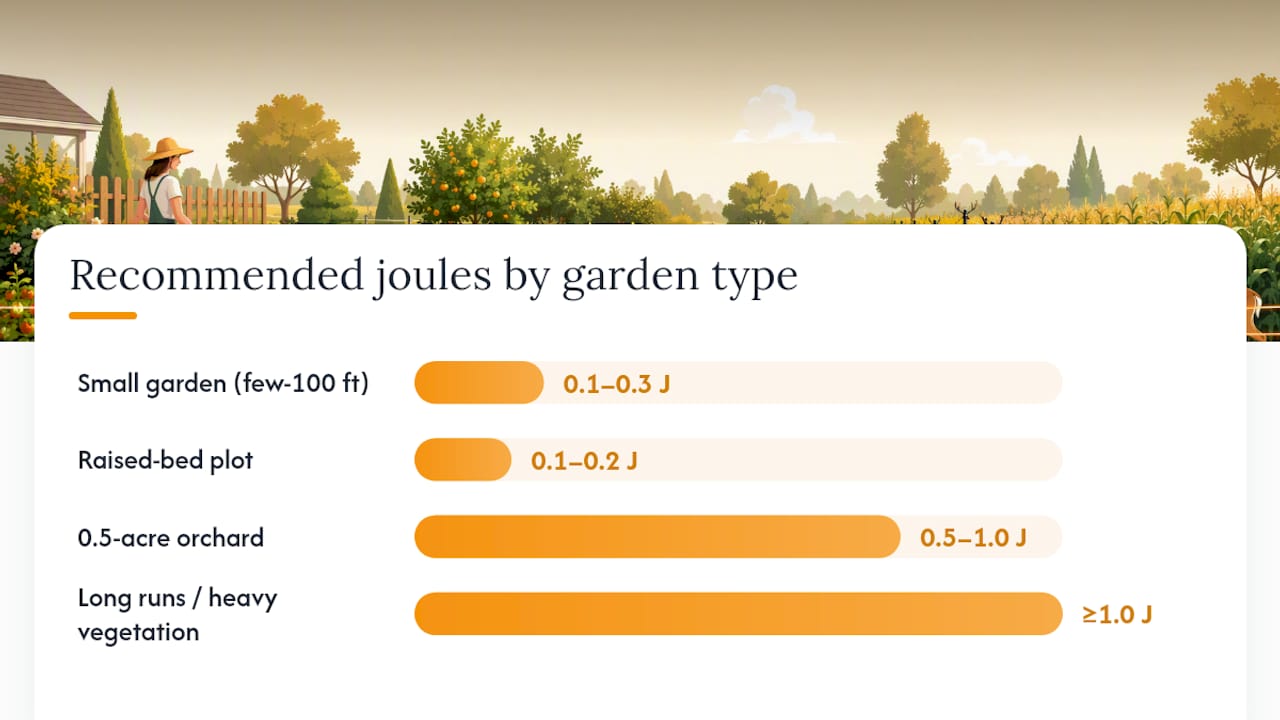
- 0.1 to 0.3 joules handles small, well-maintained garden lines under a few hundred feet.
- 0.5 to 1.0 joules covers larger gardens or lines with some weed contact.
- 1.0 joules or more is worth it for long runs or heavy vegetation load that would otherwise bleed off voltage.
Manufacturers publish a “recommended powered fence distance” figure, but treat it as a best-case number. Zareba’s spec sheet for its 15-mile solar charger is upfront that vegetation, conductor type, and grounding all cut into that mileage claim in the real world. A steel wire line in dry, weedy soil might deliver a third of the advertised distance.
Here’s a worked comparison for two common setups:
| Garden type | Approx. fence length | Suggested joules |
|---|---|---|
| small raised-bed plot | medium perimeter | 0.1 to 0.2J |
| 0.5-acre orchard patch | large perimeter | 0.5 to 1.0J |
Low-impedance energizers, common in modern solar units, keep pushing usable voltage even when weeds are grounding out part of the circuit, which is one reason they’ve replaced older weed-burner designs. When comparing batteries, lithium units generally hold charge longer and tolerate partial discharge better than sealed lead-acid, a trade-off worth weighing against upfront price.
How to Install a Solar Electric Fence for Garden Protection
Buy everything before you dig a single post hole. Here’s the short list: an energizer rated for your fence length, compatible netting or wire, posts, one or more ground rods, insulated connectors and joint clamps, and a digital voltmeter. Skipping the voltmeter is the single most common regret gardeners report once something stops working.
- Lay out the perimeter and decide where the energizer and solar panel will sit, ideally close to the fence line to minimize lead wire length.
- Mount the energizer and solar panel facing south (in the Northern Hemisphere) with a clear, unshaded view of the sky for most of the day.
- Drive the ground rod at least 3 feet into the soil, away from other buried metal or utility lines.
- Attach netting or wire to posts, keeping tension even and connectors tight at every joint.
- Test with a voltmeter at the far end of the fence line before you consider the job done.
Grounding is where most low-voltage complaints trace back to. One rod is often enough for a small garden, but dry, sandy soil may need two or three rods spaced 10 feet apart and tied together with ground wire. Premier1’s IntelliShock 100 spec guidance recommends watering the area around the ground rod during dry spells and adjusting the solar panel’s angle seasonally to keep charging efficient as the sun’s position shifts.
If you’re planning to move the fence with the seasons, look for a unit with a built-in carry handle and a bracket that clips onto a standard T-post. It saves you from re-tooling the mounting setup every time you rotate beds.
Pro Tip: Insulate every single connection point, including where wire crosses a metal gate or post. One bare contact point can quietly drain half your fence’s voltage.
Solar Fence Maintenance and Troubleshooting
A garden fence that worked perfectly in May can be dead by August, and it’s almost always vegetation, not the energizer, at fault. Walk the line weekly during growing season and check for weeds or branches touching the wire. In shoulder seasons, do a monthly check of the battery charge and confirm the solar panel is free of dust, leaves, or shade from new growth. Before winter, disconnect the battery if you’re storing the unit, since a full discharge over cold months can shorten its life.
Common failure points, roughly in order of likelihood:
- Vegetation touching the wire and grounding out the charge.
- Loose or corroded connectors at joints and the energizer terminals.
- A solar panel partly shaded by summer foliage.
- A battery that’s aged out or never fully charged to begin with.
To troubleshoot low voltage, start at the energizer with a voltmeter, then test at 100-foot intervals moving away from it. A sharp voltage drop between two test points usually pinpoints the exact section with a short. If the whole line reads low even close to the energizer, suspect the ground system first, especially in sandy or very dry soil, where adding a second ground rod often solves it outright.
Pro Tip: Carry a cheap digital voltmeter in your garden tote all season. Testing takes 30 seconds and saves you from discovering a dead fence the morning after a rabbit got in.
Safety Basics for a Garden Solar Fence
Always switch off the energizer before touching wire, connectors, or the ground system. Use proper insulated connectors rather than improvised splices, and keep grounding solid to avoid stray voltage elsewhere in the yard. If small children play in or near the garden, consider keeping the lowest wire high enough that it’s not at toddler height, or fence off the fenced area itself.
- Post a small, visible warning sign wherever the fence borders a walkway, shared yard, or neighboring property.
- Turn the system off before any hands-on maintenance.
- Check local rules if you have specific concerns about electric fencing near a property line. This isn’t legal advice. A quick call to your local municipality clears up most questions.
Why Battery Type and Adaptive Charging Actually Matter
Not all solar energizers manage their own power the same way, and that difference shows up during a stretch of cloudy days. Lithium units with adaptive energy control monitor incoming solar charge and battery voltage in real time, throttling output to stretch reserves rather than letting the fence go dark. Gallagher’s S80 lithium energizer is built around this approach, keeping the fence live through low-sun periods that would drain a basic sealed lead-acid setup.
Adaptive charge management on a lithium energizer means the unit adjusts its own output to preserve battery life during cloudy weather, rather than running full power until the reserve simply runs out.
Lithium batteries also weigh less and tolerate deeper discharge cycles without the shortened lifespan that plagues sealed lead-acid batteries left partially drained. That’s a real advantage if your fence sits in a shaded corner of the yard for part of the day.
Pro Tip: Look for an energizer with a visible low-battery indicator and a built-in overcharge regulator. It’s a small feature that prevents both a dead fence and a cooked battery.
Buying Checklist: What to Look for in a Garden Solar Fence Kit
Before you check out, run through this list: output joules, battery type, solar panel wattage, included leads and ground connectors, warranty length, portability features, and whether the kit is actually compatible with the netting or polywire you already own or plan to buy.
- Entry-level kits (under $200): small energizers around 0.1 to 0.2J with basic SLA batteries, fine for a single small bed against rabbits.
- Mid-range units ($200 to $400): 0.3 to 0.6J energizers, often with better solar panels and longer battery life, suited to a full backyard garden or light deer pressure.
- Higher-end lithium units (over $400): adaptive charge control, larger panels, and the reliability to cover a half-acre or more against persistent deer.
Retailers and manufacturer sites both list days-of-autonomy and weatherproof housing ratings, which matter more in practice than a headline mileage number. Compare warranty terms carefully too, since a two-year warranty on a lithium unit is worth more than a one-year warranty on a cheaper SLA model given how battery replacement costs stack up over time.
- Confirm the energizer’s rated output matches your fence length, not just your garden’s square footage.
- Check that ground rod and connector kits are included, since some budget kits leave these out.
- Favor a supplier that can walk you through sizing rather than a bare product listing.
Choosing a Fence for My Own Garden
For a small raised-bed plot in a suburban yard, I’d run netting on a 0.1 to 0.2J energizer, mount the panel on the sunniest fence post, and test with a voltmeter at both ends before planting a single seed. For a half-acre orchard patch on a rural lot with real deer traffic, I’d go with a permanent multi-strand line, a 0.5 to 1.0J lithium unit and a second ground rod from day one rather than waiting for a voltage complaint to force the upgrade.
How Fencefast Helps You Choose the Right Solar Fence
Fencefast has spent 26 years as an authorized Gallagher dealer, which means the sizing advice you get is backed by real product knowledge, not a generic spec sheet. That matters most when you’re staring at three different joule ratings and none of the packaging tells you which one actually fits your garden.

Fencefast helps with more than just checkout. The team can walk you through matching an energizer to your fence length, point you toward the right netting or polywire for your specific pest problem, and ship kits and replacement parts nationwide. If you’d rather not guess between a 0.3J and a 0.6J unit, browse solar fence energizers and kits at Fencefast and get a setup sized correctly the first time.
Frequently Asked Questions
What size solar energizer do I need for a vegetable garden? Most vegetable gardens under a quarter acre do fine with a 0.1 to 0.3 joule energizer, assuming the fence line stays reasonably clear of weeds and the run is under a few hundred feet.
Will a solar electric fence keep deer out of my garden? A properly grounded multi-strand fence at 5 to 7 feet, powered by a 0.5J or larger energizer, deters most deer, though persistent pressure sometimes calls for double fencing or a taller permanent line.
How long does a solar fence battery last without sun? It depends on the battery and energizer, but many consumer units list several days of stored autonomy, with lithium batteries generally outperforming SLA in extended cloudy stretches.
Can I move a solar electric fence for garden use between seasons? Yes. Portable netting kits with a carry-handle energizer are built for exactly this, letting you relocate the entire setup in under an hour when you rotate beds.
Do I need a separate solar panel or does the energizer have one built in? Both options exist. Small garden units often integrate the panel directly on the energizer housing, while larger systems use a separate panel wired in for better sun exposure and easier repositioning.

