

For most small gardens, the right call is a portable solar energizer kit rated within the appropriate joule range for small garden animal deterrence, paired with either step-in posts and polywire or lightweight electric netting. That combination handles rabbits, raccoons, deer, and wandering pets without overbuilding for a 50 x 50-foot vegetable bed.
Three specs to lock in before you buy:
- Output energy: 0.2–0.6 J covers small-animal deterrence without excessive voltage for garden-scale use
- Effective fence length: look for kits rated to cover at least a moderate garden area typical of small gardens, which translates to roughly 500–1,000 feet of wire run
- Battery autonomy: aim for 3–7 days of backup so cloudy stretches don’t leave your beds unprotected overnight
The Gallagher S200 is a widely cited portable solar energizer that fits this profile, and Fencefast carries Gallagher products as an authorized dealer with a 26-year partnership. For installation, plan on post spacing of roughly 8 to 12 feet and grounding rods driven about two and a half to three feet into moist soil — those two numbers alone account for most DIY failures when they’re ignored.
Key Takeaways
A portable solar energizer rated 0.2–0.6 J, paired with proper grounding and a battery-backed panel, is the most practical solar-powered electric fence setup for a small garden.
| Point | Details |
|---|---|
| Right joule range | Choose 0.2–0.6 J for rabbits, raccoons, and garden wildlife; higher output adds risk without better deterrence. |
| Grounding depth | Drive rods 31–40 inches into moist soil; add a second rod in series for dry or sandy conditions. |
| Post spacing | Set posts every 8–12 ft and face the solar panel south at a 30–45 degree tilt for reliable charging. |
| Battery autonomy | A 12V battery with adequate capacity usually provides several days of backup, though actual endurance may vary with conditions. |
| Fencefast | Authorized Gallagher dealer stocking solar energizers, ground rods, and netting sized for garden-scale installs. |
Table of Contents
- What types of solar electric fence setups work for small gardens?
- How to choose the right energizer and kit for a small garden
- How do you install a solar electric fence step by step?
- Can you put an electric fence around your garden, and is it safe?
- Keep it working: common problems and easy fixes
- What does a solar garden fence cost, and where should you buy?
- What most solar fence advice gets wrong
- Fencefast carries what small-garden solar fences actually need
- Sources
What types of solar electric fence setups work for small gardens?
Three practical configurations cover almost every small-garden situation, and they differ mainly in how permanent you want the setup to be.
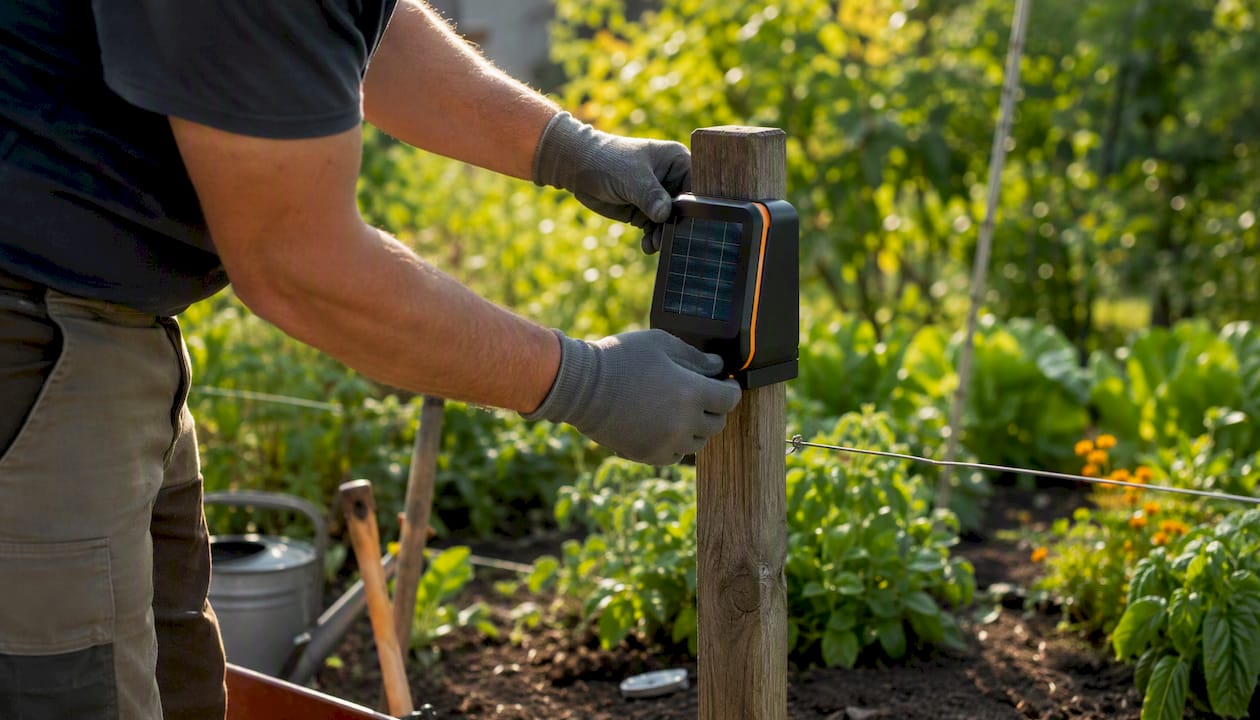
Portable all-in-one solar kits combine the panel, battery, and energizer in a single housing you can clip to a post or stake. Setup takes under an hour, and you can move the whole unit if your garden layout changes. These are the most popular solar garden fence systems for home gardeners because they require no wiring to a structure and no separate battery management.
Electric netting is a different animal entirely. It arrives as a pre-strung mesh on flexible posts, typically 42–48 inches tall, and you can stake out a complete perimeter in 15 minutes. Homesteaders who rotate poultry or move garden boundaries seasonally favor netting because it balances deterrence with minimal setup time. The trade-off is cost per foot and the need to keep vegetation from touching the mesh, which causes constant shorts.
Permanent wire systems use a fixed solar energizer mounted to a post or structure, with galvanized or aluminum wire strung on insulators around a set perimeter. More work upfront, but lower long-term cost and better durability through winter. Best for established garden beds you won’t be moving.
- Portable kits: best for seasonal use, renters, or gardeners who want flexibility
- Electric netting: fastest to deploy, ideal for poultry pens or rotational plots
- Permanent wire: lowest cost over time, suits fixed raised-bed perimeters
Pro Tip: If you’re protecting a vegetable bed that changes shape each season, electric netting is worth the higher upfront cost. You can reconfigure the entire perimeter in minutes rather than re-stringing wire and moving posts.
Solar-powered electric fencing is a reliable off-grid option that cuts running costs compared to AC-powered systems and can be installed by any motivated DIYer following manufacturer guidelines.
How to choose the right energizer and kit for a small garden
Start with the animal, not the energizer. Rabbits and groundhogs need a low-wire configuration close to the ground. Deer need height. Raccoons need both. That single decision shapes your wire count, post height, and joule requirement more than anything else.
The spec checklist that actually matters
- Target animal and perimeter length. Measure your garden perimeter before looking at any product listing. A 100 x 50-foot bed has a 300-foot perimeter — well within what a 0.3 J energizer handles.
- Output energy (joules). For rabbits, groundhogs, and small predators, a joule output in a lower range is commonly recommended for small animals and predators like rabbits and groundhogs. Deer and larger animals warrant 0.5–1 J. Going higher than needed doesn’t improve deterrence — it just increases the risk of harming a pet.
- Low-impedance vs. high-impedance design. Low-impedance energizers maintain pulse strength even when vegetation touches the wire. High-impedance units lose voltage fast under load. For a garden with any grass or weeds near the fence line, low-impedance is the right choice.
- Panel wattage and battery capacity. a 5 to 15 watt panel with a 12V battery having adequate capacity provides reliable operation through night and cloudy days gives reliable overnight and cloudy-day operation. Manufacturers recommend routing the panel through a battery before the energizer so the fence runs at night, not just during daylight hours.
- IP weather rating. Look for IP65 or better if the unit will be exposed to rain and morning dew year-round.
Spec reference for small-garden kits
| Spec | Why it matters | Small-garden target |
|---|---|---|
| Output energy | Determines deterrence level and animal safety | 0.2–0.6 J |
| Panel wattage | Drives charging speed and cloudy-day performance | 5–15 W |
| Battery capacity | Sets overnight and low-sun runtime | 12V, 7–10 Ah (or lithium 8–10 Ah) |
| Pulse voltage | Must clear the animal’s coat or fur | 4–8 kV |
| Grounding rod depth | Completes the circuit; poor grounding = weak pulse | 31–40 in |
| IP rating | Weatherproofing for outdoor exposure | an IP65 rating or better for weather resistance |
Reading a product listing: the joule number and panel wattage are the two figures worth trusting. “Miles of coverage” claims are marketing — they assume a single wire with no vegetation contact. Divide the stated coverage by two for a realistic estimate in a typical garden setting.
Pro Tip: A 12V deep-cycle battery connected between the panel and energizer smooths out daytime-only solar output so your fence stays live through the night and during overcast stretches.
How do you install a solar electric fence step by step?
A clean install takes two to three hours for a small garden. The sequence matters — grounding last is the most common mistake.
- Measure and mark your perimeter. Walk the boundary with a tape measure and mark post locations every 8–12 ft. Corner posts need to be braced or driven deeper.
- Drive your posts. Step-in posts push in by hand. Wooden or T-posts need a driver. Keep corners square and check that the wire height will clear the target animal’s belly or nose.
- Mount the solar panel and energizer. Face the panel south (Northern Hemisphere) at a tilt angle approximately matching your latitude, often between 30 and 45 degrees, to optimize solar exposure Avoid any shade from trees or structures across the day. The Gallagher S6 installation video walks through mounting height and bracket placement for a similar energizer class.
- Connect the battery. If your kit uses a separate 12V battery, connect it to the energizer before attaching the panel. Polarity matters — reverse connections can damage the unit.
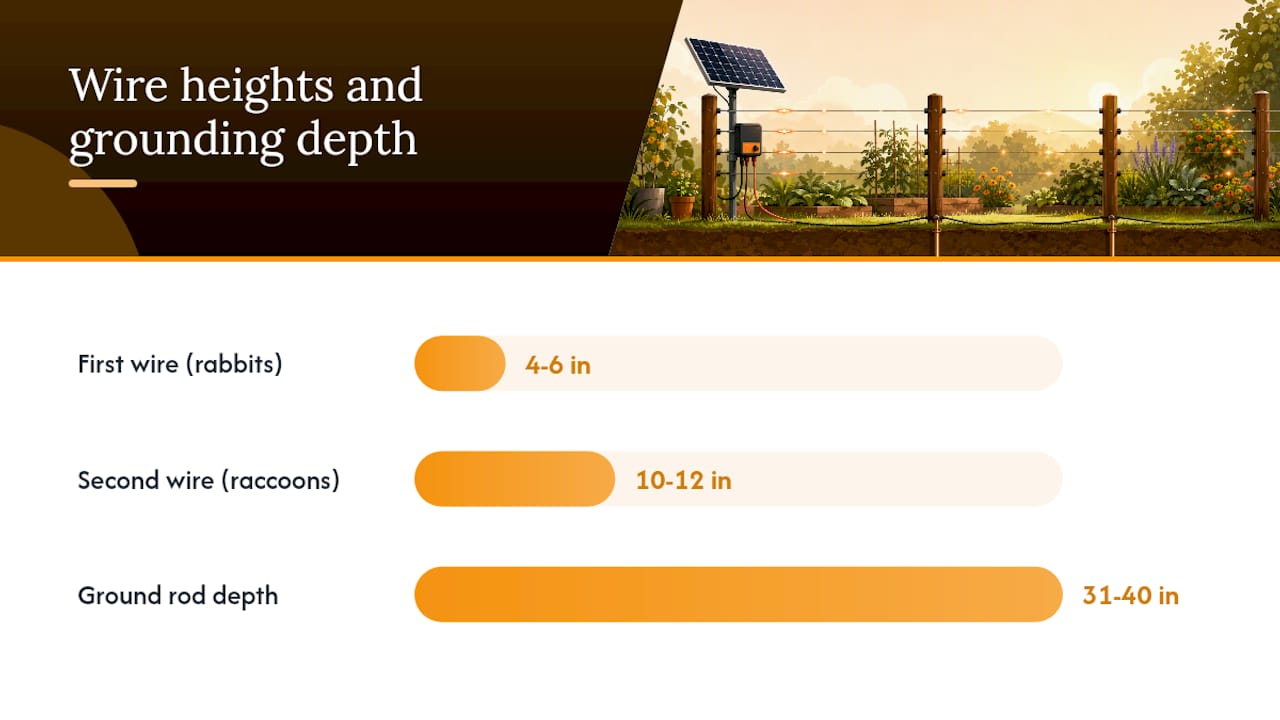
- Run your wire or netting. Attach wire to insulators on each post, keeping consistent tension. For rabbits, run the first wire 4–6 inches off the ground. Add a second wire at 10–12 inches for raccoons.
- Install grounding rods. Drive at least one galvanized rod 31–40 inches into moist soil, at least 6 feet from any building foundation. In dry or sandy soil, use two rods in series spaced 6–10 feet apart. Connect with a ground clamp and insulated lead wire back to the energizer’s ground terminal. Grounding quality is the most common root cause of weak fences — multiple rods in series in dry soils maintain reliable pulse return.
- Test the fence. Use a digital fence tester, not your hand. Walk the full perimeter and check for shorts from vegetation or sagging wire.
Installation checklist to bring on-site:
- Tape measure and marking flags
- Post driver or mallet
- Wire tensioners and insulators
- Ground clamps and lead wire
- Digital fence tester
- Warning signs (at least one per gate, more for longer runs)
- Gloves and safety glasses
Pro Tip: Tilt your solar panel slightly steeper in winter months — a 45-degree tilt captures more low-angle winter sun than a flat-mounted panel, which matters most when days are shortest and your battery needs every watt.
For a detailed solar energizer installation guide, Fencefast’s resource library covers post spacing, energizer orientation, and grounding for garden-scale installs.
Can you put an electric fence around your garden, and is it safe?
The short answer: yes, in most U.S. jurisdictions, but local rules vary enough that you need to check before you dig. Municipal codes, HOA covenants, and utility easements can all restrict fence placement, height, or type. Call your city or county planning office and ask specifically about electric fences — not just “fences.”
Before you install, verify:
- Local ordinances on electric fence use in residential zones
- HOA rules if applicable
- Utility easements along your property line (call 811 before driving any post or ground rod)
- Setback requirements from sidewalks, roads, and neighboring properties
Safety basics that apply everywhere:
- Post warning signs at every gate and at regular intervals — this is both a legal protection and a courtesy to neighbors
- Keep output voltage appropriate to the target animal; 0.2–0.6 J is sufficient for garden wildlife and won’t seriously harm a child or pet who makes accidental contact
- Use proper insulators on every post — bare wire touching a metal post shorts the circuit and can create a continuous-contact hazard
- Install a gate handle on any entry point so you’re not grabbing a live wire
- Keep the energizer in a weatherproof housing and, if children are nearby, consider a lockable box
Legal prompts to check with your municipality:
- Is an electric fence permitted in my zoning district?
- What is the minimum setback from the property line?
- Are warning signs required by local ordinance?
- Does my fence require a permit?
Keep it working: common problems and easy fixes
Most solar fence failures trace back to three causes: poor grounding, vegetation shorting the wire, and a battery that’s past its useful life.
- No pulse at all. Check the battery voltage first — a 12V deep-cycle battery below 11.5V won’t power most energizers reliably. Then check panel connections and verify the panel is getting direct sun, not partial shade.
- Weak pulse. Walk the fence line and look for grass or weeds touching the wire. A single heavy contact point can bleed enough voltage to drop the pulse below deterrence threshold. Trim vegetation back 6 inches from the lowest wire.
- Intermittent operation. Usually a shading problem on the panel or a battery that’s losing capacity. Panels accumulate dust and pollen — a seasonal wipe-down with a damp cloth restores output. Batteries in small solar kits typically last 2–5 years depending on depth of discharge and temperature cycling.
Runtime expectations: A 12V, 10 Ah battery powering a 0.3 J energizer will typically run 3–7 days without solar input, though actual performance depends on temperature, battery age, and energizer draw. Colder temperatures reduce battery capacity noticeably. Treat the manufacturer’s stated autonomy as a best-case figure and plan for the lower end in winter.
Maintenance cadence:
- Monthly: check all connections for corrosion, test fence voltage with a digital tester
- Seasonally: clean the solar panel, trim vegetation from the fence line, inspect insulators for cracks
- Annually: test battery capacity and replace if it no longer holds charge through a 48-hour cloudy period
For persistent grounding problems, adding a second ground rod in series is usually the fix — especially in dry or sandy soil where a single rod loses contact in summer.
What does a solar garden fence cost, and where should you buy?
Small-garden solar fence kits in the U.S. market generally fall into three price bands:
- Entry-level portable kits (energizer + small panel + basic hardware): $60–$150. These cover short perimeters and suit seasonal vegetable beds.
- Mid-range kits with larger panels and batteries: $150–$350. Better autonomy, more included hardware, and usually a low-impedance energizer worth the upgrade.
- Electric netting sets (complete with posts and energizer): $200–$500 depending on length and brand.
What pushes the price up: higher joule output, a larger solar panel, a bigger battery, longer warranty, and a branded energizer from a manufacturer with U.S. support. A product listing from the current market shows what typical mid-range specs look like: 0.3 J output, 8 kV, a built-in lithium pack around 10,400 mAh, a 10 W panel, and IP65 weather rating.
Buying advice:
- Prioritize kits that list joules, panel wattage, and battery capacity explicitly — any listing that omits these is hiding weak specs
- Check whether ground rods, clamps, and insulators are included or sold separately
- Confirm warranty length and whether the manufacturer has U.S.-based support
- Buy from a dealer who can answer technical questions, not just ship a box
What most solar fence advice gets wrong
The standard recommendation online is to buy the biggest energizer you can afford. That logic makes sense for a 40-acre pasture. For a 30 x 40-foot raised-bed garden, it’s the wrong frame entirely.
Oversized energizers don’t deter animals more effectively at garden scale — they just create a higher-voltage shock that’s more likely to injure a pet or startle a child. The deterrence mechanism is the surprise, not the pain level. A 0.3 J pulse is enough to train a rabbit to stay out. A 2 J pulse does the same job with more risk and no added benefit.
The second piece of advice that routinely fails gardeners: “just stake the panel in the ground and point it south.” Panel tilt and shading matter far more than most guides admit. A panel lying nearly flat in a northern climate charges at a fraction of its rated capacity from October through March. Tilt it to match your latitude and keep it clear of afternoon shade, and you’ll double your effective winter charging hours.
Grounding is the third underrated variable. Most weak-fence complaints aren’t an energizer problem — they’re a grounding problem. One shallow rod in dry summer soil can drop an otherwise capable energizer to near-useless output. Two rods in series, driven to 31–40 inches in moist soil, solve this reliably.
Fencefast carries what small-garden solar fences actually need
Gardeners who’ve read this far know the specs they need: a 0.2–0.6 J low-impedance energizer, a 5–15 W panel, a 12V battery with at least 7 Ah of capacity, and proper grounding hardware. Fencefast stocks Gallagher solar energizers — including portable units that fit the Gallagher S200 class — along with ground rods, insulators, polywire, and netting, all from a single authorized source.

As an authorized Gallagher dealer with 26 years of partnership, Fencefast offers product support that goes beyond a product listing: installation guides, sizing help, and access to manufacturer resources. You’re not guessing at compatibility — the hardware is matched and the specs are published clearly.
Compare the specs on any kit before you buy. Then browse Fencefast’s electric fencing catalog to find the energizer and accessories that fit your garden’s perimeter, your target animals, and your budget.
Sources
These are the most practical references for moving from reading to installing:
- How To Install a Solar Electric Fence (2026) | Today’s Homeowner
- Solar-Powered Electric Fencing - Backwoods Home Magazine
- How To Install A Solar Fence System: Step-by-Step Guide For Beginners - Corigy
- Build Your Own Solar Electric Chicken Fence & Keep Your Flock Safe — Bournebright

