

Map your property, run water lines so no paddock is more than 800 feet from a trough, then subdivide the usable acreage into rotational sections sized by forage output rather than raw acreage. Add lanes wide enough for a truck and a horse to pass safely, and build at least one all-weather sacrifice paddock before you commit to a permanent fence plan. Everything else in a good layout flows from those four decisions.
TL;DR:
- Paddock size should be based on forage capacity rather than acreage, with different soil and shading conditions influencing actual support levels.
- Water sources should be within 800 feet of each paddock to prevent uneven grazing and herd concentration issues that reduce pasture productivity.
- Shape efficiency favors square or near-square paddocks, with contour fencing on slopes to reduce erosion, and lane widths of 12 to 16 feet for smooth movement.
- Use a combination of permanent perimeter fencing and portable internal fences, with temporary polywire during the first season to allow flexibility and adjustments.
- An all-weather sacrifice paddock should be at least 1,200 square feet per horse and built with proper drainage and reinforcement to withstand year-round hoof traffic.
Table of Contents
- What Makes a Paddock Layout Efficient?
- How Do You Assess a Site Before Laying Out Paddocks?
- How Many Acres Does a Horse Need Per Paddock?
- What’s the Best Paddock Shape and Lane Layout?
- Where Should Water Go and How Many Troughs Do You Need?
- Should You Use Permanent or Portable Fencing?
- How Do You Build an All-Weather Paddock That Doesn’t Turn to Mud?
- What’s a Realistic Paddock Rotation Schedule?
- What Everyday Safety and Maintenance Checks Matter Most?
- How Do You Manage Drainage and Prevent Mud?
- How Should Shelter Placement Account for Wind and Sun?
- Practical Lessons From the Field
- Get Help Designing and Fencing Your Paddock System
- Sources
- FAQ
What Makes a Paddock Layout Efficient?
An efficient layout does three things at once: it matches paddock size to what the grass can actually regrow, it keeps water and gates close enough that horses use the whole space instead of wearing paths to one corner, and it stays flexible enough to change before you’ve poured money into fences you’ll regret. Most layout mistakes trace back to skipping one of those three.
Forage capacity, not acreage, should drive paddock size. Two one-acre paddocks on different soil types can support very different grazing loads, and K-State’s grazing school guidance recommends sizing paddocks for similar grazing capacity rather than equal square footage. A shaded, low spot with heavy clay will produce less usable forage per acre than a sunny sandy loam field, even at identical size.
Shape matters significantly for layout efficiency. Square or near-square paddocks generally minimize fence length per area and promote more even grazing distribution. Rectangular paddocks with length-to-width ratios between about 2:1 and 3:1 are also practical, balancing fence cost and grazing management. On sloped terrain, running fences along contour lines can reduce erosion risk compared to fencing up and down the slope. NCAT’s paddock design guidance flags top-to-bottom fence alignment as a common cause of erosion channels that get worse every season.
Water distance is the rule that quietly wrecks the most layouts. Horses that have to walk more than about 800 to 1,000 feet for a drink will graze unevenly, camping near the water source and ignoring the far end of the paddock, according to South Dakota State Extension’s grazing distribution research. That’s not just a convenience issue. Uneven grazing means some sections get overgrazed to bare dirt while others go to seed untouched, and both outcomes cost you pasture productivity.
Before you sketch a single fence line, run through this checklist:
- Confirm the acreage available and rough forage yield per zone.
- Locate every existing water source and mark the 800 foot radius around it.
- Note slope direction, drainage patterns, and any wet or compacted areas.
- Identify where a lane needs to reach every paddock for machinery and hay delivery.
- Pick a spot for at least one all-weather sacrifice paddock near the barn.
- Decide which fences will be permanent and which stay temporary for the first year.
Pro Tip: Sketch your layout in pencil first and walk the actual ground with a bag of marking flags before you buy a single post. Paper looks flat. Land isn’t.
How Do You Assess a Site Before Laying Out Paddocks?
Start with a property map that shows boundaries, existing structures, slope direction, and any drainage or wet areas, because every paddock decision after this one depends on getting the physical layout right the first time. A simple site assessment saves you from the two most expensive layout mistakes: putting a paddock where it floods every spring, and running a fence line that ignores a natural obstacle you’ll fight forever.
- Walk the property with a notebook or a mapping app and mark boundary lines, existing gates, trees, rock outcrops, and any easements or utility lines you can’t fence around.
- Flag wet spots and drainage paths during or right after a rain. Standing water, mossy low spots, and areas where hoofprints fill with water even in dry weather are the ground truth you won’t get from a satellite image.
- Note slope direction and grade. Steep sections need contour fencing and are poor candidates for sacrifice paddocks, since runoff there carries sediment and manure straight into whatever is downhill.
- Identify where lanes need to connect. Every paddock should have access to a central lane wide enough for a tractor, a manure spreader, and a led horse without forcing traffic through another paddock.
- Place handling areas and the sacrifice paddock on the highest, best-drained ground near the barn, not because it’s convenient, but because heavy hoof traffic there year-round will destroy any spot with poor drainage.
- Stake your proposed fence lines with temporary flags or twine and walk the entire route before you dig a single posthole. Distances that look reasonable on a printed map often reveal an awkward turn, a low spot, or a sightline problem once you’re standing in the field.
Skipping the walk-through is the single most common reason paddock plans get revised within the first year. A map tells you where things are. Walking the site tells you where water actually pools, where wind cuts hardest across open ground, and where a horse will naturally want to travel, information no aerial photo captures.
How Many Acres Does a Horse Need Per Paddock?
There’s no single acreage figure that works everywhere, because forage yield varies by soil type, rainfall, and grass species. The useful number isn’t acres, it’s pounds of forage your pasture produces against pounds of forage your horses eat.
Here’s the math in practical terms:
- Estimate daily forage demand. A horse eats roughly 2% of its body weight in dry matter per day, so a 1,000 pound horse needs about 20 pounds daily. Multiply by herd size for total daily demand.
- Estimate forage available per acre. This varies enormously by region and pasture condition, from under 1,000 pounds of usable dry matter per acre on thin, overgrazed ground to several thousand pounds on well-managed, fertile pasture. A local extension office or soil test can get you a realistic number for your land instead of a national average that doesn’t apply to your field.
- Divide total daily demand by forage yield per acre to find how many acres support your herd for one full grazing cycle, then size individual paddocks as fractions of that total based on how many rotations you want.
- Set your paddock count using rest and graze periods. A commonly used formula from Teagasc’s grazing infrastructure guidance is paddock number equals rest period divided by graze period, plus one. A 24 day rest period with a 3 day graze period calls for roughly nine paddocks.
Worked examples make this concrete. A single horse on decent pasture might do fine rotating through four paddocks of a half acre each, moving every few days and giving each section three weeks to recover. Two to four horses on the same quality ground usually need the total acreage scaled up proportionally rather than the paddock count, since forage demand rises with herd size but the rotation logic stays the same.
A small boarding facility running eight to twelve horses across mixed-quality pasture is a different problem. There, you’re often managing several forage zones at once, some thin and shaded, some lush and open, and the paddocks won’t be equal size even though they carry similar numbers of horses. This is where the K-State grazing capacity principle earns its keep: size each paddock to its own forage output, not to match its neighbor’s dimensions.
For a starter configuration, most small operations do well with six to eight paddocks and a graze period of three to five days. Facilities running more intensive rotational systems, especially those trying to maximize pasture quality on limited acreage, often expand to fifteen or more smaller paddocks with graze periods measured in single days. More paddocks mean more fence and more gates, so match the complexity to how much time you actually have for daily moves.
What’s the Best Paddock Shape and Lane Layout?
Square and near-square paddocks are the efficient default because they minimize fence length for a given area and encourage horses to graze evenly instead of camping along one long edge. Rectangular paddocks in a 2:1 to 3:1 ratio still work well and are often easier to fit onto an irregular property, but stretch that ratio much further and you start losing the grazing-distribution benefit while adding fence cost.
Long, narrow strips have one specific advantage: they’re built for strip grazing, where you move a single portable fence line forward every few days instead of rotating between separate paddocks. That works well for operations with flat, uniform pasture and someone available daily to shift a fence line, but it demands more labor than a standard rotation between fixed paddocks.
Lane design determines how much daily frustration your layout creates:
- Livestock lanes need roughly 12 to 16 feet of width for horses to move without crowding or spooking past each other.
- Lanes that also carry machinery, tractors, spreaders, hay wagons, need 16 feet minimum, wider if you’re navigating tight turns.
- A hub-and-spoke pattern, with paddocks radiating off a central lane near the barn, minimizes walking distance and works well for facilities under 20 acres.
- Parallel lane systems suit larger, flatter properties where paddocks run in rows and a single central lane feeds all of them.
- Every gate along a lane should open the full lane width so equipment doesn’t have to jackknife through.
Corners are where layouts fail horses, not where they fail on paper. Acute angles and tight dead ends give a frightened or dominant horse nowhere to go, and they’re a common site of kick injuries in group turnout. Round off corners wherever the fence line allows, and never place a gate in a corner where a horse could get trapped between fence panels.
Where Should Water Go and How Many Troughs Do You Need?
Every paddock should have its own water source, or at minimum be within a short walking distance typically recommended as less than about 800 to 1,000 feet, as longer distances tend to lead to uneven grazing and herd behavior problems. That figure comes directly from South Dakota State Extension’s research on grazing distribution, and it’s one of the few hard numbers in paddock design worth treating as a real constraint rather than a guideline you can round up.
The practical implication is that if paddocks are closely grouped, a single centrally placed water trough may serve several paddocks. However, for larger rotational systems covering an extended area, multiple water points should be planned to encourage even grazing and prevent animals from congregating excessively in one area.
A few system choices affect both cost and reliability:
- Central loop systems feed multiple troughs off one buried main line, which reduces the number of separate hookups but requires more upfront trenching.
- Frost-free troughs cost more initially but eliminate daily ice-breaking in cold climates, a real labor savings over a full winter.
- Portable troughs fit temporary paddock configurations well, letting you move water access as you adjust rotation size, though they need more frequent refilling and cleaning than a piped system.
- Placement away from gates and shelters reduces the manure and mud concentration that naturally builds up wherever horses linger, so set the trough a reasonable distance from the gate rather than right beside it.
Winterizing matters more than most first-year plans account for. Drain and insulate exposed lines before freeze-up, check float valves for ice jamming through the cold months, and scrub troughs on a regular schedule since horses drink less from dirty or algae-filmed water even when it’s technically available.
Should You Use Permanent or Portable Fencing?
Most efficient equine layouts use both: a permanent perimeter fence for security and boundary definition, with portable internal fencing dividing the interior into paddocks that can change size or shape as your management needs evolve. This mixed approach, backed by Pierce Conservation District’s rotational grazing guidance, avoids the single biggest financial mistake in paddock planning: building permanent cross-fencing before you actually know how your rotation will work in practice.
A permanent perimeter, whether wood post and rail, high-tensile wire, or a durable electric system, gives you the one fence line you truly don’t want to move: the boundary between your property and everything outside it. Internal divisions are a different story. Temporary polywire or electric tape lets you test a rotation plan for a full season, watch how forage responds, and adjust paddock sizes before locking anything in with permanent posts.
A few practical considerations when choosing materials:
- Visibility matters as much as strength. Horses respect a fence they can see, so wide polytape or added visual markers beat thin wire for any line horses approach at speed.
- Durability trade-offs are real. Permanent materials cost more upfront but need far less seasonal maintenance than temporary lines, which sag, get walked into by wildlife, and need retensioning.
- Maintenance time adds up. A temporary internal fence system that takes twenty minutes to reposition is worth more over a season than a slightly cheaper system that takes an hour.
- Consider where electrification adds value. A single strand of electric wire along the top of a permanent perimeter, or as the sole material for internal cross-fences, often deters leaning and testing behavior better than physical barriers alone.
Pro Tip: Run your internal fencing as temporary polywire for the first full grazing season, even if you’re confident about your paddock plan. What looks perfect on a sketch almost always needs one adjustment once you watch horses actually use the space.
For operations managing larger herds across bigger acreage, virtual boundary systems are worth a look as part of the toolbox, particularly where terrain or tree cover makes physical cross-fencing impractical. That’s a different scale of investment than a backyard paddock setup, but it’s part of the same underlying principle: build the layout you can adjust, not the one you’re stuck with.
How Do You Build an All-Weather Paddock That Doesn’t Turn to Mud?
An all-weather, or sacrifice, paddock is a small, heavily engineered turnout area designed to handle year-round hoof traffic without breaking down into mud, and building one is the difference between a pasture system that survives its first wet spring and one that doesn’t. Penn State Extension’s construction guidance treats it essentially as building a small outdoor arena, because the same layering and compaction logic applies.
- Prepare the subgrade by clearing organic material and grading for positive drainage away from the paddock, since building on soft or uneven native soil undermines everything above it.
- Lay geotextile fabric across the prepared subgrade to separate the native soil from the base material above, preventing the two from mixing under load over time.
- Add a compacted support base at least 6 inches deep, using an angular aggregate that locks together under compaction rather than a rounded gravel that shifts.
- Compact each lift to 90 to 95% of standard proctor density, working in layers rather than dumping the full depth at once, using a plate compactor or roller sized for the job, or hiring a contractor with the right equipment.
- Finish with a cushioned top layer roughly 2 inches deep, using fine aggregate no larger than a quarter inch, which provides footing comfort without holding standing water the way finer sand or unamended soil does.
- Extend a 1 to 2 foot shoulder beyond the fence line on all sides, since the highest-traffic zone in any paddock is right along the fence, and an unreinforced shoulder there erodes fast and undermines fence posts.
Sizing depends on how you’ll use the pad. Rough figures from Penn State’s guidance:
Grade the finished surface with a gentle slope, generally 1 to 2%, directing runoff toward a vegetated filter strip rather than a bare ditch or a neighboring paddock. That buffer strip slows water enough for sediment and nutrients to settle out before runoff reaches a waterway. One habit worth building early: never feed hay directly on the sacrifice pad’s surface. Loose feed dropped on compacted aggregate gets trampled into the footing and picked up along with dirt and small stones, raising the risk of sand colic in horses that graze it up off the ground.
What’s a Realistic Paddock Rotation Schedule?
A starter rotation for most small horse operations runs four to eight paddocks with a graze period of three to five days and a rest period of roughly three to four weeks, adjusted up or down based on how fast your grass actually recovers. Operations chasing tighter pasture management, especially where forage quality is a priority over simple turnout, often expand to fifteen or more paddocks with graze periods down to a single day.
The core adjustment principle is straightforward: grass growing fast needs shorter grazing stays and can support faster rotation back through the same paddocks, while slow growth during summer heat or drought needs longer rest periods even if that means more paddocks sitting empty at any given time. Rigid calendar-based rotation ignores this and either overgrazes slow-growing paddocks or wastes fast-growing ones.
A few habits make rotation manageable without turning it into a second job:
- Track stubble height with a quick visual check rather than precise measurement. Move horses off a paddock once grass is grazed down to around 3 inches, and don’t return until it’s recovered to 6 to 8 inches.
- Keep a simple log of move dates per paddock. A phone note or wall calendar works fine, and it becomes invaluable for spotting which paddocks consistently recover slower than others.
- Centralize lanes so every paddock move is a short walk rather than a trek across the property, cutting daily labor significantly on multi-paddock rotations.
- Use portable troughs on internal paddocks so water moves with the rotation instead of forcing horses back to one fixed point regardless of which section they’re grazing.
Related reading on the mechanics of moving a herd through a rotation, including grazing rotation schedules built for cattle, translates well to horse operations once you adjust for stocking rate and forage sensitivity.
What Everyday Safety and Maintenance Checks Matter Most?
Small fixes prevent most paddock failures, and they take minutes compared to the hours lost fixing an injury or a washed-out gate area later.
- Round off or angle every acute corner you can, and never place a gate at the point of a tight corner, since a cornered horse has nowhere to escape a confrontation with another horse.
- Size gates for both traffic types. A gate needs to be wide enough for equipment while also giving a nervous horse a clear, unobstructed path through, generally 10 to 12 feet for main access points.
- Preserve sightlines across paddocks so horses can see each other and approaching handlers from a distance, reducing startle reactions near fence lines.
- Add gravel aprons or rubber mats at gates and water points where hoof traffic concentrates, since these spots turn to mud fastest and stay wet longest after rain.
- Check fence tension and post stability weekly, especially after storms or freeze-thaw cycles that loosen posts in the ground.
- Test water cleanliness and flow at every trough, since horses reduce intake from dirty water well before it becomes visibly unsafe.
- Schedule spot reseeding and pasture dragging during rest periods to break up manure piles and encourage even regrowth before the next rotation cycle.
How Do You Manage Drainage and Prevent Mud?
Standing water and mud aren’t just an inconvenience, they’re the leading cause of thrush, scratches, and general hoof deterioration in horses kept on poorly drained ground. Good drainage planning starts at the same site assessment stage as your paddock layout, not as an afterthought once problems appear.
Grade high-traffic areas, gates, water points, run-in sheds, with a gentle slope away from the structure so water sheds instead of pooling at thresholds. On sloped pasture, contour your fence lines rather than running them straight downhill, a principle NCAT’s paddock design research ties directly to erosion prevention, since fences aligned up and down a slope tend to funnel runoff along the fence line and cut channels over time.
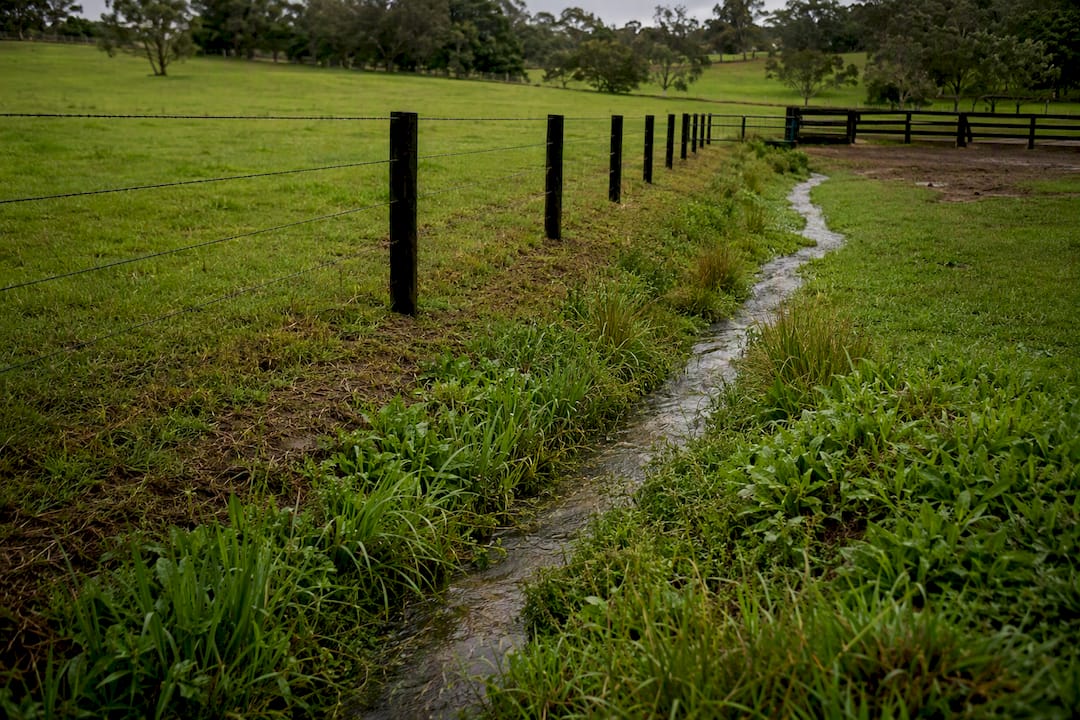
Vegetated filter strips do quiet, unglamorous work. A strip of unmowed grass or shrubs between a sacrifice paddock and any waterway or low area slows runoff enough for sediment and nutrients to drop out before reaching sensitive ground. Even a strip a few feet wide, left unmanicured, makes a measurable difference over a season.
Soil type dictates how aggressive your drainage plan needs to be. Heavy clay holds water and needs either significant grading or a French drain system beneath high-traffic zones, while sandy soils drain well naturally but erode faster under concentrated hoof traffic, particularly on any slope. Match your investment in drainage infrastructure to the soil you actually have rather than a generic plan, and prioritize the areas that see the heaviest daily use: gates, water points, and lanes, since that’s where poor drainage costs you the most in maintenance and horse health.
How Should Shelter Placement Account for Wind and Sun?
Shelter placement is a layout decision, not an afterthought you handle once the fencing is done. A run-in shed or windbreak positioned wrong can sit unused all winter while horses cluster in an exposed corner instead, wasting the investment entirely.
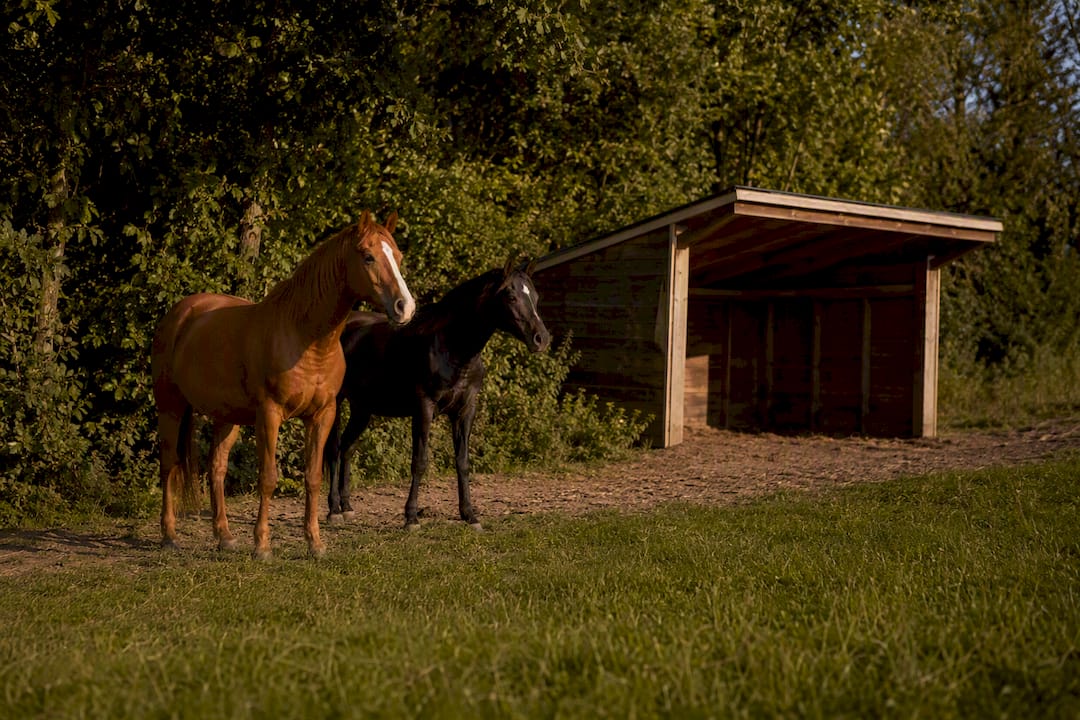
Orient open-front shelters away from your prevailing winter wind direction, typically northwest in much of North America, though local terrain and tree lines can shift the pattern on your specific property. A shelter that opens into the wind is nearly as useless as no shelter at all, since horses avoid standing in a structure that funnels cold air straight at them.
Summer sun exposure matters just as much as winter wind, particularly for paddocks with little natural tree cover. A shelter or shade structure positioned to block afternoon sun, generally an east to west orientation for the roofline, gives horses relief during the hottest part of the day when insects and heat stress peak simultaneously.
Where a paddock has existing tree cover, work with it rather than clearing it for a cleaner fence line. Mature trees offer better shade quality than most artificial structures, and preserving a windbreak of trees or shrubs along a paddock’s exposed edge reduces both winter wind chill and the need for a built structure at all. If you’re placing a new shelter, situate it on the same well-drained ground you’d choose for a sacrifice paddock, since shelters concentrate hoof traffic just as heavily as gates and water points do.
Practical Lessons From the Field
The fixes that make the biggest difference in a real layout are almost always small ones. A length of temporary polywire dividing an oversized paddock into two workable sections. A central hydrant added mid-season once it’s obvious horses are walking too far for water. A modest all-weather pad tucked next to the barn that ends up seeing more use than the three-acre pasture behind it, simply because it’s usable in March when everything else is a bog.
Flexibility beats symmetry every time. A layout with slightly uneven paddocks that gets adjusted twice in the first year beats a perfectly measured plan built once and never touched, because pasture and horses don’t care how square your geometry is. Start with temporary fencing wherever you’re unsure, watch a full season play out, then lock in permanent fence only where the plan has already proven itself. For deeper detail on the fencing side of that decision, our posts on temporary pasture fencing and rotational grazing fencing walk through material choices in more depth than fits here.
— Juiced
Get Help Designing and Fencing Your Paddock System
A layout that works on paper still needs the right materials in the ground, and that’s where a lot of otherwise solid plans stall out. Design and consultation support are available alongside a full catalog of fencing supplies, so you’re not choosing between expert planning and product access.

If your project involves engineered drainage, a multi-paddock rotation with more than a handful of sections, or an all-weather pad that needs to hold up under real traffic, it’s worth talking to someone before you buy materials. Fencefast’s design and consultation service helps you work through site-specific questions, whether that’s confirming lane widths for your equipment or sizing a water loop across a larger property. For the fencing itself, Fencefast carries temporary portable electric fencing built for exactly the kind of flexible internal divisions this guide recommends, plus permanent perimeter options and the hardware to tie a whole system together. Start with a consultation if your layout has more moving parts than a weekend project, or explore suitable portable fencing options directly if you already know what you need.
Sources
Several extension and research sources back the recommendations in this guide with real construction and design data. Penn State Extension covers all-weather paddock construction specs in detail. South Dakota State Extension documents the water-distance research behind grazing distribution. K-State’s grazing school materials address paddock layout and sizing by capacity. NCAT and Teagasc both provide deeper technical detail on fencing, water systems, and lane design for multi-paddock grazing.
- Construction of equine all-weather paddocks for mud-free management — Penn State Extension
- Financial considerations: livestock grazing distribution — South Dakota State Extension
- Layout and design guidance — K‑State (Meadowlark grazing school)
- Rotational grazing – paddock layout and design (Pierce Conservation District)
- Paddock design, fencing, water systems and livestock movement strategies — NCAT
FAQ
What Is the Ideal Size for a Horse Paddock?
There’s no single ideal size, since it depends on forage yield rather than acreage alone. A well-managed paddock should be sized so it supports your herd for a set grazing period, typically a few days, without grazing forage below about 3 inches, and an all-weather sacrifice paddock should run roughly 1,200 square feet for a single horse’s exercise turnout.
Is It Possible to Keep Two Horses on Five Acres of Pasture?
Five acres can support two horses on decent quality pasture, though the real answer depends on forage productivity, climate, and how the acreage is divided into rotational paddocks. Splitting that acreage into four or more smaller paddocks and rotating between them will produce far better pasture health than turning both horses out on the full five acres continuously.
Do Horses Get Bored in Paddocks?
Yes, horses kept in small, static paddocks with little variation can develop boredom-related behaviors like fence walking, cribbing, or aggression toward pasture mates. Rotational layouts help by giving horses new terrain and forage to explore on a regular schedule, and adding visual variety, like uneven terrain or a windbreak line, reduces monotony compared to a flat, featureless rectangle.
How Do I Manage My Horse Paddocks Effectively?
Effective paddock management combines a rotation schedule matched to grass growth rate, water placed within about 800 feet of every grazing area, and routine checks on fence tension, gate function, and drainage. Keeping a simple log of paddock rest periods and stubble height, paired with a mix of permanent perimeter and portable internal fencing, lets you adjust the system as pasture conditions change through the season.
How Many Paddocks Do I Need for a Basic Rotation?
Most small horse operations do well starting with four to eight paddocks, using a formula of rest period divided by graze period plus one to fine-tune the count. Operations aiming for tighter pasture management often expand well beyond that as they gain experience with faster rotations and shorter graze periods.

