

Temporary pasture fencing is the fastest, most affordable way to run a rotational grazing system without committing to permanent infrastructure. You subdivide a larger pasture into paddocks, move livestock as forage dictates, and let grazed sections recover. The result is healthier grass, better forage utilization, and livestock that stay where you put them. Fencefast, an authorized Gallagher dealer with 26 years of experience, supplies the components farmers rely on most for these systems.
Key advantages at a glance:
- Flexibility: Paddock size adjusts to forage availability and season without digging new posts
- Cost: Electric temporary fencing costs a fraction of permanent barbed wire or woven wire
- Speed: A single operator can set up or move a paddock in under an hour with the right equipment
- Pasture health: Controlled rest periods improve yield and plant persistence over time
- Livestock management: Moving animals frequently reduces selective grazing and improves herd behavior
What types of temporary fencing work best for your operation?
The right material depends on how often you move the fence, what livestock you run, and your budget.
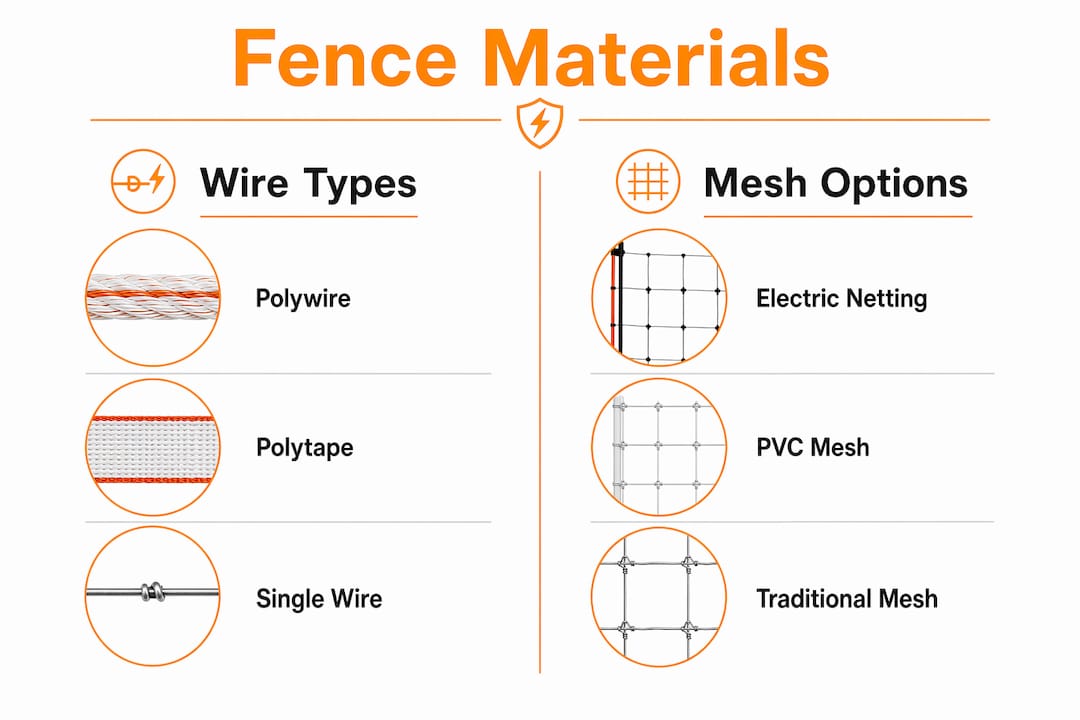
Wire: polywire vs. polytape
Polywire costs roughly half as much per foot as polytape and handles most cattle and horse applications. The filament choice matters more than most farmers realize. Aluminum filaments conduct electricity better, but they work-harden with repeated bending and become brittle. Stainless steel filaments are slightly less conductive but hold up far longer when you’re moving the fence weekly. If your paddocks stay fixed for a full season, aluminum polywire is fine. If you’re adjusting boundaries every few days, go stainless.
Polytape offers better visibility, which matters for horses and for wildlife like deer. It costs more per foot and is harder to handle in wind, but polytape lasts 5–7 years under normal use. Snow and ice load polytape harder than polywire, so in northern climates, take it down before heavy winter.
Post options and their tradeoffs
- Plastic step-in posts: UV-resistant, easy to move, no tools needed. Lifespan of 3–5 years. Best for frequently moved paddocks.
- Fiberglass rods: Less expensive than plastic, last up to 20 years with proper care. Require a hammer and take longer to install, so better for semi-permanent subdivisions.
- Metal rebar posts: Cheap and long-lasting, but inflexible. They bend if a deer hits the fence.
- Metal T-posts: Strongest and most durable of all, but require more labor and cost more. Use them at corners and sharp turns where the fence load is highest.
Mesh and netting options
Electric netting works well for sheep, goats, and poultry, where multiple strands of single wire are impractical. It’s heavier to move than polywire but provides a physical barrier that small ruminants respect before they’ve learned to avoid a shock.
How to install and manage temporary fencing correctly
Good installation takes less than an hour per paddock when you follow a consistent process.
Setup steps that save time later
Space posts 20–30 feet apart on flat ground; tighten that spacing on slopes or uneven terrain where the wire sags. Install one to three strands for cattle and horses. Wire height of 30–32 inches works for mature cattle with a single strand. Don’t overstretch the wire. Overstretching snaps the metal filaments and creates dead spots in the fence.
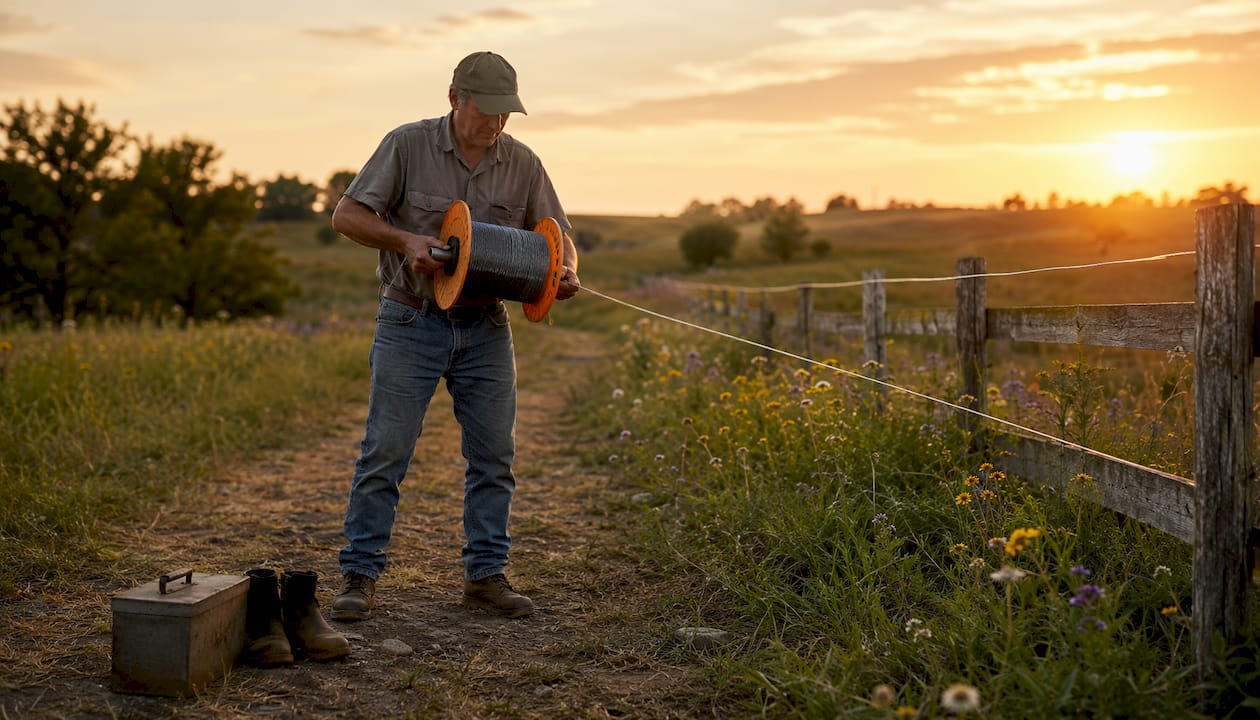
Reels are not optional
Rolling wire onto your arm or a stick kinks the filaments and kills conductivity. Buy a reel designed specifically for temporary fence wire. Geared reels with a 3:1 retrieval ratio cut roll-up time significantly compared to 1:1 reels. Reel capacity ranges from around 300 feet to 2,640 feet, so match the reel to your paddock perimeter.
Seasonal and vegetation management
Vegetation touching the wire bleeds’ voltage. Mow or spray fence lines before setting up in overgrown areas. In winter, frozen ground reduces grounding effectiveness because the soil stops conducting. Either include a ground wire in the fence circuit or wait for a thaw before relying on the system for containment.
Safety during setup
Always disconnect the energizer before handling wire. Wear rubber-soled boots. Keep children and untrained animals away from the fence line during installation.
Pro Tip: Square paddock shapes minimize total fence length while keeping water sources accessible. A square paddock layout uses less material than a long rectangle enclosing the same acreage.
What you need to know about fencing cattle vs. horses
Horses and cattle behave differently around fences, and that difference drives real safety decisions.
Horses need higher visibility and smaller mesh
Horses spook and run. When they hit a fence at speed, the fence material determines whether they walk away or get injured. Standard cattle mesh is unsafe for horses because hooves can pass through larger openings and become trapped. Use woven wire with openings no larger than 2 inches by 4 inches, or a diamond mesh pattern. Perimeter fences for horses should reach a minimum height of 5 feet. Division fences can be 4.5 feet. Polytape is the preferred temporary wire for horses because its width makes it visible at a distance and in low light.
For more on horse-specific options, Fencefast covers the best temporary fencing for horses in detail.
Cattle respond well to single-strand polywire
Mature cattle that have been trained to electric fencing respect a single hot wire. The key word is trained. Electric fencing works as a psychological barrier, not a physical one. The first shock sets the animal’s behavior. A fence that delivers a weak or inconsistent charge during that first contact teaches the animal to test the wire, not avoid it.
Calves need closer post spacing and lower wire height until they learn the system. Long-haired breeds like Highland cattle require higher voltage because their coat insulates against a standard shock.
How energizers and power sources make or break your fence
The energizer is the single most critical component in any temporary fencing system. Get it wrong and the rest of the setup doesn’t matter.
Low-impedance vs. high-impedance chargers
Low-impedance chargers deliver a short, intense pulse that pushes through vegetation contact without overheating the wire. High-impedance chargers produce a longer pulse that can arc and heat up when weeds touch the fence, potentially melting polywire or starting a fire. Low-impedance energizers are the standard choice for temporary fencing.
Matching power output to your fence
A minimum of 700 volts is required to shock cattle, pigs, and horses effectively. Long-haired cattle, sheep, and goats need at least 2,000 volts. A typical fence charger delivers 4,500–7,000 volts. The voltage determines whether a shock occurs; the joules determine how strong it feels. Double the joules, double the shock.
For portable electric fence energizer selection, match the joule rating to your livestock type and total wire length, not just linear fence distance.
Power source options
- AC (plug-in): Most reliable and least expensive when a power source is within reach
- DC (battery): Necessary for remote paddocks; batteries need regular recharging
- Solar DC: Higher upfront cost, but requires less attention in the field
Grounding requirements
Ground rods must be spaced at least 10 feet apart and driven at least 3 feet deep. Rocky soils may need angled rods or additional rods to compensate for poor conductivity. A rule of thumb: install a minimum of 3 feet of ground rod for every joule of energizer output.
Maintenance routines and troubleshooting common issues
Most fence failures trace back to a handful of repeatable problems.
Voltage drops are almost always caused by vegetation touching the wire, a broken filament creating a dead section, or inadequate grounding. Walk the fence line with a voltage tester after setup and again after any significant rain or wind. A reading below 2,000 volts at the far end of the fence warrants investigation.
Wire breaks happen when polywire is overstretched during installation or rolled incorrectly. Splice breaks with a proper fence connector, not a knot. Knotting wire concentrates stress at one point and causes the filament to snap again.
Animal pressure on the fence is often a sign of inadequate pasture space rather than a fencing defect. Fencing issues frequently result from animals running out of forage and challenging the wire repeatedly. Adjust paddock size or rotation timing before replacing equipment. Fencefast’s guide on common livestock fencing mistakes covers this pattern in detail.
Seasonal checks should include re-tensioning wire in spring after winter contraction, inspecting post clips and insulators for UV cracking, and testing ground rod connections after dry spells when soil conductivity drops.
Key Takeaways
Temporary pasture fencing works best when every component, wire, posts, energizer, and grounding, is matched to your livestock species and rotation frequency.
| Point | Details |
|---|---|
| Wire filament choice matters | Use stainless steel polywire for frequently moved fences; aluminum works for static setups only. |
| Post lifespan varies widely | Plastic posts last 3–5 years; fiberglass rods last up to 20 years with proper care. |
| Voltage thresholds by species | Cattle and horses need at least 700 volts; long-haired breeds and small ruminants need 2,000 volts. |
| Grounding drives fence reliability | Space ground rods at least 10 feet apart, 3 feet deep, with one rod per joule of energizer output. |
| Horse fencing needs smaller mesh | Standard cattle mesh creates hoof entrapment risk; use 2-inch by 4-inch or diamond mesh openings for horses. |

Fencefast carries the full range of Gallagher energizers, polywire, polytape, reels, and posts for every temporary fencing setup, from a single paddock split to a 20-paddock rotational system. Browse the complete fencing and energizer catalog or contact the team for a system recommendation tailored to your operation.

