
Over 1 million American farms rely on electric fencing to protect their livestock each year, yet even small oversights in setup can lead to costly escapes or injuries. Getting your electric fence right is not just about following rules, but about safeguarding your animals and your investment. This guide gives you clear steps for planning, installing, and maintaining a fence system that works for any American livestock operation, helping you avoid common mistakes and keep your animals safe.
Table of Contents
- Step 1: Assess Fence Layout And Gather Supplies
- Step 2: Install Posts And Run Fence Wires
- Step 3: Connect Power Source And Attach Insulators
- Step 4: Test Voltage And Inspect Safety
- Step 5: Maintain System For Long-Term Reliability
Quick Summary
| Key Point | Explanation |
|---|---|
| 1. Assess Your Pasture Layout | Surveying your land helps determine effective fence lines, ensuring a secure enclosure considering terrain and animal movement patterns. |
| 2. Choose Durable Materials | Select appropriate posts and insulators based on terrain type to maintain structural integrity and ensure effective electrical flow. |
| 3. Install Fence with Precision | Follow your layout plan closely, maintaining consistent spacing and tension to create an effective containment system for your livestock. |
| 4. Regularly Test Voltage Levels | Use a voltage meter to check for adequate electrical current, identifying weak points and maintaining proper voltage within a safe range. |
| 5. Create a Maintenance Schedule | Document maintenance tasks and schedule regular inspections to ensure long-term reliability and prevent issues that could compromise your livestock’s safety. |
Step 1: Assess Fence Layout and Gather Supplies
Preparing an effective electric fence for livestock safety starts with careful planning and strategic supply gathering. Understanding your pasture layout and selecting appropriate materials will set the foundation for a reliable containment system that protects your animals.
Begin by thoroughly surveying your pasture area and mapping out potential fence lines. Consider terrain features, existing boundaries, and animal movement patterns. You will want to create a continuous circuit that provides complete enclosure while avoiding obstacles like trees, rocks, or steep slopes. When planning your electric fencing configuration, remember that different livestock species may require specific fence height and wire spacing considerations.
For your supplies, you will need key components including an energizer, grounding rods, fence posts, insulators, electric wire or tape, warning signs, and a voltage tester. Select posts based on your terrain type wood, fiberglass, or metal options work well. Choose between permanent, semi permanent, or temporary electric fencing systems depending on your specific agricultural needs. Invest in high quality insulators to prevent electrical grounding and ensure consistent current flow throughout your fence line.
Here’s a quick comparison of electric fence post and insulator types and their ideal uses:
| Post/Insulator Type | Suitable Terrain | Durability | Best Use Case |
|---|---|---|---|
| Wood Post | Uneven, rocky | Very High | Permanent fences |
| Fiberglass Post | Rolling, soft | High | Temporary or portable fencing |
| Metal Post | Flat, firm | Medium | Semi-permanent systems |
| Ceramic Insulator | Wet, extreme | Very High | Harsh weather, wood posts |
| Polymer Insulator | Dry, moderate | High | Metal posts, general use |
Pro Tip: Sketch a detailed fence layout diagram before purchasing supplies to minimize waste and ensure you buy exactly what you need for your specific pasture configuration.
Step 2: Install Posts and Run Fence Wires
Installing electric fence posts and running wires requires precision and strategic planning to create an effective livestock containment system. This step transforms your initial layout design into a functional barrier that will keep your animals safe and secure.
Start by marking your post locations according to your earlier layout plan, ensuring consistent spacing typically between 50 to 100 feet apart. Choose sturdy fence posts made from wood, fiberglass, or metal depending on your terrain and livestock type. When driving posts into the ground, maintain a consistent depth of at least 2 feet to ensure stability. Proper wire spacing is critical for preventing animal escape, so carefully measure and install wires at recommended heights specific to your livestock species. For cattle, you might place wires at 20, 30, and 42 inches above ground level, while smaller animals may require different configurations.
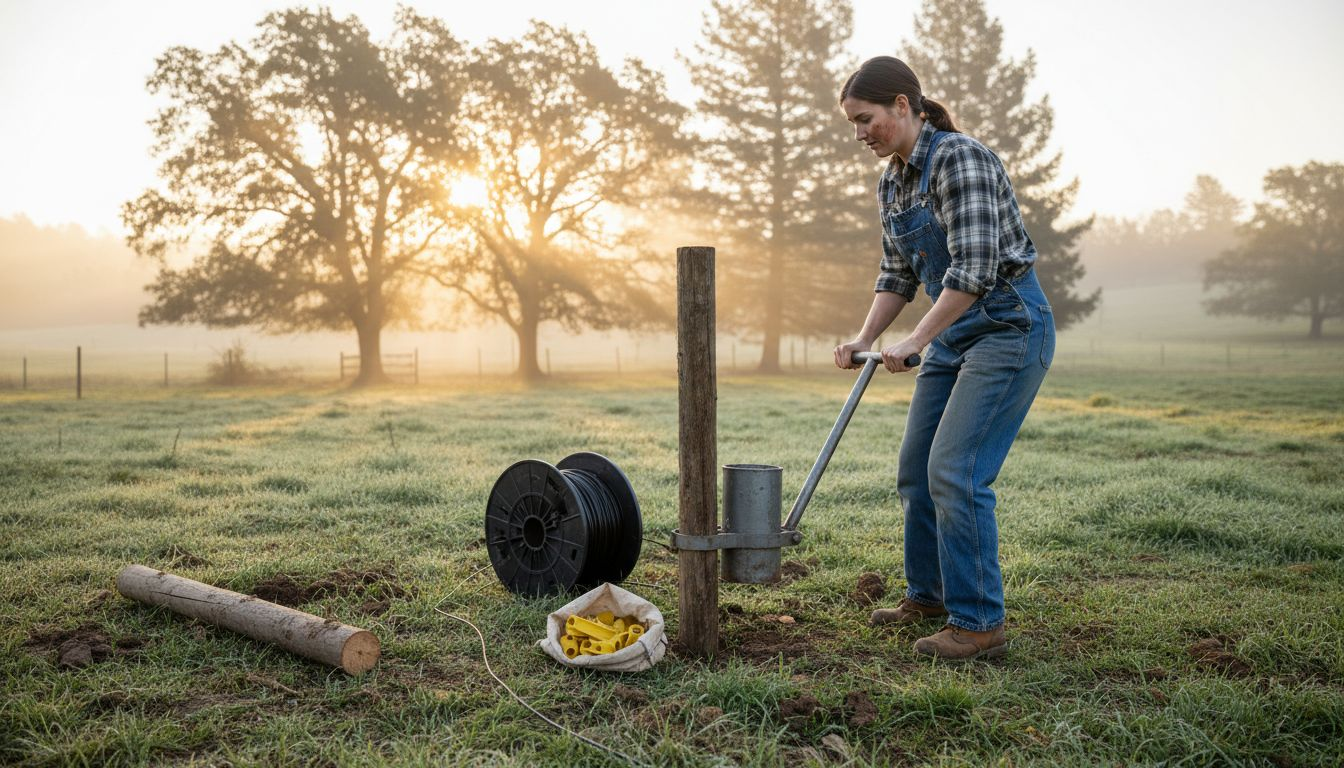
Connect your electric wires carefully, ensuring tight connections and using appropriate insulators to prevent grounding. Begin with your bottom wire and progressively work upward, maintaining uniform tension throughout the fence line. Utilize a voltage tester to confirm electrical continuity and verify that each wire carries sufficient current. When crossing gates or creating breaks in the circuit, install special gate handles or connectors that maintain the electrical connection while allowing human and animal passage.
Pro Tip: Always wear rubber gloves and use non conductive tools when working with electric fencing to protect yourself from potential electrical shocks during installation.
Step 3: Connect Power Source and Attach Insulators
Connecting the power source and attaching insulators represents a critical phase in creating a functional electric fence system. This step ensures your fence will deliver consistent electrical current while preventing unnecessary energy loss and potential short circuits.
Begin by selecting an energizer location that protects the equipment from potential rodent damage and incorporates appropriate lightning protection. Mount the energizer on a sturdy wall inside a weatherproof shed or barn, ensuring it remains dry and accessible. Install a dedicated grounding system using copper or galvanized grounding rods driven at least 6 to 8 feet into the ground. Connect multiple grounding rods if necessary to create a robust electrical connection. When attaching insulators to your fence posts, select models that match your specific wire type and fence configuration. Ceramic and polymer insulators work best for different environments wood posts require different mounting techniques compared to metal or concrete posts.
Carefully route your electric wire through each insulator, maintaining consistent tension and avoiding any contact with conductive materials. Check that each insulator provides complete electrical separation between the wire and the supporting post. Test your system using a voltage meter to confirm proper current flow and identify any potential grounding issues before completing the installation. Pay special attention to corners and gates where additional insulation and careful wire routing become particularly important.
Pro Tip: Purchase a lightning diverter and install it between your energizer and fence line to protect your expensive equipment from potential electrical surges during storms.
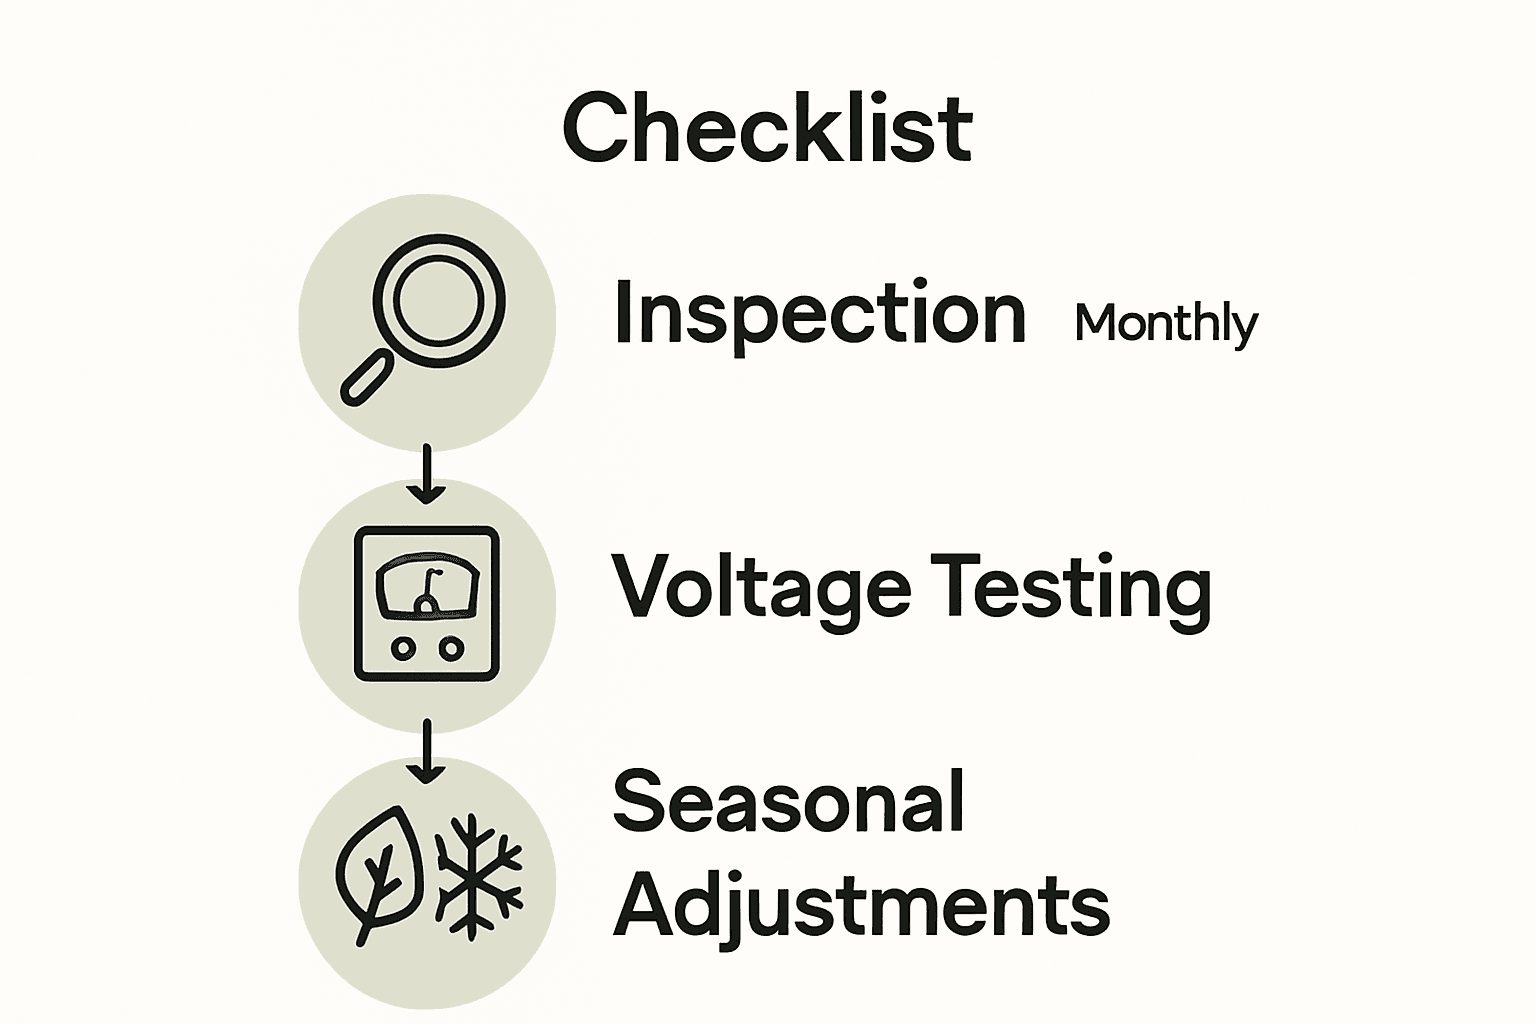
Step 4: Test Voltage and Inspect Safety
Testing voltage and conducting a comprehensive safety inspection are crucial final steps in ensuring your electric fence functions correctly and provides reliable livestock containment. This stage transforms your installation from a simple wire barrier into a precise and dependable animal management system.
Begin by using a reliable voltage meter to systematically check electrical current across all fence sections, identifying potential weak points or installation errors. A properly functioning electric fence should maintain between 2000 and 5000 volts consistently. Walk the entire fence line methodically, testing each wire segment and paying special attention to corners, gates, and areas with potential grounding challenges. Inspect all insulators for signs of damage, cracking, or electrical stress. Look for vegetation contact points that might drain current, and trim any grass or weeds growing near the fence wires. Check all wire connections to ensure they remain tight and corrosion free.
Verify that warning signs are clearly visible and securely mounted at regular intervals. Test the fence’s responsiveness by touching the wire with a specialized testing tool wearing rubber gloves. Listen for consistent clicking sounds that indicate steady electrical flow. Document any voltage readings or observed issues to track your fence’s performance over time. If voltage drops below recommended levels, systematically troubleshoot potential causes such as poor grounding, wire damage, or insulator problems.
Pro Tip: Create a maintenance log and schedule quarterly comprehensive inspections to catch potential issues before they compromise your fence’s effectiveness.
Step 5: Maintain System for Long-Term Reliability
Maintaining your electric fence system is crucial for ensuring consistent performance and protecting your livestock investment. Proper maintenance extends the lifespan of your equipment and prevents unexpected failures that could compromise animal safety.
Develop a comprehensive maintenance routine that includes regular inspections and proactive component management. Schedule quarterly system checks to evaluate voltage levels, inspect insulators, and clear vegetation that might create electrical shorts. Clean your fence line systematically by trimming grass and removing any debris that could interfere with wire tension or electrical conductivity. Pay special attention to corners and gate areas where mechanical stress and environmental factors can cause more rapid wear. Replace damaged insulators immediately and check wire connections for signs of corrosion or fatigue. Ensure your energizer remains protected from moisture, rodents, and extreme temperatures by maintaining its designated indoor storage location.
Implement a seasonal maintenance strategy that adapts to changing environmental conditions. During winter, check for ice buildup that might compromise wire tension or electrical flow. In summer, increased vegetation growth requires more frequent line clearing. Keep detailed maintenance logs documenting voltage readings, repair dates, and component replacements. This recordkeeping helps you track your fence system performance and anticipate potential future maintenance needs. Consider investing in backup components like spare insulators, wire connectors, and a backup energizer to minimize potential downtime.
This reference table summarizes ideal voltage levels and maintenance tasks for reliable fence operation:
| Task | Recommended Frequency | Key Details |
|---|---|---|
| Voltage Testing | Every 3 months | Maintain 2000–5000 volts |
| Insulator Inspection | Every 3 months | Replace cracked insulators |
| Vegetation Clearing | Monthly | Prevent shorts from growth |
| Log Updating | After maintenance | Record voltage and repairs |
| Energizer Check | Before major season | Ensure dry indoor location |
Pro Tip: Create a digital maintenance calendar with automatic reminders to ensure you never miss a critical system inspection or maintenance task.
Secure Your Livestock with Expert Electric Fencing Solutions
Setting up an electric fence for livestock safety involves more than just wires and posts. You need reliable equipment designed to deliver consistent voltage, durable insulators to prevent energy loss, and sturdy materials that withstand Canadian weather and terrain. The challenges of proper layout, voltage testing, and long-term maintenance can be daunting if you lack access to quality products and expert advice.
At FenceFast.ca, we understand these pain points and offer a comprehensive range of fencing components and electric fencing systems tailored specifically for agricultural needs. Whether you are installing permanent wood posts or temporary fiberglass fencing, our selection of energizers, grounding rods, insulators, and accessories are crafted to maximize your fence’s reliability and safety.

Take control of your livestock containment today by exploring our expertly curated solutions at FenceFast.ca. Benefit from nationwide shipping, design consulting, and easy online ordering so you can get started quickly. Don’t wait until weak voltage or damaged components threaten your animals. Visit FenceFast.ca now and build a strong, effective electric fence that safeguards your livestock and gives you peace of mind.
Frequently Asked Questions
How do I assess my pasture layout for electric fencing?
To effectively assess your pasture layout, survey the area for terrain features, existing boundaries, and animal movement patterns. Sketch a detailed fence layout diagram before purchasing supplies to minimize waste and ensure you buy exactly what you need for your specific configuration.
What materials do I need to set up an electric fence for livestock?
You will need components such as an energizer, grounding rods, fence posts, insulators, and electric wire or tape. Gather these supplies based on the specific needs of your livestock and terrain to ensure an effective fencing system.
How do I install electric fence posts and run the wires?
Begin by marking your post locations according to your layout plan, ensuring spacing of 50 to 100 feet apart. Drive the posts into the ground to a depth of at least 2 feet and maintain proper wire heights for your specific livestock species to prevent escapes.
What steps should I take to connect the power source safely?
Select a location for your energizer that is protected from damage and mount it securely. Connect grounding rods driven deep into the ground to ensure a robust electrical connection and attach insulators carefully to maintain electrical separation from posts.
How can I test the voltage of my electric fence?
Use a reliable voltage meter to check the electrical current across all fence sections. Aim to maintain voltage levels between 2000 and 5000 volts consistently for effective livestock containment.
What maintenance tasks are crucial for my electric fence system?
Develop a routine that includes quarterly inspections, voltage testing, and clearing vegetation along the fence line. Regularly replace damaged components and keep a detailed log to track repairs and voltage readings for better management.

