Choosing the right temporary electric fence is more than a simple weekend project for any american livestock owner. Livestock farms across the country lose thousands each year because of ineffective fencing, yet a properly installed electric fence reduces escapes by up to 90 percent. Efficient containment not only protects your animals but also saves you money and stress. Discover how smart choices and careful planning make a difference in building a fence that truly works for your farm.
Table of Contents
- Step 1: Assess Your Fencing Needs and Location
- Step 2: Gather Essential Temporary Electric Fence Supplies
- Step 3: Install Posts and Lay Out Fence Lines
- Step 4: Attach and Connect Wires and Insulators
- Step 5: Set Up and Test the Energizer System
- Step 6: Inspect and Adjust the Temporary Electric Fence
Quick Summary
| Key Point | Explanation |
|---|---|
| 1. Assess fencing needs thoroughly | Evaluate your livestock type and terrain to design a secure and effective electric fence system. |
| 2. Gather essential tools and materials | Prepare a toolkit with necessary tools and components for a reliable temporary electric fence installation. |
| 3. Install and position posts accurately | Ensure correct spacing and height of posts to create a strong boundary for your livestock. |
![]() |
| 4. Connect wires and insulators correctly | Secure all connections and maintain tension to ensure a functional electric fence that contains animals effectively. |
| 5. Conduct regular inspections and adjustments | Monitor fence performance and address issues like voltage inconsistencies or damaged insulators promptly.
|
| 4. Connect wires and insulators correctly | Secure all connections and maintain tension to ensure a functional electric fence that contains animals effectively. |
| 5. Conduct regular inspections and adjustments | Monitor fence performance and address issues like voltage inconsistencies or damaged insulators promptly.
Step 1: Assess Your Fencing Needs and Location
Settling on the right temporary electric fence strategy starts with a thorough assessment of your livestock and terrain. Understanding your specific requirements will help you design an effective containment system that keeps your animals safe and secure.
According to ahdb.org, electric fencing offers tremendous flexibility for managing livestock grazing. It allows you to adjust stocking density and control grazing pressure with minimal physical infrastructure. Depending on your animals, you will need different wire configurations. For cattle, a single wire at 90 cm works well, while sheep might require multiple strands positioned at specific heights from the ground.
When evaluating your location, consider terrain obstacles, available power sources, and potential grazing rotation needs. Your fence design should account for potential challenges like uneven ground, vegetation density, and proximity to water sources. Fence installation requires careful planning to ensure both animal safety and system durability. A well-planned temporary electric fence can transform your grazing management strategy, providing cost effective and adaptable containment for your livestock.
Step 2: Gather Essential Temporary Electric Fence Supplies
Preparing for a successful temporary electric fence installation requires gathering the right tools and materials. Your equipment selection will determine the effectiveness and efficiency of your livestock containment system.
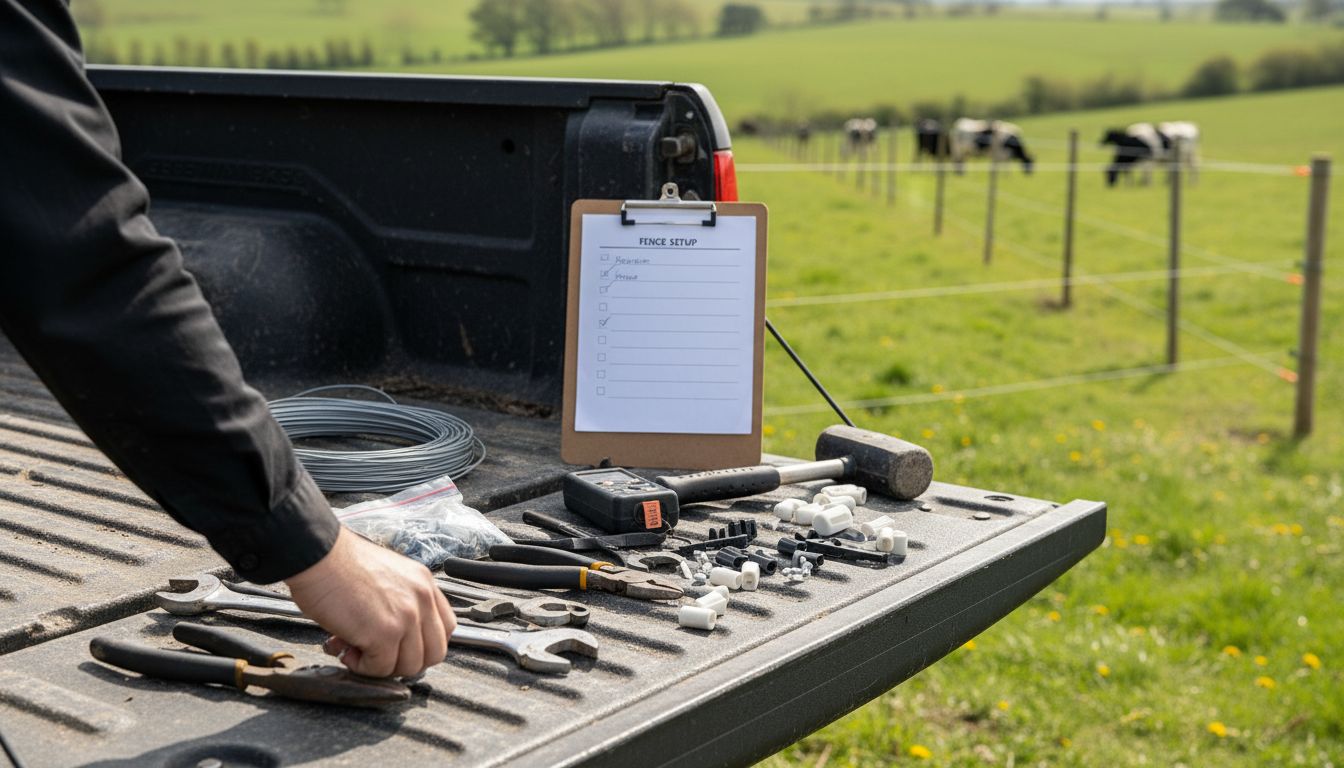
According to pubs.ext.vt.edu, a comprehensive grazing toolkit for temporary electric fencing should include several key items. Essential tools include adjustable wrenches, screwdrivers, high-tensile wire cutters, fence pliers, and a rubber mallet for driving posts into difficult ground. You will also want to pack critical electrical components like a voltmeter, spare energizer fuses, split-bolt connectors, fence insulators, and wire crimp sleeves.
Understanding temporary fencing solutions can help you select the right supplies for your specific livestock needs. Beyond the basic tools, consider bringing spare parts for waterers and additional hose fittings to ensure you can make quick repairs or adjustments in the field. By carefully preparing your toolkit, you will be ready to set up a reliable and effective temporary electric fence that keeps your animals safely contained.

Step 3: Install Posts and Lay Out Fence Lines
Installing temporary electric fence posts and laying out fence lines requires precision and careful planning to create an effective livestock containment system. Your goal is to establish a clear boundary that guides and protects your animals.
According to ahdb.org, the wire placement varies depending on your livestock type. For cattle, a single strand at 90 cm works well, while sheep might require multiple strands positioned at specific intervals. How to install electric fence for effective livestock control suggests starting by marking your fence perimeter and ensuring consistent post spacing.
As recommended by ruralpayments.org, you can create an effective barrier using single wire, multiple wires, electrified tape, or netting. Make sure all fencing materials are new and properly installed. When driving your posts, maintain consistent height and tension to ensure a uniform and effective electric fence that will keep your livestock safely contained.
Step 4: Attach and Connect Wires and Insulators
Connecting wires and insulators is a critical phase in building an effective temporary electric fence that safely contains your livestock. Precise installation ensures electrical continuity and prevents potential animal escapes.
According to ahdb.org, positioning your live wire is crucial. The wire connected directly to the power source should be placed at nose height for your specific livestock type. Special attention is required when creating gateways use insulated gate hooks with tape or springs to prevent stock from crossing when the gate is shut.
As you attach insulators, ensure they are securely fastened to each post and maintain consistent tension across your wire runs. Essential tools for fence building can help you select the right equipment for a clean installation. Pro tip: Double-check all connections and test your electrical current before releasing livestock into the enclosed area to guarantee a secure containment system.
Step 5: Set Up and Test the Energizer System
The energizer is the powerhouse of your temporary electric fence, delivering the crucial electrical pulse that keeps livestock safely contained. Proper setup and testing are essential to ensure your fencing system works effectively.
According to pubs.ext.vt.edu, a voltmeter or faultfinder is an essential tool for testing your energizer system and verifying its correct functionality. Install and maintain a fence energizer solar system easily recommends connecting your energizer to a reliable power source, whether battery, solar, or electrical outlet, ensuring consistent and stable energy delivery.
When testing your system, walk the entire fence line with your voltmeter, checking for consistent voltage and identifying any potential weak spots or interruptions. Pay close attention to connections at posts, gates, and wire junctions. A properly functioning energizer should deliver a sharp, consistent pulse that deters livestock from challenging the fence boundary. Proper testing now can prevent potential escapes and ensure your animals remain safely contained.
Step 6: Inspect and Adjust the Temporary Electric Fence
Inspecting and adjusting your temporary electric fence is crucial to maintaining an effective livestock containment system. Regular monitoring ensures the fence remains functional and prevents potential animal escapes.
According to ahdb.org, common electric fencing challenges include poor ground connections, stock challenging fences, and broken insulators. To address these issues, consider increasing ground rod count, using visibility flags, and selecting UV resistant insulators. Troubleshooting electric fences suggests checking your system systematically to catch potential problems early.
As recommended by pubs.ext.vt.edu, using a voltmeter or faultfinder can help you quickly identify and resolve any electrical system weaknesses. Walk your fence line periodically, checking wire tension, inspecting insulators for damage, and ensuring consistent voltage throughout the entire enclosure. Proactive maintenance will keep your temporary electric fence operating at peak performance.
Secure Your Livestock with the Right Temporary Electric Fence Supplies
Setting up a temporary electric fence can be challenging when you need the right materials and tools to ensure safety and reliability for your livestock. The article highlights the importance of selecting the proper posts, wires, insulators, and energizers that suit your animals and terrain. It also stresses the need for careful installation and ongoing maintenance to keep your fence effective and your animals contained.
At FenceFast.ca, we understand these challenges and provide a wide range of high-quality fencing components and electric fencing systems designed specifically for farmers and ranchers across Canada. Whether you need powerful energizers, durable wire, or precision connectors, our products will help you build a secure perimeter tailored to your livestock’s needs.

Don’t wait until your fence fails and your livestock escapes. Explore our selection of temporary electric fencing supplies today and enjoy expert guidance plus nationwide shipping. Visit FenceFast.ca now to find everything you need to complete your fencing project with confidence and keep your animals safe from start to finish.
Frequently Asked Questions
How do I assess my fencing needs for livestock?
To assess your fencing needs, evaluate your livestock type, terrain, and grazing requirements. Determine factors like the number of animals and their specific wire configurations for effective containment.
What supplies do I need to set up a temporary electric fence?
Gather essential tools such as high-tensile wire cutters, fence pliers, and a voltmeter. You will also need wire, insulators, and energizer components to ensure a functional electric fence system.
How do I install posts and lay out fence lines for a temporary electric fence?
Start by marking your desired fence perimeter and ensuring consistent spacing between posts. Install the posts at an appropriate height and make sure the wire is positioned correctly based on the type of livestock you have.
How do I connect wires and insulators for the electric fence?
Securely attach insulators to each post and connect the live wire at the correct height for your livestock. Ensure all connections are tight and check the tension of the wires to prevent sagging.
What steps should I take to set up and test the energizer system?
Connect your energizer to a reliable power source and test it with a voltmeter along the entire fence line. Walk the fence to check for consistent voltage, and address any weak spots immediately to ensure effective containment.
How often should I inspect and adjust my temporary electric fence?
Inspect your electric fence regularly, at least once a month, to check for issues like broken insulators and weak connections. Make necessary adjustments promptly to maintain optimal fencing performance.
