
Every horse owner in rural Canada knows that animals testing a temporary fence can quickly turn a routine enclosure into a challenge. Temporary fencing matters because your horses’ safety, training progress, and peace of mind depend on a setup that stands up to unpredictable conditions. Find out how visibility and safety guide material choices, perimeter marking, and installation techniques so you can confidently manage your horses during training or travel without risking injuries or escapes.
Table of Contents
- Step 1: Choose the Ideal Fence Materials and Tools
- Step 2: Mark the Perimeter and Prepare the Ground
- Step 3: Assemble and Install Temporary Fence Components
- Step 4: Test Stability and Ensure Horse Safety
Quick Summary
| Important Insight | Clear Explanation |
|---|---|
| 1. Choose Safe, Visible Materials | Select materials like electric tape or portable panels that are visible and safe for horses to prevent accidents. |
| 2. Properly Mark and Prepare Ground | Clearly mark the perimeter and prepare the ground to ensure stability and effectiveness of the fence installation. |
| 3. Securely Assemble Fence Components | Install corner and end posts first, ensuring tight connections and proper tension on wire to prevent any weak spots. |
| 4. Thoroughly Test Stability | Inspect all components for firmness and safety, checking for loose sections or hazards before introducing horses. |
| 5. Keep Essential Tools Handy | Maintain a portable toolkit in your vehicle for quick fence setup, ensuring you’re prepared for any location or weather condition. |
Step 1: Choose the Ideal Fence Materials and Tools
Selecting the right materials and tools is the foundation of a secure temporary horse fence. Your choices directly affect how quickly you can install the fence, how long it lasts, and most importantly, how safely it contains your horses.
Start by assessing your specific needs. Are you setting up a temporary corral for training, a holding pen during travel, or a short-term grazing area? The duration and purpose of your fence will guide your material selection.
Key materials for temporary horse fencing include:
- Electric fence tape or rope for quick setup and low cost
- Portable panels (metal or PVC) for maximum flexibility
- High-tensile wire with posts for durability
- Wooden boards or rails for aesthetic appeal and safety
- Corral panels for rapid assembly without digging
When choosing materials, prioritize visibility and safety. Horses need to clearly see fence lines, or they may panic and run through. Bright tape, solid panels, or reflective materials work well across Canadian weather conditions.
Tools make the installation process faster and more reliable. You’ll need a power drill for fastening, wire cutters for trimming materials, and post-level tools to ensure vertical alignment. Having master fence installation tools available makes the entire process smoother.
Quality matters when working with livestock. Review fence material standards that specify durability and safety for agricultural applications, ensuring your temporary fence meets professional specifications.
For temporary setups in rural Canadian conditions, portable corral panels often offer the best balance of speed, reusability, and horse safety. They require no digging, handle mud or snow well, and adapt to uneven terrain.
Here’s a comparison of common temporary horse fence materials and their ideal uses:
| Material Type | Best Use Scenario | Setup Speed | Durability Level |
|---|---|---|---|
| Electric fence tape | Quick training, low-cost boundary | Very fast | Moderate |
| Portable corral panels | Travel, uneven or muddy terrain | Fast | High |
| High-tensile wire | Semi-permanent pasture division | Moderate | High |
| Wooden rails | High-visibility short-term safety | Slow | Moderate |
Temporary doesn’t mean temporary quality. Horses are unpredictable, so invest in sturdy materials that won’t fail under pressure.
Pro tip: Keep a portable toolkit in your truck during travel or training seasons so you’re always ready to set up a secure enclosure quickly, regardless of location or weather.
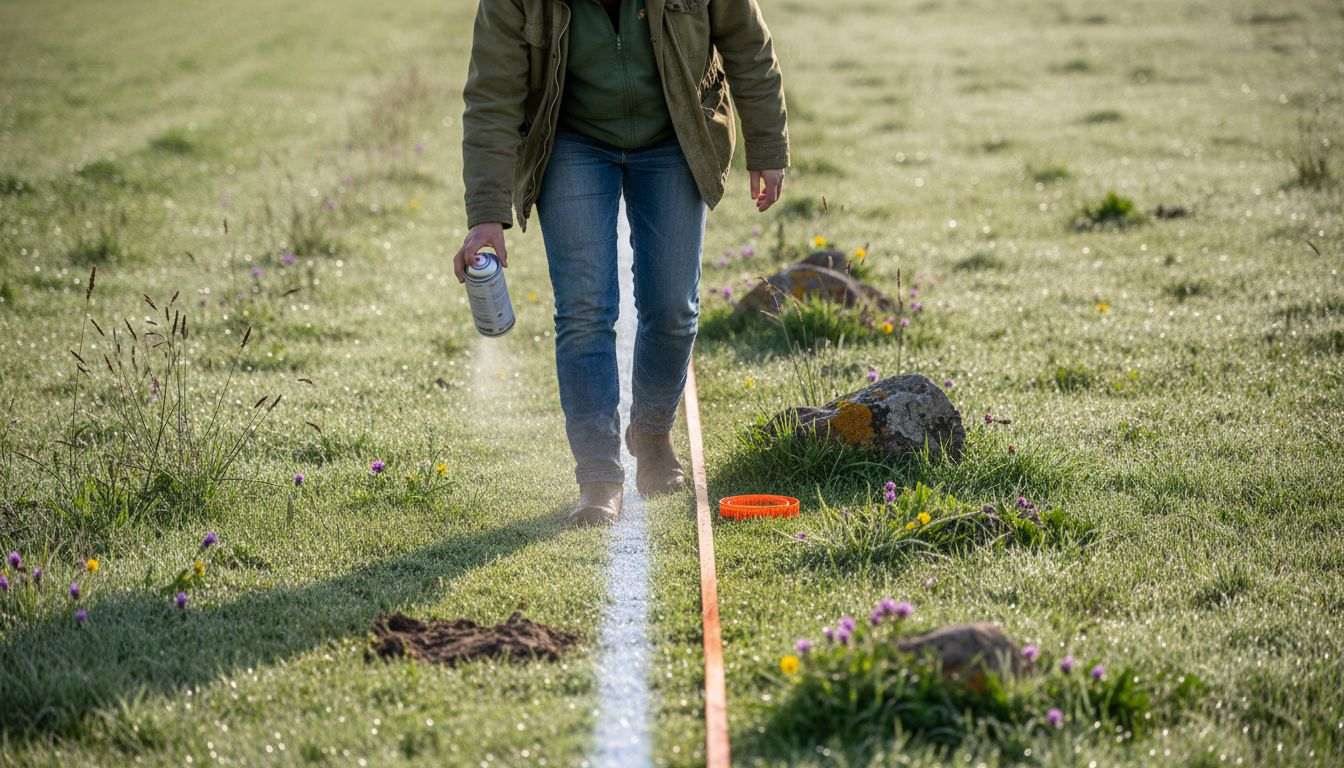
Step 2: Mark the Perimeter and Prepare the Ground
Marking your fence line and preparing the ground are critical steps that determine whether your temporary fence will be secure and level. A well-marked perimeter saves time during installation and prevents costly mistakes.
Start by identifying the ideal fence location on your property. Walk the intended perimeter and look for the shortest, straightest path that avoids obstacles. Avoid rough terrain, excessive vegetation, water crossings, and erosion-prone areas that could weaken your fence or create safety hazards for your horses.
Once you’ve chosen the route, mark the fence line clearly using chalk, spray paint, or string. Walk the entire perimeter again to confirm the line flows smoothly and makes sense for your horses’ movement. Straight sections are easier to build and maintain than zigzag patterns.
Key ground preparation steps include:
- Clear vegetation, brush, and debris along the marked line
- Remove large rocks or obstacles that would prevent post installation
- Level uneven ground where posts will sit
- Identify any low spots that might collect water or mud
- Check for underground utilities or hidden hazards
Proper site preparation for fence installation ensures posts sit securely and prevents sagging or misalignment. Horses can sense when a fence is unstable, and they’ll test weak spots relentlessly.
For Canadian rural properties, pay special attention to soil conditions. Rocky or clay-heavy ground may require different post-setting techniques than sandy soil. Frost heave in winter can lift posts out of place, so plan accordingly if you’re setting up a temporary fence that might stay through colder months.
If your ground slopes significantly, work along the contour rather than fighting gravity. Fence location planning along property contours reduces livestock trailing and soil erosion while making your fence more stable.
A few hours preparing the ground now saves you days of fence repairs later when horses discover weak spots.
Pro tip: Mark your perimeter a day before installation so you can review it in daylight and adjust if necessary, ensuring your fence line is genuinely functional for your specific horses and training needs.
Use this summary to plan your perimeter marking and ground prep steps efficiently:
| Task | Main Consideration | Result for Fence |
|---|---|---|
| Marking Perimeter | Avoid obstacles and water areas | Faster installation |
| Clearing Vegetation | Remove brush and debris | Better post seating |
| Leveling Ground | Eliminate uneven spots | Reduces sag/sway |
| Locating Utilities | Check before digging | Prevents damage |
Step 3: Assemble and Install Temporary Fence Components
This is where your plan becomes reality. You’re now ready to physically assemble and install the fence components that will contain your horses safely and securely.
Begin with the corner and end posts since they anchor your entire fence. Position them first along your marked perimeter line. For temporary fences, you don’t need to dig deep holes like permanent installations, but posts should be stable enough that horses cannot push them over. Use a post-level tool to ensure vertical alignment.
If you’re using portable corral panels, assembly is straightforward. Connect panels using the built-in connectors or pins, working your way around the perimeter. Make sure each connection is tight and secure before moving to the next section.
For wire or rope fencing, proper wire and mesh tensioning methods prevent sagging and maintain fence function. Loose fencing looks unstable to horses and creates safety risks.
Installation sequence for wire-based fences:
- Set all posts at the correct spacing and height
- Attach wire or rope at one corner post
- Pull the line taut to the next post without overstretching
- Secure with appropriate fasteners or clips
- Continue around the entire perimeter
- Check tension and adjust as needed
Height matters significantly for horses. Standard temporary fencing should be at least 4 to 5 feet tall. Anything lower invites jumping or attempting to jump. Ensure visibility by choosing bright colors or reflective materials, especially if your fence uses dark wire.
Take time testing each section before considering the job complete. Walk around and check for sagging, loose connections, or gaps. Push on the fence to simulate horse pressure. Any weak spots discovered now are easily fixed.
Horses test fences constantly. A properly installed fence needs no adjustments during the first week. If it does, something wasn’t done correctly.
Pro tip: Install at least one removable gate section so you can quickly move horses in or out without dismantling the entire fence, which is crucial during emergencies or when transitioning between training areas.
Step 4: Test Stability and Ensure Horse Safety
Your fence is installed, but the real test happens now. Before bringing horses into the enclosed area, you need to verify that every component is secure and safe from multiple angles.
Start by checking post firmness. Walk the entire perimeter and push hard on each post at different heights. Posts should not wiggle, lean, or shift under pressure. A loose post is a failed post, and horses will discover this immediately.
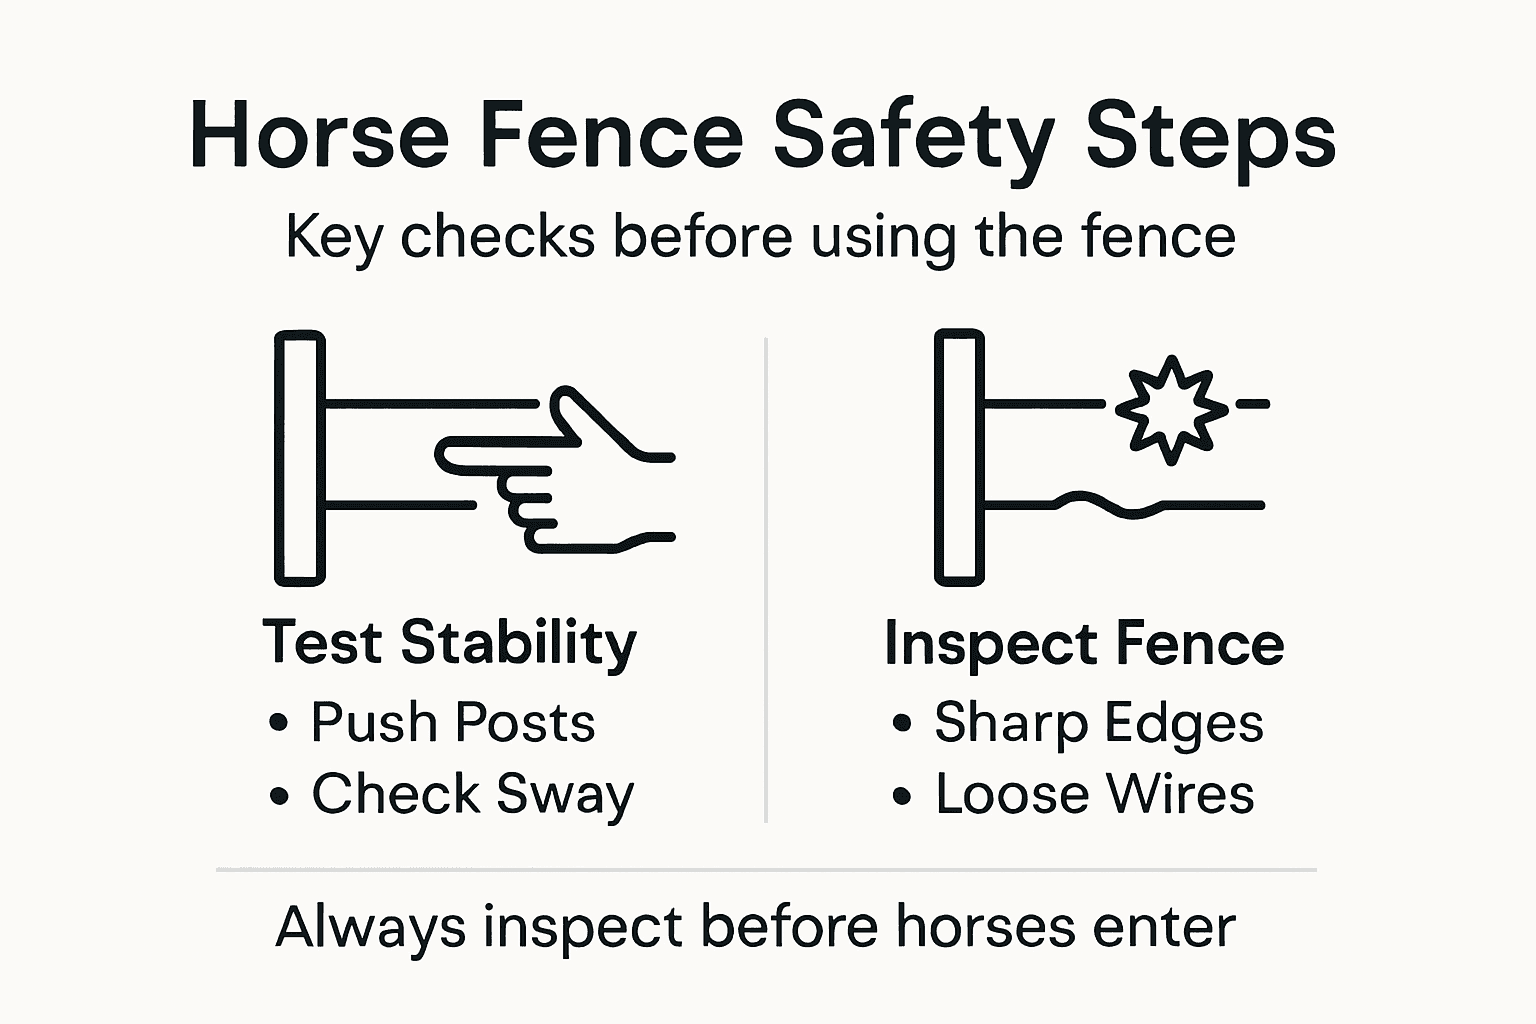
Next, inspect all wire or rope tension. Run your hand along the fence line and look for sagging sections. Tight fencing maintains its integrity under impact. Loose sections look inviting to horses curious about testing boundaries.
Safety inspection checklist:
- No sharp wires, protruding edges, or jagged materials visible
- All connections and fasteners are completely secure
- Gate hinges and latches function smoothly
- No gaps large enough for a hoof to slip through
- Visibility is clear so horses see the fence line from all angles
- Wire or mesh does not have loose strands
Avoid sharp wires and barbed fencing that can cause serious lacerations. Closely woven mesh designs minimize the chance of hooves getting caught while providing safe containment. These designs flex under impact and return to their original form, which is crucial when horses spook or charge.
Walk the fence from your horse’s perspective. Get down low and look for hazards you might miss from standing height. Check visibility in both bright daylight and lower light conditions. Poor visibility causes collisions.
If you find problems during inspection, fix them now. Don’t delay hoping they’ll be fine. A fence that feels unstable to you will definitely feel unstable to your horse, and they’ll test weak spots relentlessly.
A horse will find the one weak spot in your fence during its first day. That’s not pessimism, that’s experience. Make your inspections brutal so horses never get the chance.
Pro tip: Have a second person walk beside the fence while you push and pull on different sections, watching for movement or flex that indicates weak points needing reinforcement before horses arrive.
Build Your Temporary Horse Fence with Confidence and Ease
Setting up a secure temporary fence for horses can be challenging when you need durable materials and reliable tools that keep your horses safe and your installation quick. The article highlights common pain points like choosing the right fence components, ensuring stability without permanent digging, and maintaining high visibility and safety for your horses. At FenceFast.ca, we understand these exact needs and offer a comprehensive selection of fencing supplies, electric fencing systems, and livestock management tools tailored specifically for Canadian farmers and ranchers.

Don’t let unstable posts or unclear fence lines put your horses at risk. Explore our extensive range of fencing components, connectors, and wire designed for fast assembly and long-lasting performance. Whether you are setting up portable corral panels or tensioned wire fences, our expert resources and nationwide shipping will help you get ready quickly and securely. Visit FenceFast.ca today and equip your temporary fencing project with the quality and safety your horses deserve.
Frequently Asked Questions
What are the best materials for setting up a temporary horse fence?
Choosing the right materials is essential for a secure temporary horse fence. Consider options such as electric fence tape for quick setups, portable panels for flexibility, or high-tensile wire for durability. Review the specific needs of your temporary enclosure to select the most suitable material for your situation.
How do I mark the perimeter for my temporary horse fence?
Mark the perimeter by walking the intended line and identifying the straightest path while avoiding obstacles. Use chalk, spray paint, or string to clearly outline the fence line, ensuring it flows smoothly for effective installation.
What is the proper way to install corner posts for a temporary fence?
Begin by positioning the corner posts first along your marked perimeter. Ensure they are stable enough to withstand pressure without being buried deeply, and use a post-level tool to verify vertical alignment. This foundation is crucial for the entire fence’s integrity.
How can I ensure my temporary horse fence is safe and stable?
Inspect each post for firmness by pushing hard on them and check for sagging wire or rope. Conduct a thorough safety inspection by ensuring there are no sharp edges, loose connections, or gaps that could pose a risk to your horses, and make necessary adjustments before introducing the animals.
What should I do if I discover weak spots in my temporary fence?
If you find weak spots during your inspection, immediately reinforce or fix them before allowing horses into the enclosed area. Strengthening these sections will prevent any potential escape or injury, ensuring a safe environment for your horses.
How tall should my temporary horse fence be?
Your temporary horse fence should be at least 4 to 5 feet tall to prevent horses from jumping over. Ensure visibility by using bright colors or reflective materials, so horses can see the fence from various angles, reducing the risk of collision.

