
Did you know that a single faulty connection can reduce electric fence efficiency by up to 80 percent? Many farmers face sudden problems with their electric fences, risking livestock safety and property damage. Understanding the right tools and reliable testing steps allows you to fix common fence issues with confidence. By following proven troubleshooting methods, you can keep your fence system strong and animals secure year round.
Table of Contents
- Step 1: Prepare Essential Tools And Safety Equipment
- Step 2: Inspect Power Source And Energizer Connections
- Step 3: Examine Fence Wires And Insulators For Faults
- Step 4: Test Voltage Along The Fence Line
- Step 5: Identify And Resolve Grounding Problems
- Step 6: Verify System Operation And Monitor Performance
Quick Summary
| Key Point | Explanation |
|---|---|
| 1. Gather essential diagnostic tools | Collect a digital voltmeter and fault finder for effective troubleshooting of electric fence issues. |
| 2. Always prioritize safety gear | Wear insulated gloves, closed-toe shoes, and other protective equipment to minimize shock risk while working. |
| 3. Inspect and maintain fence components | Regularly check wires and insulators for damage and vegetation to ensure optimal electrical performance. |
| 4. Conduct systematic voltage testing | Measure voltage at various points along the fence to identify drops indicating potential faults or interruptions. |
| 5. Establish a monitoring routine | Create a regular schedule to check fence performance and document readings to predict future maintenance needs. |
Step 1: Prepare essential tools and safety equipment
Troubleshooting an electric fence requires strategic preparation and safety precautions. Before diving into repairs, you will need specific tools and protective equipment to diagnose and resolve fence issues efficiently and safely.
Here’s a summary of essential tools and safety equipment for electric fence troubleshooting:
| Category | Tools & Equipment | Purpose |
|---|---|---|
| Diagnostic Tools | Digital voltmeter Fault finder |
Measure voltage, locate faults |
| Repair Tools | Wire cutters Pliers Spare insulators Electrical tape |
Cut/repair wires, replace components |
| Safety Gear | Insulated gloves Long pants Closed-toe shoes Insulated tools |
Protection from electric shock & injury |
| Emergency Prep | First aid kit | Treat minor injuries immediately |
Start by gathering key diagnostic and repair tools. According to agricultural extension research, a digital voltmeter or fault finder is crucial for accurately measuring fence voltage and identifying electrical problems. You will also want wire cutters, spare insulators, electrical tape, and a pair of sturdy pliers. Make sure these tools are clean and in good working condition before beginning your fence troubleshooting.
Safety is paramount when working with electric fencing systems. Always wear insulated rubber gloves that protect against electrical shock. Wear long pants and closed-toe shoes to minimize exposed skin. According to Virginia Tech research, using insulated tools is critical to prevent accidental electrical contact. Before touching any fence components, confirm the energizer is completely powered off.
Pro Tip: Keep a basic first aid kit nearby in case of unexpected electrical contact or minor injuries while working on your fence system.
As you prepare your tools and safety gear, mentally map out your systematic approach to diagnosing fence issues. By being methodical and safety conscious, you set yourself up for successful electric fence repairs. Ready? Let’s move on to testing and identifying potential fence problems.
[Discover our guide on essential fence building tools to complement your repair skills.]
Step 2: Inspect power source and energizer connections
Now that you have your tools and safety gear ready, it is time to diagnose potential issues with your electric fence’s power source and energizer connections. Understanding how to properly test and verify your energizer’s functionality will help you quickly identify and resolve electrical problems.
Begin by locating your electric fence energizer and checking its power supply. According to research from agricultural experts, a digital voltmeter is your most reliable tool for testing the energizer’s output. First, unplug the energizer from its power source and disconnect it from the fence circuit. This prevents any unexpected electrical interactions during your diagnostic process.
Carefully connect your voltmeter to the energizer’s output terminals. Verify that the voltage readings match the manufacturer’s recommended specifications. As recommended by Virginia Tech agricultural extension research, if the voltage readings are consistently low or inconsistent, you will need to investigate potential connection issues or equipment malfunction.
Warning: Always handle electrical equipment with caution and ensure you are using properly insulated tools and protective gear during testing.
Check all connection points for signs of corrosion, loose wires, or physical damage. Oxidation or rust can significantly impact electrical conductivity and fence performance. Gently clean any corroded terminals using a wire brush or electrical contact cleaner. Ensure all connections are tight and secure before reconnecting the power source.
If your energizer appears to be functioning correctly but you are still experiencing fence performance issues, you may need to explore additional troubleshooting steps. Our next section will help you methodically investigate potential circuit problems.
Learn more about [essential fence building tools to support your repair process.]
Step 3: Examine fence wires and insulators for faults
With your energizer tested, the next critical step is thoroughly examining your electric fence wires and insulators for potential faults. This systematic inspection will help you identify and resolve issues that could compromise your fence’s electrical integrity and performance.
According to Virginia Tech agricultural research, start by conducting a comprehensive survey of the entire fence line. Walk the entire perimeter and look for obvious physical damage such as broken wires, downed trees pressing against the fence, or vegetation that might be creating unwanted electrical connections. Pay close attention to areas where wildlife or livestock might have caused unexpected stress on the fence system.
Carefully inspect each insulator to ensure they are securely mounted and in good condition. According to agricultural equipment experts, damaged or improperly positioned insulators can create short circuits that dramatically reduce your fence’s electrical effectiveness. Look for signs of cracking, wear, or displacement that might interrupt the electrical current.
Pro Tip: Sunlight and weather can degrade insulators over time. Replace any that show signs of significant wear or damage to maintain optimal fence performance.
Use your wire cutters to trim any vegetation touching the fence wires, as plant contact can drain electrical charge and reduce your fence’s protective capabilities. Check wire tension and look for signs of rust, fraying, or stretching that might indicate potential future failure points.
[Explore our comprehensive guide to electric fence post insulators for more detailed insights into maintaining your fence system.]
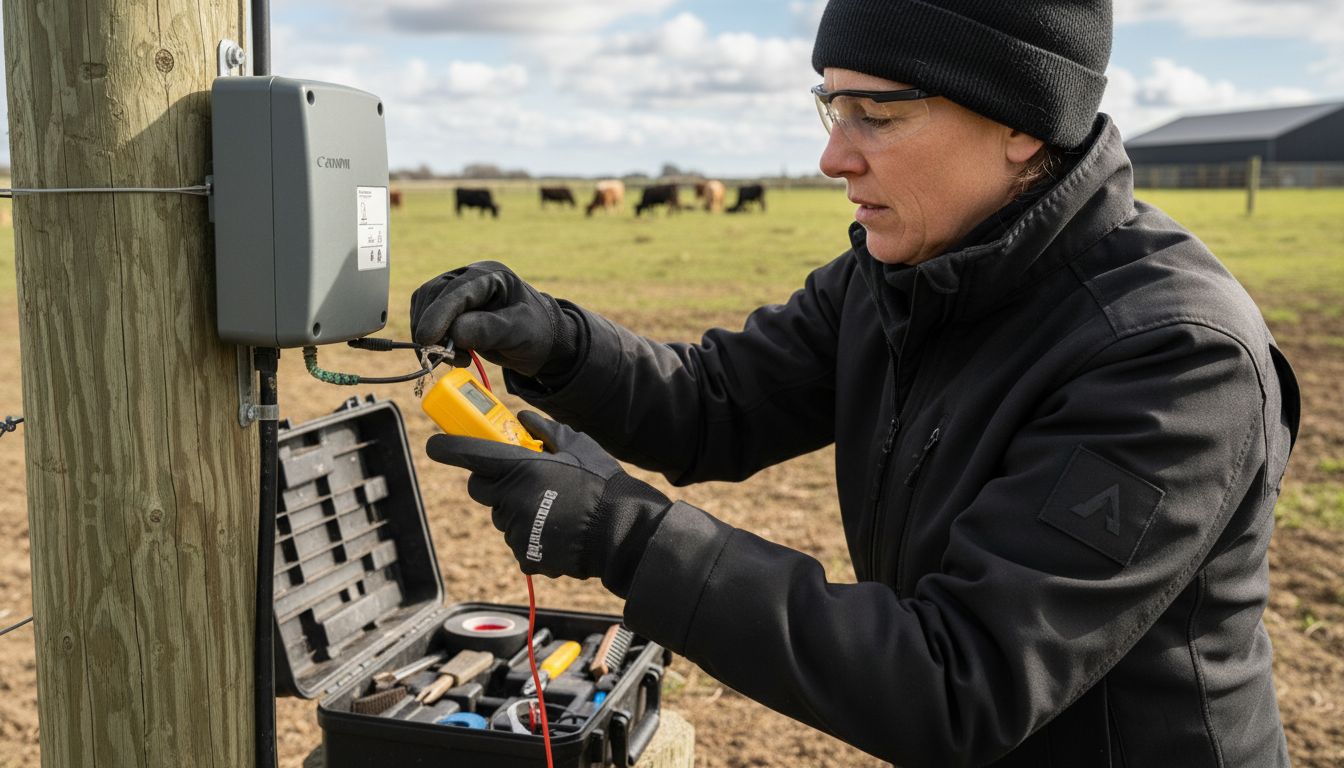
Step 4: Test voltage along the fence line
Now that you have inspected your fence components, it is time to conduct a detailed voltage test along the entire fence line. Precise voltage measurement will help you pinpoint exactly where electrical performance might be compromised.
According to Virginia Tech agricultural research, using a digital voltmeter is the most reliable method for checking voltage levels. Begin at the energizer and systematically move along the fence, taking readings at multiple points. Consistent voltage readings indicate a healthy electrical system while significant drops suggest potential faults or interruptions.
When testing, ensure your voltmeter probes make good contact with the fence wire. For an accurate reading, hold one probe against the electrified wire and touch the ground probe to a metal stake driven into the soil. Agricultural equipment experts recommend testing multiple sections to create a comprehensive voltage profile of your entire fence system.
Pro Tip: Voltage levels can vary depending on fence length and environmental conditions. Most electric fences should maintain between 4000 to 5000 volts for optimal animal containment.
Pay special attention to areas near gates, corners, and spots with previous vegetation interference. These locations are more likely to experience voltage drops that could compromise your fence’s effectiveness. If you notice substantial voltage variations, you will need to investigate potential causes such as wire damage or grounding issues.
[Learn more about electric fence testing techniques to ensure your livestock remain safely contained.]
Step 5: Identify and resolve grounding problems
After testing voltage along your fence line, understanding and addressing grounding issues becomes critical for maintaining an effective electric fence system. Poor grounding can dramatically reduce your fence’s electrical performance and compromise its ability to contain livestock.
According to Canadian farm fencing experts, the first step is to test your ground system by short-circuiting the fence and measuring voltage at the ground rods. Research indicates that readings above 0.3 kilovolts suggest insufficient grounding. This means your electrical current is not dissipating effectively into the ground, which can weaken your fence’s overall effectiveness.
Inspect your ground rod installation carefully. Ground rods should be copper or galvanized steel and driven at least 6 feet into moist soil. If your initial ground rod does not provide adequate conductivity, agricultural equipment specialists recommend installing additional ground rods. Space these rods approximately 10 feet apart and connect them using heavy gauge wire to create a comprehensive grounding network.
Pro Tip: Dry or rocky soil can significantly impair ground rod performance. Consider adding moisture around your ground rods or selecting alternative installation locations with better soil conditions.
Ensure all ground rod connections remain clean and free from corrosion. Loose or oxidized connections can interrupt electrical flow and reduce your fence’s protective capabilities. Periodically check these connections and apply dielectric grease to prevent future corrosion and maintain optimal electrical conductivity.
[Discover our comprehensive guide to grounding electric fences safely for more detailed insights into maintaining your system.]
Step 6: Verify system operation and monitor performance
After addressing grounding and voltage issues, your final task is to comprehensively verify and establish an ongoing monitoring strategy for your electric fence system. Consistent performance verification ensures your livestock remain safely contained and your fence operates at peak efficiency.
According to Virginia Tech agricultural research, the most critical step is to retest the entire fence voltage after completing all previous troubleshooting steps. Walk the full fence line with your digital voltmeter, comparing readings against your initial measurements. Look for consistent voltage levels that indicate successful repairs and optimal electrical performance.
Agricultural equipment experts recommend establishing a regular monitoring schedule that accounts for seasonal variations. Weather conditions like extreme temperatures, moisture, and vegetation growth can impact fence performance. Consider checking your fence voltage monthly during peak growing seasons and quarterly during less active periods. Document your voltage readings to track any gradual changes or emerging patterns.
Pro Tip: Create a simple maintenance log to record voltage readings, repair dates, and observed performance issues. This documentation can help you predict and prevent future fence problems.
Pay special attention to areas previously identified as problematic. Test gate connections, corners, and sections near vegetation more frequently. If you notice recurring voltage drops or performance inconsistencies, it may signal underlying structural issues that require more comprehensive investigation or professional assessment.
Learn more about [electric fence testing techniques to maintain your system’s long term reliability.]
Take Control of Your Electric Fence Troubles with Trusted Solutions
Facing electric fence challenges like low voltage, grounding issues, or faulty connections can be frustrating and risky. You want fast, effective repairs without compromising safety or livestock containment. Our comprehensive range of electric fencing supplies and expert gear is designed to help you tackle these exact problems with confidence. From insulated gloves and power supplies to wire cutters and durable insulators, we offer everything needed to restore your fence’s performance quickly and securely.

Explore FenceFast.ca now for high-quality products tailored to agriculture and rural fencing needs. Don’t wait until a small fault leads to costly escapes or livestock injuries. Start upgrading your fence system today and benefit from nationwide shipping and personalized support. Ready to fix your electric fence the right way? Visit us and get the job done safely and efficiently.
Frequently Asked Questions
What tools do I need for troubleshooting electric fences?
To troubleshoot electric fences, you’ll need a digital voltmeter or fault finder to measure voltage, as well as repair tools such as wire cutters, pliers, spare insulators, and electrical tape. Gather these essential tools before starting your repairs to ensure an efficient process.
How do I test the voltage of my electric fence?
Test the voltage of your electric fence by connecting a digital voltmeter to the energizer’s output terminals. Move along the fence line, taking readings at multiple points to identify areas with voltage loss or inconsistency.
What should I inspect for grounding problems in my electric fence?
Inspect your ground rods to ensure they are properly installed at least 6 feet deep in moist soil. When testing, voltage readings above 0.3 kilovolts indicate inadequate grounding, prompting you to add additional ground rods for improved conductivity.
How often should I monitor my electric fence’s performance?
Establish a regular monitoring schedule, checking your electric fence’s voltage at least once a month during peak growing seasons and quarterly at other times. Document your voltage readings to track gradual changes and detect patterns that may indicate future issues.
How do I handle vegetation affecting my electric fence?
To manage vegetation impacting your electric fence, regularly trim any plants or bushes that touch the wires. This helps maintain optimal electrical performance and prevents voltage loss, ensuring your fence stays effective for livestock containment.
What safety precautions should I take while troubleshooting my electric fence?
Always wear insulated rubber gloves, long pants, and closed-toe shoes when working on your electric fence. Prior to touching any components, ensure the energizer is powered off to prevent electrical shock during your repairs.

