

TL;DR:
- Replacing barbed wire with smooth, high-visibility wire and creating seasonal crossings help protect wildlife and livestock simultaneously.
- Targeted modifications at natural corridors and avoiding unnecessary fencing reduce long-term maintenance costs and improve animal movement.
- Virtual fencing offers flexible, low-impact alternatives for seasonal or sensitive areas but requires trained stock and reliable power sources.
You can protect wildlife movement and keep livestock secure at the same time. The single most effective starting point: replace the top and bottom barbed-wire strands with smooth, high-visibility wire, keep overall fence height at 40 inches or less on flat ground, and build seasonal lay-down sections at known game crossings. USDA NRCS guidance is direct about it: less fence is better, and targeted modifications beat wholesale replacement every time. The Utah Division of Wildlife Resources adds that where fencing is unavoidable, design around the species and seasonal movement patterns already present on your land.
- Replace top and bottom barbed strands with smooth or high-tensile wire today.
- Keep fence height at or below around 40 inches on flat ground.
- Create lay-down or drop-down sections at natural corridors, riparian zones, and game trails.
Table of Contents
- Quick wins: the highest-impact retrofits you can do this season
- Physical fences vs. virtual fencing: how to choose
- Species-specific design: what each animal actually needs
- Material choices and construction best practices
- How to retrofit an existing fence step by step
- Installation timelines, maintenance, and cost ranges
- Permits, NRCS programs, and state agency coordination
- How virtual fencing works and when Gallagher eShepherd fits
- Key Takeaways
- The case for planning around wildlife from the start
- Fencefast can help you build it right
- Useful sources and further reading
Quick wins: the highest-impact retrofits you can do this season
Rank these by the time and money they take, and start at the top.
Immediate (same day or week):
- Swap barbed top and bottom strands for smooth, high-visibility wire. This single change cuts entanglement risk for deer, elk, and pronghorn dramatically.
- Add PVC sleeves or colorful flagging to existing top wires so birds and ungulates can see the fence from a distance. Reflective tags and flagging placed at regular intervals work well for both nocturnal and diurnal species.
- Leave gates open temporarily during known migration windows, especially fawning and calving season (roughly June through summer).
Short-term (within a month):
- Raise the bottom strand to about sixteen to eighteen inches above ground so pronghorn, fawns, and calves can crawl under without snagging.
- Mark high-risk crossing zones (ridgelines between woodlots, creek crossings, wetland edges) and prioritize those for visibility upgrades first.
Longer-term (seasonal planning):
- Install lay-down sections at confirmed wildlife corridors. A standard 3- or 4-wire lay-down fence can be dropped and raised by one person and dramatically reduces both wildlife damage and your maintenance bill.
- Evaluate whether any fence runs cross riparian habitat unnecessarily. Removing or rerouting those sections often costs less than the annual repair bill they generate.
Physical fences vs. virtual fencing: how to choose
Use physical fencing when you need permanent stock containment, predator exclusion for calves, or perimeter security that cannot be interrupted by a power or connectivity failure. Consider virtual fencing for rotational grazing, short-term exclusion of sensitive riparian habitat, or anywhere a physical barrier would fragment a migration corridor.
| Dimension | Physical (Modified, Wildlife-Friendly) | Virtual Fencing |
|---|---|---|
| Livestock containment | High — proven for all species and terrain | High for trained cattle; lower for untrained or mixed species |
| Wildlife collision/entanglement risk | Low when properly modified (smooth wire, correct height) | Minimal — no physical barrier |
| Upfront cost | Moderate — materials plus labor | Higher hardware cost (collars, base station, app subscription) |
| Ongoing maintenance | Annual tensioning, visibility marker checks, lay-down tests | Battery/collar monitoring, software updates, retraining new stock |
| Installation timeline | Days to weeks depending on run length | Hours to days for setup; weeks for stock training |
| Permitting/regulatory constraints | May require NRCS coordination on public or riparian land | Fewer physical permits; check state livestock regulations |
| Scalability/flexibility | Fixed; seasonal lay-downs add flexibility | High — boundaries shift in the app without moving wire |
Choose virtual fencing when:
- Your fence line would cross a confirmed migration corridor with no good reroute.
- You need seasonal exclusion of a riparian or wetland area without permanent infrastructure.
- Stock density is low and cattle are already familiar with electric training.
- You want rotational grazing precision without moving temporary wire repeatedly.
Stick with physical fencing when:
- You need predator exclusion for calves, lambs, or poultry.
- Terrain or connectivity is too variable for reliable collar signal.
- Permanent perimeter security is non-negotiable.
Species-specific design: what each animal actually needs
Tailor fence height, strand spacing, visibility, and crossing placement to the wildlife present. A fence that works for mule deer will still trap pronghorn if the bottom strand is too low.
| Species Group | Max Top Height | Bottom Clearance | Wire Visibility | Seasonal Treatment |
|---|---|---|---|---|
| Deer / Elk | around 40 inches | approximately 18 inches | High-vis top wire or flagging | Lay-down sections during rut and winter migration |
| Pronghorn | — | approximately 18 inches minimum | Critical — smooth wire only | Drop sections during spring/fall migration |
| Fawns / Calves / Small mammals | N/A | 16–approximately 18 inches | Less critical | Open crawl gaps June through summer |
| Ground-nesting birds | Low overall height preferred | 12–16 in | Flagging on lower strands | Avoid new fence runs through nesting areas April–July |
| Waterfowl / Raptors | 40 in max near wetlands | N/A | Reflective tags on top wire | Set fence lines back from wetland edges |
Measurements above are sourced from the Oregon Department of Fish and Wildlife fencing manual and NRCS guidance.
Topography changes everything. A 40-inch fence on flat ground can become an impassable wall in a gully or on a steep slope. The Wyoming Game & Fish Handbook recommends running fence lines along natural contours and placing lay-down sections specifically in low spots where animals funnel naturally.
- Place crossings at fence corners near cover, riparian corridors, and existing game trails — not in the middle of open runs where animals rarely approach.
- During fawning and calving season, temporarily open or drop sections near water sources.
Material choices and construction best practices
Prefer smooth wire on the top and bottom strands, use high-visibility materials on the top wire, and avoid woven mesh topped with barbed wire anywhere near a migration corridor.
Measured recommendations:
- Maximum height: 40–42 inches on flat ground; less on slopes.
- Top two wires: at least 12 inches apart to prevent back-leg entanglement in deer and elk.
- Bottom wire: 16–18 inches from the ground for pronghorn and fawn clearance.
- Strand count: 3–4 strands work for most cattle and horse pastures; sheep, bison, and cows with young calves may need more.
- Post spacing for lay-down sections: space posts to allow a single person to lower and raise the section without tools.
Do not do:
- Do not use barbed wire as the top or bottom strand near any wildlife corridor.
- Do not space top wires closer than 12 inches — that gap is where deer and elk lose legs.
- Do not run woven mesh with a barbed top wire through riparian zones or ridgeline crossings.
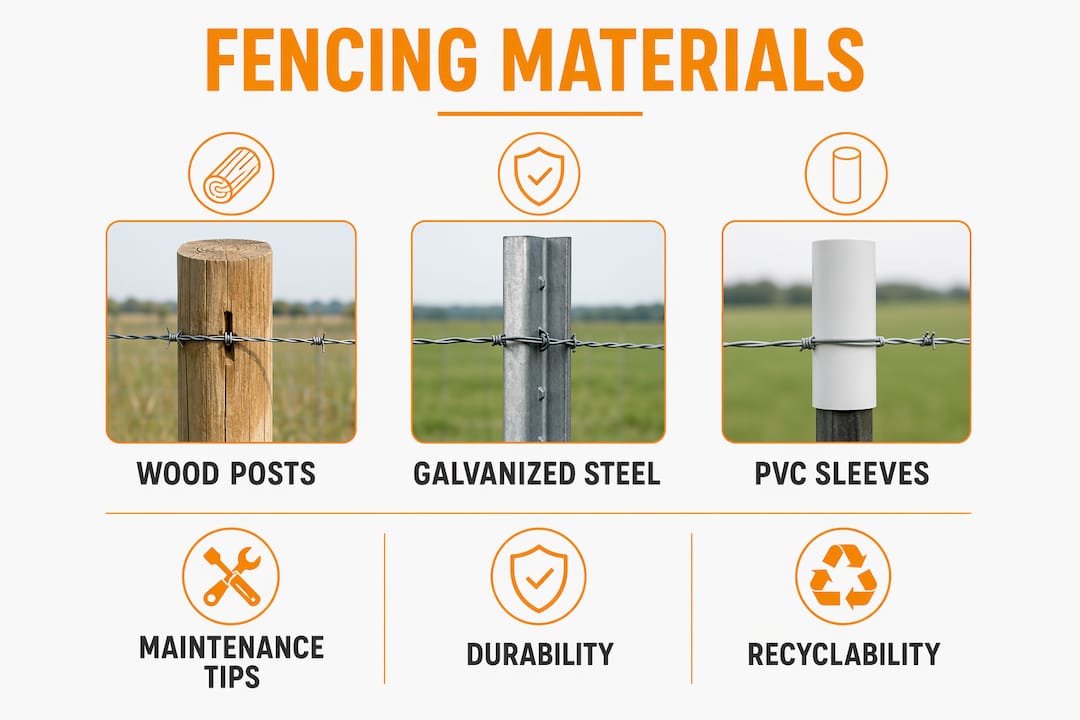
Material lifecycle matters too. Long-term durability and recyclability vary significantly between wood, galvanized steel, and high-tensile wire — high-tensile smooth wire tends to outlast standard barbed wire and requires less frequent replacement.
Pro Tip: Plan fence lines along topographic contours rather than straight property lines. On a slope, a fence running across the fall line creates a much lower effective barrier height on the uphill side — and that small adjustment can be the difference between a deer crossing safely and getting hung up.
How to retrofit an existing fence step by step
Start with a site assessment before you buy a single staple.
- Map the property. Walk fence lines at dawn or dusk and mark water sources, riparian zones, ridgelines, and any spots where you find hair on wire, worn ground, or broken strands — those are your active crossing points.
- Identify and prioritize high-risk sections. Fence runs near wetlands, creek lines, and between woodlots are highest priority. Tag them before anything else.
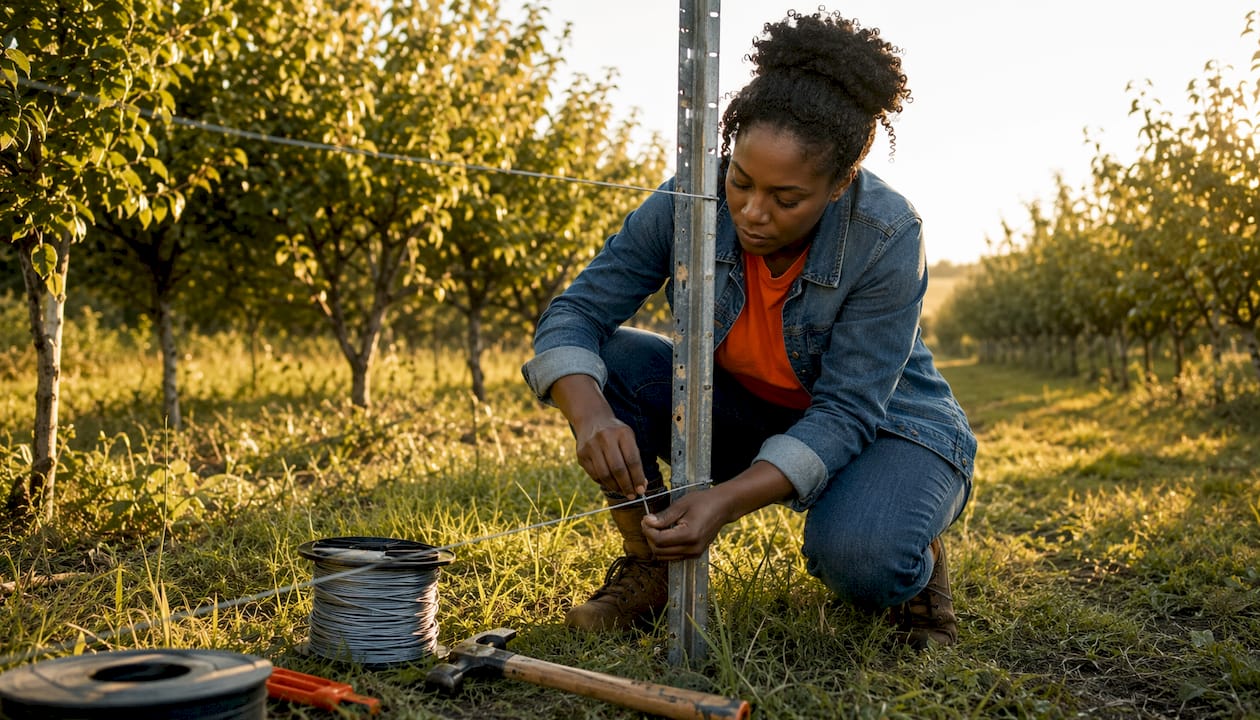
- Remove or replace barbed top and bottom strands first. This is your biggest safety gain per dollar. Smooth high-tensile wire is the direct replacement.
- Add visibility markers. Install PVC sleeves, reflective tags, or flagging tape on top wires at marked crossing zones.
- Raise the bottom strand to 16–18 inches at confirmed crossing points.
- Install lay-down sections at the top two or three crossing locations identified in step one.
- Assess remaining fence condition. If more than 30% of posts are rotted or leaning and wire tension is gone throughout, full replacement is cheaper than patching. Otherwise, staged retrofits over one to two seasons are usually sufficient.
Installation timelines, maintenance, and cost ranges
Habitat-friendly designs often reduce long-term maintenance costs because wildlife damage to fences drops when animals can cross without fighting the wire.
| Scope | Upfront Cost (per linear foot) | Timeline | Annual Maintenance |
|---|---|---|---|
| Visibility upgrades only (flagging, PVC) | Low | 1 day | Replace markers annually |
| Strand swap (barbed to smooth) | Low to moderate | 1–3 days per run | Tension check twice yearly |
| New 3–4 strand smooth wire fence | Moderate | 1–2 weeks | Tension, post check, lay-down test |
| Lay-down section installation | Moderate | 1–2 days per section | Seasonal raise/lower, hinge check |
| Full virtual fencing system | Higher (hardware) | 2–5 days setup + training weeks | Collar battery, software, retraining |
Annual maintenance checklist:
- Spring: check tension, replace any damaged visibility markers, test lay-down sections before fawning season.
- Fall: re-tension after freeze-thaw cycles, inspect posts for heave, lower lay-down sections before migration.
- After heavy snow: check for sagging bottom wires and bent posts at crossing points — snow load is the most common cause of entanglement hotspots.
Permits, NRCS programs, and state agency coordination
Coordinate with USDA NRCS and your state wildlife agency early, especially when fence lines will cross riparian zones, public land boundaries, or confirmed migration corridors. These agencies can point you to cost-share programs and approved designs that save money and reduce permitting friction.
Practical steps:
- Find your local NRCS office and ask specifically about the Environmental Quality Incentives Program (EQIP) and Wildlife Habitat Incentive Program funding for fencing modifications.
- Check your state fish and wildlife agency’s fencing guidelines — Utah, Wyoming, and Oregon all publish species-specific handbooks with approved measurements.
- Document any migration corridors crossing your property before you apply; agencies respond faster when you arrive with a map.
- Record all seasonal openings (lay-down dates, gate schedules) in your permitting correspondence — it demonstrates good-faith compliance and simplifies renewals.
- If federal cost-share funds are used, fences must be maintained to the approved standard. Build that into your annual maintenance budget from day one.
How virtual fencing works and when Gallagher eShepherd fits
Virtual fencing can reduce permanent barriers and allow seasonal wildlife movement while controlling livestock, but it requires trained stock, reliable solar power, and consistent monitoring.
System components:
- GPS-enabled collars (neckbands) worn by individual animals.
- A base station that communicates boundaries to collars.
- App-based software for drawing, adjusting, and monitoring virtual fence lines.
- Audio and mild electric cues that train animals to respect invisible boundaries.
Gallagher eShepherd is one commercial example available in the U.S. market. As a GPS-enabled, solar-powered system, it allows ranchers to shift grazing boundaries without moving physical wire — useful for rotational grazing and for temporarily opening riparian areas during sensitive seasons. Practical constraints include the time needed to train naive cattle (typically several weeks), collar battery longevity in cold climates, and the need for adequate cellular or satellite connectivity across the grazing area.
Deployment checklist for a low-risk pilot:
- Start with a small, well-fenced paddock so physical backup exists during training.
- Train a small group of calm, older cattle first before expanding to the full herd.
- Map virtual boundaries well inside any physical fence lines during the training phase.
- Monitor collar alerts daily for the first two weeks.
Pro Tip: Run a 30–60 day pilot on one paddock before committing to full deployment. The main failure point is undertrained stock, not hardware — a short pilot reveals which animals need more time before you remove physical backup fencing.
Key Takeaways
Fewer, targeted fences with smooth wire, correct clearances, and seasonal openings produce better wildlife outcomes and lower maintenance costs than fencing entire landscapes.
| Point | Details |
|---|---|
| Smooth wire top and bottom | Replace barbed top/bottom strands first — the single highest-impact, lowest-cost modification available. |
| Correct clearances | Keep top height at about 40 inches max; maintain a bottom clearance suitable for pronghorn, fawns, and calves. |
| Seasonal lay-down sections | Install drop sections at confirmed game crossings and open them during fawning season (June through summer). |
| Virtual fencing for flexibility | Gallagher eShepherd and similar systems eliminate physical barriers in migration corridors but require trained stock and reliable power. |
| Fencefast for hardware and setup | Fencefast supplies wire, visibility hardware, and Gallagher eShepherd systems with design consulting to help you implement these modifications. |
The case for planning around wildlife from the start
Most producers I talk to come to habitat-friendly fencing after a problem: a dead pronghorn on the wire, a fence line that gets destroyed every migration season, or a riparian zone that’s been fenced off for decades and is visibly degrading. The retrofit conversation is almost always more expensive than it needed to be.
What the evidence consistently shows is that producers who plan fence lines around habitat needs and build seasonal openings from the start report fewer fence repairs and better wildlife outcomes. That’s not a conservation argument — it’s a maintenance cost argument. A lay-down section costs a few extra hours at installation and saves you a blown fence run every hard winter.
The mistake I see most often is treating the entire property perimeter as a containment problem. Most livestock operations only need tight fencing around a fraction of their land — haystacks, calving areas, high-value pastures. The rest can be lower, smoother, and more permeable without losing stock control. Mapping that distinction before you build or retrofit is where the real savings are.
One practical tip that rarely makes it into manuals: use aerial imagery to draft your fence plan, then walk the lines at dawn or dusk before you set a single post. Game trails show up clearly in morning light, and you’ll find crossings you’d never spot on a satellite image. That walk changes where you put lay-down sections every time.
Fencefast can help you build it right
If you’re ready to retrofit an existing fence or set up a virtual fencing pilot, Fencefast offers the hardware, design consulting, and Gallagher eShepherd setup support to get it done without the guesswork of sourcing components from multiple suppliers.

Fencefast carries smooth high-tensile wire, PVC visibility sleeves, lay-down hardware, and the full Gallagher eShepherd system — collars, base stations, and app onboarding. As an authorized Gallagher dealer with 26 years of partnership, the team can walk you through a pilot deployment plan, help you identify which sections of your existing fence are highest priority for modification, and point you toward NRCS cost-share programs that may offset part of the project cost.
Services and shipping availability may vary by state — contact Fencefast directly to confirm what’s available in your area and get a quote tailored to your operation.
Useful sources and further reading
- USDA NRCS Wildlife Friendly Fences — The primary federal reference for measurements, crossing designs, and cost-share program guidance. Start here.
- Utah Division of Wildlife Resources — Wildlife-Friendly Fences — Species-specific advice and the “no fence where possible” principle explained for Western ranchers.
- Wyoming Fences & Wildlife Handbook (WGFD) — Detailed topography guidance, lay-down section designs, and contour-aware placement recommendations.
- Oregon Department of Fish and Wildlife Fencing Manual — Specific measurements for flat and sloped ground, conversion tables, and retrofit methods for multiple species.
- Fencefast Wildlife-Friendly Fence Design Guide — Farm-scale examples and retrofit case notes with supplier context; translates well to U.S. ranching operations.
- Fencefast Sustainable Fencing Materials — Material lifecycle comparisons and practical visibility recommendations for farm implementation.
- Unsustainable Magazine — Bird-Friendly Fence Design — Detailed guidance on high-visibility markers, PVC sleeves, and reflective tags for reducing avian collisions.
Recommended
- How to Repair Fences: Practical Steps for Farmers and Landowners 2025 – FenceFast Ltd.
- Wildlife friendly fence design guide for Canadian farmers – FenceFast Ltd.
- Fence installation steps for Canadian farms: A practical guide – FenceFast Ltd.
- Animal fencing basics: Essential solutions for Canadian farms – FenceFast Ltd.

