

For line posts on a permanent high-tensile fence, use heavy-duty tube or fin insulators. For brace and corner posts, use high-strain start/end insulators rated for full wire tension. For T-posts where you need quick access to swap a wire, pinlock insulators do the job. Three rules govern the choice every time: pick UV-stable, impact-resistant material; match the mounting style to the post type and its job (line versus end); and put strain-rated insulators only where the wire actually pulls hard, not where it just rests.
Skip these rules and you get shorts, voltage drop, and insulators that crack apart within a season or two.
- Line posts: tube or fin insulators, UV-stabilized plastic or glass-fiber reinforced plastic
- Brace/end posts: high-strain insulators, glass-fiber reinforced, rated for full break strength
- T-posts: pinlock insulators for fast wire changes
Pro Tip: If an insulator feels brittle when you flex it by hand, or you spot hairline cracks near the wire groove, replace it before it fails outright. A slow voltage drop across a long run often traces back to one or two aging insulators rather than a grounded post.
TL;DR:
- Using impact-resistant, UV-stable insulators in the correct placement at line, brace, and T-posts prevents shorts and electrical failures within a single season.
- High-strain insulators at corner and brace posts must be rated for full wire tension to avoid early cracking or disconnection during tensioning or strong winds.
- Exposure to sun, temperature swings, and dirt buildup causes insulator degradation, so biannual inspections and replacement of brittle or cracked units are essential.
- Proper mounting techniques, including pre-drilling and correct seat engagement, avoid shorts and ensure insulators withstand physical and electrical stresses.
- Matching insulator material and type to the specific post location and load conditions extends fence longevity and reduces repeated hardware replacements.
Table of Contents
- Common High Tensile Wire Insulator Types and Where They Go
- Which Materials Hold Up Best on a Permanent Fence?
- How to Mount Insulators Without Creating Shorts
- What Routine Maintenance Actually Catches
- When to Bring in Fencefast’s Design Expertise
- How Weather and Dust Wear Down Insulators Over Time
- Key Takeaways
- Why Most Fence Failures Trace Back to One Overlooked Part
- Get the Right Hardware Before You Start Stringing Wire
- Sources
Common High Tensile Wire Insulator Types and Where They Go
Not every insulator on a high-tensile fence does the same job, and using the wrong type in the wrong spot is the single most common install mistake ranchers make. Line posts, T-posts, and brace posts each put different mechanical stress on an insulator, so the hardware needs to match the location.
- Tube and fin in-line insulators. These slide over the post and cradle the wire in a protective channel, keeping the wire off the wood or metal entirely. They’re the standard choice for long, permanent line runs because they shield the wire from abrasion against the post in wind and shift over the fence’s lifespan.
- Pinlock and pin insulators. These snap onto T-posts and let you pull a wire free in seconds for repairs or seasonal rotation. They’re fast and cheap, but they aren’t built to hold significant strain. Use them on line posts, never at corners or ends where tension concentrates.
- Spiralator and in-line tube insulators. These wrap around an existing wire without cutting it, which makes them the go-to for retrofitting an older fence or fixing a chafe point mid-run without re-tensioning the whole line.
- High-strain start/end insulators. Built from glass-fiber reinforced plastic, these anchor the wire at brace posts and corners where the full pull of the wire lands. A permanent fencing insulator rated for wires up to about 2.5 mm is typical spec for this job on a heavy-duty fence.
Get this pairing wrong, most often a pinlock at a corner, and you’ll be back out there with a new insulator before the season’s over. FenceFast’s fence insulator selection guide breaks the choice down further by livestock type if your fence needs to handle anything from goats to bulls.
Which Materials Hold Up Best on a Permanent Fence?
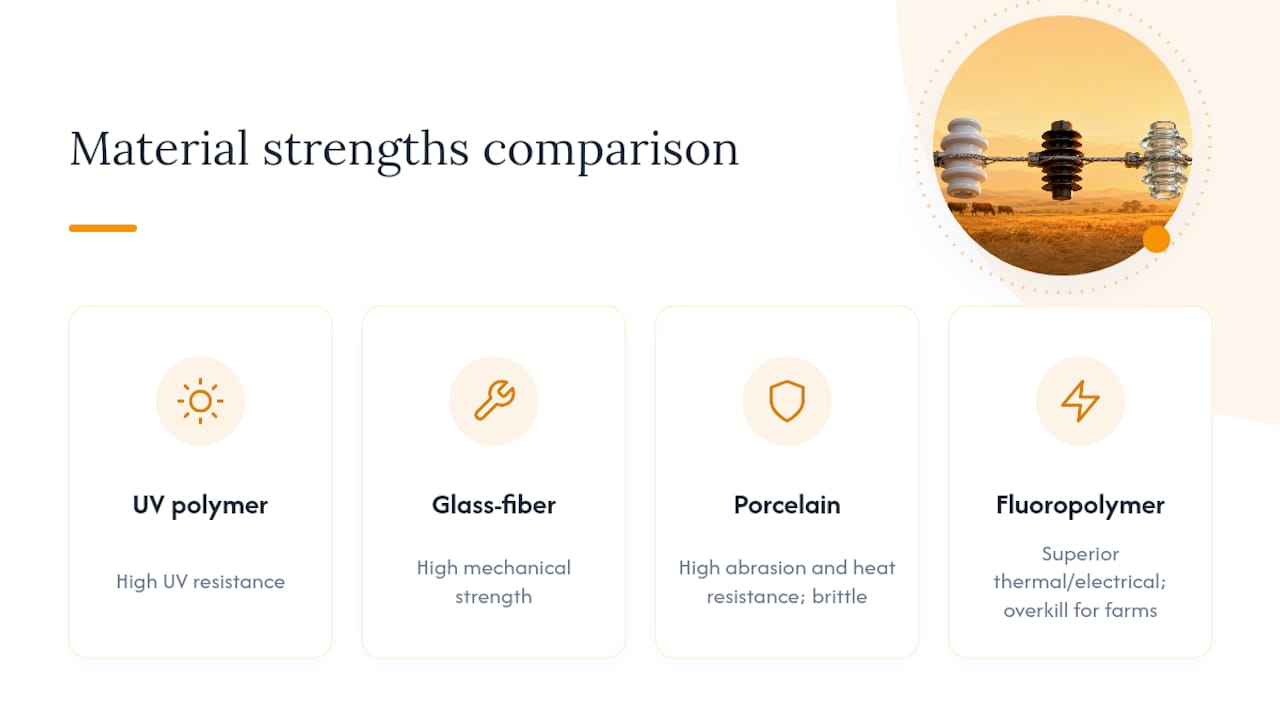
For nearly every farm fence, the choice comes down to two materials: UV-stabilized plastic or glass-fiber reinforced plastic. Porcelain still has a place, but it’s a narrower one than most catalogs suggest.
UV-stabilized polymer insulators resist sun degradation far better than standard plastic, which turns chalky and cracks within a couple of seasons under constant exposure. Glass-fiber reinforced plastic goes a step further on mechanical strength. It’s the material you want at brace and end posts, where the insulator has to resist both sun and the pull of the wire itself.
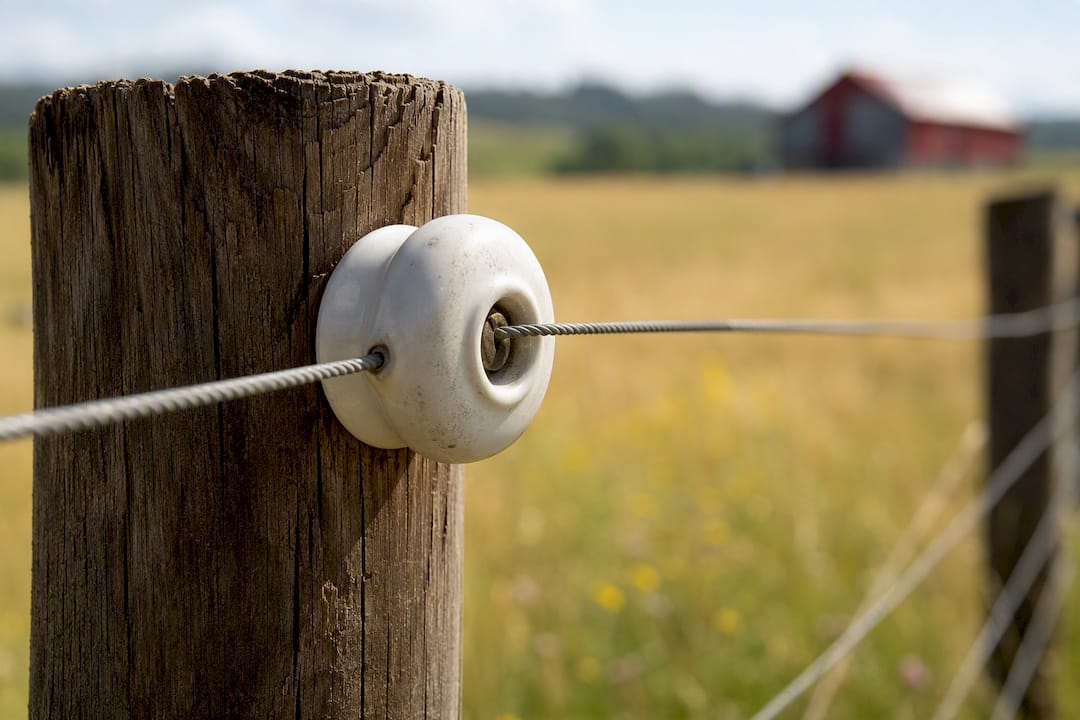
Porcelain still earns its place where abrasion or heat is a real concern, such as fences near equipment lanes or areas with brush fire risk, since it won’t melt or scuff the way plastic can. It’s heavier and more brittle to impact, though, which makes it a poor fit for corners livestock might rub against.
Specialty fluoropolymer insulation, the kind used in aerospace and industrial wiring, has excellent thermal and electrical properties, but it’s overkill for a cattle fence. Extension guidance and industry material comparisons agree: for typical farm conditions, UV-stable plastics and glass-fiber reinforced options deliver the durability you need without paying for aerospace-grade performance you don’t.
Watch for three warning signs that a material is failing: a brittle snap when flexed, hairline cracking radiating from the wire groove, and discoloration or a fine white residue near the contact point, which can indicate early wet-arc tracking.
How to Mount Insulators Without Creating Shorts
Good insulator hardware only works if it’s mounted correctly. A perfectly rated insulator installed loose or crooked will arc against the post just as fast as a cheap one.
- Wood posts: Nail-on insulators go in fast and hold well in solid wood, but pre-drill in dry or older posts to avoid splitting. Screw-in insulators grip better in posts that see freeze-thaw cycles, since nails can work loose as wood swells and shrinks.
- T-posts: Seat pinlock insulators fully onto the post’s ridges before locking the wire in. A half-seated pinlock is the most common cause of a wire slipping free during a windstorm.
- Metal posts: Use clamp-style or screw-mounted insulators rated for metal contact. Never let a wire touch a metal post directly, even briefly during install.
- Retrofitting a live wire: Spiralator and in-line tube insulators wrap on without cutting the wire, which saves you from re-tensioning an entire run just to fix one chafe point.
For tensioning, don’t reach for whatever cutters are in the truck. Specialized high-tensile-rated cutters hold their edge on hardened wire, while standard cutters blunt fast and slip. A spinning jenny prevents the dangerous kink-and-recoil that happens when high-tensile wire unspools under its own spring tension. At splices and end points, nicopress sleeves preserve close to 100% of the wire’s break strength, where even a well-tied knot only holds a fraction of that.
Pro Tip: Leave a few extra inches of clearance between the wire and post at every insulator, especially on curves. Wire that rubs the insulator edge under tension wears a groove over time, and that groove is where the next short starts.
Fencefast’s fence tools and fasteners category carries the sleeves and dispensing tools that make this part of the job go faster, and the steel post insulator guide covers metal-post mounting in more detail if that’s your setup.
What Routine Maintenance Actually Catches
A fifteen-minute seasonal walk of the fence line catches most insulator problems before they turn into a dead fence. Spring and fall checks matter most, since freeze-thaw cycles and summer UV exposure do the bulk of the damage.
- Look for cracked or chalky insulators, especially at south-facing brace posts that take the most sun.
- Check that wires sit centered in tube and fin channels, not rubbing the edge.
- Test voltage at several points along the line. A steady drop from one section to the next usually points to a specific bad insulator, not a system-wide fault.
- Re-seat any pinlock insulator where the wire looks loose or has shifted.
| Symptom | Likely Cause | Fix |
|---|---|---|
| Voltage drops sharply past one point | Cracked or grounded insulator | Replace the insulator, isolate the section to confirm |
| Wire arcs visibly at a post | Wire touching post directly | Re-seat in insulator, check for wear groove |
| Insulator snaps when touched | UV degradation or age | Replace before next windstorm |
| Energizer reads normal but fence feels weak | Vegetation contact elsewhere | Clear brush, then recheck insulators |
If a full section shows chronic voltage loss even after replacing obvious cracked insulators, that’s the point to call in a professional review rather than keep swapping parts one at a time.
When to Bring in Fencefast’s Design Expertise
Some jobs are worth a second opinion before you buy hardware. Long permanent runs, complex brace and corner layouts, or a grant-funded virtual fencing project all benefit from someone who’s specified this gear across a lot of different farms.
- Fencefast has operated as an authorized Gallagher dealer for 26 years, covering both traditional high-tensile systems and virtual fencing setups.
- Design consulting is available for complex end and brace configurations where the wrong insulator choice is expensive to fix later.
- Grant-funded virtual fencing projects, including OFCAF and BMP programs, often need product guidance that matches funding requirements.
| Situation | Recommended Step |
|---|---|
| Long permanent line, multiple brace points | Consult on insulator and post spec before ordering |
| Retrofitting an aging fence | Ask about spiralator and in-line tube options |
| Applying for virtual fencing grants | Get setup guidance tied to program requirements |
How Weather and Dust Wear Down Insulators Over Time
Sun exposure does more damage to insulators than any other environmental factor on most farms. UV radiation breaks down plastic polymer chains from the outside in, which is why an insulator that looked fine in April can turn brittle and chalky by August. South and west-facing brace posts age fastest since they catch the most direct sun hours.
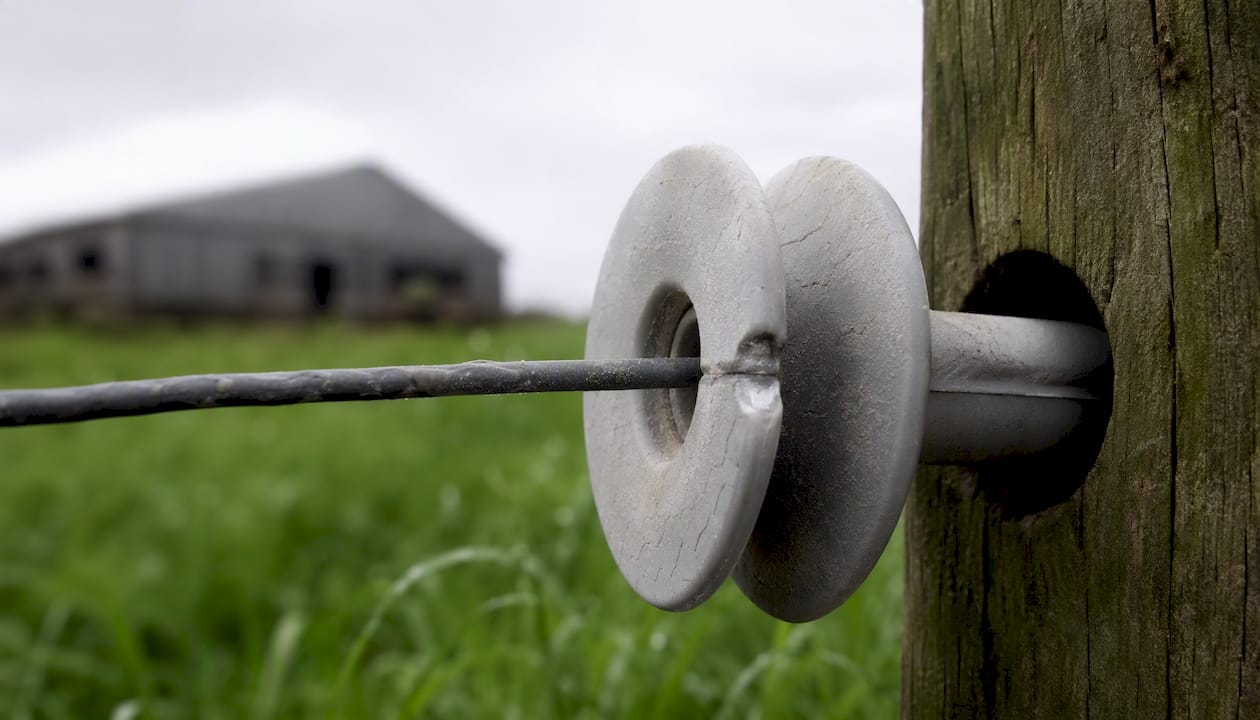
Temperature swings compound the problem. Plastic expands and contracts with heat and cold, and repeated cycling opens tiny stress cracks around the wire groove long before a insulator looks obviously damaged. In regions with hard freeze-thaw winters, this cracking often shows up first at the mounting hole, where the material flexes most.
Moisture matters less for the insulator body itself and more for what it enables: dust and grime buildup that mixes with humidity to create a conductive film across the insulator’s surface. That film is exactly how wet-arc tracking starts, a slow surface leakage that bleeds voltage without any visible break in the plastic. Matching material to the site’s actual heat range, UV exposure, and abrasion conditions rather than buying the cheapest option available cuts this failure mode significantly.
Dry, dusty environments bring a different wear pattern: fine grit acts like sandpaper against the wire groove every time wind moves the line, slowly grinding a channel that eventually lets the wire touch bare post material.
Key Takeaways
Choosing the right insulator by post type and material, then inspecting it twice a year, is what keeps a high-tensile fence at full voltage for its full working life.
| Point | Details |
|---|---|
| Match type to location | Use tube/fin on line posts, high-strain insulators at braces, pinlock on T-posts. |
| UV resistance is the deciding factor | UV-stabilized plastic or glass-fiber reinforced plastic outlasts standard plastic in sun exposure. |
| Mount correctly, not just adequately | A cracked wear groove or half-seated pinlock causes more shorts than bad hardware. |
| Inspect twice a year | Spring and fall checks catch brittle or cracked insulators before a full failure. |
| Fencefast supplies and advises on this hardware | Its fence equipment catalog and 26-year Gallagher dealership cover both product selection and design consulting. |
Why Most Fence Failures Trace Back to One Overlooked Part
The conventional advice on high-tensile fencing spends most of its energy on wire gauge and energizer output, and almost none on the insulator sitting between them. That’s backward. A top-tier energizer pushing current through a cracked, sun-baked insulator is just an expensive way to lose voltage to the ground.
The bigger mistake is treating insulators as one product category instead of three distinct jobs. A line post insulator, a T-post insulator, and a brace-post insulator each face different physical demands, and buying one type for the whole fence is how a rancher ends up replacing hardware every other year instead of every decade.
What should come first isn’t the fanciest material. It’s matching hardware to load. Spend on strain-rated, glass-fiber insulators at your corners and braces, where wire tension actually lives, and you can be far more conservative with what you use along a straight line run. That’s the split extension research and product specs both point toward, and it’s the one most farm fence guides skip entirely.
— Juiced
Get the Right Hardware Before You Start Stringing Wire
Guessing at insulator specs from a hardware store shelf is how most farms end up with a mismatched fence, some line posts with tube insulators, some corners with hardware never rated for full wire tension. Fencefast’s fence equipment catalog is built around matching insulators to the job: line, T-post, or brace, so you order the right part once instead of driving back to town twice.

As an authorized Gallagher dealer for 26 years, Fencefast also offers design consulting for readers planning long permanent runs or complex brace layouts, plus setup guidance for grant-funded virtual fencing projects through programs like OFCAF. If your next fence run includes more than a couple of corners, get your insulator and hardware list checked against your layout at Fencefast’s fence equipment collection before you place an order.
Sources
- Working with High Tensile Fence Wire - Cooperative Extension: Livestock - University of Maine Cooperative Extension
- Insulation guide - NASA NEPP
- How to choose the right insulation for your cable needs - Mercury Wire

