Did you know that improper farm fence installation can lead to losses of over $1,000 per year from escaped livestock and repairs? Strong, well-built fences keep animals safe, prevent property disputes, and protect your investment. Whether you’re raising cattle or marking new boundaries, understanding each step ensures a fence that lasts. From land assessment to the final inspection, this guide offers the knowledge you need for a reliable, long lasting farm fence.
Table of Contents
- Step 1: Assess Land And Select Fence Type
- Step 2: Mark Layout And Prepare Fence Line
- Step 3: Install Fence Posts Securely
- Step 4: Attach Fencing Material Properly
- Step 5: Inspect And Test Fence Integrity
Quick Summary
| Key Point | Explanation |
|---|---|
| 1. Conduct Thorough Land Assessment | Assess terrain, obstacles, and soil before choosing fencing materials to ensure proper design and effectiveness. |
| 2. Verify Property Boundaries Accurately | Confirm your exact property lines using surveys or markers to avoid disputes and ensure proper fence placement. |
| 3. Securely Install Fence Posts | Ensure each post is deeply anchored and vertically aligned to create a stable and long-lasting structure. |
| 4. Maintain Consistent Tension in Fencing Material | Attach fencing material tightly to prevent sagging or weak points that could compromise security and durability. |
| 5. Regularly Inspect Fence Integrity | Periodically check all sections and components for weaknesses or damage to maintain reliable performance over time. |
Step 1: Assess Land and Select Fence Type
Building a strong farm fence starts with careful land assessment and strategic fence type selection. By thoroughly understanding your property’s unique characteristics and needs, you will create a fence that provides security, defines boundaries, and supports your agricultural goals.
Begin by walking your entire property perimeter and carefully mapping out the terrain. According to the Food and Agriculture Organization, critical steps include marking the fence line and checking the bottom terrain along the proposed route. Measure slopes, note water drainage patterns, identify potential obstacles like rocks or tree roots, and determine soil composition. These details will directly influence your fence design and post placement.
![]()
Your fence type should match your specific requirements. For livestock management, consider factors like animal type, herd size, and potential predator risks. 10 Tips for Choosing the Best Livestock Fence can provide additional guidance on selecting appropriate fencing materials. Wire mesh might work well for smaller animals, while heavy duty rail fencing could be ideal for larger livestock or property demarcation.
Warning: Skipping thorough land assessment can lead to costly reconstruction or ineffective fencing. Take time to understand your land’s unique characteristics before investing in materials and labor.
Step 2: Mark Layout and Prepare Fence Line
Marking and preparing your fence line is a critical step that determines the overall success of your farm fencing project. This process requires precision, careful planning, and a systematic approach to ensure your fence follows property boundaries and meets your agricultural needs.
According to Chain Link Fencing, the first task is locating your exact property boundaries and measuring the total length of the planned fence. Start by obtaining a property survey or consulting local land records to confirm precise boundary lines. Use landscape markers, existing fence posts, or professional surveying tools to establish clear reference points. Marking Property Boundaries can provide additional guidance on this critical step.
Next, use wooden stakes and bright marking tape to outline your proposed fence line. The Food and Agriculture Organization recommends carefully checking the bottom terrain along your planned route, measuring slopes, and identifying potential obstacles. Walk the entire proposed fence line multiple times to ensure accuracy. Remove rocks, clear vegetation, and mark any areas requiring special attention like drainage paths or uneven ground.
Warning: Skipping thorough boundary verification can lead to potential legal disputes with neighbors or costly fence relocation. Always confirm your property lines before investing time and resources into fence installation.
Step 3: Install Fence Posts Securely
Installing fence posts is a critical phase that determines the long term stability and durability of your farm fence. Proper installation requires precision, the right tools, and a methodical approach to ensure your fence will withstand years of agricultural use.
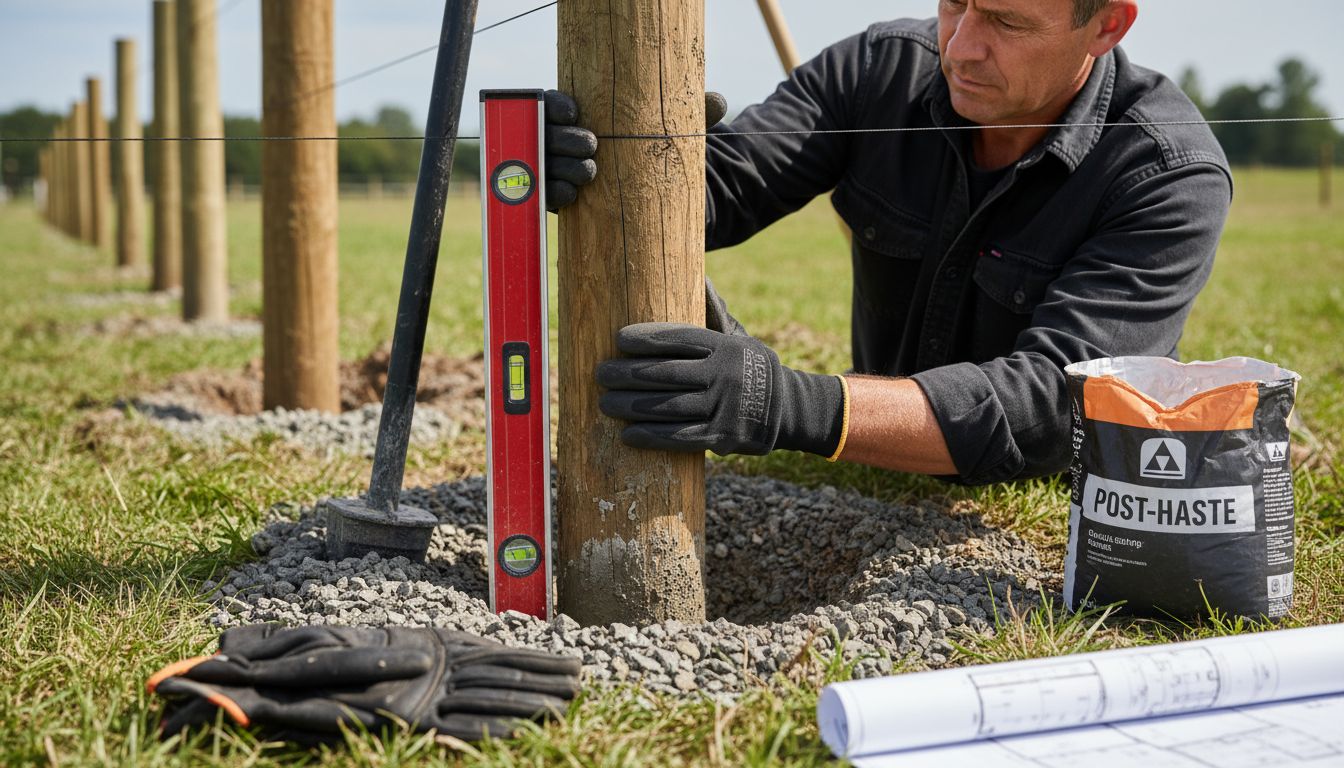
According to Chain Link Fencing, the process begins with digging precise post holes and carefully centering each post. Measure and mark your ground lines, ensuring posts are perfectly vertical or plumb. For terminal posts like corners or gates, dig holes approximately 24 inches deep and 12 inches in diameter. Essential Tools for Fence Building can help you understand the specific equipment needed for this task.
As recommended by P2 Information House, line posts should be placed at consistent intervals with strategic bracing for end and corner posts. Use quick setting concrete to stabilize each post, carefully filling holes and allowing proper time for curing. Tamp the concrete around the post to eliminate air pockets and create a solid foundation.
 Verify post alignment using a level multiple times during installation to guarantee straight line placement.
Warning: Rushing the post installation can lead to a weak fence structure. Take your time to ensure each post is perfectly positioned and securely anchored before moving to the next step.
Step 4: Attach Fencing Material Properly
Attaching fencing material correctly is crucial for creating a durable and effective farm fence that will protect your livestock and define your property boundaries. This step requires careful technique and attention to detail to ensure a secure and long lasting installation.
According to P2 Information House, the key to successful fencing material attachment is maintaining consistent tension and precise positioning. Start by stretching your wire fabric or mesh material taut between terminal posts, ensuring no sagging or loose sections. Use wire ties to fasten the material to line posts at regular intervals about 12 to 18 inches apart. When working with Livestock Fence Safety Tips, pay special attention to how the material is secured to prevent potential weak points.
Research from the Eric Institute recommends leaving a small gap between the ground and the bottom of the fence fabric approximately 2 to 4 inches to prevent moisture damage and allow for ground movement. Thread tension bars through the fabric end sections and attach them securely to terminal posts using specialized fasteners. Pull the material extremely tight during installation to minimize future sagging and maintain structural integrity.
Warning: Improper attachment can compromise your entire fence system. Take time to check each connection point and ensure uniform tension across the entire fence length.
Step 5: Inspect and Test Fence Integrity
Inspecting and testing your farm fence is the final critical step that ensures your hard work will provide reliable protection and boundary definition for years to come. This comprehensive evaluation will help you identify and address any potential weaknesses before they become significant problems.
According to the California Department of Transportation, the inspection process involves meticulously verifying material specifications and installation methods. Carefully examine each section of fencing for proper alignment, consistent tension, and secure fastening. Check that wire ties are tightly secured, posts remain vertical, and fabric remains taut without sagging. When testing electric fencing, Electric Fence How To can provide additional guidance on ensuring proper conductivity and safety.
Research from the Eric Institute recommends creating a systematic documentation process to track your fence inspection. Walk the entire fence line systematically looking for potential issues like loose connections, ground disturbances, rust spots, or areas of potential animal damage. Test gate mechanisms, check tension on all wire sections, and verify that no sections have been compromised by weather or wildlife. Repeat this inspection process every few months to maintain optimal fence performance.
Warning: A single overlooked weakness can compromise your entire fence system. Take your time during inspection and address even minor issues immediately to prevent more significant problems down the line.
Build Your Farm Fence with Confidence and the Right Tools
Building a strong farm fence is essential for protecting your livestock and defining your property clearly. After carefully assessing your land, marking boundaries precisely, and installing posts securely, the next step is sourcing reliable fencing materials and tools that stand the test of time. Challenges like maintaining consistent tension in fencing fabric and safely installing electric fence systems can be frustrating without the right equipment and expert guidance.
You do not have to face these challenges alone. At FenceFast.ca, we specialize in providing high-quality fencing components, electric fencing systems, and livestock management tools tailored specifically for Canadian farmers and ranchers. Our easy-to-navigate catalog and expert advice empower you to complete every step with confidence from post installation to securing wire and ensuring fence integrity.

Start your fencing project today with solutions that fit your unique needs. Visit FenceFast.ca now to explore our full range of products and services designed to help you build farm fences that protect your animals and investment for years. Don’t wait until fence weaknesses show up; equip yourself with the best supplies and expert support to build strong fences the first time.
Frequently Asked Questions
How do I assess my land before building a farm fence?
Begin by walking the entire property perimeter to map out the terrain. Measure slopes, note water drainage patterns, and identify obstacles like rocks or tree roots that could affect the fence design.
What factors should I consider when choosing a fence type for livestock?
Consider your specific agricultural needs, including the type of livestock you have, herd size, and potential predator risks. For example, heavier fencing may be needed for larger animals, whereas wire mesh might suffice for smaller ones.
How do I mark and prepare a fence line effectively?
Start by verifying your property boundaries using landscape markers or survey tools. Use wooden stakes and bright marking tape to outline the proposed fence line, and ensure you’ve cleared any obstacles along the route.
What is the proper method for installing fence posts?
Dig post holes that are at least 24 inches deep and 12 inches wide for terminal posts, ensuring they are vertical. Use quick-setting concrete to secure each post and verify alignment frequently while installing.
How can I ensure my fencing material is attached properly?
Stretch your wire or mesh material tight between posts and secure it every 12 to 18 inches with wire ties. Maintain consistent tension to prevent sagging and check for moisture gaps under the fence.
What should I look for when inspecting my completed farm fence?
Conduct regular inspections to check for proper alignment, secure fastening, and any signs of damage or wear. Address any loose connections or rust spots immediately to avoid larger issues down the road.
