

How to install ground rods for an electric fence: the core steps
Getting the grounding right is the single most important thing you can do for an electric fence. A weak ground means a weak shock, and a weak shock means your livestock will test the fence until they find a way through. Here is exactly how to do it correctly.
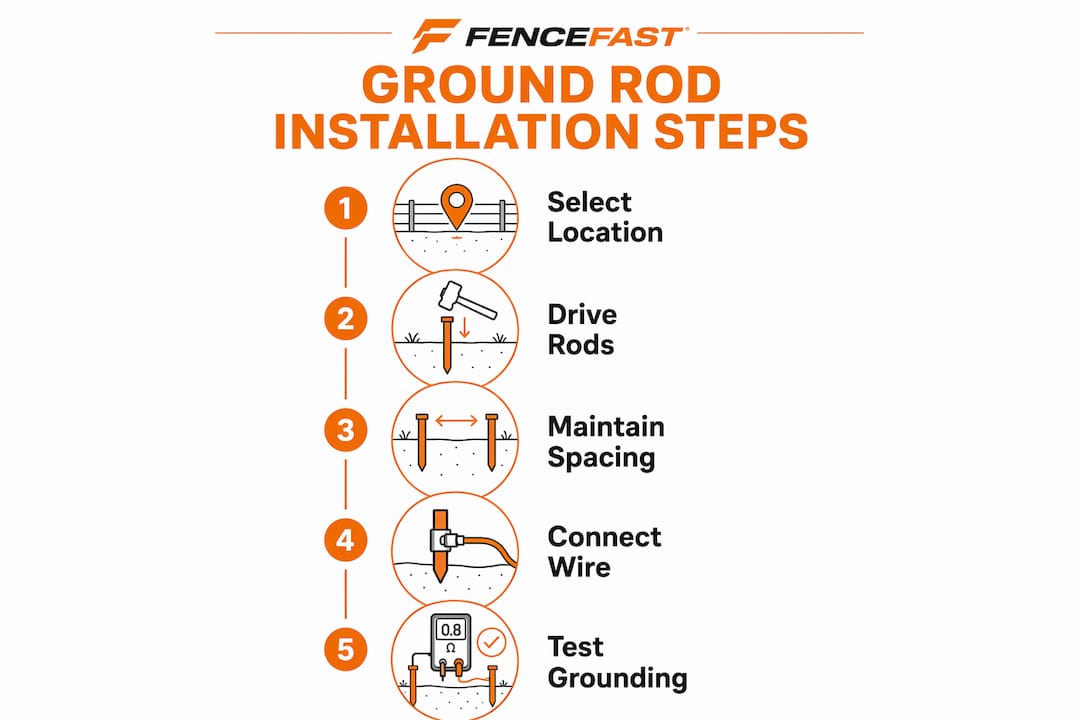
- Choose your rods. Use galvanized steel ground rods that are 6 feet long. Galvanized steel holds up in soil without corroding quickly, and it pairs cleanly with galvanized wire and stainless steel or bronze clamps. Do not use rebar or repurposed steel pipe — rust kills conductivity fast.
- Count your rods. For energizers up to 15 joules, install at least three rods driven 6 feet deep. More rods are recommended for energizers with higher output, tailored to your specific energizer and soil conditions.
- Pick your location. Start within 20 feet of the energizer and place rods in soil that stays moist year-round. Under a roof drip line or on the shaded north side of a barn are both solid choices. Keep the entire grounding system at least 33 feet away from utility grounds, service boxes, and metal water pipes.
- Space the rods. Drive each rod at least 10 feet apart from the next. Closer spacing causes the grounding fields to overlap, which raises resistance instead of lowering it.
- Drive them deep. Use a sledgehammer, T-post driver, or hammer drill to push each rod as far into the ground as possible. Leave only a few inches above the surface for your clamp and wire connection.
- Wire them together. Run one continuous, unbroken length of insulated wire from rod to rod, securing it at each one with a noncorrosive clamp. For energizers under 20 joules, 12½-gauge galvanized steel wire works fine. For energizers above 15 joules, step up to high-conductivity lead-out cable or 6-gauge copper wire.
- Connect to the energizer. Route the wire from the last rod to the energizer’s ground terminal. Never connect it to the fence terminal — that sends the current the wrong direction entirely.
Pro Tip: Bury the ground wire in a shallow trench between rods to protect it from foot traffic, equipment, and UV degradation. Just keep the clamps and connection points above ground so they don’t corrode prematurely.
Table of Contents
- What materials and location give you the best grounding?
- How many rods do you need, and how far apart should they go?
- How do you connect the rods to the energizer correctly?
- Expert insights on keeping your grounding system working long-term
- Fencefast has the grounding supplies your fence actually needs
- Key Takeaways
What materials and location give you the best grounding?
Material selection and placement location are where most grounding failures actually start. Choosing the wrong combination of metals or dropping rods in the wrong spot can cut your fence’s effectiveness dramatically, even if everything else is done right.
Galvanized steel rods are the standard choice for most farms. They pair with galvanized wire and stainless steel or bronze clamps without any compatibility issues. Copper rods are also effective, but they require copper wire and copper clamps throughout. The problem arises when people mix the two. Mixing copper wire with steel rods causes galvanic corrosion at the connection points, which degrades conductivity over time and can eventually cause fence failure. If you must bridge different metals, use bronze or stainless steel clamps as the transition point.
For location, the goal is consistently damp soil. Electrical current travels from the animal through the ground and back to the energizer through the soil, so dry soil breaks that circuit. Shaded areas, spots under roof eaves, and the north-facing sides of buildings tend to hold moisture longer through summer droughts. Keep the grounding system well away from metal buildings, and run insulated lead-out wire past any metal structures rather than letting the ground wire contact them.
- Avoid mixing galvanized steel and copper components without compatible transition clamps.
- Place rods in naturally damp soil, not in sandy or rocky areas if you can help it.
- Stay at least 33 feet from utility grounds, service boxes, and metal water piping.
- Use insulated wire to bypass metal buildings rather than routing around them with bare wire.
- Never use steel fence posts as ground rods — they lack the depth and surface contact area needed.
How many rods do you need, and how far apart should they go?
The number of rods your system needs depends directly on your energizer’s output, measured in joules. Virginia Tech’s extension guidelines set the standard: three rods for energizers up to 15 joules, five rods for up to 25 joules, and seven rods for up to 35 joules. These are minimums, not targets. Sandy soil, dry climates, or high-output energizers may push you beyond those numbers.
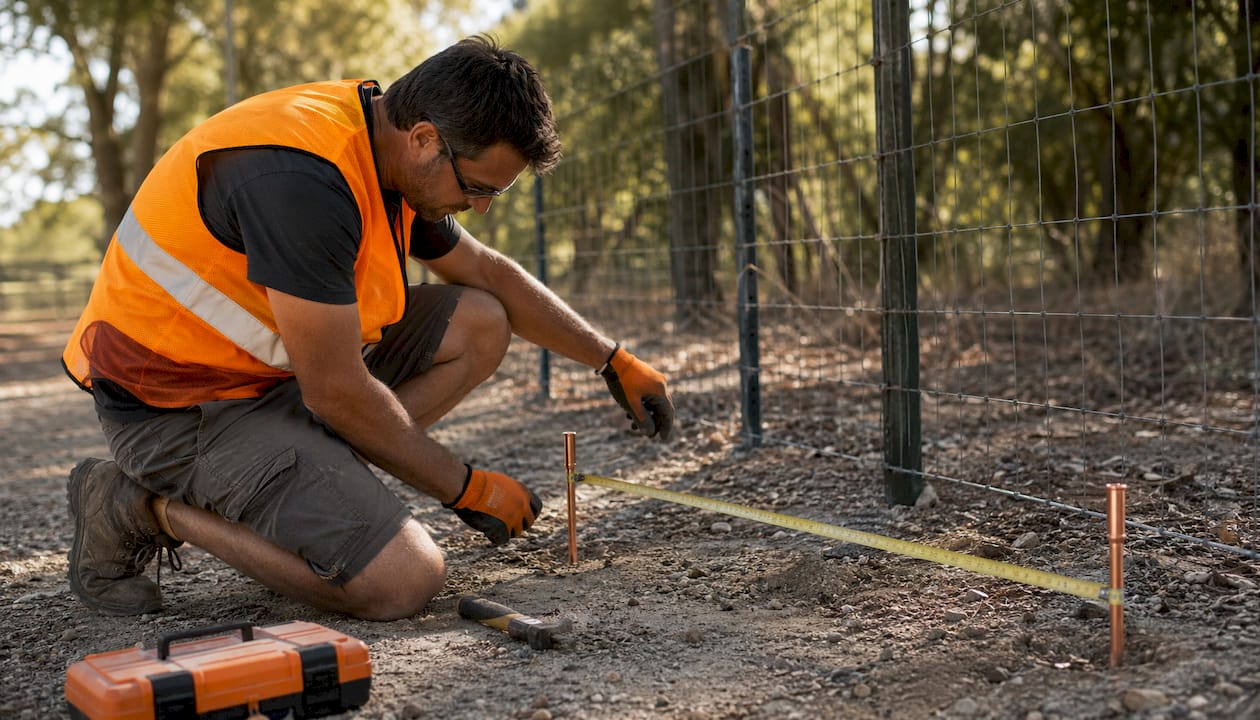
The math behind the rod count comes down to total contact length with moist soil. Each rod needs at least 6 feet in the ground, so a three-rod system requires 18 total feet of rod in moist soil. If your soil is rocky and you can only drive rods 4 feet deep, you need more rods to make up the difference. Spacing matters just as much as count. Rods placed less than 10 feet apart create overlapping electrical fields, which increases resistance rather than reducing it. Ten feet is the minimum; more space between rods is generally better.
In rocky or hardpan soils where vertical depth is limited, driving rods at a 45-degree angle lets you reach the required total contact length without needing to go straight down. Multiple shorter rods angled outward can outperform a single long rod that bottoms out on bedrock.
How do you connect the rods to the energizer correctly?
The connection process is straightforward, but the details matter. A loose clamp or the wrong terminal connection will undermine everything else you’ve done.
- Strip the insulation from each wire end before attaching a clamp. Bare metal to bare metal is what creates a solid electrical connection.
- Use one continuous wire to daisy-chain all rods together rather than running separate wires from each rod back to the energizer. Fewer splices means fewer failure points.
- Secure each connection with a noncorrosive clamp, either bronze or stainless steel. Tighten clamps firmly so there is no movement between the wire and the rod.
- Route the wire from the final rod to the energizer’s ground terminal. The ground terminal is typically marked with a minus sign or a green label. Connecting to the fence terminal by mistake will not shock anything — it will just send current back into the fence wire instead of completing the circuit.
- Avoid connecting your fence grounding system to any existing utility ground or metal underground piping. Doing so can cause interference and, in lightning events, can route dangerous surges through your system.
After everything is connected, tug each clamp by hand to confirm it holds. A clamp that shifts under light pressure will fail under soil movement and seasonal temperature changes.
Expert insights on keeping your grounding system working long-term
Soil moisture is the single most critical factor for a grounding system’s performance, and it’s also the one most farmers forget about after installation. A system that works perfectly in April can drop to near-useless by August if the soil around your rods dries out. Testing annually during the driest part of summer tells you whether your system is still adequate. Measure voltage between the ground wire and the earth at a point away from the rods. High readings mean the ground is struggling and you likely need additional rods.
For genuinely dry or sandy soils, a bentonite and coarse rock salt slurry poured around each rod can improve conductivity immediately. The ratio is two parts bentonite to one part coarse rock salt, mixed with water to a pourable consistency. This treatment is not permanent but can remain effective for several years. Because the salt mixture is corrosive, switch to stainless steel rods and clamps before applying it. Galvanized components will corrode faster than you’d expect under those conditions.
Corrosion at connection points is the other leading cause of grounding failure. Galvanic corrosion from mixed metals builds up gradually and is easy to miss until the fence stops working. Inspect clamps and wire connections at least once a year, and clean off any white or green oxidation with a wire brush before retightening. Catching a corroded clamp early costs you five minutes. Missing it costs you a fence that doesn’t work when you need it most.
Pro Tip: If rocky soil prevents driving rods vertically to the required depth, lay them horizontally in open trenches and apply the bentonite-salt slurry. Space those horizontal rods at least 35 feet apart and plan to add water during dry spells.
Fencefast has the grounding supplies your fence actually needs

Getting the grounding right starts with having the right components on hand before you drive the first rod. Fencefast carries a full selection of electric fence grounding supplies built for agricultural use, including galvanized steel ground rods, insulated lead-out wire, and corrosion-resistant bronze and stainless steel clamps. Whether you’re setting up a new pasture fence or fixing a grounding system that’s been underperforming for years, the product catalog covers what you need without the guesswork of sourcing components from multiple suppliers.
Fencefast also carries Gallagher energizers and accessories, making it straightforward to match your grounding system to your energizer’s joule output from the start. Browse the full fencing and grounding catalog to find the right rod count, wire gauge, and clamp type for your setup, or reach out to the Fencefast team directly for guidance on your specific soil conditions and livestock needs.
Key Takeaways
Proper electric fence grounding requires the right rod count, correct depth in moist soil, compatible metals throughout, and annual testing to catch problems before your livestock do.
| Point | Details |
|---|---|
| Rod count by joule output | Use 3 rods for energizers up to 15 joules, 5 rods for up to 25 joules, and 7 rods for up to 35 joules. |
| Minimum depth per rod | Each rod needs at least 6 feet in moist soil; add more rods if depth is restricted by rock or hardpan. |
| Spacing and placement | Space rods at least 10 feet apart and keep the system at least 33 feet from utility grounds and water pipes. |
| Metal compatibility | Stick to one metal system throughout; use bronze or stainless steel clamps only if bridging galvanized steel and copper. |
| Fencefast supplies | Fencefast stocks galvanized rods, insulated wire, and corrosion-resistant clamps suited for agricultural grounding systems. |
Recommended
- DIY Ground Rod for Electric Fence: Step-by-Step Setup Guide – FenceFast Ltd.
- Electric Fence Ground Rod Installation for Reliable Fencing – FenceFast Ltd.
- Best Ground Rod for Electric Fence: Reliable Containment – FenceFast Ltd.
- Installing Ground Rods for Electric Fence: A Farmer’s Guide – FenceFast Ltd.

