

For most sheep operations, electric netting is the best temporary fence choice: it combines predator deterrence, high visibility, and fast setup in a single roll. If you move paddocks daily or work solo on flat ground, polywire on step-in posts is lighter and faster. High-tensile smooth wire with insulators makes sense for longer-term seasonal subdivisions where you won’t be pulling posts every few days.
Three questions narrow the decision immediately:
- How often will you move? Daily moves favor polywire. Weekly or seasonal subdivisions favor netting or high tensile.
- Do you have predator pressure? Coyotes, dogs, or foxes make netting the clear choice.
- Is your soil dry, rocky, or frozen in winter? If yes, plan for extra grounding or a positive/negative fence design before you buy anything.
Three common setups and rough cost ranges:
- Electric netting (electro-net), 164 ft roll: $80–$180 per roll depending on height and strand count; reusable for several seasons with care
- Polywire or polytape on step-in posts: $30–$80 per 1,000 ft of wire plus posts; lightest and fastest to move
- High-tensile smooth wire with T-post corners and insulators: $0.05–$0.15 per foot of wire; lowest cost per foot but slower to set up and take down
For details on each type, jump to the comparison section. For energizer sizing and grounding, go to the energizer section. For installation steps, see the setup section.
Key Takeaways
The most reliable temporary fence for sheep combines a properly sized energizer, a solid ground system, and a fence type matched to your move frequency and predator risk.
| Point | Details |
|---|---|
| Choose netting for lambs and predators | Electric netting gives the best protection for young lambs and areas with coyote or fox pressure. |
| Size energizer by total energized length | Divide the rated distance by the number of strands; allow roughly 1 joule per mile of energized fence. |
| Prioritize grounding | Drive rods at least 3 feet deep; add rods or use a positive/negative design in dry or frozen soils. |
| Train stock early and monitor 72 hours | One strong corrective contact near water builds lasting fence respect; watch the flock for the first 72 hours after each move. |
| Move every 2–3 days for parasite control | Frequent paddock moves disrupt parasite life cycles and improve forage utilization across the season. |
Table of Contents
- What type of temporary fence for sheep actually works best?
- What components does a temporary sheep fence need?
- How to set up a temporary paddock in 10–30 minutes
- How to train sheep to respect an electric fence
- How to size your energizer and build a grounding system that holds up
- What does temporary fencing actually cost, and is it worth it?
- What does the research say about temporary fencing and parasite control?
- A note on what the field actually teaches you
- Where to find the parts and help you need
- Sources
What type of temporary fence for sheep actually works best?
Temporary electric fencing for sheep falls into three categories, and the right one depends on your operation’s rhythm, not just your budget.
Electric netting (electro-net)
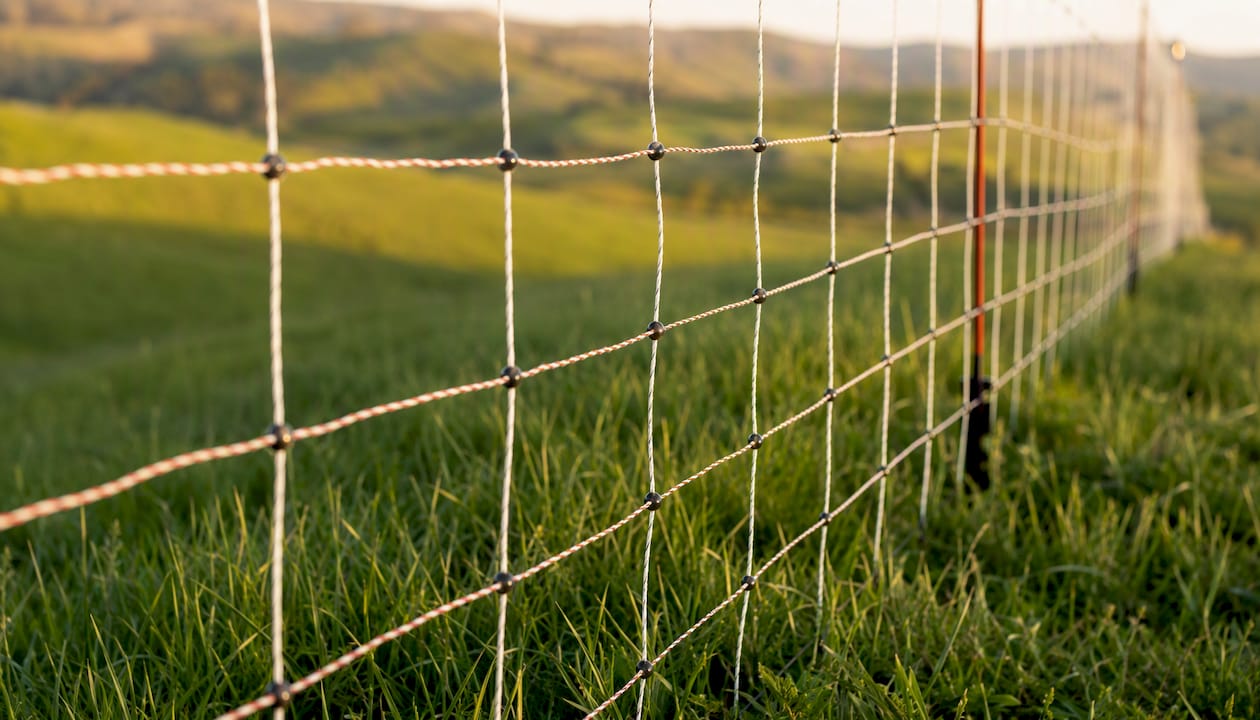
Electro-net is a prefabricated mesh with horizontal electrified strands woven into vertical support strings, typically 35–48 inches tall. You unroll it, push the built-in posts into the ground, connect to an energizer, and you’re done. It’s the go-to for lambs, mixed predator environments, and anyone who wants a visible, physical-plus-psychological barrier. The mesh is obvious to sheep, which reduces accidental contact and panic.
Polywire and polytape
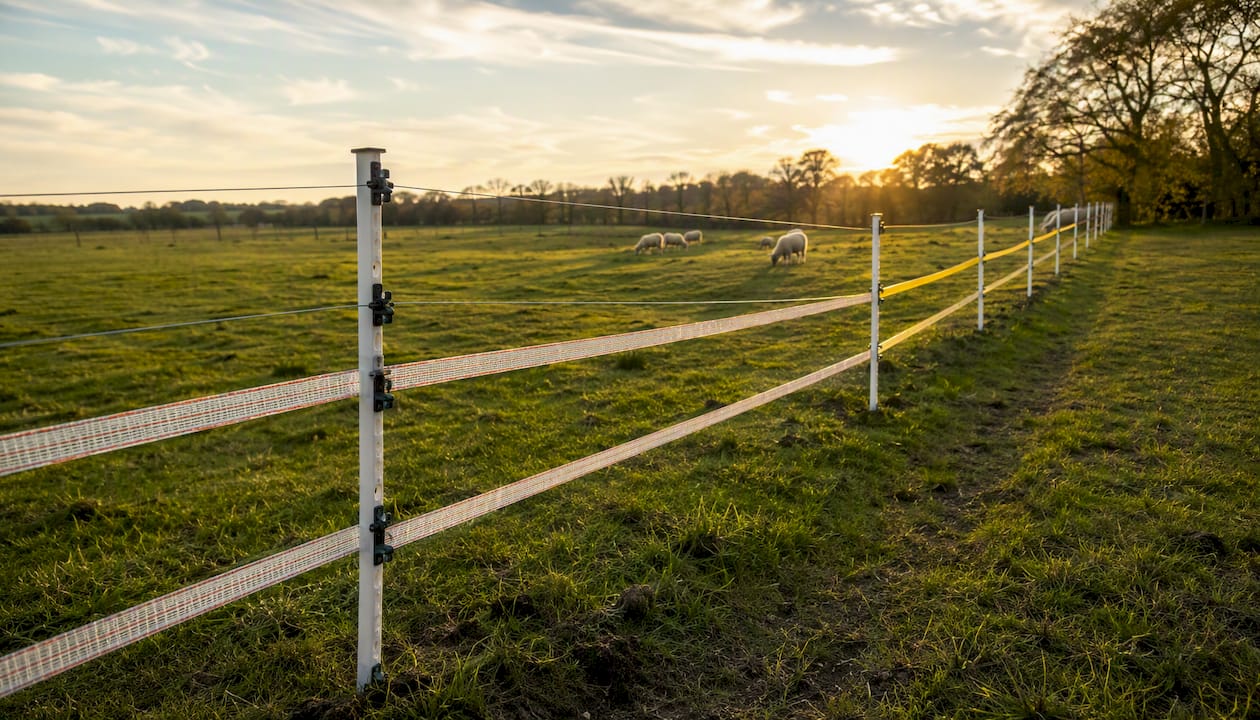
Polywire (thin stranded wire with conductive filaments) and polytape (wider, ribbon-style) run between step-in posts. Oklahoma State University Extension recommends multiple strands for sheep, with strand heights set to contact the animal at chest and neck level. Polytape is more visible than polywire, which matters for flighty breeds or in low-light conditions.
High-tensile smooth wire with insulators
Single or double strands of high-tensile wire clipped to T-posts or wood corners with insulators. Lower cost per foot than netting, but slower to set up and not ideal for lambs or areas with active predators. Best for longer-term seasonal subdivisions where you’re not moving the fence every few days.
| Feature | Electric netting | Polywire/polytape | High-tensile temporary |
|---|---|---|---|
| Best for | Lambs, predator areas, quick setup | Frequent daily/weekly moves | Seasonal subdivisions, long runs |
| Portability/setup speed | Moderate (rolls, built-in posts) | Fast (step-in posts, light wire) | Slow (post pulling, wire tensioning) |
| Visibility to sheep/wildlife | High (mesh structure) | Moderate (polytape) to low (polywire) | Low |
| Power needs | Moderate to high (mesh has more contact points) | Low to moderate | Low |
| Cost per foot/reusability | Higher upfront; good reuse life | Low upfront; wire degrades with UV | Lowest per foot; long lifespan |
| Durability/animal-proofness | Good for sheep; not for large predators | Moderate; breaks under pressure | Good for adults; poor for lambs |
Pro Tip: Choose white or yellow polytape over green or black polywire when working with young lambs or in brushy terrain. The contrast helps sheep see the barrier before they hit it, which makes the initial training event less traumatic and the fence more effective long-term.
When to choose netting: you have lambs, active coyote or fox pressure, or you need a fast setup with no separate post-stringing step. When to choose polywire: you’re moving paddocks daily, working alone, and your flock is already trained to electric fences. When to choose high-tensile temporary: you’re subdividing a large pasture for a full season and won’t be moving the fence more than a few times.
What components does a temporary sheep fence need?
Every temporary electric fence system has three core parts: a ground system, a power source, and the fence itself. Getting any one of them wrong undermines the other two.
| Component | Typical spec range | Sheep-specific note |
|---|---|---|
| Energizer (battery) | 1–2 joule output | Size by total energized length, not just perimeter |
| Energizer (solar) | 0.5–1 joule | Good for remote paddocks; recharge time matters in cloudy weather |
| Energizer (mains/AC) | 1–10+ joule | Most reliable; use where grid power is accessible |
| Step-in posts | 30–48 in tall, 8–12 ft spacing | Lighter plastic posts work for polywire; fiberglass for netting |
| T-post corners | 5–6 ft, driven 18 in | Use at corners and gates; brace for tensioned wire |
| Insulators | Clip-on, screw-in, or ring type | Match to post type; use UV-rated plastic |
| Polywire/polytape | 3–6 strands, 6 in spacing | Chest and neck height for sheep |
| Reels | Geared or standard | Geared reels pay off on frequent moves |
| Ground rods | Galvanized steel, 3–4 ft | Space 10 ft apart; add rods in dry soils |
| Connectors/leads | Insulated alligator or hook type | Check for corrosion at every setup |
Energizer types: Battery energizers are portable and work anywhere, but their advertised range assumes a single strand of wire. Solar energizers suit remote paddocks well, though a run of cloudy days can drop output. Mains energizers deliver the most consistent power and are worth the cord run if you have a barn nearby.
According to UNL Beef, T-posts work well for corners and gates in temporary setups, while step-in posts handle line posts efficiently. For corners under tension, drive a T-post at a slight outward angle and brace it with a second post if the run is long.
Geared reels are worth the extra cost if you’re moving polywire paddocks more than once a week. Standard reels work fine for seasonal setups where you’re rolling up wire only a few times per year.
How to set up a temporary paddock in 10–30 minutes
A clean setup prevents most of the shorts and voltage drops that make sheep test fences. Follow this sequence every time.
- Assess the site. Walk the perimeter. Clear tall grass or weeds from the fence line — vegetation contact is the most common cause of voltage loss. Check for water and shade inside the paddock.
- Place corner posts first. Drive T-posts or push netting corner stakes at each corner. For polywire, brace corners with a second step-in post angled outward.
- String the wire or unroll the netting. Work around the perimeter, clipping wire to insulators or pushing netting posts into the ground. Keep wire taut but not over-tensioned.
- Place the energizer. Set it in a dry, shaded spot. Connect the fence lead to the output terminal and the ground lead to the ground rod.
- Drive the ground rod. Push or drive it at least 3 feet into moist soil, at least 6 feet from any building foundation or water line.
- Power on and test. Use a fence tester or digital voltmeter. Target 2,000–4,000 volts for sheep. Below 2,000 volts, sheep will test the fence.
- Walk the fence line. Check for sags, contact with vegetation, or posts that didn’t seat fully.
What to carry on every setup trip:
- Insulated gloves
- Wire cutters and pliers
- Spare insulators and clips
- Fence tester or multimeter
- Spare battery or charged backup
- Tape and a permanent marker (label energizer terminals)
Safety first: Disconnect the energizer before handling any wire, adjusting posts, or clearing vegetation from the fence line. Never assume a fence is off because it looks off. Test before you touch, and keep children away from the fence line during setup and testing.
For daily paddock moves, space step-in posts 30–40 feet apart on flat ground. You can stretch that to 50 feet on smooth terrain with trained sheep. Tighter spacing (20–25 feet) is worth it in hilly or brushy areas where sags are more likely.
How to train sheep to respect an electric fence
Electric fencing is a psychological barrier, not a physical one. Virginia Tech Extension is direct about this: if the fence isn’t consistently powered, animals learn they can push through it. One bad experience with a dead fence undoes weeks of good training.
The goal is a single, memorable corrective event in a controlled setting. Set up a small, well-powered electrified pen near water or a feed source. Sheep moving toward water will contact the fence naturally. One solid shock at 2,000+ volts is enough to establish respect. Repeat exposure to a weak or intermittent fence does the opposite: it teaches them the fence can be ignored.
The core principle: A sheep that has never touched a live electric fence is curious. A sheep that has touched one at full power is cautious. A sheep that has touched one at low power is dangerous — it has learned the fence won’t stop it.
Oklahoma State University Extension recommends training lambs near water so they encounter the fence while motivated to move. Behavioral improvements generally become apparent with consistent daily training.
Pro Tip: Monitor the flock for the first 72 hours after moving to a new paddock. Sheep test new boundaries, especially after a fence move. Check voltage morning and evening during this window.
For lambs during early season, Teagasc guidance recommends 3–4 strands, with the lowest strand no higher than 6 inches off the ground. Lambs are small and low to the ground; a fence set for adult ewes won’t stop them. During lambing season, add a physical barrier (netting or a solid panel) alongside the electric fence until lambs are old enough to be trained.
How to size your energizer and build a grounding system that holds up
Energizer sizing is where most temporary fence failures start. The advertised range on the box assumes a single strand of wire in ideal conditions. FieldCropNews explains it clearly: divide the rated distance by the number of energized strands to get your realistic coverage.
Quick sizing example:
- You have a 1,200-foot perimeter paddock with 4 strands of polywire.
- Total energized length: 1,200 ft × 4 = 4,800 ft (roughly 0.9 miles).
- An energizer rated for 5 miles on a single strand covers about 1.25 miles of 4-strand fence. That gives you adequate headroom.
- A rule of thumb from Alabama Cooperative Extension: allow approximately 1 mile of fence per joule of output when sizing for multi-strand systems.
Grounding rules:
- Drive ground rods at least 3 feet deep in moist soil. UNL Beef notes that a 3-foot galvanized rod is often sufficient for roughly 2 miles of temporary fence in average soils.
- Space multiple rods at least 10 feet apart.
- Use galvanized steel rods; avoid mixing metals (galvanized rod with copper clamp corrodes quickly).
- In dry or frozen soils, add extra rods or switch to a positive/negative fence design where alternating strands carry the ground return. UGA Forage Extension specifically recommends this approach for winter or drought conditions.
Troubleshooting checklist:
- Voltage below 2,000 V: check for vegetation contact first, then connections, then battery charge.
- Voltage drops after rain: look for a short where wire touches a wet post or wet vegetation.
- Voltage drops in dry weather: add a ground rod or switch to a positive/negative design.
- Corroded connections: clean with sandpaper and apply dielectric grease.
- Intermittent power: check the battery terminals and the lead connections at the energizer.
What does temporary fencing actually cost, and is it worth it?
The short answer: yes, for almost any sheep operation running rotational grazing. The upfront cost is real, but the per-use cost drops fast once you’re moving the same rolls and posts through multiple seasons.
| Option | Approx. cost per roll | Expected lifespan | Portability | Maintenance |
|---|---|---|---|---|
| Electric netting (35 in) | $80–$180 | 5–10 seasons with care | Moderate | Untangle after each move; check posts |
| Polywire (3-strand) | $8–$20 | 3–5 seasons | High | Inspect for breaks; re-tension |
| Polytape (3-strand) | $30–$80 | 3–5 seasons | High | UV degrades tape; replace as needed |
| High-tensile smooth wire | $0.05–$0.15 per foot | 10+ seasons | Low | Minimal; check insulators annually |
A basic starter setup for a quarter-acre paddock with polywire, step-in posts, and a battery energizer typically runs $150–$300 total. A netting setup covering the same area costs $250–$450. Neither figure includes the energizer if you already own one.
Spend more on netting when you have lambs, active predators, or a flock that hasn’t been trained to polywire. Budget polywire is acceptable for trained adult ewes on flat, clean pasture with no predator pressure. The energizer is never the place to cut costs: a weak energizer is the single most common reason temporary fences fail.
For practical sheep fencing ideas that stretch your budget further, this overview of secure pasture setups covers several approaches worth considering.
What does the research say about temporary fencing and parasite control?
The case for frequent paddock moves goes beyond forage management. University of Missouri Extension research links rotational grazing with moves every 2–3 days to meaningful disruption of internal parasite life cycles, particularly barber pole worm (Haemonchus contortus), which is the primary parasite threat in warm-season sheep grazing across the U.S.
The mechanism: Most sheep parasites complete their infective larval stage on the pasture within 3–7 days of being shed. Moving sheep before that window closes removes the flock from the contaminated area before larvae reach peak infectivity. Longer rest periods (21–60 days) allow pasture contamination to drop significantly before sheep return.
Temporary fencing makes this kind of intensive subdivision practical on farms that can’t justify permanent fence infrastructure across every paddock. A single energizer and a few rolls of polywire or netting can divide a 10-acre pasture into 6–8 paddocks, rotating sheep through on a schedule that keeps parasite pressure low and forage quality high.
| Grazing approach | Typical move frequency | Parasite pressure | Forage utilization |
|---|---|---|---|
| Continuous grazing | No moves | High | Low (selective grazing) |
| Rotational (permanent fence) | Every 7–21 days | Moderate | Moderate |
| Intensive rotational (temporary fence) | Every 2–7 days | Low to moderate | High |
| Ultra-high density (daily moves) | Daily | Low | Very high |
The Alabama Cooperative Extension frames temporary electric fencing as one of the most affordable tools for implementing this kind of management, noting that the basic system components (ground, power source, fence) can be assembled for a fraction of the cost of permanent infrastructure.
A note on what the field actually teaches you
The research is solid, and the extension recommendations are worth following. But a few things don’t show up in fact sheets.
Rocky ground is the hardest grounding problem you’ll face. In areas with shallow soil over rock, a standard 3-foot rod won’t seat fully. Angled rods driven at 45 degrees into a crack, or multiple short rods spread across a wider area, often outperform a single deep rod that stops at 18 inches. If you’re farming in the Ozarks, the Hill Country, or anywhere with limestone bedrock close to the surface, budget for extra rods and test voltage before you trust the fence.
Public right-of-way is a liability issue that catches small farms off guard. A temporary fence that crosses or runs adjacent to a public road or trail needs clear signage and, in some states, a specific setback distance. Check your county extension office or state department of agriculture before you run a fence line near any public access point.
Aggressive predators change the math on netting vs. polywire. A single coyote that has learned to test fences will push through polywire that isn’t at full voltage. In high-predator areas, netting plus a dedicated livestock guardian dog is a more reliable combination than any electric fence alone.
Where to find the parts and help you need
Putting together a reliable temporary sheep fencing system means sourcing quality components, not just the cheapest roll of wire. Fencefast carries energizers, electric netting, polywire, step-in posts, ground rods, reels, and connectors suited to sheep operations of every scale, with nationwide shipping across Canada and expert guidance available for system design.

Whether you’re setting up your first rotational paddock or replacing worn-out netting after several seasons, Fencefast’s product catalog covers the full system: from battery and solar energizers sized for multi-strand sheep fences to geared reels that make daily moves faster. Design consulting is available for farms that need help matching energizer output to total energized length or planning a grounding system for dry or rocky soils. Browse the full range and order directly at Fencefast, or reach out for a system recommendation before you buy.
Sources
The recommendations in this article draw on peer-reviewed extension publications from land-grant universities and cooperative extension services across the U.S. and Ireland. These sources cover installation, energizer sizing, grounding, training, and grazing management in detail.
For installation and components: start with the Alabama Cooperative Extension and UNL Beef guides. For energizer sizing, the FieldCropNews piece on joule-to-distance conversion is the clearest practical explanation available. For parasite control and move frequency, the University of Missouri Extension publication is the foundational reference.
- Temporary Electric Fencing Basics - Alabama Cooperative Extension System
- Temporary fencing for pasture management | UGA Forage Extension Team
- Intensive Grazing Management and Parasite Control (University of Missouri Extension)
- Electric Fencing for Sheep | Oklahoma State University Extension
- Considerations for Temporary Fence Around Cropland | UNL Beef
- Electric Fencing for Small Ruminants (Virginia Tech Extension)
- Temporary fencing for sheep - Teagasc

