

Insulated lead-out wire is required whenever your ground conductor must pass near metal structures, cross under or through buildings, or run within 33 feet of a utility or building service ground. That’s the governing rule. The second rule, equally non-negotiable: your energizer’s output in joules determines the conductor gauge. According to Virginia Tech Extension, energizers under 20 joules work fine with 12.5-gauge galvanized steel insulated lead-out wire; anything above 20 joules calls for high-conductive lead-out cable or 6-gauge copper.
Here’s what that means in practice:
- Under 20 joules: 12.5–14 ga insulated lead-out wire is acceptable for most installations.
- Over 20 joules: Use high-conductive lead-out cable or 6-gauge copper to handle the current without resistance loss.
- Safety separation: Keep your fence grounding system at least 33 feet from utility grounds, house service box grounds, or metal water pipes.
The sections below walk through installation steps, rod specs, conductor selection, routing rules, and troubleshooting in that order.
Key Takeaways
A properly sized insulated lead-out wire, matched to your energizer’s joule output and routed away from utility grounds, is the single most important factor in a reliable electric fence grounding system.
| Point | Details |
|---|---|
| Match gauge to energizer output | Under 20 J: 12.5–14 ga insulated; over 20 J: high-conductive lead-out or 6 ga copper. |
| Use insulation near structures | Insulated lead-out is required whenever the conductor passes within 33 feet of utility or building service grounds. |
| Size your rod system correctly | 3 rods for small energizers, 5 rods for up to 25 J; — for up to 35 J; space rods 10 feet apart. |
| Run one continuous conductor | A single unbroken lead-out from energizer to all rods reduces corrosion and resistance failure points. |
| Fencefast for components | Fencefast carries insulated lead-out wire, ground rods, clamps, and Gallagher energizers matched to these specs. |
Table of Contents
- How to run insulated ground wire from your energizer to ground rods
- Ground rod system specs: how many rods, how deep, and where to place them
- Which wire gauge and conductor type should you use?
- Materials, clamps, and corrosion: what to buy and what to avoid
- When does your ground conductor need insulation?
- How to test and troubleshoot a weak grounding system
- What insulation materials are used for ground wires?
- How environment affects insulated ground wire longevity
- Safety precautions when installing insulated ground wires
- Maintenance tips for insulated ground wire conductors
- The grounding mistake most installers make
- Fencefast has the wire, rods, and energizers you need
- Sources
How to run insulated ground wire from your energizer to ground rods
A clean, continuous run from energizer to rods is the single biggest reliability factor in any grounding system. Here’s how to do it right.
- Locate your energizer and pick a rod site. Choose a spot where the soil stays relatively moist year-round — low spots, areas under eaves, or shaded ground hold moisture better in dry spells. Moist soil dramatically improves rod-to-earth conductivity.
- Run a continuous insulated lead-out from the energizer’s ground terminal to the first rod. Powerflex’s grounding reference makes the case clearly: bare wire loses return current the moment it contacts wet grass, soil, or any grounded object along the route. Insulation prevents those unintended current paths.
- Daisy-chain your rods with one unbroken conductor. Virginia Tech’s grounding guide recommends a continuous, unbroken wire connecting all rods in sequence. Every splice or mechanical join is a potential corrosion point and a resistance risk.
- Clamp each rod tightly. Use stainless steel or bronze clamps, especially if any copper is in the circuit. Loose clamps corrode faster and add measurable resistance.
- Return the final conductor to the charger’s ground terminal. Confirm the terminal connection is clean and tight before energizing.
Materials checklist:
- Insulated lead-out wire rated for fence voltages (10–14 ga, 20 kV rating recommended)
- Ground rod clamps: stainless steel or bronze preferred
- Ground rods: galvanized steel, 6 feet minimum length
- Conduit for driveway crossings or high-traffic areas
Pro Tip: Bury the lead-out wherever livestock or machinery could damage it. Where the conductor must pass close to building utilities, insulated cable is not optional — it prevents cross grounding with the building’s service ground.
Ground rod system specs: how many rods, how deep, and where to place them
Rod count and depth are where most DIY grounding systems fall short. The Virginia Tech PDF guide ties rod counts directly to energizer output:
The logic is total feet of rod in moist soil, not just rod count. If your soil is rocky or dry and you can’t drive a rod to 6 feet, add more rods rather than accepting a shallow installation. Space rods roughly 10 feet apart. For a deeper look at rod depth and why it matters, Fencefast’s guide on electric fence ground rod depth covers the tradeoffs in detail.
Additional placement rules:
- Keep the entire grounding system at least 33 feet from utility grounds, building service grounds, or metal water pipes.
- Place rods where soil stays moist: low-lying areas, shaded ground, or spots that drain slowly after rain.
- For small solar energizers with short rods, the BC Ministry of Agriculture grounding guide notes that in dry or frozen conditions, adding grounded fence wires as a parallel return path can compensate for poor earth conductivity.
Which wire gauge and conductor type should you use?
Matching conductor to energizer output is straightforward once you know the thresholds. The Virginia Tech guide sets the standard, and Beef Magazine’s grounding tips add the practical 20 kV rating recommendation for most farm installations.
| Energizer Output | Conductor Type | Notes |
|---|---|---|
| Under 20 J | 12.5–14 ga galvanized steel insulated | Standard for most small to mid-size farms |
| Over 20 J | High-conductive lead-out or 6 ga copper | Required for larger energizers; copper has lower resistance |
| Short runs (under —) | 12.5–14 ga insulated | Gauge is flexible for short distances; insulation still required |
Three conductor types cover most installations:
Galvanized steel insulated fence wire handles the majority of farm setups under 20 joules. It’s affordable, widely available, and compatible with galvanized ground rods and clamps.
High-conductive lead-out cable is a purpose-built product with a copper-clad or aluminum core wrapped in UV-stable insulation. It’s the right call for energizers above 20 joules or runs longer than 100 feet.
Bare 6-gauge copper works well when your ground rods are also copper, but it corrodes aggressively when paired with galvanized steel. Use it only in an all-copper system.
For a full breakdown of ground wire options, Fencefast’s complete ground wire selection guide is worth bookmarking.
Pro Tip: Avoid mixing copper and galvanized steel in the same circuit. If you must combine them, stainless steel or bronze clamps slow galvanic corrosion significantly.
Materials, clamps, and corrosion: what to buy and what to avoid
The connection between rod and conductor is where grounding systems quietly fail. Corrosion at a clamp adds resistance; enough resistance and your fence loses punch.
Preferred combinations:
- Galvanized steel rods + galvanized wire + stainless or bronze clamps
- Copper rods + copper wire + copper or bronze clamps
- Never rebar — it rusts unevenly and doesn’t make reliable electrical contact
Avoid mixing copper and galvanized steel unless you use compatible clamps and inspect them annually. The electrochemical reaction between the two metals accelerates in wet soil, which is exactly where your rods should be.
On insulation type: double-insulated underground cable belongs anywhere the conductor is buried or crosses under driveways. Single-insulated hook-up wire is fine for aboveground runs that won’t be exposed to UV for extended periods, but it degrades faster in direct sun.
Pro Tip: Buy clamps rated for the conductor size you’re using. An undersized clamp on a 6-gauge conductor won’t seat properly and will work loose over one freeze-thaw cycle.
When does your ground conductor need insulation?
The short answer from Doityourself: whenever the conductor passes near building structures, use insulated wire to prevent cross grounding with the building’s service ground. That’s the rule. Here’s when it applies:
- The lead-out passes within 33 feet of a utility ground, building service box, or metal water pipe.
- The conductor crosses under or through a building, barn, or equipment shed.
- The wire runs alongside metal fence posts, metal conduit, or other grounded structures.
- The conductor is buried where it could contact moist soil directly (use double-wall underground jacket here).
For exposed aboveground runs away from structures, UV-stable insulation extends service life considerably. Standard PVC degrades in direct sunlight within a few seasons in most U.S. climates. Polyethylene or cross-linked polyethylene (XLPE) insulation holds up better under prolonged UV exposure.
Use conduit wherever the conductor crosses a driveway, gate opening, or high-traffic area. A cracked insulation jacket from a tractor tire is a grounding failure waiting to happen.
How to test and troubleshoot a weak grounding system
A fence that’s running but not delivering a reliable shock to livestock is almost always a grounding problem. Here’s how to diagnose it systematically.
- Check voltage at the energizer. Use an electric fence voltmeter. A reading significantly below the energizer’s rated output points to a system-wide issue, not a fence wire problem.
- Short the fence to ground. Place several metal rods or a length of wire across the fence line to ground, then re-read voltage at the energizer. If voltage drops sharply, the grounding system can’t handle the load.
- Walk the lead-out and inspect every clamp. Look for green or white corrosion, loose bolts, or cracked insulation. Measure voltage drop across each connection with the voltmeter probes on either side of the clamp.
- Check rod depth and soil moisture. Pull one rod and examine it. Dry, pale soil on the rod means it’s not reaching moist earth. Add rods or reposition to wetter ground.
- Verify the continuous run. A splice that’s failed internally won’t show visible damage. Replace any section of lead-out that shows resistance higher than the rest of the run.
Common fixes in order of frequency: add rods to increase total rod length in moist soil, replace corroded clamps, switch to a single continuous unbroken lead-out, and upgrade conductor gauge if the energizer exceeds 20 joules. Fencefast’s grounding techniques guide covers these fixes with additional detail.
Pro Tip: Test your ground after a dry spell, not just after installation. Dry soil can cut effective rod contact dramatically, revealing a grounding system that looked fine in spring but fails by August.
What insulation materials are used for ground wires?
The insulation jacket on a lead-out wire does more than prevent accidental contact. It determines how long the conductor survives in the field.
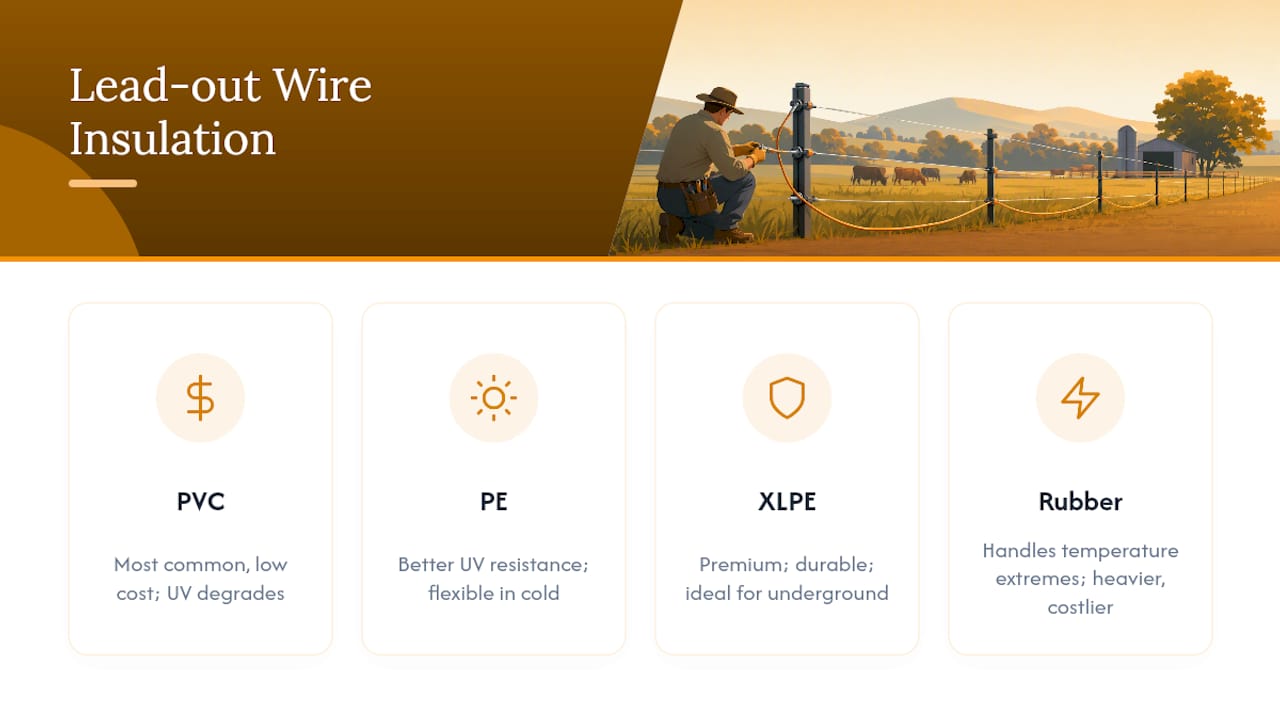
PVC (polyvinyl chloride) is the most common and least expensive option. It handles moderate temperature ranges and resists moisture well, but UV exposure degrades it over several seasons. Fine for buried or shaded runs; less ideal for long aboveground spans in direct sun.
Polyethylene (PE) offers better UV resistance and flexibility in cold temperatures. It’s the standard choice for aboveground lead-out wire in most agricultural applications and holds up through freeze-thaw cycles better than PVC.
Cross-linked polyethylene (XLPE) is the premium option. The cross-linking process improves heat resistance, chemical resistance, and long-term UV stability. Double-wall XLPE cable is the right choice for underground crossings or any installation where the conductor will be in the ground for years without inspection.
Rubber-jacketed cable appears in some older installations and handles temperature extremes well, but it’s heavier and more expensive than PE or XLPE for equivalent performance.
How environment affects insulated ground wire longevity
UV radiation is the fastest killer of aboveground insulation. In high-altitude or high-UV regions of the U.S. Southwest and Mountain West, unprotected PVC can crack and split within two to three seasons. Polyethylene and XLPE extend that considerably.
Moisture matters differently depending on where the wire sits. Buried conductors in consistently wet soil stay flexible longer than those in soil that cycles between wet and bone dry. Repeated wetting and drying stresses the jacket at any point where it contacts a clamp or fitting.
Temperature extremes affect flexibility. PVC becomes brittle below about 14°F (minus 10°C), which means a sharp bend in a buried conductor can crack the jacket during a hard freeze. XLPE and PE remain flexible at lower temperatures, which is why they’re preferred in northern U.S. climates.
Livestock contact is an underrated factor. Cattle and horses will chew or rub against any wire they can reach. Where the lead-out is accessible, bury it or run it through conduit.
Safety precautions when installing insulated ground wires
Electric fence grounding systems operate at high voltages, and a few installation rules keep that voltage where it belongs.
Always de-energize the fence before working on the ground circuit. The ground terminal carries return current when the fence is live, and contact with a live ground terminal on a high-joule energizer is painful and potentially dangerous.
Maintain the 33-foot separation from utility grounds and building service grounds. Cross grounding between a fence system and a building’s electrical ground can create stray voltage that affects both livestock and people near water troughs, metal gates, or wet concrete.
Use insulated tools when tightening clamps on an energized system. Better practice: de-energize, clamp, re-energize, test.
Follow the energizer manufacturer’s grounding instructions. Most manufacturers specify minimum rod counts and conductor gauges for their units, and those specs are the baseline, not the ceiling.
For small energizers like the Gallagher Live Lite, the grounding requirements are modest, but the separation and insulation rules still apply.
Maintenance tips for insulated ground wire conductors
A grounding system that worked at installation can degrade silently over two or three seasons. Annual inspection catches most failures before they affect fence performance.
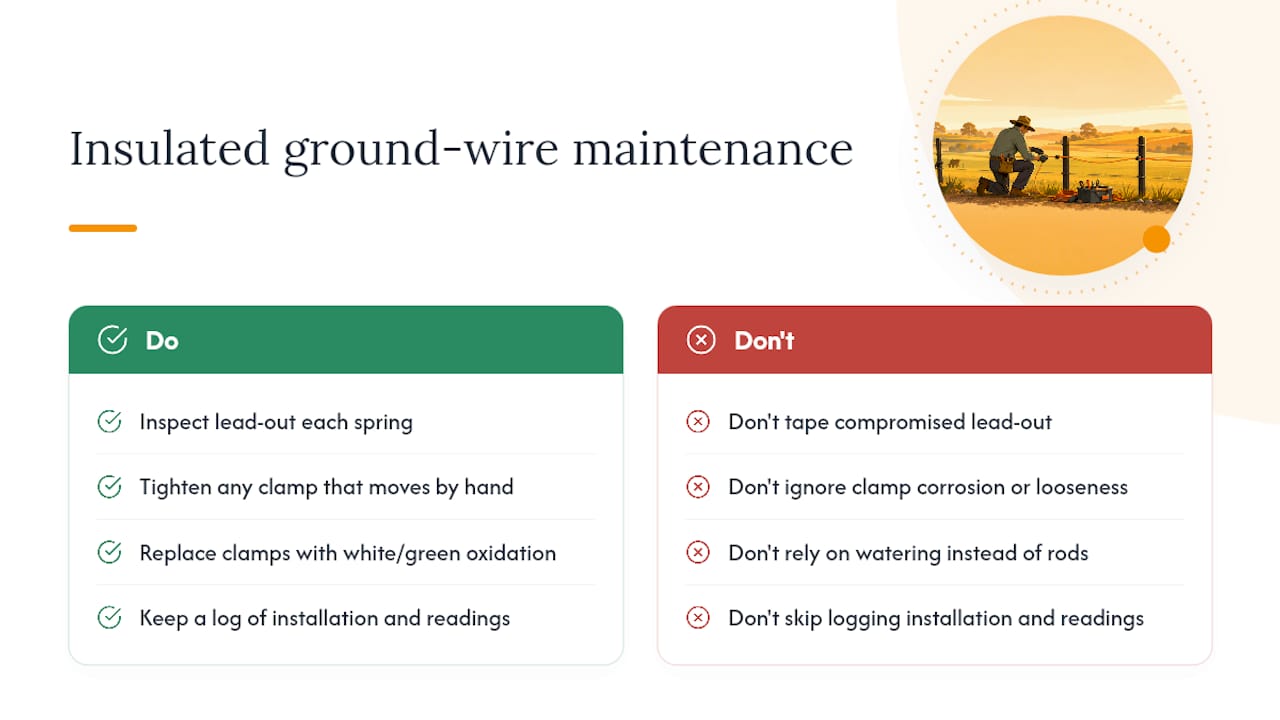
Each spring, walk the entire lead-out and check every clamp for corrosion, looseness, or cracked insulation at the contact point. Tighten any clamp that moves by hand. Replace any clamp showing white or green oxidation that doesn’t clean off.
Check insulation continuity visually. Cracks, splits, or sections where the jacket has pulled away from a clamp fitting are failure points. A section of lead-out with compromised insulation near a building or metal structure should be replaced, not taped.
After a dry summer, re-test voltage and compare it to your spring baseline. A drop of more than 10–15% suggests the rods are no longer reaching moist soil. Adding a rod in a wetter location is faster and more reliable than watering the existing rod site.
Keep a simple log: installation date, rod count and depth, conductor gauge, and voltage readings at installation and each annual check. That record makes troubleshooting much faster when something changes.
The grounding mistake most installers make
Most grounding failures on farms come down to one of three things: rods that are too short for the soil conditions, conductors that were spliced instead of run continuously, or metal combinations that corrode faster than anyone expected.
The continuous run rule deserves more emphasis than it usually gets. Every splice in a lead-out is a mechanical connection that will corrode at a different rate than the wire itself. On a farm where the ground circuit might not be inspected for two or three years, a corroded splice can cut effective grounding by half before anyone notices the fence is underperforming.
Mixing metals is the other silent failure. A copper clamp on a galvanized rod in wet soil will show measurable corrosion within one season. It’s not a theoretical concern — it’s a predictable outcome of basic electrochemistry. Use matched metals or stainless clamps, and the problem largely disappears.
For anyone building out a new system or diagnosing an existing one, Fencefast’s ground rod installation guide is a practical starting point.
Fencefast has the wire, rods, and energizers you need
Getting the grounding system right is the foundation of any electric fence that actually works. Fencefast carries the full range of grounding components — insulated lead-out wire, ground rods, compatible clamps, and energizers from Gallagher — so you can spec and order everything in one place without hunting across multiple suppliers.

Whether you’re grounding a small solar energizer for a rotational grazing paddock or wiring a high-joule system for a large perimeter fence, Fencefast’s product catalog is built around the same specs covered in this guide. The Gallagher Live Lite is a strong starting point for smaller installations, and the broader catalog covers the wire gauges, clamp types, and rod lengths that match any energizer output. Browse the full selection at Fencefast and get your grounding system specced correctly from the start.
Sources
The recommendations in this guide draw from the following sources. Each is worth consulting directly for installation diagrams, soil-specific guidance, and manufacturer specs.
- Electric Fencing: How to Install a Grounding System | VCE Publications | Virginia Tech
- Grounding System For Electric Fences - BC Ministry of Agriculture
- Electric Fence Grounding Technical Reference - Powerflex
- 6 Tips For Proper Electric Fence Grounding - Beef Magazine
- What gauge of wire do I need to connect my electric fence to the .7 joules controller that is 25ft away? - DIY Stack Exchange

