

Start with structural integrity and safety, then handling flow and biosecurity, and only after that turn to energy or comfort upgrades. Follow that order, check permit requirements before any major work begins, and apply the two-thirds rule: if fixing a building costs more than two-thirds of building new, rebuild instead of retrofitting.
TL;DR:
- Structural issues like corrosion and foundation cracks most often prompt a rebuild rather than repair, especially when they worsen rapidly.
- Upgrades identified as safety-critical or handling bottlenecks should be prioritized, with costs for repairs exceeding two-thirds of rebuilds indicating a replacement is better.
- Permitting and environmental approval processes must be verified early, especially nutrient management and separation distance rules, to avoid project delays.
- Energy and ventilation improvements like sealing leaks and installing variable-speed fans can significantly reduce operating costs and improve barn conditions.
- Address small but impactful issues such as manure and bedding odors, water quality, and feed storage to prevent long-term costs and farm management problems.
Table of Contents
- Checklist for livestock facility upgrades: the site-walk version
- How to inspect structure, floors, and handling equipment
- Budgeting an upgrade: the two-thirds rule and realistic timelines
- Permits, approvals, and environmental limits to check first
- Ventilation, insulation, and energy upgrades that pay for themselves
- Biosecurity, animal flow, and worker safety fixes
- Procurement and contractor selection: staying on schedule
- Fencefast and Juiced: matching checklist items to real solutions
- Water supply and drainage: availability, quality, and waste removal
- Feed storage and delivery: what to upgrade and why
- Emergency preparedness: fire safety and evacuation planning
- Waste and odor management beyond manure storage
- Get the right equipment for your upgrade project
- What three real projects taught us
- Sources
Checklist for livestock facility upgrades: the site-walk version
A site walk works best with a clipboard, not a memory. Walk the whole operation once, score each item, and let the scores set your order of work rather than whatever feels most urgent that morning.
- Structure: roof leaks, foundation cracks, corroded steel supports, sagging trusses, spalling concrete.
- Handling equipment: worn gate latches, misaligned chutes, alley widths that pinch or bottleneck, headlock function.
- Biosecurity: uncontrolled entry points, missing cleaning or disinfection zones, gaps that let rodents or birds in.
- Utilities: exposed wiring, dead or inadequate lighting, missing emergency power cutoffs.
- Manure and drainage: slope direction, sediment basin capacity, storage volume against herd size, setback distances from water sources.
- Energy and ventilation: fan function, insulation gaps, air leaks around doors and vents.
Score each category 1 to 5, with 1 meaning “fix this before animals go back in.” Anything scoring a 1 or 2 on structure or handling safety jumps to the front of the line automatically, regardless of budget.
Pro Tip: Photograph every checklist item as you go, even the ones that pass. Six months later, that baseline photo set is the fastest way to prove what changed and justify the next round of spending to a lender or partner.
How to inspect structure, floors, and handling equipment
Work from the ground up, because a failure at the foundation makes every upgrade above it temporary.
- Check concrete slats and floors first. Hairline cracks are normal aging; spalling, exposed rebar, or slats that flex under weight signal a floor system nearing the end of its service life.
- Test footings and foundation walls. Look for horizontal cracking, wall bowing, or gaps where the wall meets the slab. These usually point to soil movement or drainage failure underneath, not just cosmetic wear.
- Inspect steel framing and roof trusses. Rust that has pitted through steel, or trusses with visible sag between supports, mean the structure is carrying less margin than it was designed for.
- Walk every gate, panel, and chute. Latches that stick, panels bent from animal pressure, and chutes out of alignment all raise injury risk for both animals and handlers, based on the layout and sizing benchmarks in handling-facility design checklists.
- Document everything before deciding. A photo, a measurement, and a one-line note for each defect turns a walk-through into a prioritized repair list you can hand to a contractor or lender.
Corrosion through structural steel and foundation failure are the two findings that most often push a project from “repair” toward “rebuild,” since both compound quickly once they start.
Budgeting an upgrade: the two-thirds rule and realistic timelines
Before committing to a plan, run the numbers against a simple heuristic: if retrofitting costs more than two-thirds of a comparable new build, rebuilding is usually the better long-term investment. The exception is a building with strong “good bones,” meaning sound concrete slats and a stable foundation, where retrofit dollars still buy years of useful life.
Break the work into three phases instead of one giant project:
- Immediate (weeks 0 to 3): anything tied to safety, like broken latches, exposed wiring, or a failing headlock.
- Seasonal (off-season window): ventilation upgrades, insulation, lighting, and drainage work that benefits from dry weather or an empty barn.
- Long-term (12 to 18 months out): major rebuilds, new manure storage, or automation that needs full design and permitting lead time.
Your budget should include capital costs, ongoing operating costs, permitting fees, and a contingency line of at least 10 to 15 percent, because hidden foundation or wiring issues surface more often than owners expect once walls come down.
Permits, approvals, and environmental limits to check first
Contact your local building authority before you order materials, not after. In Ontario, for example, projects generating more than 5 nutrient units require an approved Nutrient Management Strategy before a building permit is issued, and similar nutrient or siting rules apply in many other jurisdictions under different names.
Confirm these before breaking ground:
- Building permit requirements for the specific structure type and size.
- Nutrient management or manure storage approvals, if your herd size triggers them.
- Site characterization or separation distance rules from wells, waterways, or neighboring property lines.
- Written documentation of every approval, kept with your project file for future inspections or resale.
A short phone call to your local authority in week one can save months later, particularly on manure storage and separation distance rules that vary by region and herd size.
Ventilation, insulation, and energy upgrades that pay for themselves
Air quality and energy costs are tied together more tightly than most managers assume. A leaky building forces fans to work harder, and a fan running constantly on a fixed speed wastes energy every hour it runs above what the animals need.
Work through this list on your next walk:
- Confirm fans actually reach rated output, not just that they spin.
- Check that inlet baffles or curtains open and close fully, without binding.
- Look for insulation gaps at eaves, doors, and around ductwork.
- Seal obvious air leaks before adding any new equipment.
- Consider variable-speed drives (VSDs) on fans and heat recovery units on exhaust air.
Variable speed drives (VSDs) on fans and heat recovery units can significantly reduce energy use and heating costs in barns, making ventilation controls one of the fastest-payback items on the entire checklist, according to efficiency research on pig and poultry shed retrofits.
Biosecurity, animal flow, and worker safety fixes
Disease risk and injury risk both trace back to the same root cause most of the time: poor flow. Alleys that are too narrow, crowding pens that bottleneck, or a two-lane setup where animals can turn back all raise stress and slow work.
- Widen alleys and switch to single-lane movement where crowding is common.
- Add a controlled entry point with a boot wash or disinfection mat.
- Seal gaps where rodents or wild birds enter feed and bedding areas.
- Install non-slip flooring and guard rails at loading points and working chutes.
Pro Tip: A single-lane, curved alley almost always outperforms a straight one for cattle, because animals move more calmly when they can’t see what’s waiting at the far end until they’re already committed.
Procurement and contractor selection: staying on schedule
Order long-lead items the moment your plan is set, not when the crew shows up ready to install them.
- Identify long-lead items early. Specialized gates, automated headlocks, and sensor systems can take weeks or months to arrive, so order them before demolition starts.
- Scope contractor bids in writing. Ask for references on similar livestock projects and confirm they carry proper insurance and relevant trade licensing.
- Stage work in sections. Keep at least part of the facility operational so animals always have safe housing during construction.
- Test everything before sign-off. Run gates, fans, and alarms under real load before the contractor leaves the site.
Fencefast and Juiced: matching checklist items to real solutions
As an authorized Gallagher eShepherd dealer for 26 years, Fencefast supplies the fencing hardware, virtual fencing collars, and design consulting that map directly onto this checklist. Whether you’re replacing worn latches from your structural inspection or rethinking your handling equipment layout, the product catalog and grant guidance (including OFCAF and BMP programs) exist to shorten the gap between finding a problem and fixing it.
Water supply and drainage: availability, quality, and waste removal
Water gets overlooked on most site walks because it’s usually working, until it isn’t. Start by confirming supply volume actually meets peak demand, not just average demand. A dairy or feedlot operation that added animals over the years without recalculating water line capacity often discovers the shortfall only during the hottest week of summer, when it matters most.
Test water quality at the point of use, not just at the source. Iron, sulfur, and bacterial contamination can build up in old pipes or troughs even when the well or municipal supply tests clean. Cracked or algae-lined troughs are a common source of contamination that a simple visual check will catch faster than a lab test.
Drainage deserves equal attention. Check that pen and alley slopes actually direct water and waste away from animal resting areas, not toward them. A common mistake in older facilities is a floor that was level when poured but has settled unevenly over decades, creating pooling spots that breed bacteria and soften hoof health.
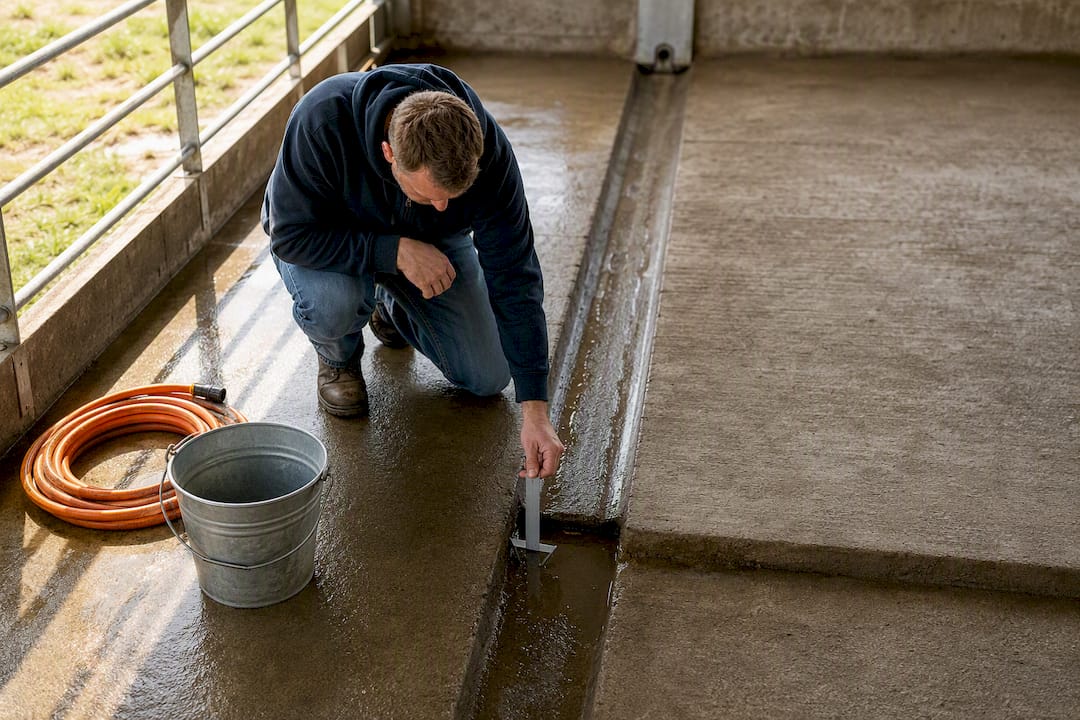
Waste removal systems should be sized for your current herd, not the one you had ten years ago. If effluent lines back up during heavy rain or high-use periods, that’s a capacity problem, not a maintenance problem, and it usually means upgrading pipe diameter or adding a secondary containment path rather than just clearing a clog. Separation distances from wells and waterways, covered earlier under permitting, apply here too. Confirm your storage and drainage layout still meets those distances after any expansion.
Feed storage and delivery: what to upgrade and why
Feed spoilage and delivery bottlenecks cost money quietly, a little at a time, which is exactly why they’re easy to miss on a fast walk-through. Start with storage structures themselves. Bins, silos, and bunker walls should be checked for moisture intrusion, since even small leaks can spoil feed from the inside out long before visible mold appears on the surface.
Check that storage capacity actually matches delivery schedules and herd size. A bin sized for a smaller herd forces more frequent deliveries, which raises both cost and the risk of running low during bad weather. On the other end, oversized storage that sits half full for months increases the odds of spoilage before the feed gets used.
Delivery systems, whether auger, conveyor, or manual cart, should move feed with minimal handling and minimal exposure to weather. Augers with worn flighting or motors running past their rated life are common failure points that show up as slow delivery long before they fail outright. If your operation still relies on manual feed carts across long distances, that’s often one of the more cost-effective livestock upgrades available, since mechanizing delivery reduces labor hours every single day rather than as a one-time fix.
Bunk and feeder design matters just as much as storage. Feeders that allow excessive waste through poor lip design or inadequate headspace per animal translate directly into higher feed costs over a year, even when nothing is technically broken.
Emergency preparedness: fire safety and evacuation planning
Fire risk in livestock buildings climbs when dust, dry bedding, and electrical wiring share the same space, which describes most older barns. Start your emergency checklist with a walk of every electrical panel and junction box, checking for exposed wiring, rodent damage, or dust buildup near heat sources like heat lamps and space heaters.
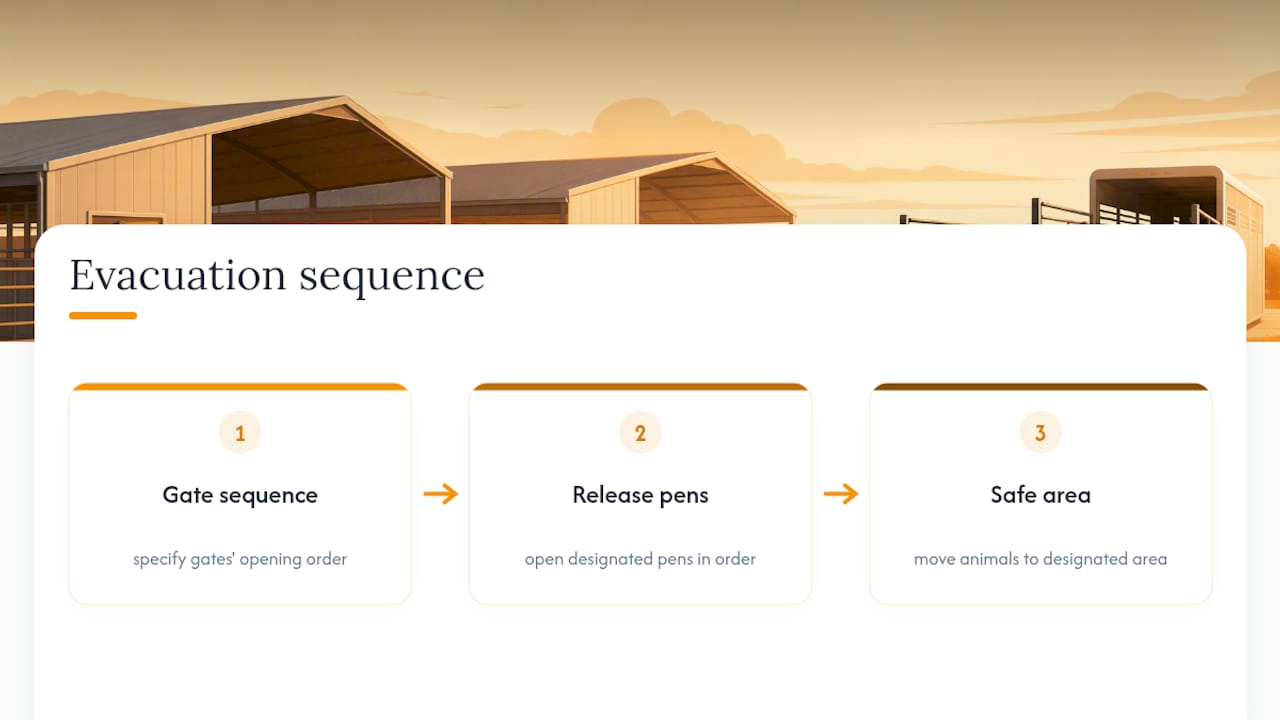
Every facility needs a documented evacuation plan, not just a verbal understanding among staff. That plan should specify gate sequences, which pens open first, and where animals go once they’re out, since a documented plan is the only version that still works when the person who normally handles it isn’t on-site during an actual emergency.
Fire suppression equipment should be checked on a set schedule, not left until an inspector asks about it. Extinguishers need current inspection tags, and any sprinkler systems need functional testing rather than a visual glance at the pipes.
Backup power deserves a place on this list too. Ventilation fans and water pumps that stop during a power outage can create a welfare emergency within hours in hot weather, so a generator with enough capacity to run critical systems, tested under real load rather than just started and shut off, belongs on every disaster preparedness checklist for facilities running enclosed housing.
Finally, post evacuation routes and emergency contact numbers where staff and visitors can see them, and review the plan with every new hire, not just annually with the same three people who already know it by heart.
Waste and odor management beyond manure storage
Manure storage and separation distances get most of the attention, but odor and waste issues often come from smaller sources that never make it onto a formal checklist. Bedding disposal is one of them. Old bedding that sits in a pile near buildings rather than getting composted or spread promptly becomes both an odor source and a pest attractant.
Dead animal disposal deserves its own protocol, separate from general waste handling. Facilities without a clear, documented procedure for mortality often default to whatever’s convenient in the moment, which creates both odor and biosecurity risk. A designated composting area or scheduled pickup service, decided in advance rather than improvised, solves this cleanly.
Feed waste and spilled bedding that accumulate around feeders and along fence lines break down slowly and generate odor long after anyone notices they’re there. A regular sweep of these areas, built into a weekly routine rather than an annual cleanup, keeps odor from compounding.
Ventilation design plays a role here too, connecting back to the airflow checklist covered earlier. Poor air exchange doesn’t just affect animal comfort, it traps odor compounds inside the building and pushes them out in concentrated bursts whenever doors open, which is often the source of complaints from neighboring properties even when the facility itself is well managed.
Get the right equipment for your upgrade project
Fencefast is built for exactly the gap between finding a problem on your checklist and having the right part in hand to fix it. Instead of sourcing gates, latches, and fencing components from three different suppliers and waiting on backorders, you get one catalog built specifically for agricultural fencing and containment, backed by 26 years as an authorized Gallagher dealer.

Start with these categories based on what your site walk turned up:
- Fence Equipment for gates, panels, and hardware replacements.
- Fence Tools & Fasteners for the connectors and staplers your crew needs on install day.
- Virtual fencing solutions if your upgrade plan includes GPS-based herd management instead of, or alongside, traditional fencing.
If you’re not sure where to start, Fencefast’s design consulting team can walk through your checklist results and help scope a project, including guidance on OFCAF and BMP grant programs that may offset the cost of virtual fencing adoption. Visit the Fencefast homepage to start a conversation about your next upgrade.
What three real projects taught us
Timing beats budget every time. A safety fix delayed one season becomes an injury the next. Hidden costs live behind walls, not in your spreadsheet, so build a contingency line before you need it, not after. And future-proof every upgrade for the herd size you’ll have in five years, not the one you have today, because retrofitting twice costs more than building right once. Run your checklist this week, and reach out for design help before you order a single gate.
— Juiced
Sources
- Ontario
- Retrofit vs rebuild: How to decide if your hog barn is worth saving | PorkBusiness
- AEN-145: Designing or Reworking Your Cattle-handling Facilities: A Checklist for Success | University of Kentucky

