
TL;DR:
- Proper site assessment and goal-setting are crucial for selecting suitable fence posts.
- Different materials and post sizes are needed for corners, gates, and line runs depending on conditions.
- Regular maintenance and strategic investments prolong fence lifespan and reduce long-term costs.
Fencing costs across Canada have climbed sharply in recent years, and a bad post choice can turn one repair job into a recurring expense that drains your operation season after season. Whether you run cattle across open pasture or manage horses in smaller paddocks, the fence post is the backbone of your entire system. Get it wrong and you are looking at leaning lines, broken wire, and livestock on the wrong side of the fence at the worst possible time. This guide cuts through the noise and gives you a clear, practical framework for selecting, installing, and maintaining fence posts that actually hold up to Canadian conditions.
Table of Contents
- Understand your fencing needs and challenges
- Essential materials and specifications for fence posts
- Site preparation and placement: Soil, spacing, and installation tips
- Maintenance, cost control, and post longevity
- Our expert take: What really matters when choosing fence posts
- Get the right fence posts and expertise with FenceFast
- Frequently asked questions
Key Takeaways
| Point | Details |
|---|---|
| Clarify requirements | Start by assessing your livestock, terrain, and goals to avoid common fencing mistakes. |
| Select the right material | Choose post type and size based on your farm’s unique conditions and fence purpose. |
| Prepare your site | Check soil drainage, frost depth, and plan spacing to ensure long-lasting posts. |
| Prioritize maintenance | Regular inspections and timely repairs will save money by maximizing post life. |
Understand your fencing needs and challenges
Before you order a single post, you need to know exactly what your fence is supposed to do. That sounds obvious, but plenty of producers skip this step and end up with a setup that works fine for two years and fails in the third. Your fencing objectives will shape every decision that follows.
The three most common goals on Canadian farms are:
- Livestock containment: Keeping cattle, horses, pigs, or sheep inside a defined area safely and reliably
- Boundary marking: Establishing clear property lines that hold up to legal scrutiny and neighbor disputes
- Predator exclusion: Protecting poultry, lambs, or calves from coyotes, wolves, and other wildlife
Each goal demands a different approach. A boundary fence on flat prairie land has almost nothing in common with a predator-proof perimeter around a poultry yard. Once you know your primary objective, layer in the site-specific factors that will influence your post selection.
Soil type is one of the biggest variables. Sandy soils drain fast but offer less grip for posts. Heavy clay holds moisture and can heave posts dramatically during freeze-thaw cycles. Rocky terrain makes driving posts a serious challenge. Terrain also matters: steep slopes require closer post spacing and deeper setting to resist lateral pressure from wire tension.
Weather exposure is another factor that Canadian producers know all too well. Posts in regions with severe winters need to be set below the frost line, which can reach 48 inches or more in northern Alberta and Saskatchewan. Ignoring this turns a well-built fence into a tilting mess by spring.
Your livestock type determines the physical demands on the fence. Cattle push hard. Horses are sensitive and can injure themselves on sharp edges. Pigs root and lift. Each species creates a different stress pattern on your posts and wire. Understanding the types of agricultural fencing suited to each animal will save you from mismatched systems.
“The fence that works for your neighbor’s operation may be completely wrong for yours. Walk your lines, know your animals, and build for your specific conditions.”
Pro Tip: Sketch a rough map of your property before buying anything. Note soil types, slopes, gates, and high-traffic animal areas. This single step prevents most of the common sizing and placement errors.
With 4-strand barbed wire installation running about $7,392 per mile, the cost of getting it wrong is not abstract. Every post that fails early adds labor, materials, and downtime to your operation.
Essential materials and specifications for fence posts
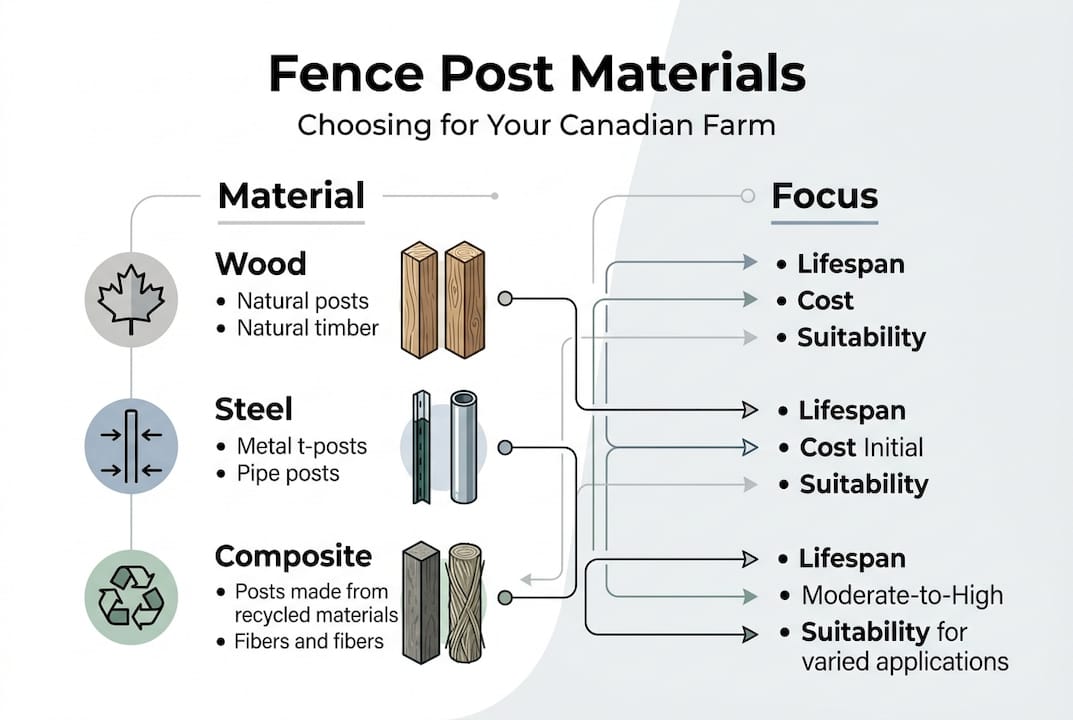
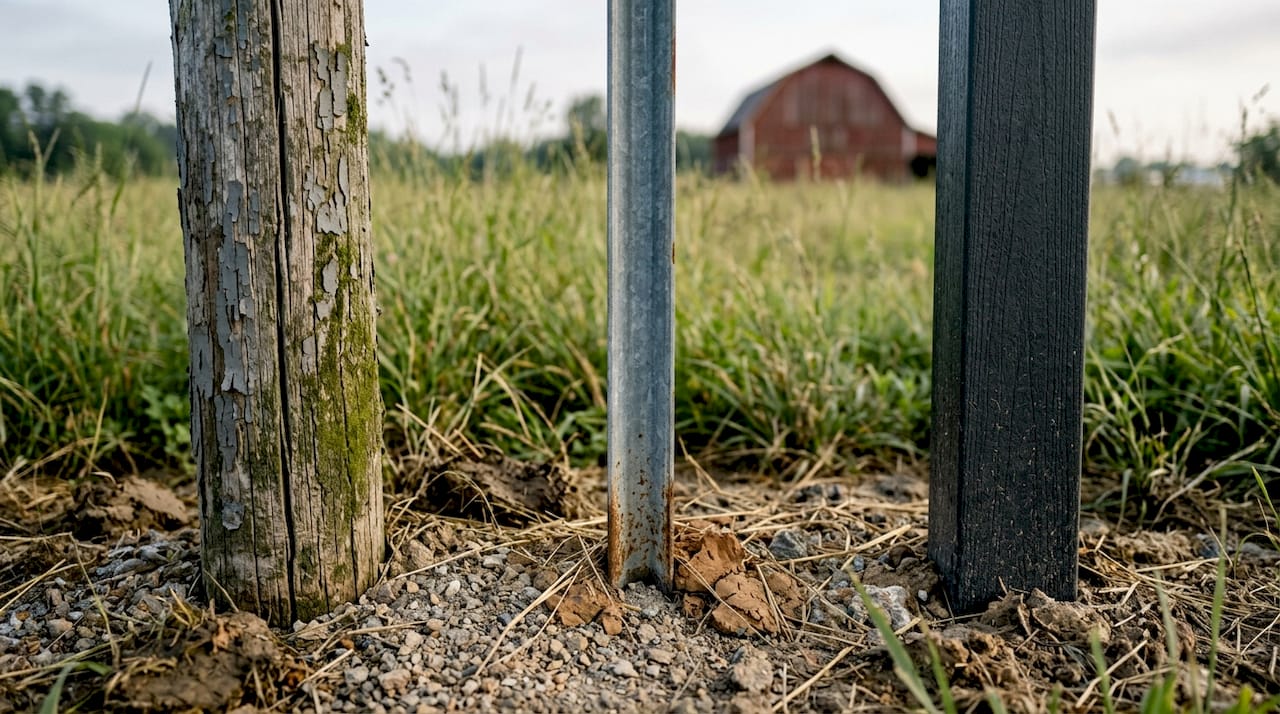
With your goals and challenges mapped, it’s time to select fence post materials and specs that match your farm’s needs. The three main options are wood, steel, and composite, and each has a real place in agricultural fencing.
| Material | Lifespan | Upfront cost | Best for | Weakness |
|---|---|---|---|---|
| Pressure-treated wood | 15 to 25 years | Moderate | General farm use, corners | Rot in wet soils |
| Steel T-post | 20 to 30 years | Low to moderate | Line posts, large acreages | Can rust, sharp ends |
| Fiberglass/composite | 25 to 40 years | Higher | Electric fencing, wet areas | Less rigid under impact |
| Round cedar/tamarack | 20 to 30 years | Moderate to high | Corners, gates, traditional farms | Availability varies by region |
Wood remains the most widely used material on Canadian farms because it is familiar, workable, and available almost everywhere. Pressure-treated posts resist rot and insect damage, making them a solid choice for most soil types. Steel T-posts are the go-to for long line runs where you need consistency and speed of installation. Composite and fiberglass posts shine in electric fence setups because they do not conduct electricity and resist moisture far better than wood.
One specification that many producers underestimate is the difference between corner posts and line posts. Corner and gate posts should be at least one foot longer than your line posts and significantly larger in diameter. The forces at corners and gates are dramatically higher because all the wire tension converges there. A line post that works perfectly in the middle of a run will fail quickly at a corner if it is the same size.
Here is a simple process for matching post specs to your application:
- Identify corner, gate, and brace post locations first. These get your largest, strongest posts.
- Select line post material based on soil type and livestock pressure.
- Determine post length by adding your required burial depth to your desired above-ground height.
- Choose diameter based on animal pressure. Cattle need heavier posts than sheep.
- Factor in your local availability and budget before finalizing your order.
For a deeper look at how these materials compare in real Canadian conditions, the guide on fence post materials and the breakdown to compare fencing materials are worth reviewing before you commit.
Pro Tip: Never use the same post spec for your entire fence line. Corners and gates need to be overbuilt. Skimping there is where most fence failures begin.
Site preparation and placement: Soil, spacing, and installation tips
Having chosen your materials, let’s move on to preparing your site for the best results. Even the best posts will underperform if they are placed in the wrong soil or set at the wrong depth.
Testing soil drainage before installation is not optional. It tells you whether you need to adjust your post type, your burial depth, or your bracing strategy. A simple drainage test involves digging a hole about 12 inches deep, filling it with water, and checking how fast it drains. Fast drainage means sandy or loamy soil. Slow drainage points to clay or hardpan, which will affect how posts move with frost.
| Soil type | Recommended burial depth | Post type adjustment |
|---|---|---|
| Sandy/loamy | 30% of post length | Standard wood or steel |
| Clay/heavy | 33% of post length plus gravel base | Steel or treated wood |
| Rocky | Mechanical driving or blasting required | Steel T-post preferred |
| Wet/boggy | 40% of post length with concrete collar | Composite or galvanized steel |
Post spacing is another area where producers often default to a single number without considering the full picture. For most cattle fencing, 12 to 16 feet between line posts is standard. Tighter spacing adds strength but increases cost. Wider spacing saves money but reduces wire support and increases sag risk.
Here is a practical installation sequence that prevents the most common errors:
- Mark all corner and gate post locations first and set those before any line posts.
- Run a string line between corners to keep your line posts aligned.
- Set posts to the correct depth based on your soil type table above.
- Tamp or compact backfill in layers to eliminate air pockets around the post.
- Check vertical alignment with a level before the backfill sets.
- Install bracing at every corner and gate before tensioning any wire.
For a complete breakdown of spacing decisions, the fence post spacing guide covers terrain-specific adjustments in detail. If you want a full walkthrough from clearing to wire tensioning, the farm fence installation steps resource is a practical companion.
Pro Tip: In areas with deep frost, setting posts in late summer gives the soil time to settle around them before winter. Spring installation in frost-prone zones often leads to heaving in the first season.
Maintenance, cost control, and post longevity
After installation, ongoing maintenance is crucial for lasting results and cost savings. A fence that gets inspected and repaired promptly will outlast one that is ignored by a decade or more.
Annual maintenance costs average about 2% of your initial installation cost. On a $7,000 per mile fence, that is roughly $140 per mile per year. That number sounds manageable until you skip two or three seasons and face a full section replacement.
Here are the key maintenance tasks broken down by post material:
- Pressure-treated wood: Check for ground-level rot annually. Probe the base with a screwdriver. Soft spots mean the post is compromised. Replace before it fails completely.
- Steel T-posts: Inspect for rust, especially at the ground line. Reapply rust-inhibiting paint or coating every few years in wet climates.
- Fiberglass/composite: Check for UV degradation and cracking at the top. These posts rarely fail at the base but can become brittle above ground over time.
- Cedar/tamarack: Inspect for insect damage and splits. Natural posts can last decades with minimal care if they were properly dried before installation.
Beyond material-specific tasks, walk your fence lines at least twice a year. Look for posts that have shifted, leaned, or pulled out of alignment. A leaning post is a warning sign, not a cosmetic issue. Wire tension changes when posts move, and that accelerates wear across the whole run.
“The producers who never have fence emergencies are the ones who never skip their spring and fall inspections. It’s that simple.”
Cost control also means being strategic about when and how you buy materials. Buying posts in bulk before the spring rush typically saves 10 to 15% compared to purchasing mid-season. Coordinating installation with a neighbor to share equipment rental costs is another practical way to reduce your per-mile expense.
For a step-by-step approach to fixing damaged sections without replacing entire runs, the fence repair steps guide covers the most common repair scenarios on working farms.
Our expert take: What really matters when choosing fence posts
Here is something most fencing guides will not tell you: the biggest mistakes we see on Canadian farms are not about material quality. They are about mismatched expectations. A producer buys the cheapest line posts available, sets them at standard depth, and then wonders why the fence is heaving and leaning after the first hard winter in a low-lying field with poor drainage.
The uncomfortable truth is that no single post type works everywhere. Canadian geography is too varied. What holds up flawlessly in the Peace Country may rot out in three years on a wet Manitoba lowland. Local knowledge matters more than any product specification sheet.
We also see producers consistently underinvest in corners and gates while trying to save money overall. That is exactly backwards. Spend more where the stress is highest and you will spend far less on repairs over a ten-year horizon.
Walking your fence lines before you build is not just about measuring. It is about reading the land. Where does water pool after rain? Where do your animals crowd the fence? Where does snow drift and create extra load? Those observations are worth more than any formula. For inspiration on designs that account for animal behavior and terrain, the collection of livestock fencing ideas is a solid starting point.
Get the right fence posts and expertise with FenceFast
Ready to put this advice to work on your farm? FenceFast has the products and knowledge to help you build a fence that lasts.

At FenceFast.ca, you will find a full range of fence post solutions alongside accessories for every stage of your project. Whether you need netting options for rotational grazing setups or electric fence accessories to complement your post-and-wire system, we stock what Canadian producers actually use in the field. We also offer design consulting to help you match your post selection to your specific terrain, livestock, and budget. Nationwide shipping means your materials arrive when you need them, not after the season has passed.
Frequently asked questions
What is the best type of fence post for heavy clay soil?
Pressure-treated wooden or steel posts work best in heavy clay soils because they resist rot and shifting. Test soil drainage before installation to confirm the correct post type and burial depth for your specific site.
How far apart should fence posts be for cattle fencing?
For cattle fencing, posts are typically spaced 12 to 16 feet apart, though terrain and wire type may require adjustments. The fence post spacing guide covers how to adapt spacing for slopes, corners, and high-pressure areas.
How long do wooden fence posts last?
Properly installed and maintained wooden fence posts can last 15 to 20 years or more in Canadian conditions. Longevity depends heavily on soil moisture, post treatment, and how consistently you inspect and maintain the base. Review wooden post lifespans for material-specific expectations.
How much does it cost to install agricultural fence posts in 2026?
A 4-strand barbed wire fence averages about $7,392 per mile based on 2025 estimates, with costs varying based on materials, labor rates, and terrain. Budget an additional 2% of that total annually for ongoing maintenance to protect your investment.

