

TL;DR:
- Proper ground rod installation is crucial for electric fence performance because it completes the electrical circuit through moist soil. Most fence failures result from inadequate grounding rather than energizer issues, emphasizing the importance of correct placement, depth, and material matching. Regular inspections and proper wire connections ensure the ground system remains effective and prevents costly livestock escapes.
Installing ground rods for electric fence systems is the single most critical step in building a fence that actually works. A ground rod, also called an earth rod, creates the return path that allows electrical current to complete its circuit through the soil and back to the energizer. Without a solid grounding system, even the most powerful energizer delivers weak, inconsistent shocks. This guide covers the tools, placement, depth, and wiring steps you need to build a grounding system that keeps your livestock contained and your fence performing at full strength.
What tools and materials do you need for ground rod installation?
The right materials make the difference between a grounding system that lasts decades and one that fails in its first season. Before you drive a single rod, gather everything on this list.
Essential tools:
- Sledgehammer or a dedicated ground rod driver (a driver attachment for a rotary hammer saves significant labor)
- Wire strippers and crimping pliers
- Ground clamps rated for outdoor, buried use
- Insulated wire in the correct gauge for your energizer
- Safety glasses and work gloves
Ground rod types:
The two most common rod materials are galvanized steel and copper-clad steel. Galvanized steel rods cost less and work well for most farm applications. Copper-clad rods offer better conductivity and resist corrosion longer, making them worth the extra cost for permanent installations. Both are typically sold in 6-foot and 8-foot lengths, which aligns with the recommended rod depth of 6 to 8 feet for effective current transfer.
Material compatibility table:
| Rod material | Compatible wire | Compatible clamps |
|---|---|---|
| Galvanized steel | Galvanized steel wire | Galvanized or zinc clamps |
| Copper-clad steel | Copper wire | Copper or brass clamps |
Mixing copper rods with galvanized wire causes galvanic corrosion at the connection point. Corrosion increases resistance, and increased resistance means weaker shocks. Match your metals throughout the entire grounding circuit.
Pro Tip: Use 12.5-gauge or heavier insulated wire to connect your ground rods to the energizer. Undersized wire creates resistance that reduces fence voltage even when the rods are perfectly installed.
How do you choose the right placement and depth for ground rods?
Placement determines how well your grounding system performs year-round. The goal is to keep the rod tips in consistently moist soil, because moisture is what carries the electrical current.
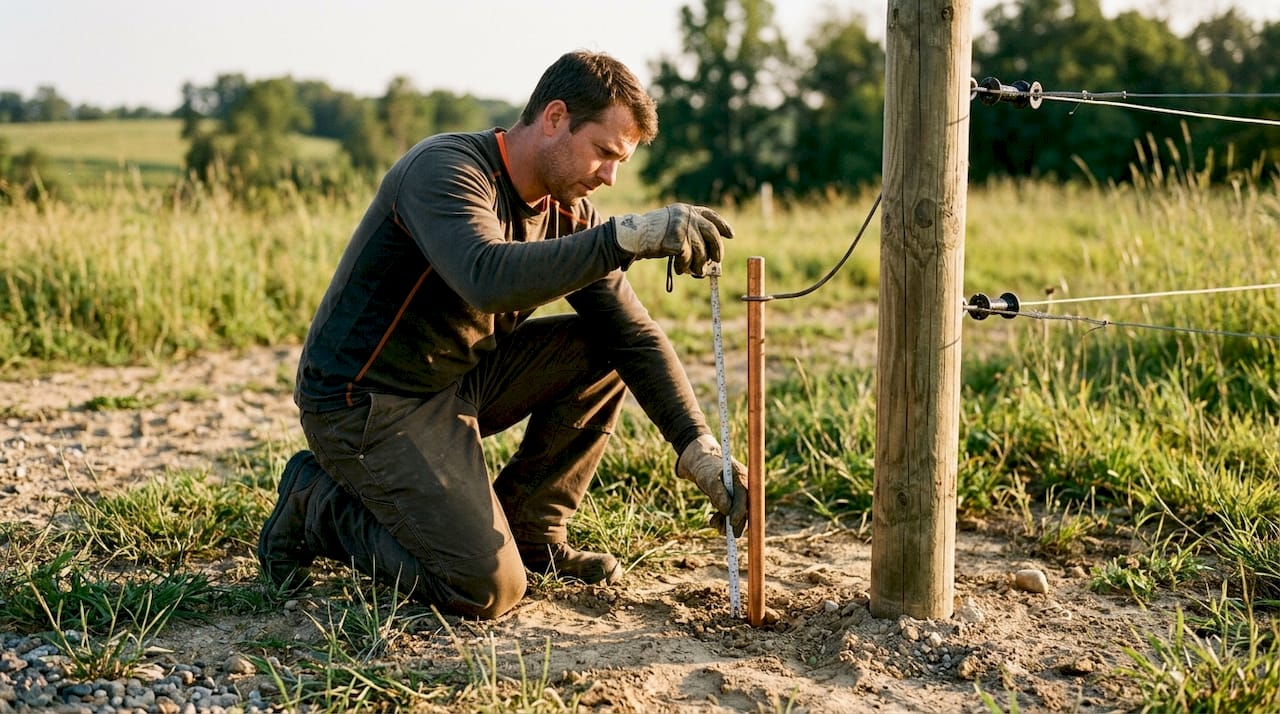
Soil conditions to target
Moist, loamy soil is ideal. Avoid dry sandy areas, rocky outcroppings, and any location where the soil freezes solid for extended periods. In dry climates or during summer drought, the top 2 to 3 feet of soil can lose enough moisture to significantly reduce conductivity. Driving rods to a depth of 6 to 8 feet reaches the stable moisture layer that stays relatively consistent through seasonal changes.
Spacing and proximity rules
Industry standards recommend a minimum of three ground rods spaced at least 10 feet apart for energizers up to 15 joules. That spacing matters because each rod creates a zone of electrical influence in the surrounding soil. Rods placed too close together overlap those zones and reduce the total grounding surface. Place your first rod as close to the energizer as practical, then space additional rods in a line moving away from the unit.
Ground rods must also stay away from your home’s electrical grounding system, buried phone lines, water pipes, and any other utility infrastructure. Sharing a grounding system with your home electrical service creates interference hazards and can damage sensitive equipment. Call 811 (the national “call before you dig” service) before driving any rod to confirm utility locations.
Pro Tip: Install your ground rods on the north or east side of the energizer when possible. These sides tend to retain more soil moisture in most North American climates, giving you better conductivity through dry summer months.
Key stat: Poor grounding accounts for over 95% of electric fencing problems. That figure means most fence failures have nothing to do with the energizer or the wire. They trace directly back to an inadequate ground system.
How do you install ground rods and connect them to the energizer?
With your site selected and materials ready, the physical installation follows a clear sequence. Work methodically and you will finish with a low-resistance grounding system built to last.
Step-by-step installation process
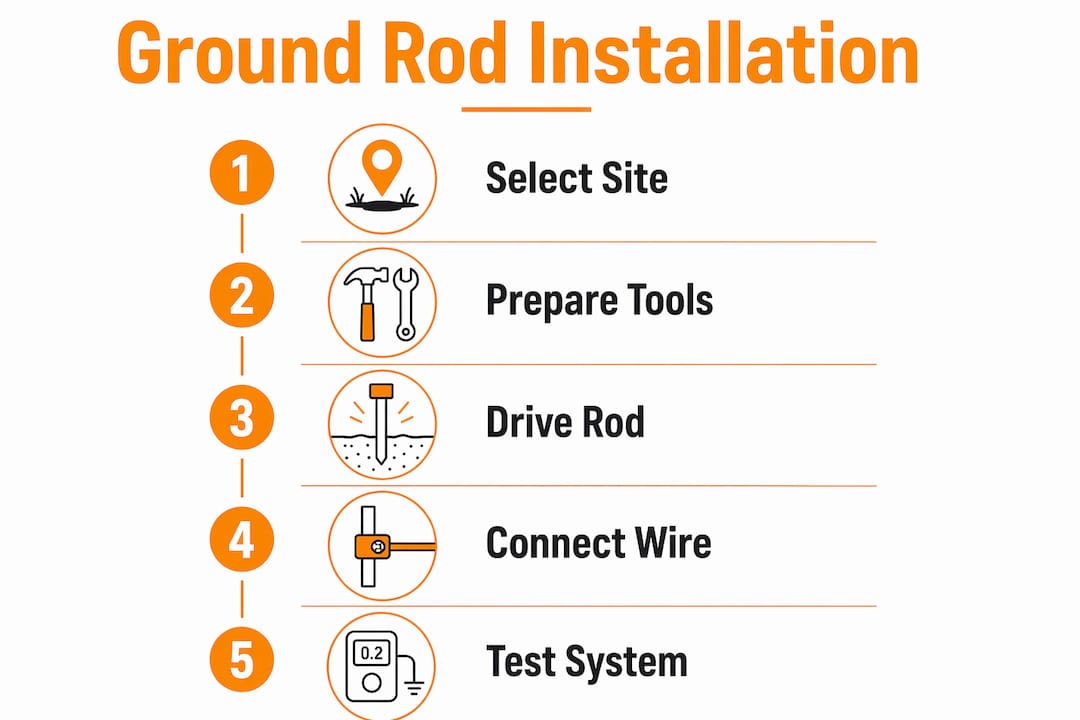
- Mark your rod locations. Measure at least 10 feet between each rod position and mark each spot with a stake. Confirm all locations are clear of utilities.
- Drive the first rod. Hold the rod vertically and drive it straight down using a sledgehammer or ground rod driver. Keep it plumb. A rod that leans significantly loses effective depth.
- Stop 4 to 6 inches above grade. Leave enough rod exposed above the soil surface to attach your ground clamp securely.
- Drive remaining rods. Repeat the process for each additional rod, maintaining the 10-foot minimum spacing.
- Attach ground clamps. Slide the clamp onto the exposed rod section and tighten firmly. A loose clamp is a resistance point.
- Connect rods with insulated wire. Run insulated wire from the first rod to the second, then to the third, creating a series connection. Leave a small amount of slack in the wire to allow for soil movement without pulling connections loose.
- Connect the final wire to the energizer’s ground terminal. Use the same metal type throughout. Tighten all connections until there is no movement.
- Bury exposed wire runs. Any wire running along the surface between rods should be buried at least 4 inches deep to protect it from equipment and foot traffic.
Rocky soil adjustment table:
| Soil condition | Recommended adjustment |
|---|---|
| Rocky, cannot drive full depth | Drive rod at a 30-degree angle; add extra rods |
| Dry, sandy soil | Add more rods spaced further apart; water area before driving |
| Frozen ground | Wait for thaw or use a longer rod to reach below frost line |
Insulated, properly gauged wire with secure clamps is the standard for minimizing resistance between rods and the energizer. Loose or corroded connections cause voltage losses that no amount of additional rods can fix.
Pro Tip: After connecting all rods, tug each wire connection firmly by hand. If anything moves, tighten it. A connection that feels solid today can loosen after the first hard frost if it was not fully tightened during installation.
What are the most common ground rod mistakes to avoid?
Even experienced farmers make grounding errors that cost them fence performance. Knowing the most common mistakes helps you catch problems before they affect your animals.
Common installation errors:
- Driving rods too shallow. Rods that stop in dry topsoil fail to reach the moist layer where current flows. The ground system is half of fence performance, and shallow rods cut that performance severely.
- Using too few rods. A single ground rod almost never provides enough surface area for a full-sized energizer. Three rods is the minimum for energizers up to 15 joules.
- Mixing incompatible metals. Copper and galvanized steel in contact with each other corrode rapidly. The resulting resistance degrades your fence within one to two seasons.
- Placing rods too close together. Rods spaced less than 10 feet apart share overlapping soil zones and provide little additional grounding benefit.
- Skipping the utility check. Driving a rod into a buried cable or pipe creates a serious safety hazard.
How to test your grounding system
Use a digital voltmeter or a dedicated fence tester to check grounding effectiveness. With the fence energizer running and the fence wire loaded with vegetation or a test load, measure the voltage at the ground rod. A reading above 200 volts at the ground rod indicates the grounding system is not dissipating current effectively. Add rods or relocate existing ones to bring that reading down.
A fence that shocks weakly is not an energizer problem until you have ruled out the ground system first. Check your rods before you replace any equipment. Most fence failures trace back to grounding, not the energizer.
In dry or rocky soils where driving rods to full depth is not possible, driving rods at a 30-degree angle or adding more shorter rods spaced further apart maintains effective grounding. Watering the soil around rods during extended dry periods also improves conductivity temporarily.
Pro Tip: Check your ground rod connections every spring before turning the fence on for the season. Frost heave and soil movement loosen clamps over winter. A five-minute inspection prevents a summer of poor fence performance.
Key Takeaways
A properly installed ground rod system, with rods driven 6 to 8 feet into moist soil, spaced at least 10 feet apart, and connected with matched-metal hardware, is the foundation of every reliable electric fence.
| Point | Details |
|---|---|
| Minimum rod depth | Drive rods 6 to 8 feet into moist soil for reliable current transfer. |
| Rod quantity and spacing | Use at least three rods spaced 10 feet apart for energizers up to 15 joules. |
| Metal compatibility | Match rod, wire, and clamp materials to prevent corrosion and resistance. |
| Grounding accounts for most failures | Over 95% of fence problems trace back to poor grounding, not the energizer. |
| Test before assuming failure | Use a voltmeter or fence tester to verify grounding before replacing any equipment. |
The part most farmers get wrong about electric fence grounding
I have walked hundreds of fence lines with farmers who were convinced their energizer was failing. Nine times out of ten, the energizer was fine. The ground rods were the problem. Either there were not enough of them, they were too shallow, or someone had mixed copper clamps with galvanized rods and the connection had corroded into near-uselessness.
The insight that changed how I approach every installation is this: the ground system is not a support component. It is half the fence. The energizer pushes current out through the fence wire, and the ground system pulls it back through the soil. If either half is weak, the circuit is weak. A $600 energizer paired with a poor ground system will underperform a $200 energizer with a properly built ground system every single time.
The other thing I see farmers skip is the spring inspection. Frost heave is real. I have pulled clamps off rods in april that were finger-loose after a hard Canadian winter. That loose clamp cost the farmer two months of poor fence performance before he called me. Five minutes with a wrench at the start of each season prevents that entirely.
For anyone doing a DIY ground rod setup for the first time, resist the urge to cut corners on rod count or depth. The labor cost of driving three rods correctly is minimal compared to the cost of chasing livestock that learned your fence does not hurt. Build the ground system right the first time, and the fence will work reliably for years.
— Juiced
Fencefast has the ground rod supplies you need
Getting your electric fence grounding right starts with having the right materials on hand before you begin.

Fencefast carries ground rods, insulated wire, ground clamps, and the full range of electric fence accessories needed for a complete installation. Whether you are setting up a new paddock or upgrading an existing system, the Fencefast team can help you select the correct rod type, wire gauge, and clamp hardware for your soil conditions and energizer size. Fencefast ships across Canada and offers expert support for farmers who want to get the grounding system right the first time. Visit fencefast.ca to browse products or reach out with your installation questions.
FAQ
How deep should ground rods be for an electric fence?
Ground rods should be driven at least 6 to 8 feet into the soil to reach consistently moist layers that conduct current effectively. Shallow rods in dry topsoil are the leading cause of poor fence performance.
How many ground rods does an electric fence need?
A minimum of three ground rods is recommended for energizers up to 15 joules, with each rod spaced at least 10 feet apart. Larger energizers or dry soil conditions require additional rods.
What is the best material for electric fence ground rods?
Copper-clad steel rods offer the best conductivity and corrosion resistance for permanent installations. Galvanized steel rods are a cost-effective choice for temporary or seasonal fencing, provided all connected hardware uses the same metal type.
Can I use my home’s ground system for an electric fence?
No. Electric fence ground rods must be kept separate from home electrical grounding systems to prevent interference and safety hazards. Always install a dedicated grounding system for your fence energizer.
How do I know if my electric fence ground system is working?
Use a digital voltmeter or fence tester with the energizer running. A voltage reading above 200 volts at the ground rod indicates the system is not dissipating current properly and needs additional rods or better placement.
Recommended
- DIY Ground Rod for Electric Fence: Step-by-Step Setup Guide – FenceFast Ltd.
- How to Ground Electric Fence: Safe & Effective Steps for 2025 – FenceFast Ltd.
- Electric Fence Ground Rod Installation for Reliable Fencing – FenceFast Ltd.
- Best Ground Rod for Electric Fence: Reliable Containment – FenceFast Ltd.

