

For most small-scale sheep keepers, electrified portable netting is the fastest, safest way to create temporary paddocks that actually hold animals and deter predators. If you need something running this week, here are the three kit types worth considering:
- Electric netting kit (e.g., Gallagher ElectroNet or similar 35–39" netting rolls): the go-to for lambs, mixed flocks, and anywhere coyotes are a real concern. Posts are built in, setup is fast, and the mesh height stops most predators cold.
- Polywire or polytape + step-in posts: lighter, cheaper, and faster to move across large perimeters. Best for adult sheep on flat ground where you’re shifting paddocks every few days.
- Portable livestock panels (welded wire or galvanized): no electricity required, and they hold up in high-traffic spots like sorting areas or temporary gates. Heavier to move, but nearly indestructible.
Fencefast carries Gallagher netting, energizers, and accessories, and their team can help you size a kit before you buy.
Key Takeaways
Portable electric netting is the most practical starting point for most sheep owners: it contains animals, deters predators, and supports rotational grazing with minimal infrastructure.
| Point | Details |
|---|---|
| Netting height for sheep | Use 35–39" netting minimum; size for lambs if running a mixed-age flock. |
| Energizer sizing | Buy at least 30% more output capacity than your current fence needs; never undersize for wet conditions. |
| Grounding is non-negotiable | Use at least one 6-foot rod per joule of energizer output, spaced 10 feet apart, in moist soil. |
| Permanent perimeter still required | Portable fencing subdivides pasture inside a boundary; it does not replace a permanent perimeter fence. |
| Fencefast for kits and support | Fencefast is an authorized Gallagher dealer offering product consulting and the full portable fencing lineup. |
Table of Contents
- What types of portable sheep fencing should you use?
- What height and specs do you need for sheep?
- Which energizer and power source should you choose?
- How do you set up and move portable fencing safely?
- How do you train sheep to respect an electric fence?
- What are the real advantages and disadvantages of portable fencing?
- What does portable sheep fencing cost, and how long does setup take?
- Safety best practices and why you still need a permanent perimeter
- What does research say about portable fencing and pasture health?
- A supplier’s honest perspective on what buyers get wrong
- Where to buy portable sheep fencing and get real support
- Sources
What types of portable sheep fencing should you use?
The right fencing type depends almost entirely on what you’re asking it to do. Rotational grazing, predator protection, and temporary containment each pull you toward a different solution.
Electric netting
Electric netting is the workhorse of portable sheep fencing. A standard roll runs 164 feet (50 meters) and stands roughly 35–39 inches tall, with multiple horizontal conductive twines woven through plastic posts spaced about 10–12 inches apart. The bottom wire is typically left unenergized to reduce shorts from vegetation contact, while the upper twines carry the charge. That design keeps voltage loss manageable even in wet or grassy conditions.
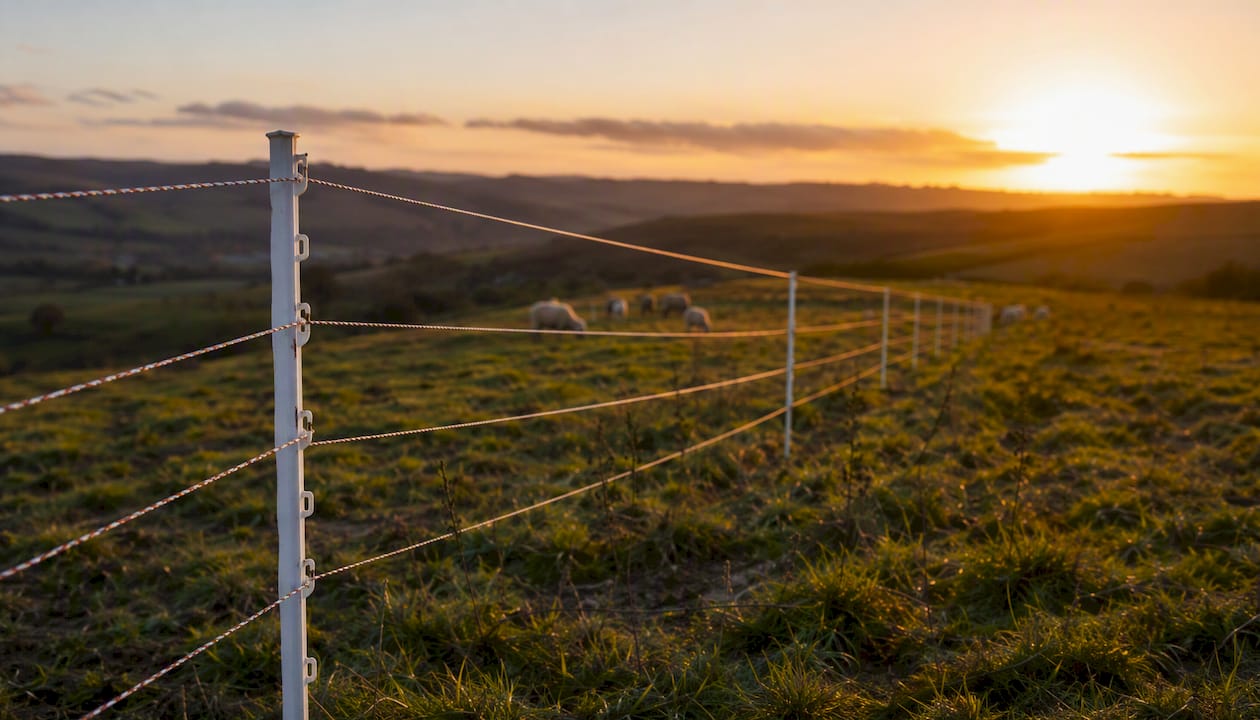
It’s the best choice for lambs (who will test any gap they can find), for predator deterrence, and for quick paddock creation. Two people can set up a 50-meter run in under half an hour. Rolls link together for larger enclosures, and the whole thing packs into a compact bundle you can carry under one arm.
Polywire and polytape with step-in posts
Polywire is faster to move and cheaper per foot than netting, which makes it attractive for large perimeters or frequent paddock shifts. A single person can walk a line of step-in posts and string polywire across several acres in under an hour. Polytape (wider, more visible ribbon) is the better pick when sheep haven’t been trained to electric fencing yet, since they can actually see it.
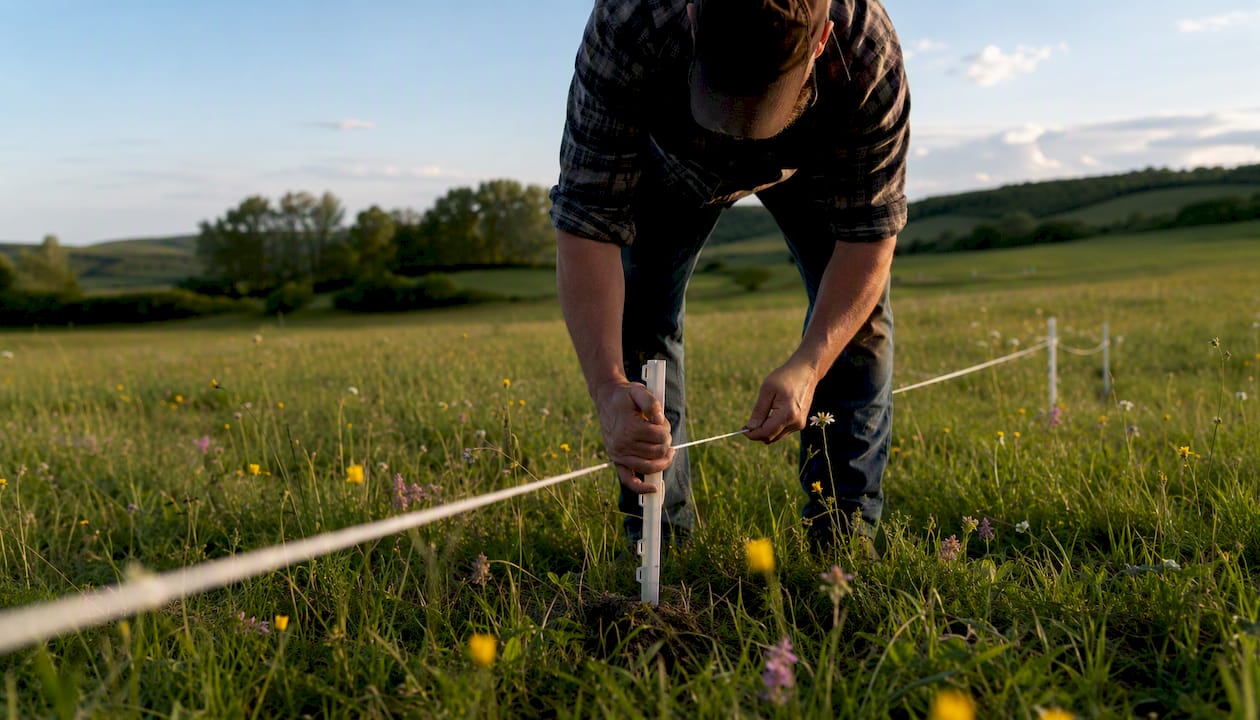
The trade-off: polywire offers no physical barrier. A panicked or determined animal can push straight through it. It also has internal conductor resistance that limits how far you can run a single strand before voltage drops, so choose products with adequate filament counts for longer runs. For predator control, polywire alone is rarely enough.
Portable livestock panels
Welded wire or galvanized portable panels (typically 16 feet long, 34–52 inches tall) don’t need an energizer, which makes them useful in situations where electricity isn’t practical. They shine in sorting areas, temporary holding pens, or anywhere sheep are stressed and likely to charge a fence. The downside is weight: a standard panel runs 50–80 lbs, and moving a full perimeter is a two-person job with a truck nearby.
Some producers use a hybrid approach: panels for the corners and gates, netting for the straight runs. That combination gives you the structural integrity of panels where it matters most and the speed of netting everywhere else.
Matching type to use case
| Use Case | Best Type | Why |
|---|---|---|
| Rotational grazing (frequent moves) | Polywire + step-in posts | Fastest to move, lowest cost per acre |
| Lamb containment | Electric netting (35–39") | Mesh prevents squeeze-throughs |
| Predator deterrence | Electric netting (high voltage) | Physical + electrical barrier |
| Temporary holding / sorting | Portable panels | No electricity needed, high strength |
| Orchard or tree protection | Polywire or netting | Flexible shape, easy to reconfigure |
What height and specs do you need for sheep?
Get the specs wrong and you’ll spend more time chasing animals than grazing them. Here’s what actually matters.
Height: For adult sheep, a minimum of 35 inches (90 cm) is the standard recommendation. Lambs and smaller breeds need the full mesh height of netting rather than just a tall strand count, because they’ll find horizontal gaps that adults ignore. If you’re running a mixed-age flock, size for the lambs.
Conductor count and spacing: More horizontal conductors mean more contact points and better predator deterrence. Quality sheep netting typically runs 9–12 horizontal strands, with the energized lines spaced 3–4 inches apart near the bottom (where a dog or coyote would push through) and wider near the top. A fence with only 5 strands might hold adult sheep but won’t stop a determined predator.
Roll length and scaling: Standard rolls are 164 feet (50 m). A single roll creates a roughly 40 x 40-foot paddock, adequate for 3–5 ewes for a few days. For a flock of 20–30 animals on a 3-day rotation, plan on 3–4 rolls minimum. Rolls link end-to-end, so you can expand incrementally.
Visibility: Polytape (1.5–2 inches wide) is far more visible than polywire. For animals new to electric fencing, start with tape. Once they’ve learned to respect the charge, you can switch to polywire for easier handling.
Spec checklist before you buy:
- Minimum height: 35" for adults, 39" for lambs or mixed flocks
- Conductor count: 9+ horizontal strands for sheep netting
- Roll length: 164 ft (50 m) standard; confirm compatibility for linking rolls
- Post spacing: 10–12 inches built into netting; 8–10 feet for step-in posts with polywire
- UV resistance: look for UV-stabilized plastic posts and netting material rated for 5+ years
- Bottom wire: confirm it’s unenergized on netting products to reduce vegetation shorts
Pro Tip: Gallagher’s sheep and goat netting leaves the bottom wire unenergized by design, which meaningfully reduces voltage loss from grass contact. If you’re comparing netting products, check whether the manufacturer does the same.
Which energizer and power source should you choose?
The energizer is where most buyers make their biggest mistake: they undersize it, then wonder why the fence doesn’t hold.
Understanding energizer specs
Joules measure stored energy per pulse. Kilovolts (kV) measure the voltage delivered to the fence. For portable sheep netting, you want a minimum of 0.5 joules output for a single roll in clean conditions, and at least 1–2 joules if you’re running multiple rolls or dealing with vegetation contact. A fence voltmeter is non-negotiable: aim for at least 4,000–5,000 volts on the fence line to reliably deter sheep and predators.
Power source options
12V battery only: The simplest portable setup. A 12V, 100Ah deep-cycle battery paired with a low-draw energizer (0.5–1W continuous draw) can run a fence for weeks in clean conditions. Battery runtime depends on energizer draw, fence length, and vegetation contact, so always size up rather than down. A battery that’s borderline adequate in July may fail in a wet September when grass is touching the bottom strands.
Solar + battery: The right choice for remote paddocks or any setup you’re leaving unattended for more than a few days. A 5–10W solar panel keeps a 12V battery topped off through most of the grazing season. Strip grazing setups have maintained electrification through full grazing cycles using exactly this combination. The solar panel adds cost but eliminates the weekly battery swap.
Mains-powered energizer: If you’re within reach of an outlet, a mains energizer delivers the most consistent, high-output power. It’s not portable in the true sense, but it’s ideal for a semi-permanent subdivision fence close to a barn.
| Power Source | Best For | Limitation |
|---|---|---|
| 12V battery only | Short-term moves, close monitoring | Needs regular recharging |
| Solar + 12V battery | Remote paddocks, multi-week grazing | Higher upfront cost |
| Mains energizer | Near-barn setups, permanent subdivisions | Not truly portable |
Gallagher’s portable fencing lineup includes energizers designed to power rotational grazing setups far from mains power when paired with solar and deep-cycle batteries, which is worth knowing if your pastures are more than a cord’s length from any building.
When you add a second roll or run into a wet season with heavy vegetation contact, you’ll need that headroom. Per Mississippi State University Extension guidance, never connect two energizers to the same fence perimeter — it creates dangerous voltage spikes and can damage both units.*
How do you set up and move portable fencing safely?
Setup goes faster every time you do it, but the first time through a checklist prevents the mistakes that cost you animals.
Step-by-step setup
- Walk the site first. Identify low spots, wet areas, and vegetation that will contact the fence. Clear tall grass along the fence line if possible.
- Drive your ground rod(s). A minimum of one 6-foot galvanized ground rod, driven fully into moist soil, is required for any electric fence. For longer runs or dry conditions, use two or three rods spaced 10 feet apart.
- Unroll netting or string polywire. For netting, unroll along the fence line before standing posts. For polywire, walk the line with step-in posts first, then string the wire.
- Tension and anchor corners. Corner posts take the most stress. Use fiberglass or steel anchor posts at corners and gates; the built-in plastic posts in netting are not designed to hold corner tension alone.
- Connect the energizer. Attach the fence lead to the live terminal and the ground lead to your ground rod. Keep the energizer off a wet ground surface.
- Test before animals enter. Use a fence voltmeter at multiple points along the line. You want 4,000+ volts at the far end of the run.
Anchoring in difficult ground
- Hard or rocky ground: Use a steel driver bar to pre-punch holes for step-in posts. For netting, carry a rubber mallet.
- Frozen ground: Portable fencing in frozen conditions is genuinely difficult. Pre-drill or use a ground thaw technique; alternatively, switch to portable panels until the ground softens.
- Soft or sandy soil: Step-in posts pull out easily. Use longer fiberglass posts (48"+) and push them deeper than you normally would.
Retrieving and moving the fence
Retrieve polywire onto a geared reel with a 3:1 retrieval ratio — the time savings over a standard reel are significant if you’re moving paddocks weekly. For netting, fold it accordion-style as you pull posts, keeping the posts attached to the netting so nothing gets separated. Store netting loosely coiled, never tightly wound, to avoid kinking the conductors.
Safety reminders:
- De-energize the fence before handling any part of it.
- Use insulated gloves when connecting or disconnecting leads.
- If a fault light shows on the energizer, walk the fence line before assuming it’s a vegetation short. A broken conductor or a post knocked over by an animal is a common cause.
- Keep children and pets away from the fence perimeter during setup and testing.
How do you train sheep to respect an electric fence?
An untrained sheep will walk through a polywire fence the first time it gets spooked. Training takes one to three days and pays off for the life of the animal.
The basic method: Set up a small training pen inside a secure area (a paddock or barn lot with existing fencing). Run a single strand of electrified polywire or tape at nose height, roughly 18–24 inches off the ground. Let animals approach at their own pace. Most sheep will touch the wire with their nose within minutes and back off sharply. That one contact is usually enough.
Wool and fleece considerations: Thick wool is a natural insulator. A heavily fleeced ewe may not feel a shock through her side or back, but she will feel it on her nose or face. This is why nose-height training works regardless of fleece length. If you’re running a high-wool breed like a Rambouillet or a Merino, increase your fence voltage to compensate, and consider shearing before introducing animals to a new fence system.
Common behavior problems and fixes:
- Testing the lines: Usually a sign of low voltage. Check your fence voltmeter and clear any vegetation contacts before assuming the animal is the problem.
- Leaning or crowding at gates: Sheep crowd gates when they’re hungry or stressed. Feed animals away from gate areas and check that gate handles are properly insulated.
- Lambs slipping under netting: The bottom mesh on quality sheep netting is designed to prevent this, but very small lambs (under 2 weeks) can still squeeze through. Add a second strand of polywire 4–6 inches off the ground inside the netting perimeter during the first few weeks.
- Animals ignoring the fence after a power outage: Re-train. A fence that has been dead for even a few hours can lose its psychological hold on the flock.
Pro Tip: For mixed-age groups, train adults first in a small pen, then introduce lambs with the adults already present. The adults’ avoidance behavior teaches lambs faster than any solo training session.
For more on electric fencing behavior and training, Fencefast’s guide covers breed-specific considerations in more detail.
What are the real advantages and disadvantages of portable fencing?
Portable fencing is not a universal solution. Knowing where it excels and where it fails saves you from expensive mistakes.
Advantages:
- Flexibility: You can reconfigure paddocks in under an hour to match forage availability, season, or flock size.
- Cost per managed acre: A $300–$500 netting kit covers far more ground over a season than a comparable length of permanent fence, because you’re moving it rather than building new fence for each paddock.
- Pasture management: Rotational grazing with portable fencing forces more uniform grazing, which improves regrowth rates and reduces weed pressure over time.
- Speed of deployment: A single person can set up a functional paddock in 20–30 minutes with netting, or faster with polywire.
- No permanent land commitment: Rented land, leased pastures, and shared grazing arrangements all become viable.
Disadvantages:
- Not a perimeter fence. Portable fencing is an interior subdivision tool. It is not designed to keep animals in against a sustained push or to stop a determined predator from the outside. Extension guidance consistently recommends a permanent boundary fence combined with portable cross-fences.
- Weather wear: UV degrades plastic posts and netting conductors over time. Budget for replacement posts and netting every 5–8 years depending on sun exposure.
- Vegetation management: Grass and weeds touching the fence bleed voltage. You’ll spend real time clearing fence lines, especially in summer.
- Predator limitations: Standard netting deters most predators, but a large dog or a determined coyote can push through low-voltage netting. High-voltage energizers and mesh netting together are more effective than either alone.
When portable fencing is the right tool: rotational grazing on owned or leased pasture, temporary lambing paddocks, orchard protection during the growing season, and any situation where the land use changes seasonally.
When to install permanent fencing instead: boundary perimeters, high-traffic areas adjacent to roads or public land, and anywhere predator pressure is severe enough that a momentary power outage could result in a catastrophic loss.
What does portable sheep fencing cost, and how long does setup take?
Budget ranges vary widely depending on kit quality and whether you’re starting from scratch or adding to an existing system.
Starter kit price ranges:
- Entry-level electric netting kit (164 ft roll + basic energizer): $150–$250
- Mid-range netting kit with solar energizer and battery: $400–$650
- Premium netting kit (Gallagher ElectroNet or equivalent, quality energizer, geared reel): $600–$900+
- Polywire + step-in post kit (1,000 ft polywire, 50 posts, basic energizer): $100–$200
Additional costs to budget:
- Ground rods (2–3 recommended): $15–$30 each
- 12V deep-cycle battery: $80–$150
- Solar panel (5–10W): $40–$100
- Geared reel (3:1 ratio): $40–$80
- Replacement posts (netting): $3–$8 each
- Fence voltmeter: $30–$60
Time estimates:
- First setup (netting, single person, 164 ft): 30–45 minutes including ground rod and energizer connection
- Subsequent moves (same setup, practiced): 15–20 minutes
- Polywire + step-in posts (500 ft, single person): 20–30 minutes
- Two-person team with a geared reel cuts retrieval time roughly in half
Budgeting tip: Buy modular kits where rolls link together. Starting with one roll and one energizer lets you test the system before committing to a full rotational setup. If you’re moving paddocks more than once a week, a geared reel pays for itself in saved time within a single season, per Mississippi State University Extension guidance on portable fencing.
Safety best practices and why you still need a permanent perimeter
Electric fencing is safe when installed correctly. The risks come from shortcuts.
Safety checklist:
- Always de-energize before handling fence components.
- Post warning signs near any electrified fence visible from a road or public access point.
- Keep children and pets away from energized fence lines.
- Use insulated gloves and tools when connecting leads or testing voltage.
- Never run fence wire over or under a public road without checking local regulations first.
Grounding: the step most people skip
A poorly grounded fence is the single most common reason a fence fails to hold animals. The ground system completes the circuit: when an animal touches the fence, current flows through the animal, into the ground, back to the energizer via the ground rods. Without adequate grounding, the shock is weak or absent.
| Ground Rod Requirement | Guidance |
|---|---|
| Minimum rod length | 6 feet galvanized steel |
| Minimum number of rods | 1 per joule of energizer output |
| Rod spacing | At least 10 feet apart |
| Soil moisture | Rods must be in moist soil; dry or sandy soils need more rods |
| Testing | Fence voltage should read 4,000+ V; ground voltage should read under 200V |
If your ground voltage reads above 200V, add more ground rods. That high reading means current is returning through the soil inefficiently, which reduces the shock an animal receives.
Portable fencing is not a perimeter fence
This point deserves plain language: portable electric netting and polywire are interior subdivision tools. They are not designed to contain animals against a sustained push, and they will not stop a determined predator from the outside if the voltage drops. Permanent electric perimeter fences use multiple strands and stronger materials for exactly this reason. Use portable fencing to subdivide the area inside your permanent boundary, not to replace it.
Follow local regulations on electrified fences near roads or public rights-of-way. Rules vary by state and county, so check with your local extension office before installing any fence adjacent to a public area.
For a deeper look at grounding and energizer specs, Fencefast’s Electric Fencing 101 guide covers the technical side in full.
What does research say about portable fencing and pasture health?
Portable fencing is not just a containment tool. Used as part of a rotational system, it changes how pasture performs.
Portable fencing enables precision pasture allocation by confining animals to a specific paddock until forage is grazed to a target height, then moving them to a fresh area. The rested paddocks recover faster, produce more dry matter per acre over a season, and develop deeper root systems than continuously grazed pastures. The soil benefits too: shorter grazing periods reduce compaction and allow better water infiltration.
Mississippi State University Extension’s guidance on livestock fencing systems makes the practical case clearly:
Practical recommendations from extension research:
- Subdivide pastures into at least 4–6 paddocks for a meaningful rotational benefit. Fewer paddocks mean longer rest periods that allow over-mature growth, which sheep prefer less.
- Move animals when forage reaches 3–4 inches (the target residual height for most cool-season grasses). Don’t wait until the paddock is bare.
- Tie your portable fence moves to a written grazing plan, even a simple one. Producers who track paddock rest days consistently outperform those who move by eye.
- Portable fencing should support, not replace, boundary security. Extension guidance is consistent on this point across states.
For more on rotational fencing benefits and how to build a simple grazing plan around portable fencing, Fencefast’s resource library covers the implementation side in detail.
A supplier’s honest perspective on what buyers get wrong
Most fencing problems we see at Fencefast trace back to three decisions made before the first post goes in the ground: the wrong energizer size, inadequate grounding, and cheap reels.
What buyers commonly forget:
- Energizer output degrades with fence length and vegetation contact. A 0.5-joule energizer that tests fine on a clean 164-foot roll in August will struggle on three linked rolls in a wet October. Buy more capacity than you think you need.
- Grounding is not optional. A single 4-foot rod driven into dry soil is not a ground system. It’s a suggestion. Two or three 6-foot rods in moist soil is the minimum for a reliable fence.
- Cheap reels cost you time every single move. A geared reel with a 3:1 retrieval ratio and a cog-and-lock lever system is worth the extra $40 if you’re moving paddocks more than twice a month.
Honest warnings:
- An undersized energizer paired with netting in a wet season is the most common reason a fence stops holding animals. The fix is not more ground rods — it’s a bigger energizer.
- Polywire with a low filament count loses voltage over distance faster than most buyers expect. Check the filament count before you buy, not after the fence fails.
- Netting warranties on plastic posts vary from 0–5 years. Read the warranty before you assume you’re covered for UV damage.
Fencefast is an authorized Gallagher dealer with a 26-year partnership, which means access to the full Gallagher product line, technical specs, and direct manufacturer support. The team offers design consulting for producers who want help sizing a system before committing to a purchase.
Where to buy portable sheep fencing and get real support
Fencefast carries the full range of Gallagher portable fencing products: netting, energizers, solar panels, batteries, geared reels, and accessories. As an authorized Gallagher dealer, Fencefast can verify specs, confirm compatibility between components, and help you size a system for your flock and pasture layout before you order.

If you’re starting from scratch, the design consulting service is worth using. Bring your paddock dimensions, flock size, and power situation (mains access or remote), and Fencefast’s team will recommend a kit that fits. Fencefast also tracks available government funding programs that may offset fencing costs for eligible producers. Visit Fencefast to browse the product catalog, request a consultation, or contact the team directly for help matching a kit to your operation.
Sources
- Livestock Fencing Systems For Pasture Management | Mississippi State University Extension Service
- Portable Livestock Fencing
- Electric Sheep & Goat Netting | Gallagher Global
- Temporary electric fencing for sheep farm strip grazing - Nemtek
- Product Guide - Batteries - Electric Fencing Direct

