
Choosing the right temporary fencing for rotational grazing can feel like a balancing act for any Canadian rancher. The way you manage paddock layout, fence materials, and cattle movement directly affects pasture health and herd productivity. By focusing on cost-effective, versatile products, you can create a grazing system that supports animal welfare and keeps your land resilient for the long run. Discover how smart planning and the right tools make rotational grazing simpler and more reliable.
Table of Contents
- Step 1: Assess Grazing Area And Plan Fence Layout
- Step 2: Select And Gather Temporary Fence Materials
- Step 3: Install Posts And Attach Fence Wire
- Step 4: Connect Electric Fencing Components Securely
- Step 5: Test Fence Integrity And Adjust For Safety
Quick Summary
| Key Point | Explanation |
|---|---|
| 1. Assess Your Grazing Area Thoroughly | Walk your pasture to understand terrain, slopes, and water sources before planning your grazing layout. This foundational knowledge ensures better grazing success. |
| 2. Select Appropriate Temporary Fence Materials | Use portable electric fencing components that facilitate easy movement and are suitable for regular relocation based on forage recovery needs. |
| 3. Ensure Proper Electrical Connections | The effectiveness of your fence relies on proper connections between energizers, wires, and ground systems. Regularly inspect these connections to maintain voltage levels. |
| 4. Test Fence Integrity Before Cattle Introduction | Check each paddock’s voltage, inspect for damage, and observe cattle behavior upon first contact to ensure the fence effectively contains livestock. |
| 5. Document and Adjust Based on Testing Results | Keep records of voltage readings and issues detected during testing, allowing for proactive adjustments throughout the grazing season to enhance system performance. |
Step 1: Assess Grazing Area and Plan Fence Layout
Before you drive a single post or stretch wire, you need to understand your actual grazing landscape. This step shapes everything else about your rotational grazing success. You’ll walk your pasture, measure distances, identify water sources, and sketch out a fence layout that works with your land, not against it.
Start by walking your entire grazing area on foot. Pay attention to the terrain, noting slopes, wet areas, and natural boundaries like tree lines or water features. Take photos from different angles. Your goal is to understand how water naturally moves across your land and where animals might bunch up during different seasons. Canadian prairie can look deceptively uniform from a distance, but paddocks that work in spring might waterlog in early summer or become inaccessible during freeze cycles. Look for your lowest points, highest points, and everything between. This ground-level perspective beats any aerial view when you’re planning livestock movement.
Next, measure your total grazing area. Walk it off with a GPS device or use online mapping tools to calculate acreage. Now here’s where research-backed planning matters: strategic grazing paddocks sized for 24- to 36-hour allocations reduce inter-animal competition and prevent animals from grazing fresh regrowth. This means your paddock size must match your herd size and your rest period goals. If you run 50 cattle and want each paddock grazed for 24 hours before moving, you need enough paddocks to give grazed areas time to recover. Divide your total acreage by the number of paddocks you plan to create. Most Canadian ranchers working with temporary fencing find that 4 to 8 paddocks provide flexibility without overwhelming complexity.
Water access determines much of your layout. Walk your property and note where water is already available. Can you move portable troughs, or do you rely on streams and dugouts? Cattle must never graze more than a quarter mile from water during hot months, and ideally closer. If water is centralized, your paddocks need to fan out from that center point. If water is scattered, your paddocks follow the water. Account for seasonal changes too. That stream that flows in April might be dry by August. Plan accordingly now rather than discovering this problem mid-grazing season.
Consider your farm infrastructure next. Paddock design should align with your specific goals such as ease of use, simplicity, and forage harvest efficiency while accounting for landscape and operational logistics. Think about how you’ll move cattle between paddocks. Do you have existing lanes or roadways? Will you use portable gates or permanent corridors? The more times you handle cattle, the more stress you create. Design your layout so moving animals requires minimal effort and handling. Rectangular paddocks generally move cattle more easily than square ones. An L-shaped or linear arrangement often beats a radial one when you’re using temporary fencing.
Now sketch your layout on paper or using a mapping tool. Draw your paddocks, mark water sources and access points, note slope direction, and identify any problem areas like boggy ground or rocky outcrops. Don’t aim for perfect symmetry. Your pasture is unique. Paddocks can vary in size as long as you’ve calculated overall acreage and understand how rotation cycles will work. Some ranchers use software tools to design layouts digitally, while others prefer working on printed property maps with a pencil. Either method works. What matters is having a clear visual reference before fence goes down.
One more critical step: walk your planned fence lines. Actually stand where you’ll install posts and temporary fencing. Look at sight lines. Can you see all animals from one or two vantage points? Can you easily access each paddock for water delivery, supplemental feeding, or checking cattle? Problems that seem minor on a map become frustrations when you’re doing the work daily during cold weather or when cattle aren’t cooperating.
Pro tip: Stake out at least one complete paddock with temporary markers before ordering materials, then graze a small group of animals for a few days to test your layout under real conditions, adjusting fencing lines based on how cattle actually use the space rather than how you predicted they would.
Step 2: Select and Gather Temporary Fence Materials
Now that you have your layout planned, it’s time to choose the right materials and gather everything before installation day. The materials you select will determine how quickly you can set up paddocks, how easily you’ll move them, and how effectively they’ll contain your cattle. Getting this decision right saves you frustration and expense throughout your grazing season.
Temporary electric fencing is your foundation for rotational grazing. Portable electric fence components are easy to move and adjust, allowing you to subdivide pastures based on forage recovery needs rather than being locked into permanent divisions. You have three primary wire options: poly wire, poly tape, and high-tensile wire. Poly wire is affordable and works well for cattle, stretching easily and providing good conductivity. Poly tape offers visibility that cattle can see, which reduces charging into fences. High-tensile wire is more durable but harder to move frequently. For most Canadian ranchers doing rotational grazing, poly wire or poly tape works best because you’ll be moving these fences regularly. Pick materials that match your labor situation. If you’re moving fence solo, prioritize ease. If you have help, you can manage heavier materials.
Here’s a quick comparison of temporary electric fence wire types for rotational grazing:
| Wire Type | Visibility | Durability | Ease of Moving |
|---|---|---|---|
| Poly Wire | Moderate | Good for short term | Very easy to move |
| Poly Tape | Very high | Decent for season | Easy to relocate |
| High-Tensile | Low | Excellent, long term | Hard to relocate |
Your post system makes the difference between enjoyable work and exhausting work. Electric fence posts designed for portability including step-in posts and pigtail posts eliminate the need for hammers, digging, or extra insulators. Step-in posts have flat blades that push into the ground, working well in soft soil but struggling in hard or frozen ground. Pigtail posts twist into the ground and work better in packed earth or prairie soils. Lightweight insulated posts save your back and make relocation practical. Calculate how many posts you need based on your paddock perimeter. Most ranchers space posts 5 to 8 feet apart, depending on terrain. Calculate conservatively and buy more than you think you’ll need. Posts get lost, bent, or left behind. Having extras prevents workflow delays mid-season.
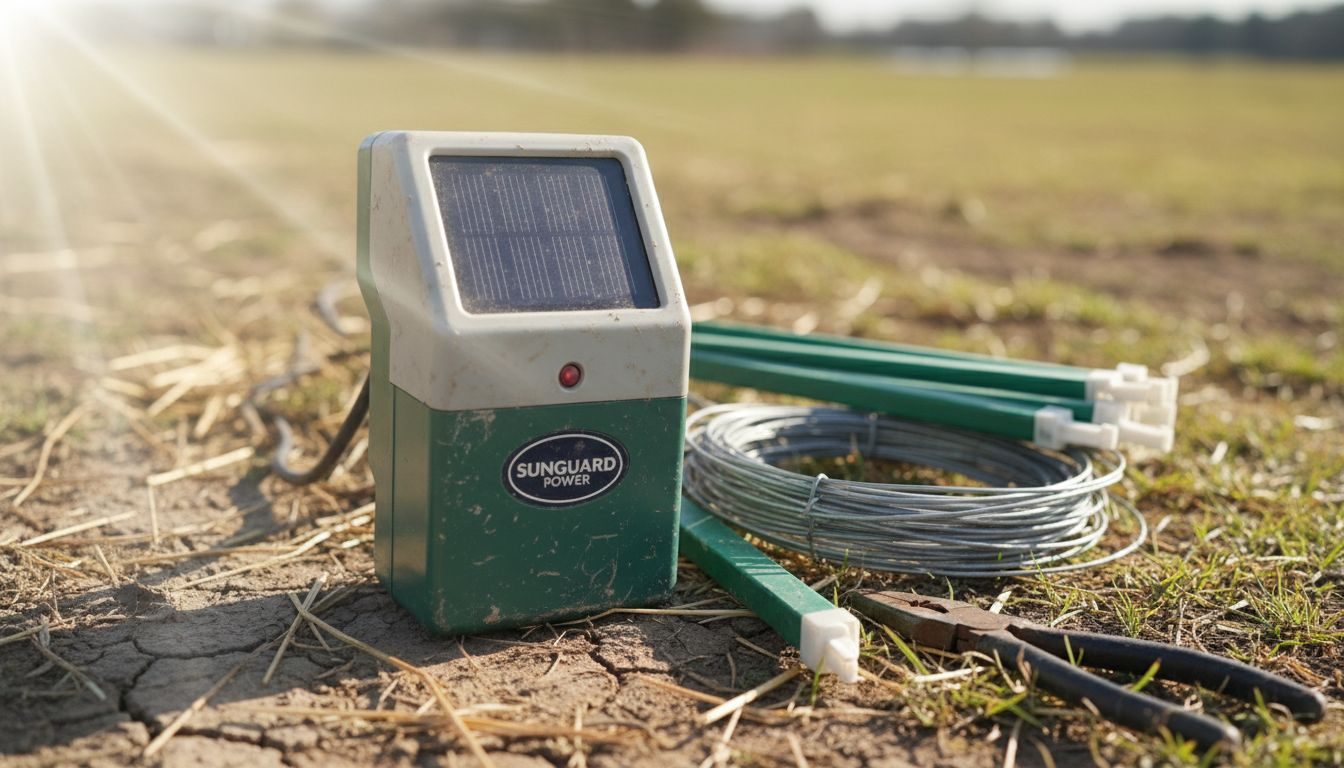
You’ll also need energizers (power supplies) to electrify your temporary fence. Solar-powered energizers work well if you have consistent sunlight across your grazing areas. Battery-powered units offer flexibility for shaded locations or areas far from buildings. Plug-in models work if you have electrical access near your grazing paddocks. For most Canadian operations, one quality energizer powers multiple paddocks if you space them across your property strategically. Buy one with enough joule rating to match your expected wire length. Undersizing leaves your fence ineffective during wet conditions when conductivity drops.
Gather your reels, gate hardware, and connectors before installation day. Reels for efficient fence setup and takedown simplify moving temporary fences. Quality connectors and insulators prevent voltage loss and keep your fence functioning reliably. Include safety equipment in your materials list too. Gloves protect your hands, and a fence tester lets you verify conductivity before releasing cattle. Many ranchers skip the fence tester and regret it when cattle escape through a dead section.
Don’t forget a strong permanent perimeter fence around your entire grazing area. Temporary fencing handles rotational divisions, but a permanent boundary fence prevents livestock escapes if temporary fencing fails or loses power. This permanent fence is your insurance policy. Budget for quality materials here because you’re not moving this fence repeatedly.
Make a detailed materials checklist organized by paddock and post type. Calculate footage needed for each paddock’s perimeter. Add 10 percent extra for connections, overlaps, and contingencies. Visit FenceFast.ca to compare product options and get quotes on bulk materials. Ordering everything at once often saves money compared to multiple purchases throughout the season. Check your inventory carefully before ordering to avoid duplicate purchases.
Pro tip: Buy 20 percent more posts and 15 percent more wire than your calculations suggest, as temporary fencing components disappear into fields or get damaged, and having spares on hand eliminates mid-season runs to the supplier.
Step 3: Install Posts and Attach Fence Wire
This is where your plan becomes reality. You’re about to transform your layout into functioning paddocks that will contain your cattle and protect your pasture. Post installation and wire attachment require attention to detail, but the work moves quickly once you establish a rhythm.
Start by marking your post locations along each paddock perimeter using chalk, spray paint, or flags. Walk the line one more time to verify spacing and alignment. Your posts should be evenly spaced, typically 5 to 8 feet apart depending on your terrain and wire type. Uneven spacing creates weak points where cattle can push through or where wire sags excessively. For step-in posts in soft soil, push them into the ground with steady pressure, twisting slightly if needed. For pigtail posts in harder ground, screw them in using a straight downward motion combined with a slight twisting action. Don’t force posts into frozen or extremely compacted soil. Wait for better soil conditions or choose a different paddock location. Bent posts create electrical problems and never function reliably.
Once your posts are installed, proper wire tensioning maintains fence durability and effectiveness. Attach your wire to the first post at a consistent height, typically 20 to 36 inches from the ground for cattle. This height targets the sensitive areas on cattle’s faces and noses where they feel electrical contact most acutely. Start your wire at one corner post and run it along the perimeter. Use wire handling tools like spinning jennies to manage the wire as you work, preventing tangling and making attachment easier. Wrap the wire around each post, creating enough tension so the wire doesn’t sag noticeably between posts but not so much tension that it stretches excessively or pulls posts out of alignment. If your wire is too loose, cattle lean into it and defeat the electrical contact. If your wire is too tight, it strains posts and creates excessive stress points.
When you reach the end of your line, overlap the wire back to your starting point by at least 12 inches. Use crimping tools to secure connections, ensuring tight electrical contact between wire segments. Poor connections create dead zones where fence effectiveness drops dramatically. If you’re using poly tape instead of wire, the wider surface area makes tensioning easier to feel and see. Poly tape visibly sags when under-tensioned, giving you immediate feedback. Wire requires more careful judgment, so take your time getting the tension right on your first paddock. You’ll develop a feel for it quickly.
Test your circuit before moving cattle into the paddock. Use a fence tester to verify voltage at multiple points along your fence. You should read at least 2000 volts for strong deterrent effect. Lower readings indicate connection problems or inadequate energizer output. Walk the entire fence perimeter checking for vegetation touching the wire, which creates electrical loss. Remove any branches, weeds, or debris making contact. Your fence won’t work if electricity leaks into the ground through vegetation.
Safety matters during installation. Wear insulated gloves when handling charged wire. Keep children and pets away from the installation area. Never install fence during thunderstorms or immediately before them. Wet conditions can make the fence dangerously conductive for you while still protecting cattle effectively. If you touch an energized temporary fence, you’ll feel a strong but brief shock that’s startling but not dangerous. It’s an uncomfortable reminder to respect electricity.
With one paddock complete, you have a working model to replicate across your remaining paddocks. Your installation speed increases substantially on subsequent paddocks. Most Canadian ranchers complete a typical paddock in 45 minutes to 2 hours, depending on terrain complexity and perimeter length.

Pro tip: Install your first paddock on relatively flat, weed-free ground to perfect your technique and tensioning feel before tackling more challenging terrain, then use that experience to work more efficiently on subsequent paddocks.
Step 4: Connect Electric Fencing Components Securely
Your fence is only as effective as its electrical circuit. Proper connections between your energizer, wires, posts, and ground determine whether cattle respect your fence or test it repeatedly. This step requires attention to detail, but the process itself is straightforward once you understand how electricity flows through your system.
Start by locating your energizer in a central position relative to your paddocks. Most Canadian ranchers place their energizer near a building or shelter where it’s protected from weather and accessible for monitoring. Your energizer sends electrical pulses through the fence wire. An adequate and consistent power supply around one joule per five acres maintains effective shock levels throughout your entire fencing system. Undersizing your energizer creates weak pulses that cattle gradually learn to ignore. Oversizing doesn’t hurt, but it’s unnecessary expense. Calculate your total fence length across all paddocks and choose an energizer rated for that distance.
Next, install your grounding system. This is the part most ranchers underestimate, yet it’s absolutely critical. Proper connection and grounding ensure the circuit completes when animals contact the fence. Without adequate grounding, electricity has no return path and your fence fails silently. Drive grounding rods deep into moist soil at least 6 feet away from your energizer. Most systems use two rods spaced 10 feet apart, connected together with heavy copper wire. Moist soil conducts electricity effectively. Dry soil or rocky ground reduces grounding effectiveness dramatically. If your soil is naturally dry, consider digging your grounding area slightly deeper or adding water to improve conductivity. Connect your energizer’s ground terminal to these rods using insulated cable. Never skip this step or underestimate its importance.
Now connect your hot wire from the energizer to your first fence post. Use insulated wire between the energizer and fence to prevent accidental shocks during installation and operation. Most ranchers run this connection along the ground or on posts, keeping it clearly visible so nobody accidentally touches it. At your first fence post, connect the hot wire to your energizer output terminal using a quality connector. Tight connections prevent voltage loss. Loose connections create resistance that weakens your shock. Inspect these connections regularly throughout the season, especially after heavy rain or wind.
Your fence wire must form a complete circuit back to your energizer through the ground. When cattle touch the fence, they complete this circuit, receiving a shock. If your circuit has gaps or high resistance points, the shock weakens or disappears entirely. Walk your entire fence perimeter and visually inspect every connection. Look for corrosion, loose wires, or debris accumulation. Mud on connections creates electrical resistance. Vegetation touching wires bypasses the fence. Remove anything compromising electrical flow. In wet conditions, even small amounts of vegetation can bleed significant voltage into the ground.
Test your system before introducing cattle. Use a voltage tester to measure output at multiple points along your fence. You should read between 2000 and 5000 volts depending on your energizer capacity and system design. Lower readings indicate connection problems, inadequate grounding, or fence damage. Fix these issues before moving animals into the paddock. A properly functioning fence that cattle respect prevents constant handling stress and escape attempts.
Monitor your system weekly during grazing season. Check grounding connections for corrosion. Inspect wires for damage or vegetation contact. Verify voltage remains in the effective range. A few minutes of weekly maintenance prevents complete system failure mid-season. Replace corroded connections immediately. Tighten any loose wires. Remove vegetation touching your fence.
Remember that your temporary fence is part of a system that includes permanent perimeter fencing. The temporary fence handles rotational divisions while permanent fence prevents escapes if temporary fencing fails. Both serve critical functions. Never neglect either one.
Pro tip: Install a spare energizer before the grazing season starts and keep it stored in a dry location so a failed unit doesn’t eliminate your fence system in the middle of grazing rotation, which could be catastrophic for cattle management.
Step 5: Test Fence Integrity and Adjust for Safety
Before you move cattle into your paddocks, your fence must prove itself under controlled conditions. Testing fence integrity reveals problems while you can still fix them easily. This step prevents escaped cattle, injured animals, and the frustration of chasing livestock across your neighbors’ property.
Start your testing with a voltage check at multiple points along each paddock perimeter. Use a digital fence tester to measure voltage at least every 50 feet. You should see consistent readings between 2000 and 5000 volts, depending on your energizer capacity. Readings below 1500 volts indicate problems that need immediate attention. Low voltage means cattle can lean into the fence without experiencing an effective shock. Walk your entire perimeter systematically, recording voltages in a notebook. Note locations where voltage drops significantly. These problem areas are where cattle will test your fence first.
Below is a concise summary of critical fencing voltage ranges and their consequences:
| Voltage Range | Deterrent Effect | Risk of Escape |
|---|---|---|
| 2000–5000 volts | Strong, reliable | Very low risk |
| 1500–1999 volts | Moderate deterrence | Higher risk, check fence |
| Below 1500 volts | Weak, unreliable | Cattle likely to escape |
Check for physical damage as you walk the line. Look for broken wires, loose connections, or damaged posts. Bent posts create electrical contact problems. Corroded connectors bleed voltage into the ground. Vegetation touching the wire bypasses your fence entirely. Remove any branches, weeds, or grass making contact with your fence. In wet conditions, even moisture on the wire can reduce effectiveness. Your inspection should be thorough but doesn’t need to be time-consuming. Most ranchers complete a full paddock walk-through in 15 to 20 minutes.
Now conduct a practical test with cattle. This might seem risky, but introducing a small group of calm cattle into your paddock while you monitor their behavior reveals how your fence actually performs under real conditions. Watch their first contact with the wire. A proper electric fence should cause cattle to stop and back away after touching it once. They should not charge it repeatedly or attempt to go through it. If cattle show no reaction or seem unfazed after contact, your voltage is too low or your grounding is inadequate. Fix these issues before introducing your entire herd.
Adjust your fence based on what you observe. Regular fence inspections identify damaged components and enable prompt repairs to prevent animal escapes. If voltage is low in specific areas, check your connections and grounding in those zones. Tighten any loose wires or connectors. If voltage is universally low across the entire paddock, your energizer may be undersized or your grounding system inadequate. Replace grounding rods or upgrade your energizer as needed. Small adjustments now prevent major problems later.
Verify that your ground circuit functions properly. Use your fence tester to confirm voltage between the hot wire and ground. If voltage reads high on the hot wire but low between wire and ground, your grounding system is the problem. Drive additional grounding rods in moist soil. Ensure your ground connections are clean and tight. Corrosion on grounding connections is a common culprit in systems that gradually lose effectiveness through the season.
Pay special attention to gate areas and corners where cattle might naturally test weak points. These locations experience more stress from animal contact and require extra attention. Maintaining proper voltage levels throughout the season ensures both animal safety and containment efficacy. Install extra posts at corners to prevent sagging. Ensure gates have proper connections that maintain electrical continuity when gates are open or closed.
Document your testing results. Write down voltage readings, problem locations, and adjustments you made. This information becomes valuable as you adjust your system throughout the season. If certain areas consistently show low voltage, you’ll know to monitor them closely. If your system performs well in some paddocks but poorly in others, the data helps you understand why.
Repeat this testing process for each paddock before moving cattle. Yes, it takes time, but compared to handling escaped cattle or managing injured animals, testing is quick and cheap insurance. Cattle learn fast. A poorly functioning fence teaches them they can escape. A well-functioning fence teaches them respect for boundaries.
Pro tip: Test your fence during evening hours when soil moisture is typically highest, as this gives you the most realistic voltage readings and reveals any grounding issues that might not show up during dry afternoon conditions.
Secure Your Rotational Grazing Success with Reliable Temporary Fencing Solutions
Rotational grazing brings numerous benefits but challenges like selecting the right temporary fence materials, ensuring proper installation, and maintaining strong electric circuits can feel overwhelming. This article highlights critical steps such as assessing paddock layout, choosing electric fence components, and testing fence integrity to keep your cattle safe and your pasture productive. Without dependable fencing supplies and expert guidance, you risk livestock stress, escape, or pasture damage.

Take control of your grazing management today by equipping yourself with premium materials tailored for Canadian conditions at FenceFast.ca. From portable electric fencing systems, including energizers and insulated posts, to connectors and gate hardware, our comprehensive selection streamlines setup and daily adjustments. Benefit also from design consulting and nationwide shipping that ensure you get exactly what you need, when you need it. Start building your ideal fencing system now and experience efficient cattle movement and peace of mind. Explore our full range of fencing and animal management supplies at FenceFast.ca and prepare your pasture for success.
Frequently Asked Questions
How do I assess my grazing area before building a temporary cow fence?
Begin by walking your entire grazing area to evaluate the terrain, water sources, and natural boundaries. Take note of wet areas and high and low points to plan an effective fence layout that accommodates livestock movement and optimizes grazing cycles.
What materials should I gather for building a temporary cow fence?
Select portable electric fence components like poly wire or poly tape, along with step-in or pigtail posts. Gather energizers, reels, connectors, and safety equipment to ensure a smooth installation and effective containment of your cattle.
How do I ensure the integrity of my temporary cow fence after installation?
Conduct a voltage test using a fence tester at various points along the wire, aiming for readings between 2000 and 5000 volts for optimal performance. Walk the fence line to check for physical damage, vegetation contact, or loose connections that could compromise the system.
What is the best way to connect the electric fencing components securely?
Start by positioning your energizer centrally, then connect the hot wire from the energizer to the first fence post using insulated wire. Ensure tight connections to prevent voltage loss, and check your grounding system to ensure it completes the electrical circuit effectively.
How often should I monitor my temporary cow fence during grazing season?
Perform weekly inspections of your temporary cow fence to check for voltage consistency, wire damage, or vegetation contact. Address any issues immediately to prevent potential cattle escapes and maintain a reliable grazing environment.
What is the importance of proper grounding for my temporary cow fence?
Proper grounding is crucial as it completes the electrical circuit when cattle contact the fence. Install grounding rods deep into moist soil and ensure solid connections to enhance effectiveness; inadequate grounding can lead to weak or nonexistent shocks, causing cattle to challenge the fence.

