
Most american backyard farmers know that goats can test any fence you put up, but what surprises many is that even experienced herds can escape if temporary fencing is not planned well. Choosing the right fencing setup is more than a quick weekend project. The materials you select and the way you prepare your land play a big role in keeping stubborn goats safely contained. This guide offers step by step support for american goat owners who want practical, proven strategies to build a fence that truly works.
Table of Contents
- Step 1: Assess Your Site and Choose Materials
- Step 2: Lay Out the Fence Line and Clear Obstacles
- Step 3: Install Fence Posts and Attach Fencing
- Step 4: Secure Entry Points and Gates
- Step 5: Test Stability and Monitor Goat Containment
Quick Summary
| Key Point | Explanation |
|---|---|
| 1. Assess your site thoroughly | Create a detailed map of your property to identify contours, soil types, and obstacles affecting fence installation. |
| 2. Choose appropriate fencing materials | Select materials like woven wire or polywire that suit your terrain and goat management needs for effective containment. |
| 3. Clear the fence line effectively | Remove vegetation and obstructions to ensure a smooth fence installation and minimize potential complications. |
| 4. Install posts securely | Space posts properly and ensure they are set deep and stable to withstand pressure from goats and maintain fence integrity. |
| 5. Conduct regular inspections | Monitor fence stability and goat containment routinely, checking for weak spots and ensuring any vegetation does not interfere with electric fencing. |
Step 1: Assess Your Site and Choose Materials
Before installing temporary goat fencing, you’ll need to thoroughly evaluate your specific landscape and select appropriate materials that match your terrain and goat management needs. This critical initial step determines the long-term success of your fencing project.
Start by creating a detailed map of your property using aerial and topographical data to understand the land’s contours, soil types, and potential challenges. Look for natural barriers, slope variations, and potential weak points where goats might attempt to escape. Consider factors like ground hardness, potential water runoff areas, and existing vegetation that could impact fence installation.
When selecting fencing materials, explore options like high-tensile wire, woven wire, polywire, and net wire to determine the best fit for your specific situation. Woven wire works well for rough terrain, while polywire might be perfect for temporary rotational grazing setups. Pro tip: Always choose materials that provide both security and flexibility, ensuring your goats stay safely contained without restricting their natural movement.
Once you’ve mapped your site and selected appropriate materials, you’ll be ready to move on to the next crucial step of marking and preparing your fencing area.
Step 2: Lay Out the Fence Line and Clear Obstacles
With your site assessment complete, you’re ready to prepare the ground and precisely mark your temporary goat fence location. This critical stage ensures a smooth installation and prevents future complications with your fencing project.
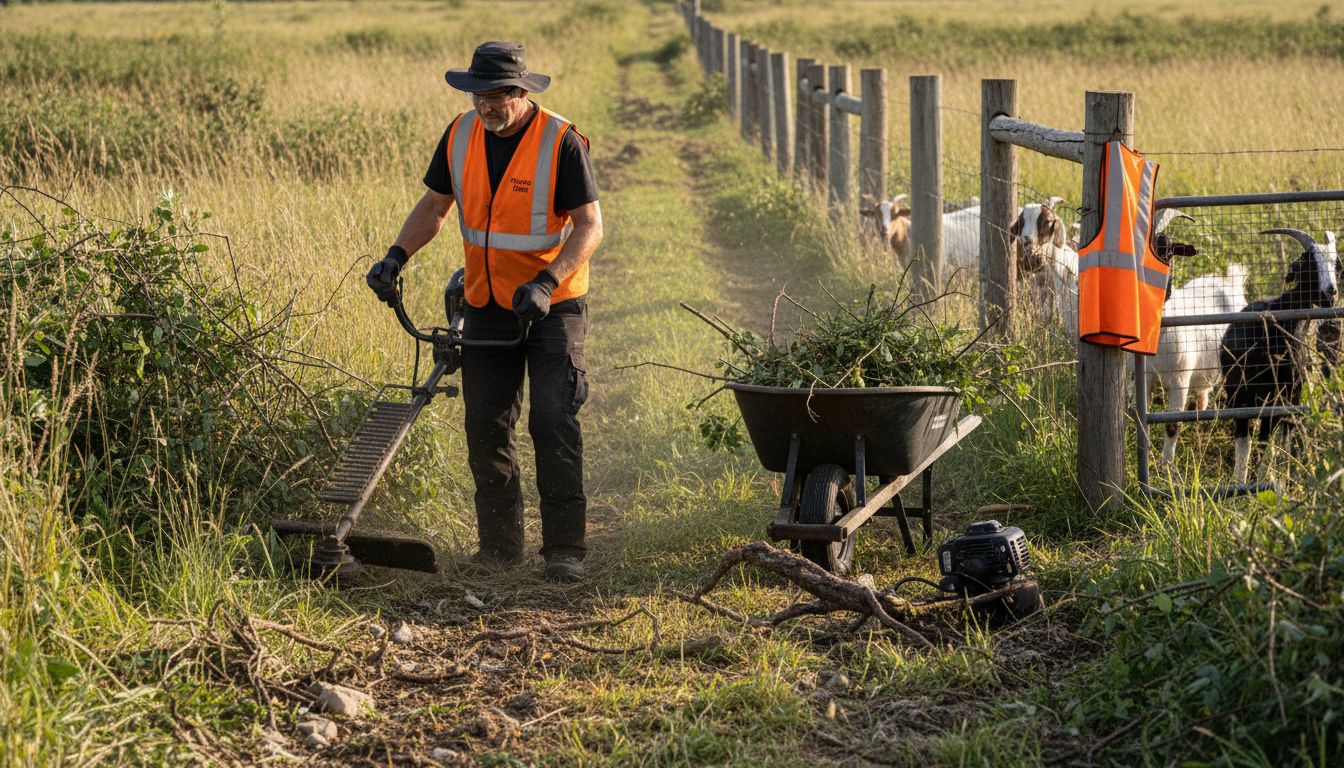
Clearing a designated fence line involves creating a clear path approximately two meters wide, removing all vegetation, rocks, and potential obstructions that might interfere with fence installation. Use a string line to establish a straight and accurate boundary, which helps maintain proper alignment and ensures your fence follows the intended path. Take time to walk the proposed route, looking for underground roots, large stones, or uneven terrain that could challenge your installation.
As you mark your fence line, consider using farm fencing techniques that accommodate your specific terrain. Remove any brush or small trees that might obstruct your fence, and create a clean corridor that allows for easy post placement and wire stringing. Pro tip: Always leave a small buffer around trees or large obstacles to prevent future growth from damaging your fence.
Once your fence line is cleared and marked, you’ll be prepared to move forward with post installation and actual fence construction.
Step 3: Install Fence Posts and Attach Fencing
With your fence line prepared, it’s time to transform your planned route into a secure boundary for your goats. This critical phase involves strategically placing posts and attaching fencing materials to create a reliable containment system.
Post placement requires careful consideration for effective goat management. Typically, you’ll want to space your posts between 20 to 40 feet apart, depending on your specific terrain. For corner and high-stress areas, use sturdy wooden posts, while metal T-posts work well for intermediate sections. When installing, ensure posts are set deeply and firmly to withstand goats pushing against the fence. For a high-tensile fence, plan to secure five to six smooth wires, with two to three potentially electrified to provide additional containment.
As you attach your fencing material, create a taut and consistent barrier that prevents goats from pushing through or finding weak spots. Pro tip: Always check wire tension and post stability before considering the installation complete. Learn more about proper installation techniques to ensure your temporary goat fence remains robust and effective.
With posts installed and fencing attached, you’re now ready to prepare for final adjustments and testing.
Step 4: Secure Entry Points and Gates
With your temporary goat fence nearly complete, installing secure and functional entry points becomes crucial for managing your herd and maintaining the integrity of your fencing system. This stage requires careful planning and precise execution.
Fixed pasture gates demand specific dimensional considerations to ensure both functionality and security. Choose a gate wide enough to accommodate equipment and livestock movement while maintaining a tight seal when closed. Typically, gates for goat enclosures should be at least 10 to 12 feet wide, constructed from durable materials that match your existing fence design. Consider using sturdy metal frames with welded wire or wooden panels that can withstand repeated use and potential goat pressure.
When installing your gate, ensure the hinges are robust and positioned to allow smooth swinging without sagging or catching. Pro tip: Add a reliable locking mechanism that goats cannot manipulate, such as a spring loaded drop latch or a padlock system. Explore additional gate installation techniques to reinforce your temporary goat fencing strategy.
With entry points secured, you are now prepared for the final testing and verification of your goat fencing system.
Step 5: Test Stability and Monitor Goat Containment
After installing your temporary goat fence, thorough testing and ongoing monitoring become critical to ensuring your herd remains safely contained. This final stage confirms the effectiveness of your fencing strategy and prevents potential escape scenarios.
Regular fence line inspections are essential for maintaining livestock security, focusing on identifying potential weak points or areas of vulnerability. Walk the entire perimeter carefully, checking for sagging wires, loose posts, potential gaps, or signs of wear that could compromise containment. Pay special attention to corners, gate areas, and sections where terrain might cause additional stress on your fencing materials. Explore advanced electric fencing techniques to enhance your containment strategy.
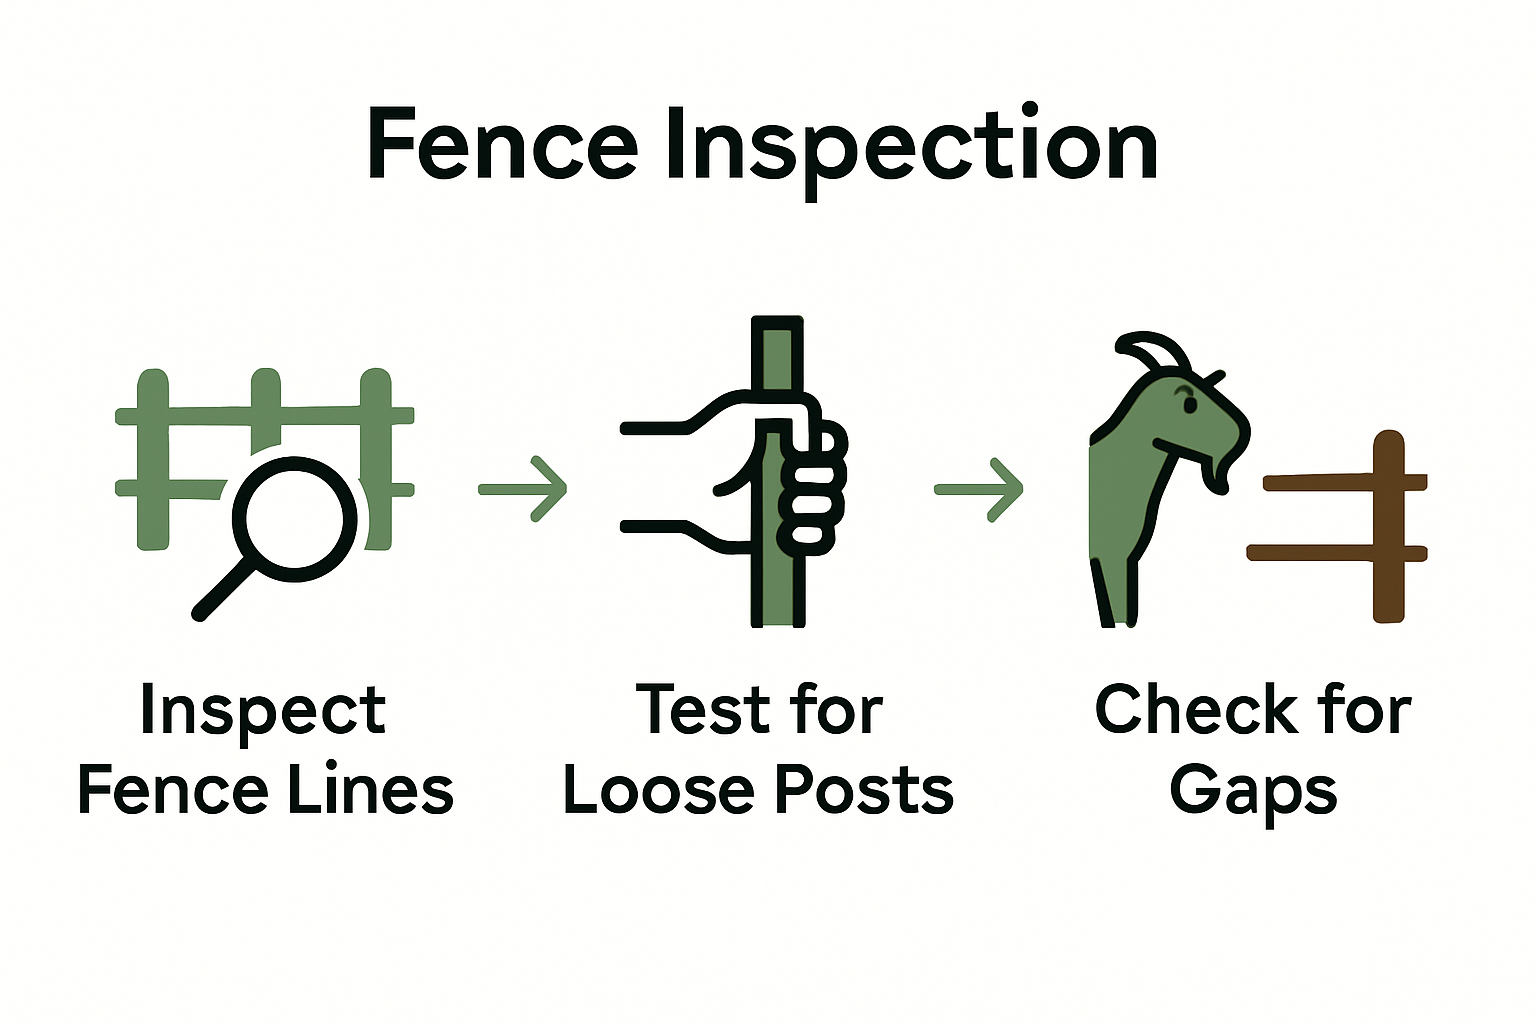
If you’re using electric fencing, ensure vegetation remains clear of the wire to maintain consistent electrical contact and prevent shorting. Pro tip: Create a routine inspection schedule checking tension, grounding, and overall fence integrity at least weekly during the first month of installation. Watch your goats behavior closely during initial containment to quickly identify any potential escape routes or weaknesses in your fencing system.
With comprehensive testing complete, you have successfully established a reliable temporary goat fence.
Build Reliable Temporary Goat Fencing with Ease
Setting up a secure temporary goat fence requires careful planning around key challenges like terrain assessment, durable material selection, and strong post installation. The article highlights the importance of factors such as proper wire tension, effective gate security, and ongoing fence monitoring to prevent escapes. These crucial details can feel overwhelming without the right tools and supplies tailored to your specific farming needs.
At FenceFast.ca, we offer everything you need to tackle these fencing challenges confidently. From high-quality fencing components like staples, connectors, and durable wires to advanced electric fencing systems and sturdy gates designed for easy installation, our catalog supports every step outlined in your setup process. Whether you are clearing fence lines or enhancing stability with reliable posts and accessories, our expert knowledge and nationwide shipping make your project smoother.

Take control of your temporary fencing today and protect your goats with ease. Visit FenceFast.ca now to explore our selection of fencing supplies and get started on creating a secure and durable goat enclosure that lasts throughout each grazing season.
Frequently Asked Questions
How do I select the right materials for temporary goat fencing?
Start by assessing your landscape and goat management needs. Choose materials like high-tensile wire or woven wire based on your terrain; for instance, woven wire is effective for rugged areas.
What should I consider when marking the fence line for temporary goat fencing?
Ensure to clear a path about two meters wide of all vegetation and obstacles that might impede installation. Walk the proposed route and look for underground roots or large stones that could pose challenges during setup.
How far apart should I space fence posts for goat fencing?
Typically, fence posts should be spaced between 20 to 40 feet apart. For corners and high-stress areas, opt for sturdy wooden posts to provide extra support and stability.
What should I check during the testing phase of my temporary goat fence?
Thoroughly inspect the entire fence perimeter for sagging wires, loose posts, or gaps. Aim to create a routine inspection plan at least once a week during the first month post-installation to ensure the fence remains secure.
How can I secure entry points effectively on my goat fencing?
Install gates that are at least 10 to 12 feet wide using durable materials that match your fenced area. Ensure hinges are mounted properly to allow smooth operation and include a reliable locking mechanism that can’t be easily manipulated by the goats.
How do I monitor my goats’ containment after installing the fence?
Observe your goats closely to identify any behavior suggesting they may find escape routes. Conduct regular perimeter checks, focusing on areas that are likely to weaken over time, ensuring they stay secure in the enclosure.

