

Four post shapes cover almost every fencing job you’ll ever plan: round tubular posts, square or rectangular hollow-section posts, driven T-posts and H-posts, and ornamental or wrought-iron posts. Each one solves a different problem, and picking the wrong shape is the single most common reason fences fail early or look wrong for the site.
Here’s the fast version, before the details:
- Round (tubular) posts — best for chain-link and light welded-mesh runs, especially in windy, exposed sites.
- Square/rectangular (SHS/RHS) posts — best for privacy panels, wood-panel infill, and anywhere you need a flat face for brackets.
- T-posts and H-posts — best for agricultural fencing, temporary containment, and fast pasture rotation where driving beats digging.
- Ornamental/wrought-iron posts — best for entryways, pool enclosures, and anywhere curb appeal matters as much as containment.
On materials: galvanized steel is the default workhorse for cost and longevity, powder-coated steel adds color without sacrificing much strength, aluminum trades some strength for zero rust and easy handling, and stainless steel earns its higher price near salt water or in heavy-corrosion settings.
Table of Contents
- Round (tubular) fence posts: form, sizes and where they work best
- Square and rectangular hollow-section posts: stiffness, panel support and attachment
- T-posts and H-posts: driven agricultural and chain-link options
- Ornamental and wrought-iron posts: style, weight and fabrication notes
- Materials and finishes: which coating fits which environment
- Post accessories: caps, anchors, brackets and sleeves
- Installation basics: embedment, spacing, and footing choice
- How to choose the right metal post for your project
- Maintenance, lifespan, and knowing when to replace a post
- Agricultural fencing: what actually goes wrong on farms
- Balancing durability, cost, and installation practicality
- If you want products or expert help from Fencefast
- Key takeaways: quick recap of what to pick and why
- Sources
Round (tubular) fence posts: form, sizes and where they work best
Round posts are hollow steel or aluminum tubes, and they’re the shape most people picture when they hear “chain-link fence.” The tube geometry distributes load evenly in every direction, which is exactly why round posts show up so often on common post shapes tied to specific applications like chain-link and light mesh systems.
Residential chain-link jobs commonly run on outside-diameter posts about 2 inches or more, with terminal and gate posts sized larger depending on gate weight. Wall thickness usually falls within a typical range for line posts, thicker for corner and end posts that take more pull from the wire.
Round posts have a real aerodynamic edge, too. Wind passes around a curved surface with less resistance than it hits a flat one, which matters on exposed rural lots and coastal properties where gusts regularly top what a subdivision fence ever sees.
What round posts do well:
- Distribute mesh tension evenly around the tube’s circumference.
- Shed wind load better than flat-faced shapes at the same wall thickness.
- Accept standard chain-link fittings (rail ends, tension bands, brace bands) without custom fabrication.
Where they fall short: Round posts are a poor match for heavy privacy panels or solid wood infill. Bracket hardware for flat panels wants a flat face to bite into, and mounting brackets onto a curved tube usually means a shimmed or specialty fitting that adds cost and a weaker connection than a direct bolt-through.
Square and rectangular hollow-section posts: stiffness, panel support and attachment
Square hollow section (SHS) and rectangular hollow section (RHS) posts are the standard choice once you’re supporting anything heavier than open mesh. A typical residential setup runs 2 inch by 2 inch square posts for line posts, stepping up to 4 inch by 4 inch or 2 inch by 3 inch rectangular sections for gate posts and taller privacy runs, following the same shape-to-application patterns manufacturers standardize around.
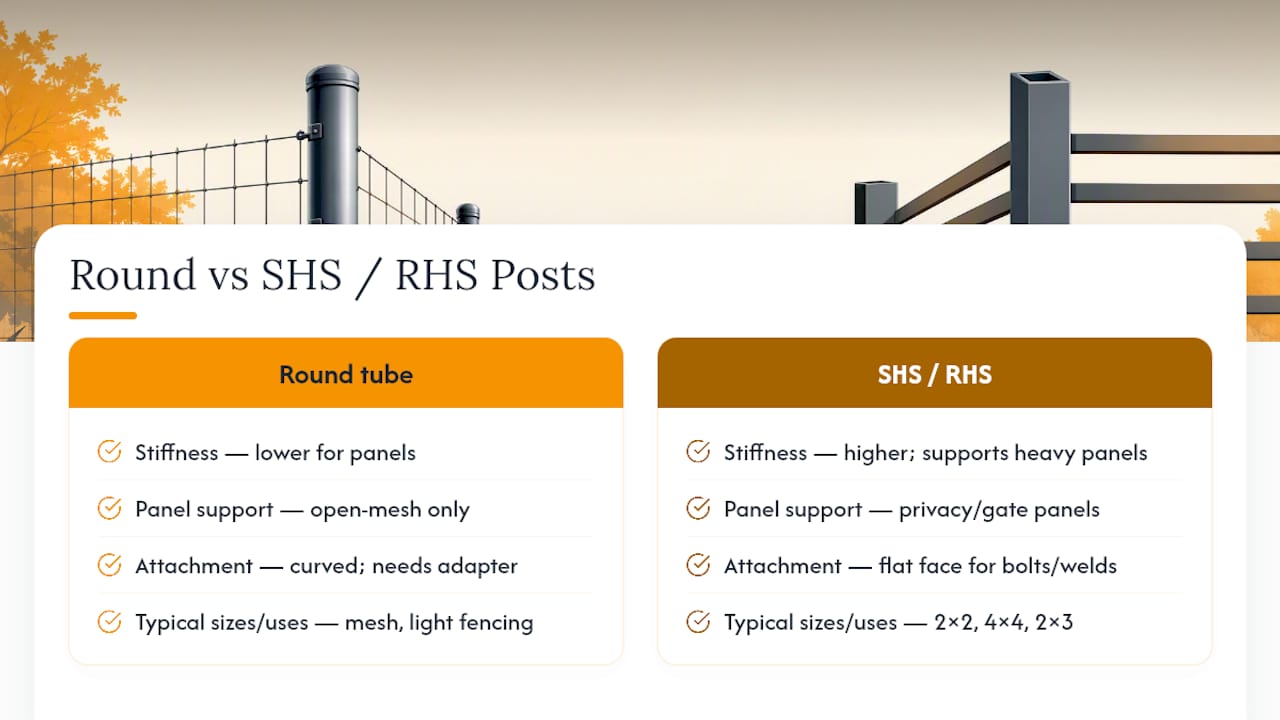
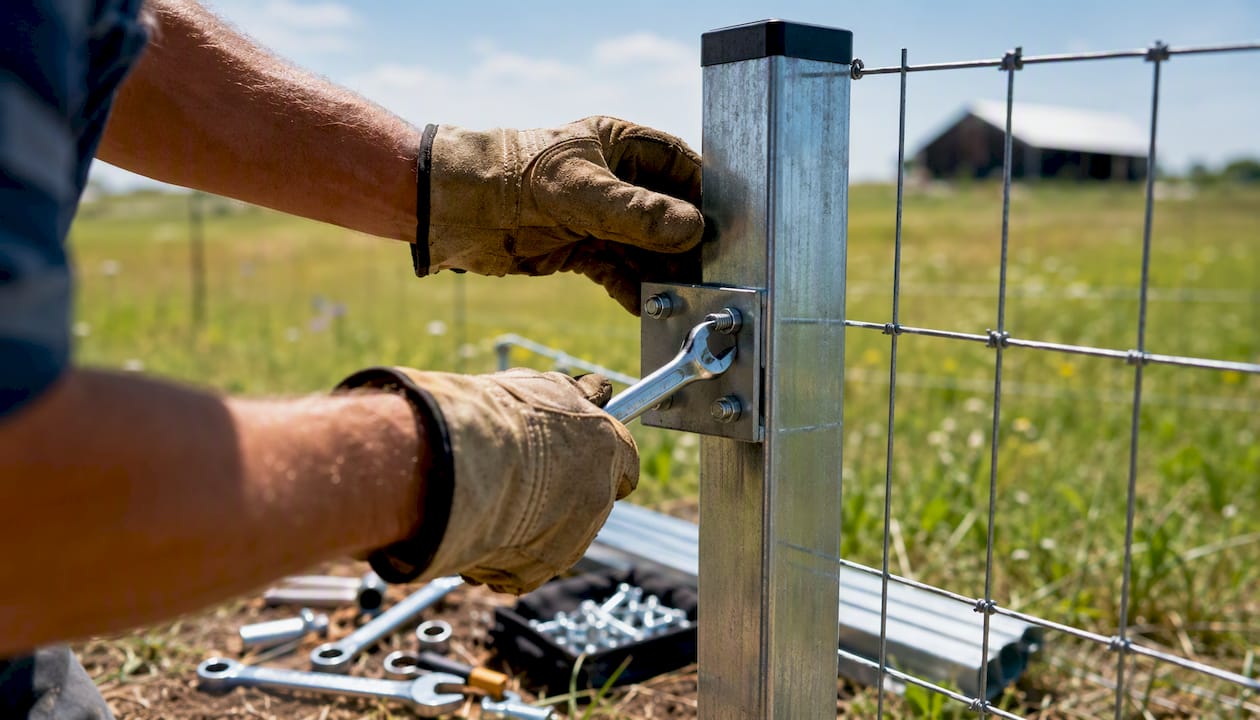
The flat face is the whole point. A square or rectangular tube gives you a straight surface for through-bolted brackets, welded panel clips, or slip-on channel systems that a round post simply can’t offer without an adapter. For six-foot privacy panels catching full wind load, that flat mounting surface is often the difference between a bracket that holds for a decade and one that works itself loose within a season.
Manufacturers lean on a handful of standardized SHS and RHS dimensions rather than custom-cutting every order, and that standardization speeds up production and keeps panel systems compatible across brands. If you’re buying posts and panels separately, matching post width to the panel bracket spec matters more than matching brand names.
Attachment methods vary by project scale. Homeowners often weld or bolt on simple bracket plates for wood-panel infill; commercial installers frequently use through-bolt plates for security fencing or slip-on channel systems that let a panel drop into a track welded onto the post face. None of these methods work well without a flat surface, which is the entire argument for choosing SHS/RHS over round tube in the first place.
One practical rule: once you’re running solid panels above four feet, concrete footings stop being optional. The wind load on a solid surface generates enough leverage at the base that a driven or gravel-set post will rack loose within a year or two, especially in loose or sandy soil.
T-posts and H-posts: driven agricultural and chain-link options
T-posts and H-posts (sometimes called channel posts) are driven directly into the ground rather than set in a dug hole, which is the entire reason farmers and contractors reach for them. No digging, no concrete, no curing time. You drive the post, clip on the wire, and move to the next one.
The typical installation sequence looks like this:
- Mark post spacing along the fence line, usually 10 to 12 feet for wire fencing and tighter for mesh.
- Set corner and end posts first, since these anchor points take the most tension and often still get concrete or brace assemblies even when line posts don’t.
- Drive line posts with a manual post driver or a tractor-mounted hydraulic driver, checking plumb every few posts.
- String and tension wire, then clip or tie to each post using the post’s built-in clips or separate fasteners.
- Recheck tension after the first freeze-thaw cycle, since driven posts can shift slightly as ground settles.
T-post and H-post applications:
- Field and pasture fencing where speed matters more than permanence.
- Temporary construction site fencing that needs to come down in months, not years.
- Chain-link support in soil conditions where driving beats digging through rock or clay.
The trade-off is durability at fixed points. Driven posts save enormous labor across long straight runs, but they lack the holding power of a concrete-set post at corners, gates, and anywhere the fence takes constant lateral pull. That’s exactly why even T-post pastures usually mix in concrete-set corner assemblies. For rotational grazing setups where the whole line moves every season, dedicated temporary driven post systems are worth a look before you commit to permanent placement.
Ornamental and wrought-iron posts: style, weight and fabrication notes
Ornamental posts, whether traditional wrought iron or modern cast aluminum, get chosen for looks first and structure second, and that changes almost everything about how you buy and install them. Real wrought iron and steel ornamental posts carry serious weight, and custom wrought-iron installations typically require professional fabrication with tight tolerances that most DIY installers underestimate going in.
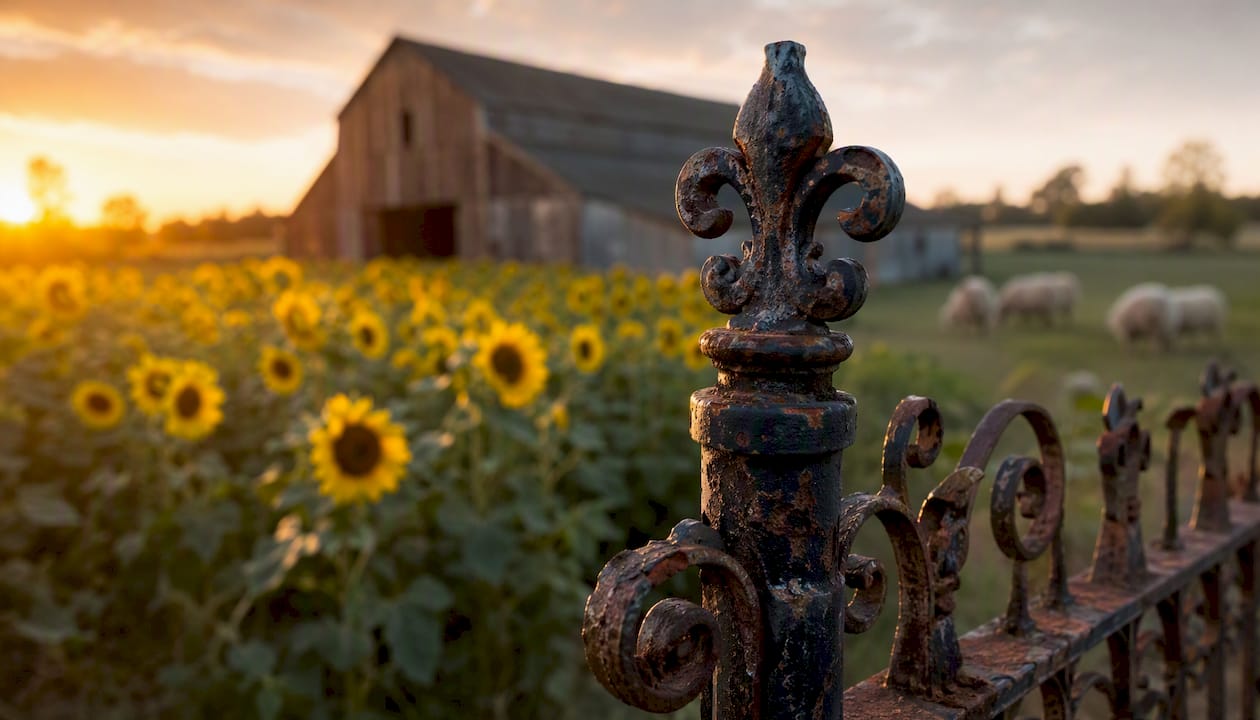
The weight has consequences beyond the post itself. Heavier posts need larger, deeper footings to resist tipping, and decorative scroll work or finials often mean the post can’t just be cut to length on-site the way a plain tube can. Welding repairs on galvanized ornamental iron also require re-galvanizing the affected area, or you’ve just created a rust starting point exactly where you patched it.
Aluminum has become the practical alternative for anyone who wants the wrought-iron look without the weight or the rust risk. It’s a common swap for pool enclosures and decorative boundary fencing precisely because aluminum delivers a similar visual profile at a fraction of the weight, without the corrosion exposure that real iron carries, though it dents more easily under a direct hit.
Installation considerations for ornamental posts:
- Confirm footing depth accounts for the post’s actual weight, not a generic chart built for lightweight tube.
- Check that decorative caps and finials are compatible with the post’s finish before final assembly.
- Budget extra time for on-site fitting since ornamental sections rarely arrive perfectly matched to uneven ground.
Pro Tip: Match your mounting hardware’s finish to the post’s coating before you buy. Bolting bare steel hardware onto an anodized aluminum ornamental post sets up galvanic corrosion right at the connection point, and that rust streak will show up exactly where everyone can see it.
Materials and finishes: which coating fits which environment
Galvanized steel remains the default for good reason. It’s the most cost-effective option for long-term outdoor use, and hot-dip galvanized posts conforming to ASTM A123/A123M zinc coating standards are built to a known, testable benchmark rather than a marketing claim.
Longevity backs that up. Hot-dip galvanized posts can last multiple decades in typical outdoor conditions, and the visible spangle pattern on the surface, that crystalline shimmer you see on new galvanized steel, is a genuine quality indicator: it means the coating went on via hot-dip application rather than a thinner electroplated process.
The catch is that “galvanized” doesn’t mean “rust-proof forever.” The zinc layer is sacrificial. It corrodes so the steel underneath doesn’t, but it still gets consumed over time. In high-salt coastal air or high-abrasion sites where the coating takes constant physical wear, that sacrificial layer depletes faster, and a powder-coat topcoat or a jump to stainless steel is often the smarter call.
Material and finish quick reference:
- Galvanized steel — best all-around value; strong, widely available, decades of service life in normal conditions.
- Powder-coated steel — same steel strength with color options and a bit more surface protection against minor abrasion.
- Stainless steel — best for coastal, high-salt, or heavy-chemical exposure where standard zinc coatings degrade faster.
- Aluminum — best where weight and easy handling matter, with zero rust risk, at the cost of some dent resistance and load capacity.
- Anodized aluminum — adds a hard, color-stable oxide layer that resists scratching better than raw aluminum in high-traffic settings.
For agricultural sites specifically, moisture from manure and urine accelerates corrosion at ground level faster than plain rain exposure does. This is one more reason many farms lean toward heavier-gauge galvanized posts or fence post materials chosen specifically for farm conditions rather than the lightest option on the shelf.
Post accessories: caps, anchors, brackets and sleeves
Post caps, base plates, sleeve inserts, and brackets rarely get the attention the post itself does, but they’re where most real-world failures actually happen. A cap keeps water out of a hollow tube’s open top, which matters more than it sounds like: standing water inside a post freezes, expands, and can split a weld seam over a few winters. Base plates and surface mounts let you set a post on concrete, a deck, or a retaining wall without digging into it. Sleeve inserts let you drop a replacement post into an old footing without breaking out concrete.
The real risk lives in mismatched hardware.
A post rated for high wind load and a heavy panel can still fail completely if the bracket holding them together isn’t rated for the same load. The connector, not the post, is usually where a fence actually gives way. Strong steel with an underspecified clip is a system that’s only as strong as its weakest bolt.
Picture a six-foot solid privacy panel on a properly sized 4x4 RHS post, attached with lightweight fence clips meant for open picket sections. The post holds. The clip doesn’t. First real windstorm, the panel peels off the post while the post itself stands there undamaged, which tells you exactly where the design failed.
For footing conditions, driven anchors and helical screw anchors work well in stable soil where you want removable or semi-permanent posts. Sandy or loose soil generally needs a wider concrete footing or a longer helical anchor to get equivalent holding power, since the anchor’s grip depends on soil resistance that loose ground simply doesn’t provide.
Installation basics: embedment, spacing, and footing choice
Getting the footing right matters more than the post grade you buy. A premium galvanized post set too shallow will lean and fail years before a basic post set correctly ever would.
Choosing between concrete, driven, and anchor systems:
Concrete encasement is close to mandatory for square and rectangular commercial posts, since those flat-faced shapes catch far more wind load per square foot than open mesh does and need the extra resistance concrete provides. Driven posts skip footings entirely and are engineered for exactly that, which is why T-posts and Y-posts dominate long agricultural runs where digging every hole would be impossible on a real timeline. Helical or screw anchors split the difference: faster than concrete, more secure than a bare driven post, and a good fit for stable soil where you still want real pull-out resistance.
On-site checklist before you call a footing done:
- Confirm embedment depth against local frost line, not just the general range above.
- Check plumb in two directions, not just one, before concrete sets or before moving to the next post.
- Verify bracket and hardware load ratings actually match the panel weight going on that post.
How to choose the right metal post for your project
Work through this in order, and you’ll land on the right post shape and material almost every time:
- Define the fence’s job. Containment, privacy, security, or decoration each point toward a different shape.
- Evaluate wind exposure and soil type. Open, windy sites and loose soil both push you toward deeper footings or concrete regardless of post choice.
- Pick material and coating based on environment. Coastal or high-corrosion sites justify stainless or a powder-coat upgrade over standard galvanized.
- Verify attachment hardware before you order posts. Bracket and clip compatibility should drive post shape, not the other way around.
- Confirm spacing and identify gate posts early. Gate posts almost always need a heavier gauge and deeper footing than line posts on the same fence.
Red flags that mean stop and rethink:
- Wall thickness that looks thin for the panel height you’re supporting.
- A round post chosen for a job that needs flat-face bracket mounting.
- Driven posts specified for a permanent commercial security line.
- Mismatched hardware finish creating a visible corrosion point at every connection.
Maintenance, lifespan, and knowing when to replace a post
Most metal post failures start small and stay invisible until they don’t. A quick annual walk of the fence line catches the majority of problems before they become expensive.
What to check:
- Coating integrity at the post’s base, where soil contact and moisture do the most damage.
- Fastener corrosion at every bracket and clip, especially where dissimilar metals touch.
- Anchor or footing movement, visible as a slight lean or a gap around the post base.
- Weld integrity on any custom or ornamental fabrication, checking for hairline cracks.
The most common failure modes follow a predictable pattern: a coating breach lets moisture reach bare steel, galvanic corrosion sets in wherever dissimilar metals contact without an insulating barrier, hardware slowly loosens through seasonal freeze-thaw cycles, and frost heave gradually pushes shallow footings upward over several winters.
Repair makes sense when the post itself is structurally sound and the damage is limited to a coating patch or a single failed bracket. Replacement is the right call once corrosion has visibly thinned the tube wall, a weld has cracked at a structural joint, or a footing has failed badly enough that resetting the same post won’t hold. Trying to patch a structurally compromised post to save a short-term cost usually just delays a bigger repair bill.
Agricultural fencing: what actually goes wrong on farms
The most expensive mistakes on working farms usually trace back to one of two decisions: driving a post where it should have been set, or under-rating a bracket on a gate that sees daily livestock pressure. A driven T-post handles a straight wire line fine. Put that same post at a heavily used gate corner, and the constant lateral load from animals leaning and gates swinging will work it loose within a season or two.
Post spacing for live-load conditions, meaning fences that cattle or horses actually push against rather than just contain, generally needs to run tighter than the standard 10 to 12 foot pasture spacing, especially near corners, water access points, and feeding areas where animal traffic concentrates.
Corrosion around manure and urine deserves specific attention. Ground-level moisture combined with the ammonia in animal waste accelerates zinc coating breakdown faster than plain weather exposure, which is one more argument for heavier-gauge posts near barns, corrals, and loafing areas rather than the standard-gauge posts fine for open pasture.
Pro Tip: On electric fence lines, never run bare wire directly against an untreated metal post without a rated insulator. The post becomes a ground path, your fence loses charge at every contact point, and livestock quickly learn which sections don’t actually shock.
Common on-farm mistakes worth avoiding:
- Using driven posts at corners or gates that need real holding power.
- Skipping insulators on metal posts carrying electrified wire, which grounds out the charge.
- Installing brackets rated for static loads on gates that see constant animal pressure.
- Ignoring ground-level corrosion checks near manure-heavy areas until a post fails.
Choosing the right insulator matters as much as the post itself on an electric line. Guidance on matching insulators to metal post types covers the specific hardware that prevents stray-current losses, and a broader look at livestock fencing mistakes that cost farmers the most walks through the failure patterns that show up most often on working farms.
Balancing durability, cost, and installation practicality
Every post choice comes down to the same four variables fighting each other: durability, load capacity, environment, and budget. Chase durability alone and you’ll overspend on stainless steel for a dry inland pasture that never needed it. Chase budget alone and you’ll under-gauge a post that fails at the first real windstorm.
The pattern that shows up again and again: people optimize for the post’s sticker price and forget the bracket, the footing, and the coating are part of the same system. A post that’s technically strong enough still fails if the connector holding the panel isn’t rated for the same load, and that mismatch costs more to fix after installation than it would have to spec correctly upfront.
For livestock work, driven posts with a solid insulator system usually beat concrete-set posts on cost and speed without giving up much practical durability. For residential privacy fencing, the calculation flips: spend the extra money on a properly gauged SHS post and a rated bracket system, because a privacy panel’s wind load punishes weak connections fast. Ornamental work sits in its own category entirely, where the fabrication and footing decisions matter more than the material grade once you’ve settled on iron or aluminum.
If you want products or expert help from Fencefast
Once you’ve settled on a post shape and material, the accessories are what turn a decent installation into one that lasts. Fencefast carries the fencing tools farmers and contractors actually reach for, including the Hayes Fencing and Crimping Tool for wire terminations and the Gallagher LiveLite energizer for livestock setups running electric wire on metal posts.

If your project involves electrified fencing on metal posts, insulator choice is not a detail to guess at. Getting the wrong insulator on a metal T-post can ground out an entire fence line, and a practical guide to choosing fence posts for Canadian farms walks through the combinations that hold up. Fencefast has worked as an authorized Gallagher dealer for 26 years, so if your project spans post selection, wire, and energizer sizing, reach out for project-specific advice before you order. Start by browsing the fencing components catalog and flag any question about post-to-hardware compatibility before checkout.
Key takeaways: quick recap of what to pick and why
The right metal fence post comes down to matching shape to load, material to environment, and hardware rating to panel weight, in that order.
| Point | Details |
|---|---|
| Match shape to fence type | Round posts suit chain-link and mesh; square/rectangular posts suit heavy panels needing flat mounting faces. |
| Driven posts save labor, not permanence | T-posts and H-posts install fast but need concrete-set corners and gates for real holding power. |
| Galvanized is the default, not automatic | Zinc coating is sacrificial; upgrade to stainless or add powder-coat near salt water or heavy chemical exposure. |
| Verify hardware before buying posts | A strong post with an underrated bracket or clip fails at the connector, not the post. |
| Fencefast supports post and hardware selection | Fencefast supplies fencing tools, insulators, and Gallagher energizers, and offers project-specific advice for matching posts to your setup. |
Sources
- Comprehensive Guide to Metal Fence Post Options: Durability, Cost, and Innovation
- Types of Fence Materials | BobVila
- Fencing materials | Modernize
- Pressure-treated vs. galvanized steel: Which fence post is right for you? - FenceWorks NW

