
TL;DR:
- Vegetation contact, inadequate grounding, and weak corner posts are the leading causes of livestock fencing failure. Regular vegetation control, load-tested grounding systems, and properly braced corners are essential for effective, long-lasting fences. Proper planning and routine maintenance help prevent costly repairs and ensure animal containment.
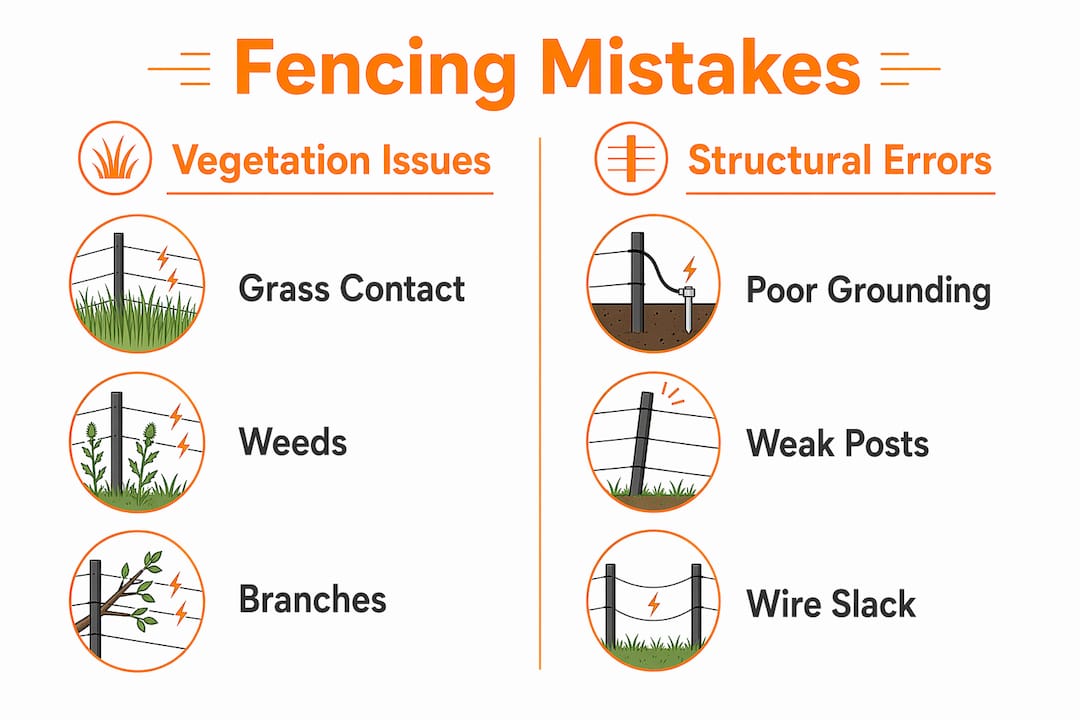
Livestock fencing mistakes are structural, grounding, and maintenance errors that directly reduce fence voltage, compromise animal containment, and shorten the working life of your entire fencing system. The three most damaging errors are vegetation contact with live wires, inadequate grounding rod installations, and weak corner post assemblies. Teagasc, the Alabama Cooperative Extension System (ACES), and the Livestock Fencing Hub all identify these same failure points across different farm types and climates. Fix these three areas and you eliminate the majority of animal escapes and fence breakdowns before they happen.
What are the most common livestock fencing mistakes with vegetation?
Vegetation touching electric fence wires is the single most frequent cause of voltage loss on working farms. When grass, weeds, or branches contact a live wire, they create an electrical short. Wet conditions make this far worse. A fence that reads 6,000 volts on a dry morning can drop to an ineffective level by afternoon after rain soaks the vegetation along the line.
Teagasc recommends removing all weeds and branches touching the fence line and conducting visual inspections regularly to maintain efficiency. That means vegetation control is not a one-time installation task. It is an ongoing operational requirement, especially during spring and summer when growth is fastest.
Pro Tip: Walk your fence line after every significant rain event. Wet vegetation shorts are invisible from a distance but will show up immediately on a fence tester.
Common vegetation mistakes that reduce fence performance:
- Allowing grass to grow tall directly under fence wires without mowing or spraying
- Ignoring tree branches that extend over or toward the fence line
- Skipping fence inspections during peak growing season (late spring through early fall)
- Failing to clear fence lines before installing new wire, which traps vegetation underneath
- Relying on the energizer to “burn off” vegetation contact instead of physically removing it
The burn-off assumption is particularly costly. A heavily loaded fence draws continuous current, which drains the energizer and accelerates wear. Routine vegetation removal keeps the system running at full power and extends energizer life significantly.
How to properly size and install grounding systems for electric livestock fences
Inadequate grounding is the leading cause of electric fence voltage loss that farmers cannot see or easily diagnose. Most farmers assume a low-voltage reading means a weak energizer. The real culprit is almost always the ground system.
Teagasc advises that most electric fence systems require at least three grounding rods to maintain strong fence voltage. Each rod should be galvanized steel, at least 4 feet long, and spaced approximately 10 feet apart. The ACES guideline adds a useful sizing rule: install a minimum of 3 feet of ground rod for every joule of energizer output power. A 6-joule energizer therefore needs at least 18 feet of total rod length in the ground.
Pro Tip: Test your grounding system under load, not just at the energizer terminal. Place an iron bar across the fence wire at 100 meters from the energizer. A properly grounded system will read below 1,000 volts on the fence wire and below 300 volts on the earthing wire under that load.
Grounding rod installation: step by step
- Drive the first rod at least 4 feet into the ground, as close to the energizer as practical.
- Space each additional rod approximately 10 feet from the previous one.
- Connect all rods with insulated ground wire, not bare wire that can corrode at connection points.
- Check all clamp connections for tightness. Loose clamps are a hidden voltage killer.
- Run a load test for grounding after installation and again each spring before the grazing season starts.
Grounding performance comparison
| Grounding setup | Expected performance | Common failure point |
|---|---|---|
| Single rod, 3 feet | Poor voltage under load | Insufficient earth contact |
| Three rods, 4 feet each, 10 feet apart | Good voltage under most conditions | Loose clamp connections |
| Three or more rods matched to joule rating | Strong voltage under heavy vegetation load | Dry or rocky soil reducing conductivity |
Soil type matters more than most farmers realize. Sandy or rocky soils conduct electricity poorly. In those conditions, you need more rods or longer rods to achieve the same grounding depth that clay soil provides with fewer rods.
What corner post and fence structure mistakes cause fence failure?
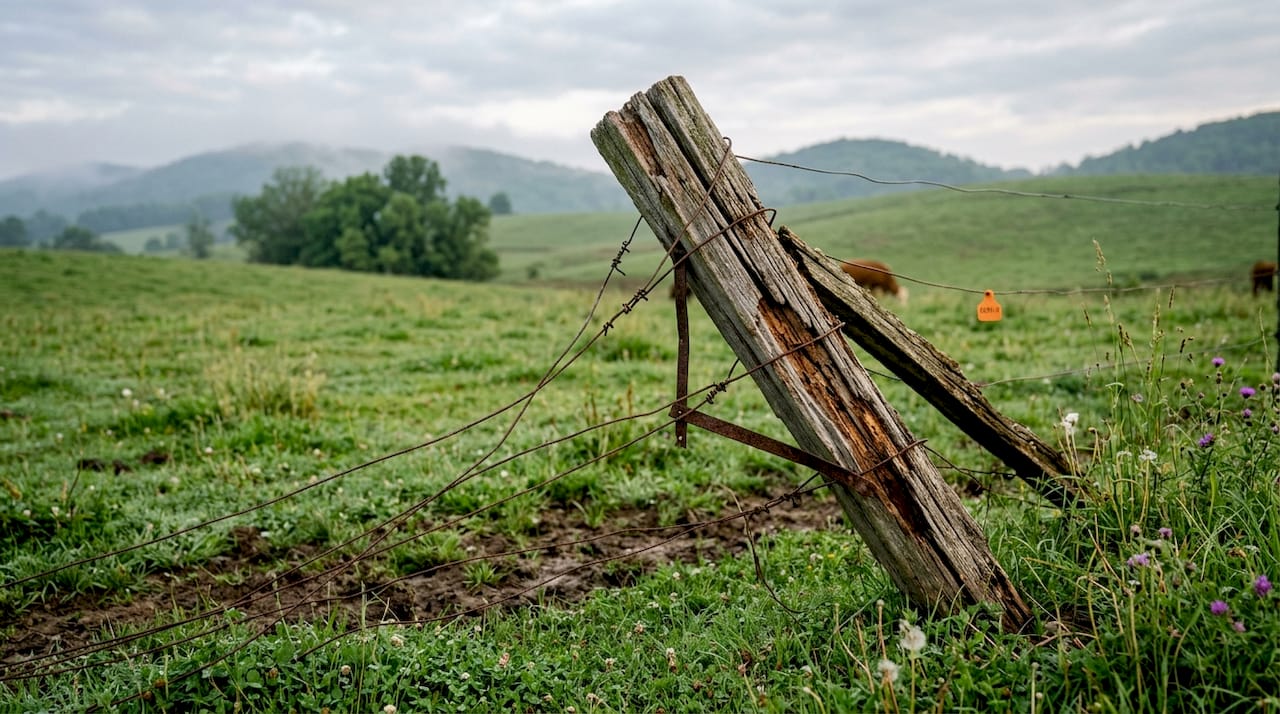
Weak corner posts and end braces are responsible for more fence failures than wire stretch or energizer problems combined. Corners carry the entire tension load of a fence run. When a corner shifts or a brace weakens, tension drops across every wire in that section.
Livestock fencing experts confirm that structurally sound corners are the foundation of tension in high-tensile wire systems. The correct fix for a sagging fence is to reinforce and reset the corner assembly, not to tighten the wire. Tightening wire against a weak corner only accelerates the corner’s failure and can snap wires under freeze-thaw cycles.
Pro Tip: Before tightening any wire, push firmly against the corner post by hand. If it moves even slightly, the brace needs repair first. No amount of wire tension will hold against a shifting post.
Corner post requirements by fence type:
- High-tensile wire fencing: corner posts 6–8 inches in diameter, set at least 4 feet deep in stable soil
- Woven wire fencing: corner posts 5–6 inches in diameter with double-span bracing
- Barbed wire fencing: corner posts 4–6 inches in diameter, braced with horizontal and diagonal members
- All types: brace wire must be tight and the diagonal brace must bear against the corner post, not away from it
Corner post failure vs. wire stretch: what actually causes tension loss
| Cause of tension loss | Frequency | Correct fix |
|---|---|---|
| Shifted or leaning corner post | Very common | Reset and brace the post |
| Weak or broken brace assembly | Common | Replace brace and re-tension |
| Wire stretch over time | Uncommon in high-tensile | Re-tension after post repair |
| Frost heave lifting posts | Seasonal in northern climates | Set posts below frost line |
Insufficient fence tension is more commonly caused by structural failures like shifted posts or weak end assemblies than by wire stretch. This is the insight most farmers miss. They spend time and money on wire when the post is the real problem.
What fence planning and maintenance mistakes reduce long-term effectiveness?
Poor initial planning creates fencing problems that no amount of maintenance can fully correct. Terrain, seasonal water flow, and grazing patterns all affect where a fence should run and how it should be built. Ignoring these factors during layout leads to fences that flood, sag, or funnel animals into corners where pressure builds against weak sections.
Planning mistakes often lead to inefficient fence layouts that require costly repairs or full rebuilds later. The most common planning errors include placing fence lines across drainage paths, spacing posts too far apart on sloped ground, and failing to account for how cattle or horses pressure specific fence sections during feeding or weather events.
Post spacing directly affects both strength and cost. Posts spaced too far apart allow wire to sag between them, reducing contact deterrence for livestock. Posts spaced too close together waste materials without improving performance. A general rule for high-tensile wire is one post every 30–40 feet on flat ground, with closer spacing on slopes or curves.
Routine maintenance prevents the slow degradation that leads to sudden failures. A fence that looks fine in april can fail by july if spring inspection is skipped. The following maintenance steps keep fences reliable year-round:
- Inspect the full fence line at the start of each grazing season
- Test fence voltage at multiple points along the line, not just at the energizer
- Check all post connections, staples, and insulators for wear or corrosion
- Clear vegetation from the fence line before growth peaks in late spring
- Re-tension wires after the first winter if frost heave is common in your area
Regular inspection and vegetation removal are ongoing maintenance requirements, not one-time installation tasks. Farms that build inspection into their seasonal calendar consistently report fewer animal escapes and lower repair costs over time.
How do energizer and material choices contribute to fencing errors?
Choosing the wrong energizer size is a common fencing error that undermines an otherwise well-built fence. An underpowered energizer cannot maintain adequate voltage across a long fence run or through heavy vegetation contact. An oversized energizer wastes money and can create safety concerns near gates and water points.
Matching the energizer joule rating to fence length and livestock type prevents underpowered systems and tripping energizers. As a baseline, cattle require a minimum of 3,000–4,000 volts to respect an electric fence consistently. Horses are more sensitive and respond to lower voltages, but they are also more likely to panic and push through a fence if startled, so physical fence strength matters as much as voltage.
Material selection errors that reduce fence effectiveness:
- Using light-gauge wire for cattle, which stretches and breaks under pressure
- Installing plastic posts in areas with heavy livestock pressure or frequent vehicle contact
- Choosing non-galvanized connectors that corrode and break the electrical circuit
- Using the wrong insulator type for the wire gauge, which causes wire slippage and voltage leakage
- Selecting a solar energizer without accounting for winter sun hours in northern Canadian climates
Animal behavior interacts directly with fence type. Pigs root under fences, so the lowest wire must be close to the ground and carry a strong charge. Poultry require fine-mesh physical barriers because electric deterrence alone does not reliably contain birds. Matching the fence system to the specific animal prevents the most expensive containment failures.
Key takeaways
The most damaging livestock fencing mistakes are vegetation contact, inadequate grounding, and weak corner assemblies. Fix the structure before adjusting tension, test grounding under load, and treat vegetation control as a seasonal maintenance task rather than a one-time job.
| Point | Details |
|---|---|
| Vegetation causes voltage loss | Clear weeds and branches from fence lines regularly, especially during wet growing seasons. |
| Grounding requires multiple rods | Install at least three galvanized rods, spaced 10 feet apart, matched to energizer joule output. |
| Corners carry all tension load | Reset and brace corner posts before re-tensioning wire to prevent recurring fence failure. |
| Planning prevents costly repairs | Map terrain, drainage, and grazing patterns before installing any fence to avoid layout errors. |
| Energizer size must match the job | Match joule rating to fence length and livestock type to maintain effective voltage under load. |
What I’ve learned from watching farmers chase the wrong problem
Most fence failures I see come down to one pattern: farmers fix the symptom and leave the cause in place. A low voltage reading triggers an energizer replacement. A sagging wire gets tightened. An animal escape prompts a wire repair. None of those fixes address what actually went wrong.
The real discipline in fencing is system-level troubleshooting. Start with vegetation and grounding before you ever question the energizer. Walk the full fence line before you tighten a single wire. Check the corner post before you blame the wire gauge. This sequence saves time and money on almost every farm I have seen.
The other thing most articles skip is the seasonal dimension. A fence that passes inspection in september will face frost heave, ice loading, and spring mud before you inspect it again. Build that reality into your maintenance calendar. Check grounding in early spring when soil moisture is highest and conductivity is easiest to verify. Re-tension wires after the ground settles. Clear vegetation before it peaks, not after it has already shorted your fence for three weeks.
Combining electric deterrence with solid physical structure is the most reliable approach for any livestock species. Neither system alone is as effective as both working together. That combination, maintained on a real schedule, is what separates farms with reliable containment from farms that are always chasing escapes.
— Juiced
Fencefast has what you need to build fences that hold
Fencing failures cost more than repair time. They cost you animal safety, neighbor relations, and the hours spent chasing livestock that should never have gotten out. Fencefast carries the grounding rods, galvanized connectors, energizers, and wire you need to build fences that actually perform under real farm conditions.

Whether you are fixing a grounding system that has never worked right or planning a new paddock layout from scratch, Fencefast stocks the full range of electric fencing components and physical fencing supplies for cattle, horses, pigs, poultry, and more. The team at Fencefast also provides design consulting to help you avoid the planning mistakes that lead to expensive rebuilds. Browse the full catalog and get your fencing system built right the first time.
FAQ
What causes low voltage on an electric fence?
Low voltage is most often caused by vegetation touching the fence wire or an inadequate grounding system, not a failing energizer. Test grounding under load and clear the fence line before replacing any equipment.
How many grounding rods does an electric fence need?
Most electric fence systems need at least three galvanized steel rods, each at least 4 feet long, spaced approximately 10 feet apart. The Alabama Cooperative Extension System recommends a minimum of 3 feet of rod per joule of energizer output.
Why does my fence keep losing tension?
Fence tension loss is most commonly caused by a shifted corner post or a weak brace assembly, not wire stretch. Reinforce and reset the corner structure before re-tensioning any wire.
How often should I inspect my livestock fence?
Inspect the full fence line at the start of each grazing season and after any major weather event. Test voltage at multiple points along the line, not just at the energizer terminal.
What voltage do cattle need from an electric fence?
Cattle require a minimum of 3,000–4,000 volts to consistently respect an electric fence. Voltage below that threshold reduces deterrence and increases the risk of animals pushing through the wire.

