
TL;DR:
- Using the right DIY fence tools ensures a fence stands straight and lasts decades.
- A power auger saves time and energy, making large projects feasible within hours.
The right DIY fence installation tools are the difference between a fence that stands straight for decades and one that leans within five years. A 150-foot cedar privacy fence costs $3,000–$6,750 installed professionally, but DIY material costs run just $800–$3,000. That gap represents real money. The tools you need to build a fence fall into a short, learnable list: post hole digger or power auger, string line and stakes, post level, circular saw, impact driver, and speed square. Get those right, and the rest follows.
What essential DIY fence installation tools do you need?
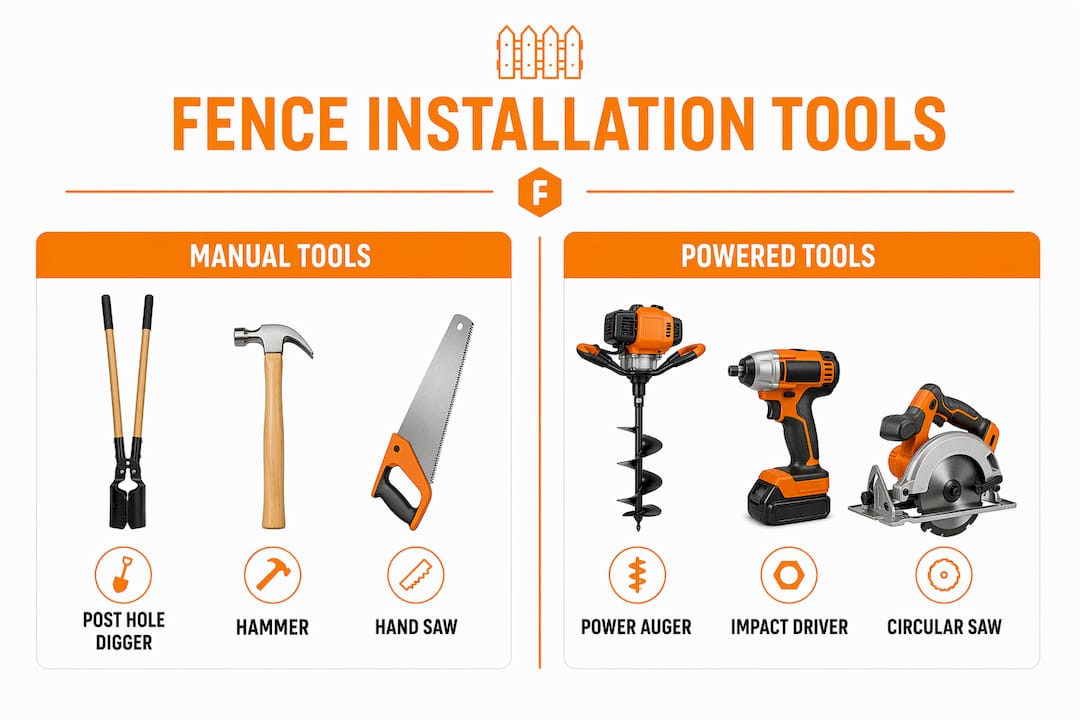
Every fence project starts with the same core kit. The tools for fence building divide cleanly into two categories: layout tools and installation tools. Layout tools set the foundation. Installation tools do the physical work.
Layout tools
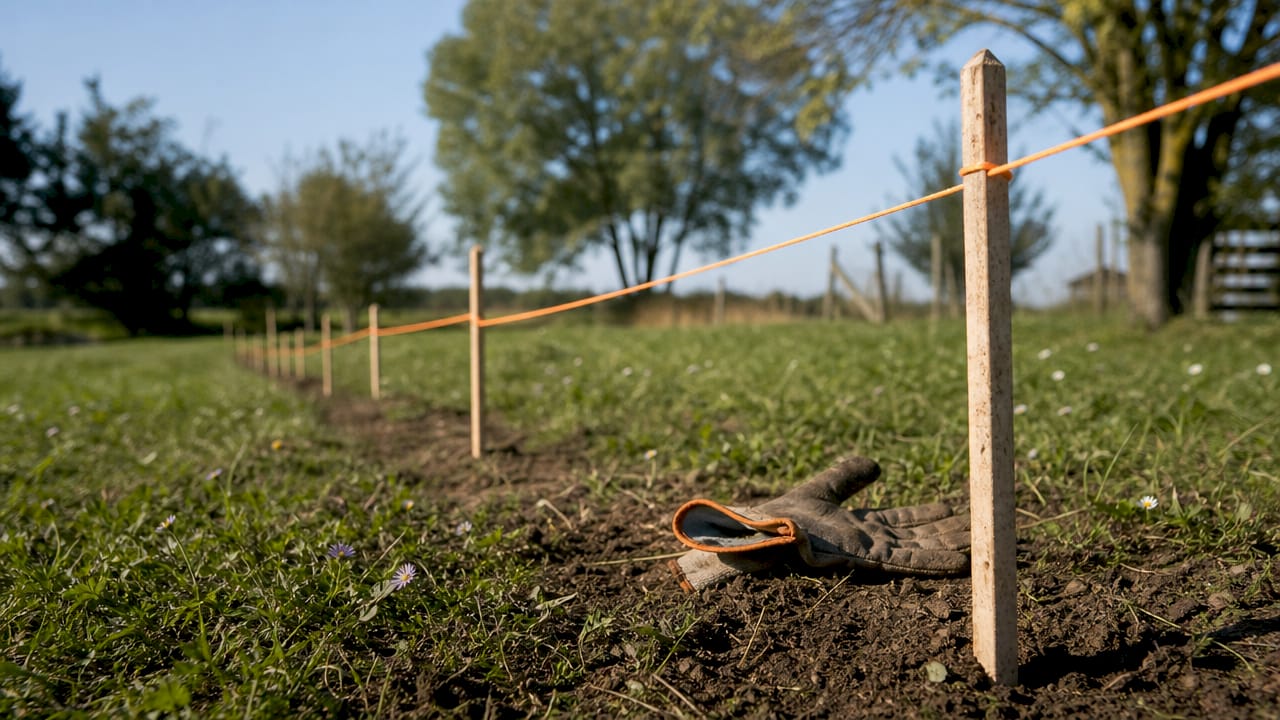
A string line and wooden stakes are the most overlooked tools on any fence project. The string line determines post alignment from end to end. Without it, even a single post placed by eye will throw off every panel that follows. Stakes cost almost nothing. The string line costs under $10. Skipping them costs you a crooked fence.
A post level is not the same as a standard carpenter’s level. A post level wraps around the post and reads plumb in two directions at once, freeing both hands to brace the post. Standard levels only check one plane at a time. That difference matters when you are working alone.
Installation tools
- Post hole digger (manual clamshell): Best for rocky soil or small jobs with fewer than 10 holes. No rental cost. High labor demand.
- Gas-powered auger (one-person): Handles most residential jobs. Faster than manual digging. Available at most equipment rental yards.
- Two-person power auger: The right choice for large projects. Renting a two-person auger runs roughly $200 per day and cuts digging time from two full days to 3–4 hours on a 26-hole project.
- Circular saw or miter saw: Cuts rails and pickets to length. A miter saw gives cleaner, repeatable cuts. A circular saw works fine for straight cuts on a budget.
- Impact driver: Drives screws faster and with less hand fatigue than a standard drill. Professional contractors use impact drivers on every fence job.
- Speed square: Marks cut lines at 90 degrees and checks rail angles before fastening.
- Rubber mallet: Sets pickets into position without splitting the wood.
- Wheelbarrow and mixing hoe: Mixes concrete for post setting.
- Safety gear: Work gloves, safety glasses, and steel-toed boots are non-negotiable.
| Tool | Manual option | Powered option | Best for |
|---|---|---|---|
| Post hole digging | Clamshell digger | Gas auger | Auger for 10+ holes |
| Fastening | Hammer and nails | Impact driver | Impact driver always |
| Cutting | Hand saw | Circular or miter saw | Miter saw for precision |
| Leveling | Standard level | Post level | Post level for plumb posts |
| Concrete mixing | Mixing hoe | Drill mixer attachment | Hoe for small batches |
Pro Tip: Rent the power auger even for a small job. The time and energy saved on hole digging pays for the rental cost before lunch.
How to use fence tools effectively at each build stage
A fence goes up in four stages: layout, post setting, rail and picket installation, and gate hanging. Each stage uses a specific set of tools in a specific order.
-
Mark your fence line. Drive stakes at each corner and end point. Run a string line tightly between them at post height. Every post position gets marked along that line. This step takes 30 minutes and prevents hours of correction later.
-
Dig post holes. Post holes must reach at least one-third the fence height in depth. For a 6-foot fence, that means 24–30 inches deep. Before digging, call 811 (the U.S. national utility locate service) to mark underground lines. A gas auger makes this step fast. A manual clamshell digger works but demands significant effort.
-
Add a gravel drainage base. Pour a 4-inch layer of gravel into each hole before setting the post. A gravel base prevents water from pooling at the base of the post, which is the primary cause of wood rot. This step adds 10 minutes per hole and years to post life.
-
Set posts in concrete. Place the post, check plumb with your post level, and brace it with 2x4 lumber nailed to temporary stakes. Professional installers use 2x4 bracing to hold every post while concrete cures. Pour concrete around the post and let it cure 24–48 hours before attaching rails or panels.
-
Cut and attach rails. Use your circular or miter saw to cut 2x4 rails to span between posts. Check each rail with a speed square before driving screws. An impact driver makes fastening fast and reduces wrist strain.
-
Install pickets. Use a rubber mallet to tap each picket into position. Check spacing with a scrap piece of wood cut to your desired gap width. Drive screws or ring-shank nails through the picket into the rail.
-
Hang gates last. Gates need 6x6 posts and holes dug 6 inches deeper than standard posts. The extra size and depth prevent sagging under the gate’s weight. Budget roughly $40 extra per gate post for the upgrade. It is worth every cent.
Pro Tip: Do not rush the concrete cure. Attaching rails to a post that has not fully cured pulls it out of plumb. Wait the full 24–48 hours, even if the concrete feels hard to the touch.
What mistakes should you avoid with fence installation equipment?
Most fence failures trace back to four errors made during the first hour of the project. Catching them early costs nothing. Fixing them after the concrete sets costs a full day of work.
- Holes too shallow. Posts that are not deep enough lean or rack within five years. Measure every hole before setting the post.
- Skipping the string line. A fence built without a string line looks wavy from 20 feet away. The string line is the only tool that guarantees a straight run.
- Using a standard level instead of a post level. A standard level checks one plane. A post level checks two. A post that looks plumb from the front can still lean sideways.
- Rushing concrete cure. Concrete that has not fully cured cannot hold a post under load. Attaching rails too early pulls posts out of alignment.
- Skipping the gravel base. Wood rot starts at the base of the post where water pools. A 4-inch gravel layer drains water away and extends post life significantly.
Safety first: Always call 811 before digging. Underground gas, electric, and water lines run through most residential yards. Hitting one with an auger creates a serious hazard. The call is free and takes two minutes.
Misaligned posts caught before the concrete fully sets can be corrected by removing the brace, adjusting the post, and re-checking with the post level. After 48 hours, correction requires breaking out the concrete, which is a major setback. Check plumb twice before walking away from each post.
Should you rent or buy tools for a fence project?
Buying every tool for a single fence project rarely makes financial sense. Renting specific tools and buying the rest is the approach that saves the most money without sacrificing quality.
Rent these tools:
- Power auger: A gas-powered auger rental costs $80–$150 per day for a one-person model. For large projects, a two-person model runs about $200 per day. Either option beats two days of manual digging.
- Plate compactor: Useful if you are setting posts in sandy or loose soil.
- Concrete mixer: Worth renting for projects with more than 20 posts.
Buy these tools:
- Post level, string line, speed square, and rubber mallet. These are inexpensive, reusable, and not available at most rental yards.
- Impact driver. If you do not own one, buy it. You will use it on every home project for years.
Choose fast-setting concrete. Quikrete Fast-Setting Concrete pours dry into the hole and sets in 20–40 minutes. Traditional concrete requires mixing and 24–48 hours of cure time before you can move to the next step. Fast-setting mix costs more per bag, but it lets you set multiple posts in a single morning and attach rails the same afternoon.
The impact driver advantage over a hammer is real on long projects. Driving 200 screws by hand creates serious fatigue. An impact driver handles the same task in half the time with far less strain on your wrists and shoulders. Rent one if you do not own one. Buy one if you plan to do more than one project.
For guidance on tool selection for farm fencing, the considerations are similar but scale up quickly with larger post counts and longer runs.
Key takeaways
A successful fence build depends on three things: the right tools, correct post depth, and patience during concrete cure.
| Point | Details |
|---|---|
| Post depth is non-negotiable | Dig holes at least one-third the fence height deep to prevent leaning posts. |
| String line first, always | Run a string line before digging a single hole to guarantee a straight fence line. |
| Rent the power auger | A $80–$200 daily rental cuts digging time from two days to 3–4 hours. |
| Use a post level, not a standard level | A post level checks plumb in two planes simultaneously, which a standard level cannot do. |
| Wait on the concrete | Let concrete cure 24–48 hours before attaching rails to avoid pulling posts out of alignment. |
What I have learned from watching DIYers get this wrong
The fence projects that fail share one pattern. Homeowners rush the layout and slow down at the wrong moments. They skip the string line because it feels like extra work, then spend two hours trying to fix a crooked post run. They drive rails into posts 12 hours after pouring concrete because the surface feels firm. Then they wonder why the fence leans by spring.
The tools that matter most are not the expensive ones. The string line, the post level, and the 2x4 bracing cost almost nothing. They are also the tools most DIYers skip. Professional fence installers do not skip them. That is the actual difference between a fence that lasts 20 years and one that needs repair in five.
I have seen homeowners rent a power auger and complete a 30-post project in a single Saturday. I have also seen homeowners skip the rental, spend two days digging by hand, and arrive at the post-setting stage too exhausted to check plumb carefully. Fatigue causes mistakes. The auger rental is not a luxury. It is a quality control decision.
One more thing: call 811 before you dig. Every time. No fence project is worth a gas line rupture.
— Juiced
Fencefast has the fencing supplies you need
Building a fence is a project you can complete in a weekend with the right materials and a solid plan.

Fencefast carries a full selection of fencing components and supplies for homeowners and rural property owners across Canada, including posts, rails, wire, staples, connectors, and fasteners. Whether you are building a wood privacy fence or a farm perimeter fence, Fencefast stocks the materials to get the job done right. The team also provides expert guidance on product selection so you buy exactly what your project requires, nothing more. Visit Fencefast.ca to browse the catalog and get your order shipped directly to your property.
FAQ
What tools do I need to build a fence?
The core tools for building a fence are a post hole digger or power auger, string line and stakes, post level, circular saw, impact driver, speed square, and rubber mallet. You also need a wheelbarrow and mixing hoe for concrete work.
How deep should fence post holes be?
Post holes should be at least one-third the fence height deep. For a standard 6-foot fence, that means 24–30 inches. Shallow holes cause posts to lean within a few years.
Is it worth renting a power auger for a DIY fence project?
Yes. A power auger rental costs $80–$200 per day and reduces digging time from two full days to 3–4 hours on a typical residential project. The time and energy savings make it worthwhile for any project with more than 8 posts.
What type of concrete works best for fence posts?
Quikrete Fast-Setting Concrete sets in 20–40 minutes when poured dry into the hole. Traditional concrete mixes require 24–48 hours of cure time. Fast-setting concrete costs more per bag but speeds up the project significantly.
How do I keep fence posts straight while the concrete sets?
Nail two 2x4 braces to the post at 90-degree angles and stake them to the ground. Check the post with a post level before walking away. Leave the braces in place until the concrete fully cures, which takes 24–48 hours.

