
TL;DR:
- Proper post depth, material choice, and site planning are essential for long-lasting permanent fencing. Consistent inspection and maintenance, along with correct installation techniques, extend fence durability and reduce costly failures. Selecting suitable materials based on environmental conditions and following legal protocols ensures a secure, reliable boundary for decades.
Permanent fencing installation is defined as the process of setting fixed boundary structures designed to last decades, not seasons. Done right, it secures livestock, defines property lines, and protects land from unauthorized access. Done wrong, it fails within two years. These permanent fencing installation tips cover the critical steps that separate a fence that holds from one that leans, rots, or lands you in a legal dispute. From post depth and material selection to utility marking and long-term maintenance, every decision you make before the first post goes in the ground determines how long your fence stands.
What are the critical steps for installing permanent fence posts correctly?
Post setting is the single most important phase of any permanent fence project. Fence failures most often result from posts not set to sufficient depth or not braced plumb while concrete cures. A fence that leans or collapses within two years almost always traces back to this step.
Follow these steps in order to get it right:
-
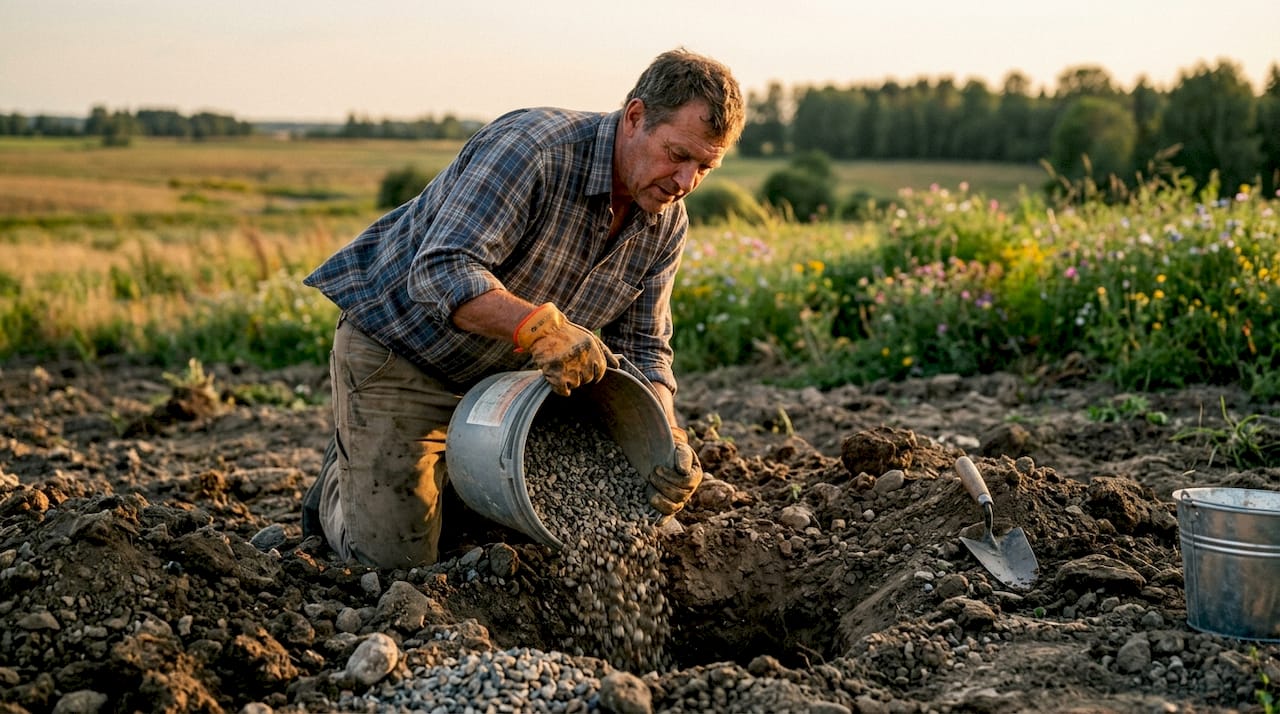
Dig to the correct depth. One-third of a post’s length should sit underground. For a 6-foot fence, that means 24–30 inches in standard soil. In frost-prone regions, depth increases to 42–60 inches to get below the frost line and prevent heaving.
-
Set posts plumb in two directions. Use a level on two adjacent faces of the post before pouring anything. A post that looks straight from one angle can still lean badly from another.
-
Brace before you pour. Temporary bracing holds the post in position while concrete or gravel sets. Skipping this step is the most common DIY mistake.
-
Choose your setting method based on soil. Concrete footings anchor posts firmly against lateral movement. Gravel set posts allow better drainage but offer less initial rigidity. Sandy or well-drained soils can work with gravel. Heavy clay soils with high lateral loads need concrete.
-
Wait before attaching rails or panels. Concrete reaches about 70% of its strength in 7 days but needs at least 48–72 hours before you load it. Attaching rails too early risks post shifting and a crooked fence line.
Pro Tip: Add 4–6 inches of compacted gravel at the base of each post hole before setting the post. This drainage layer reduces moisture contact at the post base and extends wood post life significantly. It is a step most beginners skip and most experienced installers never omit.
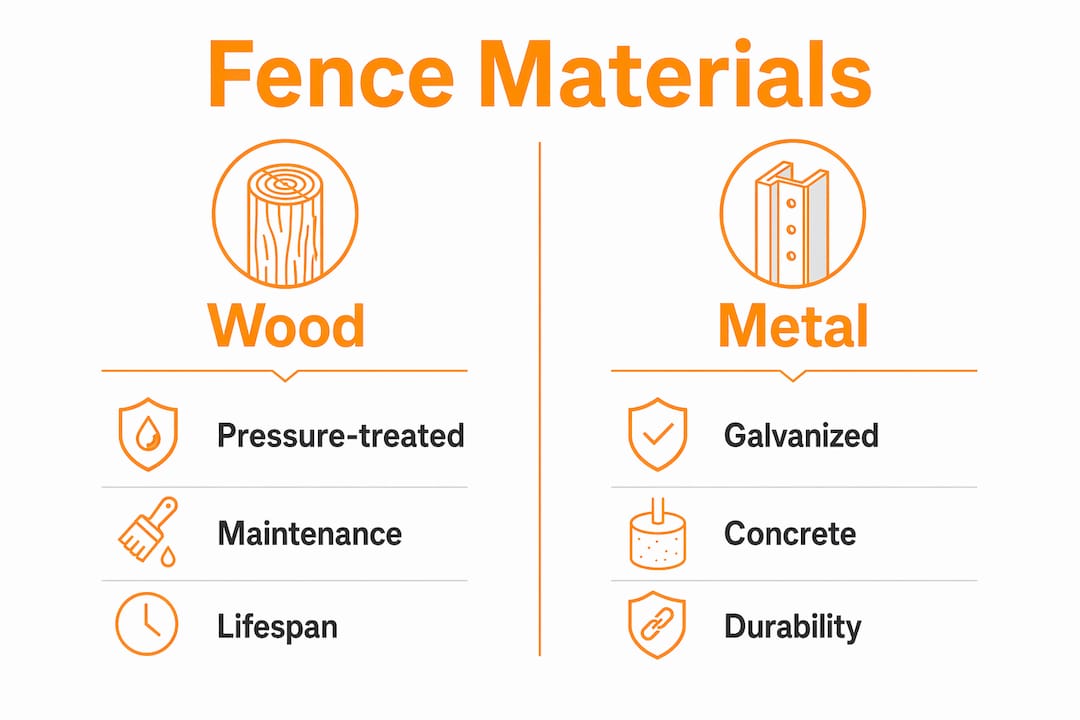
Which materials are best suited for durable permanent fencing?
Material selection determines how much maintenance your fence demands and how long it lasts. The right choice depends on your soil conditions, livestock type, UV exposure, and budget.
Common permanent fence materials at a glance:
| Material | Lifespan | Maintenance | Best For |
|---|---|---|---|
| Pressure-treated wood | 15–25 years | Moderate (seal every 2–4 years) | General livestock, property lines |
| Steel or galvanized metal | 20–50 years | Low (inspect for rust annually) | High-security, cattle, horses |
| Concrete posts | 40+ years | Very low | Permanent boundary, wet soils |
| Vinyl | 20–30 years | Low (clean annually) | Horses, decorative, low-impact livestock |
Pressure-treated wood remains the most common choice for agricultural fencing because it balances cost and durability. Metal posts, particularly galvanized steel, outperform wood in wet conditions and high-wind areas. Concrete posts offer the longest lifespan and resist rot entirely, making them worth the higher upfront cost on permanent boundary lines.
Key considerations when choosing your material:
- UV exposure: Vinyl and untreated wood degrade faster in high-sun environments. Galvanized metal and concrete hold up better.
- Moisture and pest resistance: Concrete posts eliminate rot and termite risk entirely. Pressure-treated wood resists both but requires maintenance.
- Cost: Professional fence installation costs range from $20 to $45 per linear foot. DIY material costs run $800–$2,000 for a 150-foot fence versus $3,000–$6,750 professionally installed. That gap narrows when you factor in tool rental and labor time.
Pro Tip: Apply a high-quality sealant within 60 days of installing any wood fence. Reapply every 2–4 years. Skipping this step cuts the effective lifespan of pressure-treated wood by years, not months.
For livestock-specific guidance on matching fence type to animal behavior, Fencefast’s resource on cattle fencing best practices covers species-specific requirements in detail.
How to plan your fence layout legally and strategically
Pre-installation planning prevents the two most expensive fencing mistakes: building on the wrong property line and hitting a buried utility line. Both are avoidable with the right steps taken before any digging starts.
-
Locate your property pins. Hire a licensed surveyor to verify boundary markers before you set a single post. Deed descriptions can be ambiguous. Building on property lines or utility easements is a common and costly mistake that can require full fence removal.
-
Check local permit requirements. Most municipalities require permits for permanent fencing above a certain height. Setback restrictions vary by zone. Contact your local planning or building office before purchasing materials.
-
Call 811 before you dig. Call 811 at least 3 business days before breaking ground. This service marks underground utilities including gas, water, and electrical lines. It is required by law in most U.S. regions and across Canada. A missed utility line can cost far more than the fence itself.
-
Plan gate placement for livestock flow. Gates should align with natural animal movement paths and equipment access routes. Poorly placed gates create daily frustration and can compromise livestock containment during handling.
-
Avoid easements. Utility and access easements run across many rural properties. Building a fence across an easement gives utility companies the legal right to remove it without compensation.
For a broader look at rural property planning, Fencefast’s guide on rural property fence tips covers layout strategy for livestock and land security in agricultural settings.
What maintenance practices extend the life of permanent fences?
Routine inspections and maintenance prolong fence life by catching early issues like post instability and wood rot before they become structural failures. A fence that gets checked twice a year lasts significantly longer than one that gets ignored until something breaks.
Build these practices into your annual schedule:
-
Inspect alignment and post stability every spring and fall. Frost heave shifts posts during winter. Soil settlement after heavy rain does the same. Catching a leaning post early means resetting one post, not rebuilding a section.
-
Check rails and wire for looseness or damage. Livestock pressure and wind load work fasteners loose over time. Tighten or replace hardware before a loose rail becomes a gap in your containment.
-
Keep vegetation clear at post bases. Grass and weeds trap moisture against wood posts and accelerate rot. Trim regularly or apply a ground-level barrier around each post.
-
Reapply sealant on schedule. Wood fencing needs a fresh coat of stain or sealant every 2–4 years. Waiting longer allows UV damage and moisture to penetrate the wood grain.
-
Watch for rust on metal components. Wire, staples, and connectors corrode over time, especially in wet climates. Replace corroded hardware before it fails under load.
Fencefast’s practical guide on fence longevity for farms goes deeper on agricultural-specific maintenance strategies that apply to both livestock enclosures and crop field boundaries.
Key Takeaways
Permanent fencing installation succeeds when post depth, material selection, legal compliance, and regular maintenance are treated as equally critical steps, not optional extras.
| Point | Details |
|---|---|
| Post depth is non-negotiable | Bury one-third of post length; go deeper in frost-prone regions to prevent heaving. |
| Curing time protects your investment | Wait at least 48–72 hours before attaching rails; concrete reaches 70% strength at 7 days. |
| Legal planning prevents costly removal | Call 811, verify property pins, and check permits before any digging begins. |
| Material choice drives maintenance load | Concrete and galvanized steel minimize upkeep; wood requires sealing every 2–4 years. |
| Inspections catch failures early | Check alignment and hardware each spring and fall to extend fence life significantly. |
Why I stopped trusting “good enough” post setting
The most common mistake I see on permanent fence projects is treating post setting as a task to get through rather than the foundation everything else depends on. Posts are the critical load-bearing components of any fence system. Compromise there and the rest of the structure is already failing, just slowly.
The concrete versus gravel debate comes up constantly, and I have a clear opinion: gravel is underrated for well-drained soils, and concrete is overused in situations where it actually traps moisture at the post base. The concrete collar method can accelerate decay if water pools at the surface and has nowhere to go. A gravel base layer under a concrete collar gives you the best of both: drainage below and rigidity above.
The other thing I see DIY installers get wrong is rushing the cure. Forty-eight hours feels like enough. It is not. Attach a heavy rail to a post that has been in concrete for two days and you are gambling with the alignment of your entire fence line. Wait the full week before putting any real load on new posts. The fence will be there for decades. A few extra days of patience costs nothing.
Matching fence type to your specific soil and livestock is where experience really shows. Sandy loam behaves differently than heavy clay. Cattle push fences differently than horses. Getting those details right from the start is what separates a fence that holds for 30 years from one you are repairing every spring.
— Juiced
Fencefast has the materials and expertise to back your next project
Building a permanent fence that holds for decades starts with the right products and the right information. Fencefast carries a full range of fencing components built for agricultural and rural use, from wire and staples to electric fencing systems and livestock management supplies.

Whether you are securing a cattle operation, protecting a crop boundary, or setting up a new property perimeter, Fencefast’s team can help you choose the right materials for your soil type, livestock, and budget. As an authorized Gallagher dealer with 26 years of experience, Fencefast brings real agricultural knowledge to every order. Visit Fencefast to browse the full product catalog and connect with expert support for your permanent fencing project.
FAQ
How deep should fence posts be set for a permanent fence?
One-third of the post’s total length should be buried underground. In frost-prone regions, posts need to go 42–60 inches deep to sit below the frost line and prevent heaving.
Do I need a permit to install a permanent fence?
Most municipalities require permits for permanent fencing above a certain height, and setback rules vary by zone. Contact your local planning office before purchasing materials to confirm requirements for your property.
What is the best material for a permanent livestock fence?
Galvanized steel and concrete posts offer the longest lifespan with the least maintenance. Pressure-treated wood works well for most livestock applications but requires sealing every 2–4 years to maintain its protective properties.
How long should I wait after pouring concrete before attaching fence rails?
Wait at least 48–72 hours before attaching rails or panels. Concrete reaches about 70% of its full strength after 7 days, so avoid heavy loading during that initial period to prevent post shifting.
Why should I call 811 before digging fence post holes?
Calling 811 at least 3 business days before digging is required by law in most U.S. regions and Canada. The service marks underground utilities so you avoid hitting gas, water, or electrical lines during installation.

