
Managing livestock across vast Canadian pastures presents unique challenges. Traditional electric fencing often requires grid power, limiting where you can establish boundaries and increasing operational costs. Solar fence chargers eliminate these constraints by harnessing renewable energy to power your electric fencing system anywhere on your property. This guide walks you through everything you need to know about selecting, installing, and maintaining a solar-powered electric fence charger, ensuring your livestock stays contained while you reduce energy expenses and environmental impact.
Table of Contents
- Preparing For Your Solar Fence Charger Installation
- Step-By-Step Solar Fence Charger Setup Process
- Troubleshooting And Common Setup Mistakes To Avoid
- Verifying Your Solar Fence Charger Setup Effectiveness
- Explore FenceFast’s Solar Fencing Tools And Accessories
- Frequently Asked Questions
Key takeaways
| Point | Details |
|---|---|
| Solar fence chargers offer sustainable power for remote fencing | Eliminate dependency on grid electricity and reduce ongoing operational costs |
| Proper site selection and equipment preparation are critical | Sunlight exposure and correct component specifications determine system success |
| Step-by-step installation ensures optimal performance | Following systematic procedures prevents common setup errors and maximizes efficiency |
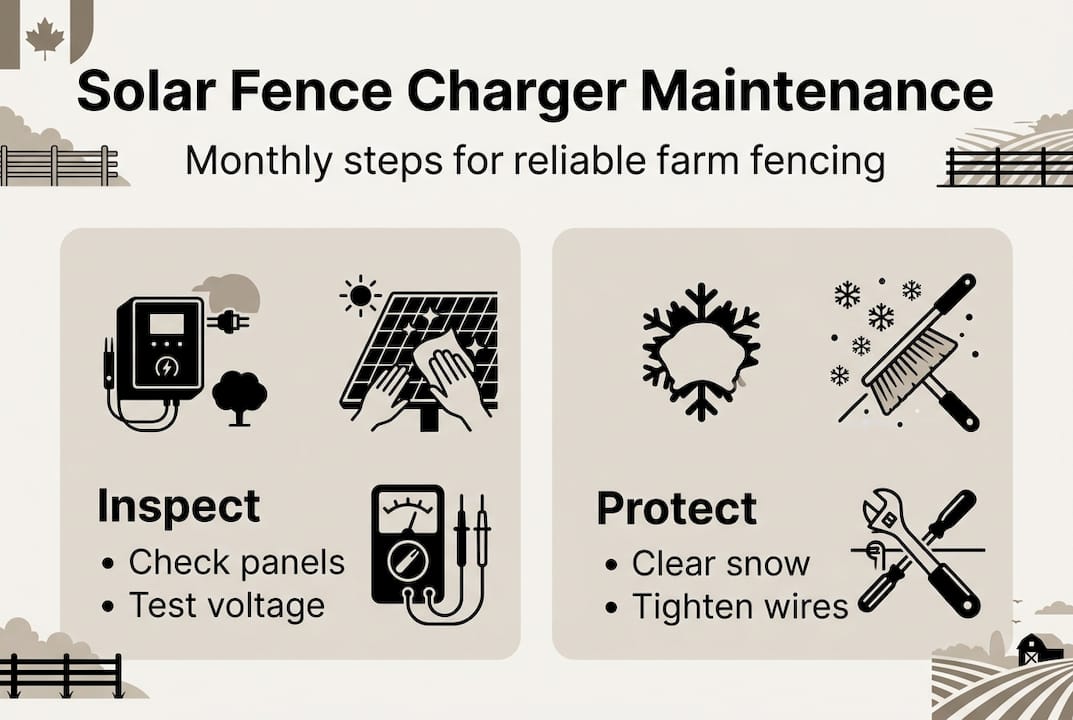
| Regular maintenance extends system reliability | Seasonal inspections and adjustments keep your fence operational year-round |
| Troubleshooting common issues prevents downtime | Identifying problems early protects livestock and saves repair costs |
Preparing for your solar fence charger installation
Successful solar fence charger installation begins long before you mount the first component. Proper planning and selecting the right equipment ensure long-term reliability of solar fence chargers, making preparation the foundation of your entire system. Start by gathering all necessary materials: a solar panel electric fence charger unit, grounding rods (typically three for optimal performance), insulated fence wire rated for your livestock type, mounting hardware designed for outdoor exposure, and weatherproof connectors. You’ll also need basic tools including a post hole digger, wire cutters, voltage tester, wrench set, and drill with appropriate bits.
Site selection determines how efficiently your system operates. Survey your property for locations receiving at least six hours of direct sunlight daily, particularly during winter months when sun angles drop. Avoid areas near tall trees, buildings, or structures casting shadows across the panel surface. Position your charger within reasonable distance of your fence perimeter to minimize voltage drop through connecting wires. Rocky or frozen ground complicates grounding rod installation, so assess soil conditions before committing to a location.
Canadian agricultural operations benefit significantly from solar technology’s environmental advantages. Solar chargers eliminate diesel generator emissions and reduce your carbon footprint while providing reliable power in remote pastures where grid connections prove impractical or prohibitively expensive. Battery specifications matter tremendously in our climate. Choose deep-cycle batteries rated for cold weather performance, as standard automotive batteries fail quickly in sub-zero temperatures. Check your charger’s voltage output matches your fence requirements: smaller paddocks for sheep or goats need less power than extensive cattle ranges.
Pro Tip: Create a site diagram mapping your fence layout, panel location, and grounding rod positions before purchasing materials. This planning step reveals the exact wire lengths needed and prevents costly mid-project supply runs.
Safety considerations extend beyond electrical hazards. Review local bylaws regarding fence height restrictions and setback requirements from property boundaries. Some municipalities require permits for permanent fencing structures. Inform neighbors about your electric fence installation to prevent accidental contact. Mark fence lines with warning signs, especially along public trails or shared access roads.
Consider these environmental factors specific to Canadian conditions:
- Snow accumulation blocking panel surfaces during winter months
- Extreme temperature fluctuations affecting battery performance
- Wildlife interference with ground-level components
- Seasonal vegetation growth potentially shading panels
- Wind exposure requiring reinforced mounting hardware
| Component | Specification | Purpose |
|---|---|---|
| Solar Panel | 10-20 watts | Powers charger and maintains battery |
| Battery | 12V deep-cycle | Stores energy for nighttime operation |
| Grounding Rods | 3 rods, 6 feet each | Completes electrical circuit safely |
| Fence Wire | High-tensile or poly wire | Conducts charge along fence line |
| Charger Unit | Output matched to fence length | Delivers appropriate voltage |
Step-by-step solar fence charger setup process
Begin installation by securing your solar panel mount in the predetermined location. Following installation best practices maximizes fence charger effectiveness and livestock control, so take time positioning the panel correctly. Face the panel true south in the Northern Hemisphere, angling it at your latitude plus 15 degrees for optimal year-round sun exposure. Use galvanized mounting brackets rated for outdoor use, securing them to a treated wooden post or metal pole sunk at least three feet deep. Tighten all hardware connections firmly, as wind loading can loosen insufficiently secured panels over time.
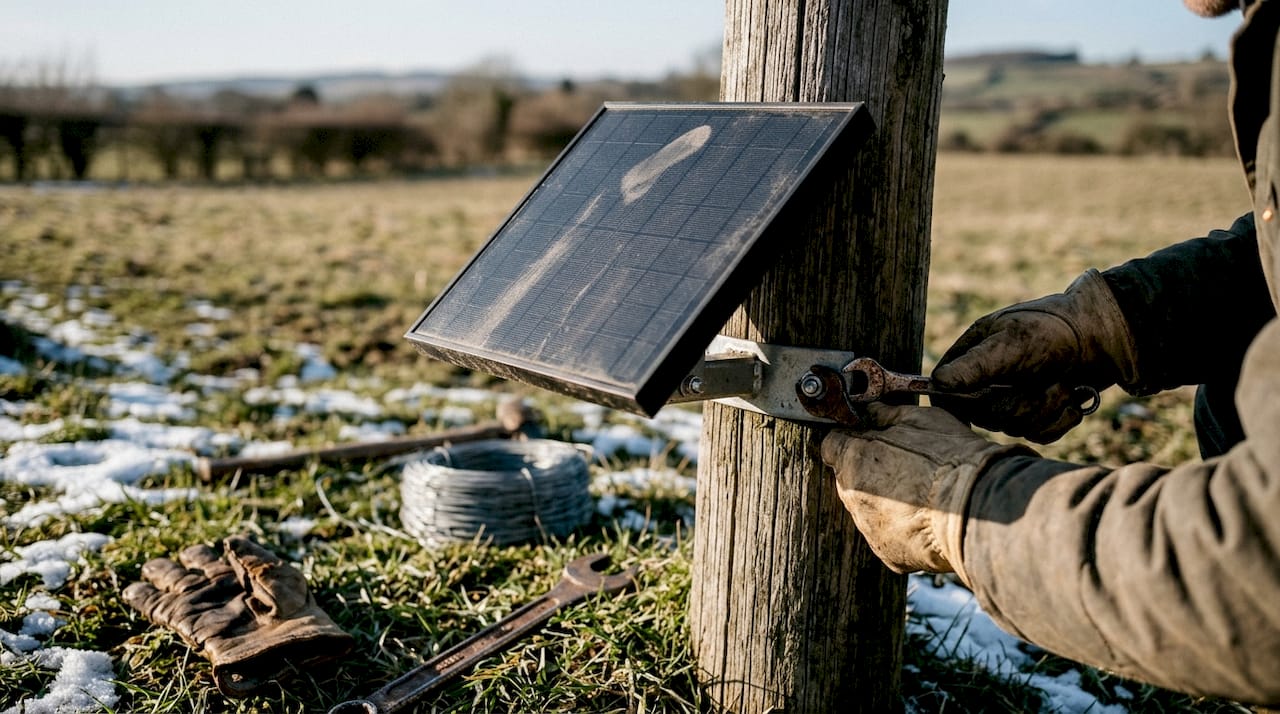
Next, install your grounding system properly. Drive three six-foot copper or galvanized steel grounding rods into moist soil, spacing them ten feet apart in a straight line. Rocky terrain requires patience; if you encounter bedrock, relocate rather than accepting shallow rod depth. Connect the rods together using insulated copper wire, creating a continuous ground path. Attach this ground wire to your solar electric fence charger for cattle ground terminal. Poor grounding causes 80% of electric fence failures, making this step absolutely critical.
Connect your charger components systematically:
- Attach the solar panel leads to the charger’s solar input terminals, observing correct polarity (red to positive, black to negative).
- Connect the battery to the charger’s battery terminals, again matching positive and negative correctly.
- Run your fence wire from the charger’s fence terminal to your first fence post, using appropriate insulators.
- Complete the ground connection from the charger to your grounding rod system.
- Double-check all connections for tightness and proper polarity before activating the system.
Test your installation immediately after connection. Use a digital voltage tester to measure fence output at multiple points along your fence line. A properly functioning system delivers between 4,000 and 6,000 volts for cattle, though smaller animals require less. Walk your entire fence perimeter checking for voltage drops indicating poor connections or vegetation contact draining power. Mark any problem areas for immediate correction.
Uneven terrain presents unique challenges requiring creative solutions. In hilly areas, maintain consistent fence height above ground despite elevation changes. Use longer posts in low spots and shorter posts on ridges. Vegetation growing beneath wires creates short circuits, so establish a vegetation-free zone at least two feet wide along your fence line. Rocks and tree roots obstructing post placement may require rerouting your fence path slightly.
Pro Tip: Apply dielectric grease to all electrical connections before final assembly. This inexpensive step prevents corrosion from moisture infiltration, dramatically extending connection reliability in wet Canadian climates.
“Weatherproofing electrical connections is not optional in agricultural settings. Moisture intrusion causes intermittent failures that are difficult to diagnose and frustrating to resolve. Invest five minutes per connection applying proper sealant and save hours of troubleshooting later.”
Always disconnect power before working on any fence components. Treat every wire as energized until you verify otherwise with a tester. Wear insulated gloves when handling energized components. Keep children and pets away from the installation area during setup. Install a clearly visible shutoff switch allowing quick power disconnection during emergencies.
Troubleshooting and common setup mistakes to avoid
Even carefully planned installations encounter problems. Regular checks and troubleshooting prevent common failures and prolong system life, making diagnostic skills essential for every operator. Poor grounding tops the list of installation errors. Insufficient ground rod depth, corroded ground connections, or dry soil conditions all compromise system performance. Test ground quality by measuring voltage between the fence wire and ground during operation. Readings above 400 volts indicate inadequate grounding requiring additional rods or improved connections.
Panel shading dramatically reduces charging capacity. Even partial shade from a single branch can cut output by 50% or more. Seasonal sun angle changes mean a location perfect in summer may fall into shadow during winter months. Monitor your panel throughout the year, trimming vegetation as needed. Snow accumulation blocks panels completely, necessitating regular clearing after storms. Install panels at a steeper angle in snow-prone areas, allowing accumulation to slide off naturally.
Battery failures manifest as inconsistent fence voltage, particularly noticeable at night when the system relies entirely on stored power. Deep-cycle batteries typically last three to five years with proper maintenance. Cold temperatures reduce battery capacity significantly; a battery performing well in summer may fail completely at minus 30 degrees Celsius. House batteries in insulated enclosures when possible, though ensure adequate ventilation preventing hydrogen gas accumulation.
Common issues and solutions:
- Intermittent shocking: Check for vegetation touching fence wire or loose wire connections
- Low voltage readings: Verify battery charge level and inspect solar panel for dirt or damage
- No power output: Test charger fuse and examine all wire connections for breaks
- Rapid battery drain: Look for fence shorts caused by wire contacting posts or ground
- Inconsistent performance: Clean panel surface and verify proper sun exposure throughout the day
| Problem | Impact | Solution |
|---|---|---|
| Insufficient grounding | Weak shock, livestock escapes | Add grounding rods, improve soil contact |
| Shaded solar panel | Battery drain, nighttime failure | Relocate panel or remove shade sources |
| Corroded connections | Voltage loss, intermittent operation | Clean terminals, apply protective grease |
| Vegetation contact | Power drain, reduced effectiveness | Clear fence line, raise wire height |
| Undersized charger | Inadequate voltage for fence length | Upgrade to higher output unit |
Develop a regular inspection checklist covering these critical points:
- Monthly voltage testing at multiple fence locations
- Quarterly battery terminal cleaning and tightness verification
- Seasonal panel cleaning removing dust, pollen, or bird droppings
- Annual ground rod connection inspection and re-tightening
- Post-storm damage assessment checking for fallen branches or displaced wires
Pro Tip: Adjust your solar panel angle twice yearly to match seasonal sun positions. Increase the angle by 15 degrees in fall for lower winter sun, then decrease by 15 degrees in spring. This simple adjustment maintains optimal charging efficiency year-round.
Preventive maintenance costs far less than emergency repairs. Budget time each month for systematic inspection. Address small problems immediately before they cascade into major failures. Keep spare fuses, wire connectors, and insulators on hand for quick repairs. Document your system’s normal voltage readings when operating correctly, providing baseline data for troubleshooting future issues.
Verifying your solar fence charger setup effectiveness
Confirming proper system operation protects your livestock investment and prevents escape-related losses. Monitoring voltage and fence integrity regularly guarantees livestock safety and charging efficiency, making verification an ongoing responsibility rather than a one-time task. Invest in a quality digital fence tester showing precise voltage readings. These devices cost between 30 and 80 dollars but prove invaluable for system diagnostics. Test fence voltage at the charger output first, establishing your baseline maximum voltage. Then test at quarter-mile intervals along your fence, noting any significant drops indicating problems between test points.
Recognize these warning signs indicating fence charger problems requiring immediate attention:
- Voltage readings below 3,000 volts on cattle fences or 2,000 volts on smaller animal enclosures
- Clicking sounds from the charger occurring more frequently than once per second
- Visible arcing or sparking at connection points
- Battery failing to maintain charge overnight despite adequate daytime sun exposure
- Livestock repeatedly testing or breaching fence boundaries
Fence integrity extends beyond electrical performance. Walk your fence line monthly inspecting for physical damage. Look for loose wires, broken insulators, leaning posts, or rust compromising wire conductivity. Tighten sagging wires promptly, as drooping conductors contact vegetation more easily. Replace cracked or damaged insulators immediately, since failed insulators allow current to ground through posts rather than shocking animals contacting the wire.
Animal behavior provides valuable performance feedback. Livestock respecting fence boundaries indicates adequate deterrent effect. Animals repeatedly approaching or testing the fence suggest insufficient voltage or inconsistent shocking. Cattle touching their noses to the wire should receive a sharp shock causing immediate withdrawal. If animals lean against the fence without reaction, your system requires troubleshooting. Monitor new animals carefully during their first week, as they learn fence boundaries through initial contact experiences.
Routine inspection tips for maintaining system performance:
- Test voltage weekly during the first month after installation, then monthly once operation stabilizes
- Inspect ground rod connections quarterly, especially after freeze-thaw cycles
- Clean solar panel surfaces monthly or after dust storms
- Verify battery water levels monthly on serviceable batteries
- Check fence wire tension and post stability during seasonal property walks
Some situations exceed typical owner maintenance capabilities. Call a professional when you encounter repeated failures despite troubleshooting efforts, need to expand your system significantly, face complex grounding challenges in rocky terrain, or lack confidence working with electrical systems. Professional installation costs more initially but ensures proper setup preventing costly future problems. Many agricultural electricians offer annual maintenance contracts providing peace of mind through expert oversight.
Document your system’s performance over time. Maintain a simple log recording monthly voltage readings, battery condition, and any maintenance performed. This historical data reveals patterns helping predict component replacement needs. Note seasonal variations in performance, distinguishing normal winter capacity reductions from actual problems requiring intervention. Photographic documentation of your installation proves valuable when troubleshooting issues remotely with technical support or when planning system expansions.
Explore FenceFast’s solar fencing tools and accessories
Setting up and maintaining your solar fence system requires quality tools designed for agricultural applications. FenceFast offers specialized equipment making installation faster and more reliable. The Hayes fencing and crimping tool simplifies wire connections, creating secure crimps that withstand years of tension and weather exposure. This professional-grade tool eliminates the frustration of inferior crimpers that slip or create weak connections prone to failure.

Complete your fencing project efficiently with the Patriot electric fence accessory kit, containing essential components for professional installations. These comprehensive kits include insulators, connectors, and hardware selected specifically for Canadian farming conditions. FenceFast understands the unique challenges facing Canadian farmers, from extreme temperature swings to vast property sizes requiring durable, reliable equipment. Browse the complete product range at FenceFast to find everything needed for successful solar fence installations, backed by expert knowledge and dependable customer support.
Frequently asked questions
How do I maintain my solar fence charger during winter in Canada?
Clear snow from panels immediately after storms to restore charging capacity. Check battery charge levels weekly during cold months, as freezing temperatures reduce storage capacity significantly. Consider housing batteries in insulated enclosures maintaining above-freezing temperatures. Consult the solar powered electric fence guide for comprehensive winter maintenance strategies specific to Canadian climates.
What size solar panel do I need for a large livestock fence?
Panel wattage requirements depend on fence length and animal type being contained. Cattle operations spanning several miles typically need 20-watt panels paired with appropriate charger output ratings. Smaller paddocks for sheep or goats function adequately with 10-watt systems. Review solar electric fence charger sizing specifications matching your specific livestock and property dimensions before purchasing equipment.
Can solar fence chargers power electric fences in shaded areas?
Solar chargers require direct sunlight for effective operation; partial shading reduces output dramatically. Even intermittent shade from passing clouds impacts performance noticeably. Select installation sites receiving unobstructed sun exposure throughout the day, particularly during peak charging hours between 10 AM and 3 PM. Examine solar charger sunlight requirements to understand minimum sun exposure specifications for reliable system operation.
How often should I test my electric fence voltage?
Test voltage weekly during the first month after installation, confirming consistent performance. Once operation stabilizes, monthly testing suffices for routine monitoring. Increase testing frequency after severe weather events, following any livestock escapes, or when adding new fence sections. Maintain a testing log documenting readings over time, establishing baseline performance data useful for troubleshooting future issues.
What causes my solar fence charger to click rapidly?
Rapid clicking typically indicates a short circuit somewhere along your fence line. Vegetation touching the wire, damaged insulators allowing current to ground through posts, or wire contacting metal structures all cause this symptom. Disconnect fence wires from the charger and listen; if clicking stops, the problem lies in your fence rather than the charger itself. Systematically inspect the fence line identifying and correcting the short circuit source.
Recommended
- Solar powered electric fence guide for Canadian farmers 2026 – FenceFast Ltd.
- Gallagher S10 Solar Fence Charger: Cut Costs 70% Canadian – FenceFast Ltd.
- Solar Panel Electric Fence Charger: Reliable Livestock Control – FenceFast Ltd.
- Gallagher S40 Solar Fence Charger: Secure Livestock – FenceFast Ltd.

