

The most durable approach to weatherproofing farm fencing combines galvanized or powder-coated metal components, pressure-treated or sealed wood posts, correct post depth below your local frost line, and a twice-yearly inspection routine. Start here, today:
- Shore up loose posts first. A leaning post is the most common entry point for storm damage. Tamp, brace, or reset any post that moves more than an inch at the top.
- Prioritize corrosion-resistant coatings on all metal. Hot-dip galvanizing outperforms paint and basic zinc coatings for long-term rust resistance. If you’re buying new wire or hardware, hot-dip galvanized wire is the baseline for farm use.
- Seal or stain every wood component before the next rain season. Oil-based penetrating stains protect against freeze-thaw cracking better than surface sealers alone.
- Set a seasonal inspection cadence. Walk every fence line in early spring and again before fall storm season. USDA frost-line maps and your local Farm Bureau are the right starting points for post-depth requirements and regional maintenance timing.
Fencefast carries the materials, hardware, and expert guidance to support every step of this process, from initial material selection through installation and long-term maintenance.
Table of Contents
- What are the best fencing materials for weather resistance?
- Which coatings and treatments protect fencing from weather and corrosion?
- How does installation technique prevent weather-related fence failure?
- What does a good farm fence inspection and maintenance schedule look like?
- How do weatherproofing choices affect animal safety for horses, cattle, sheep, and pigs?
- What do weatherproof fencing materials cost, and how long do they last?
- How do you prepare for and recover from severe weather events?
- How do you choose the right weatherproofing strategy for your farm?
- What does a field-tested farm fence inspection checklist look like?
- Key Takeaways
- What farms consistently get wrong about weatherproofing
- Fencefast has the materials and expertise for your weatherproofing project
- Useful sources
What are the best fencing materials for weather resistance?
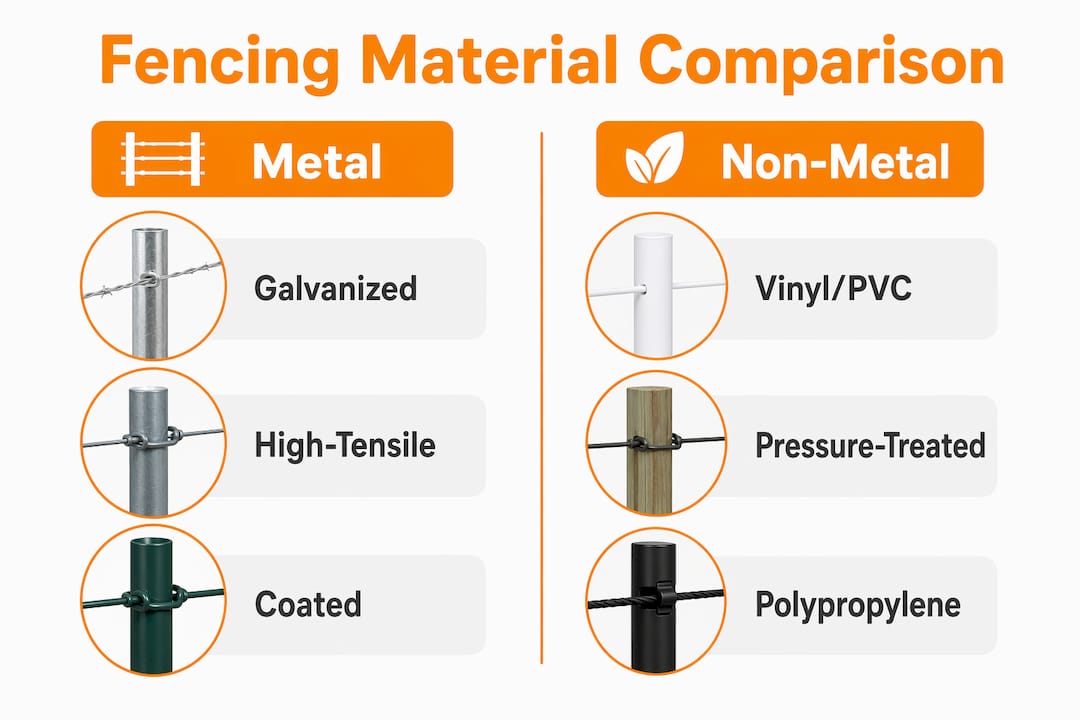
Choosing the right material is the single biggest lever you have on long-term fence performance. The table below compares the most common options on the factors that matter most for weatherproofing farm fencing.
| Material | Corrosion Resistance | Visibility | Maintenance | Typical Lifespan | Relative Cost |
|---|---|---|---|---|---|
| Hot-dip galvanized steel | Excellent | Low | Low | 30–50 years | Medium |
| High-tensile wire | Good (with coating) | Low | Low–Medium | up to around 20 years | Medium |
| Vinyl/PVC | Excellent | Medium–High | Very low | 20–30 years | Medium–High |
| Composite | Good | Medium | Low | 20–30 years | High |
| Pressure-treated wood | Moderate | High | Medium–High | 15–20 years (treated) | Low–Medium |
| Polypropylene mesh | Moderate | Low | Low | 5–10 years | Low |
Galvanized steel and high-tensile wire
Hot-dip galvanizing and heavy zinc coatings are the most reliable corrosion protection for steel farm fencing exposed to moisture and salt air. High-tensile wire, when galvanized, handles tension well and resists the sagging that lets vegetation pile up and trap moisture. The trade-off is low visibility, which matters a great deal if you run horses.
Vinyl and PVC
PVC doesn’t rust, rot, or absorb water. It handles UV exposure well because quality products include UV-stabilizing additives, and it won’t warp in summer heat the way untreated wood does. Maintenance is minimal: soap and water. The downside is cost and the fact that PVC can crack under severe impact in very cold temperatures, so it’s best suited to moderate climates or as a top-rail visibility element rather than a primary containment strand.
Pressure-treated wood
Wood remains the most visible and horse-friendly option. A well-maintained wood fence can last up to around 20 years with regular treatment, but that lifespan depends entirely on consistent staining and sealing. Untreated wood in wet climates can fail in under a decade. Pressure-treated lumber (rated for ground contact) is the minimum for posts; above-ground rails can use standard treated stock.
Polypropylene mesh
Polypropylene mesh is the most affordable option for garden perimeters and light-duty pest exclusion, but it’s less durable than metal or wood for livestock containment. UV degradation is its main enemy; expect a 5–10 year lifespan in full-sun environments.
Combining materials
Mixing materials often outperforms any single option. A common high-performance combination is woven wire for the lower section (keeps small animals in or out) topped with one or two high-tensile strands for strength, with wood or composite rails for visibility where horses are present. For electrified lines, poly tape on the top strand adds visibility and doubles as a deterrent. You can explore agricultural fencing basics for a deeper look at how these combinations play out across different farm types.
Which coatings and treatments protect fencing from weather and corrosion?
The right finish can double the service life of a fence. The wrong one, or none at all, turns a good material into a maintenance problem within a few seasons.
Metal coatings: the hierarchy
The practical corrosion-resistance hierarchy for metal fences runs from highest to lowest protection: hot-dip galvanized, heavy zinc coating, powder-coating, then painted finishes. Hot-dip galvanizing bonds zinc to the steel at the molecular level, so it protects cut edges and scratches far better than a surface coating. Powder-coating adds color and a hard surface layer, but it doesn’t self-heal the way zinc does. For farm fencing in humid, coastal, or high-salt environments, hot-dip galvanized is the only specification worth considering.
- Hot-dip galvanized: Best for wire, T-posts, and connectors in wet or coastal climates.
- Heavy zinc coating: Solid for most inland farm applications; inspect annually for bare spots.
- Powder-coating: Good for gates and structural components where aesthetics matter; pair with a zinc primer for best results.
- Paint: Acceptable for above-ground wood or decorative metal only; reapply every 2–3 years.
Wood protection: stains, sealers, and waterproofers
Oil-based stains penetrate wood fibers more deeply than water-based products and generally provide better long-term protection in harsh outdoor conditions. Water-based stains are easier to clean up and dry faster, making them practical for large fence runs when you need to move quickly. The right choice depends on your climate and how often you’re willing to reapply.
Oil-based, penetrating fence stains specifically help prevent freeze-thaw cracking and reduce moisture infiltration, which makes them the better call for northern farms where wood expands and contracts sharply through winter. Waterproofers and stain-and-sealer combination products typically need reapplication every 2–3 years depending on sun and rain exposure.
Pro Tip: Apply stains and sealers when air temperature is between 50°F and 90°F and no rain is forecast for at least 24 hours. Applying in direct midday sun causes the product to dry too fast, leaving an uneven finish that won’t penetrate properly.
Synthetic and composite materials
UV-stable polymer coatings on vinyl and composite fencing are built into the material at the factory, so there’s no field treatment required. What you do need to watch is the hardware: screws, brackets, and staples on a PVC fence can corrode even when the fence itself doesn’t. Use stainless steel or hot-dip galvanized fasteners throughout.
How does installation technique prevent weather-related fence failure?
Even the best materials fail early when installation shortcuts are taken. Post depth, drainage, and hardware choices are where most long-term weather damage originates.
Post depth and frost heave
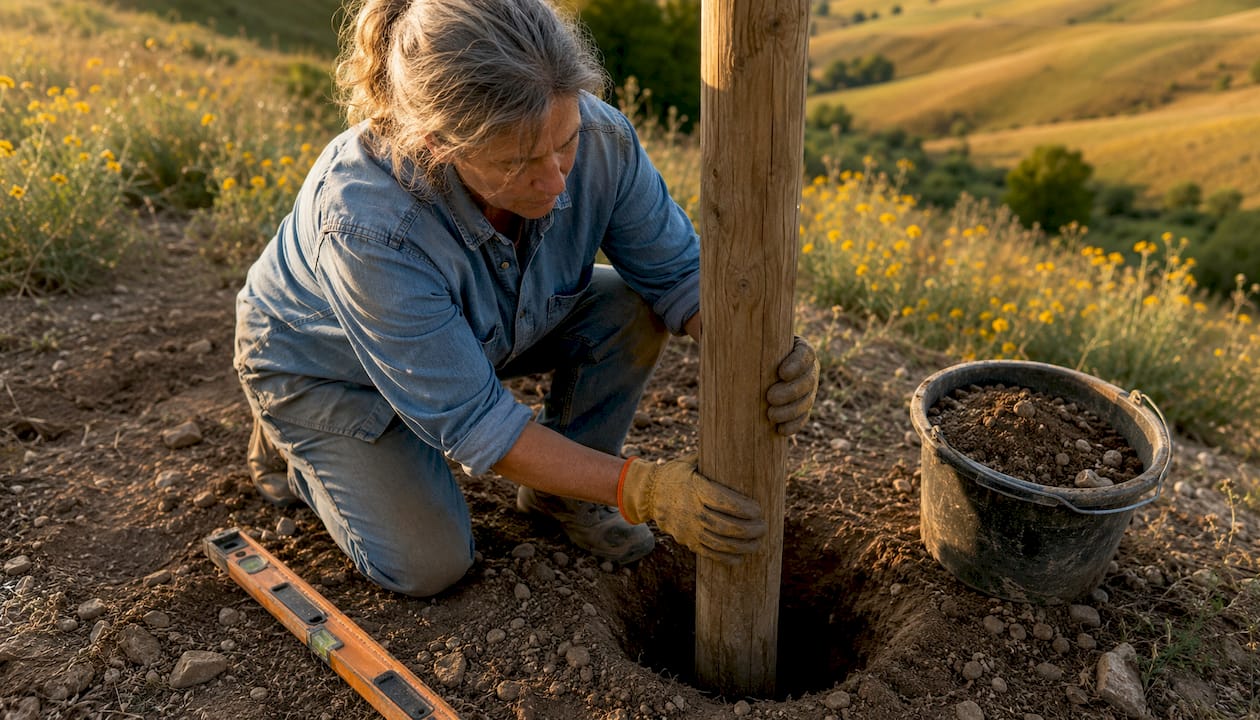
Frost heave can lift fence posts 1–4 inches per season in severe cases. The reliable fix is setting posts below the local frost line, which varies from a few inches in the deep South to 48 inches or more in northern states. USDA frost-line maps and your county extension office are the authoritative sources for your specific location. For concrete-set posts, the footing should extend at least 6 inches below the frost line. For driven T-posts in sandy or loose soils, go deeper than the minimum and compact the surrounding soil.
Recommended post depths by type:
- Wood corner and brace posts: Minimum 3.5 feet deep; 4 feet in freeze-thaw zones.
- Wood line posts: Minimum 2.5 feet; one-third of total post length in the ground is the standard rule of thumb.
- Steel T-posts: Drive to the anchor plate at minimum; add 2–4 inches in soft soils.
- Concrete-set posts: Footing depth = frost line depth plus 6 inches.
Bracing for wind and tension
Corner and end assemblies carry the most load and are the first to fail in high-wind events. A proper H-brace or diagonal brace assembly is non-negotiable for any high-tensile wire installation. Brace posts should be set at least 8 feet apart, with a horizontal rail and diagonal wire tensioned to resist the pull of the fence line. For T-post spacing, 10–12 feet is standard for most livestock wire; reduce to 8 feet in high-wind areas or on slopes where the wire changes angle.
Pro Tip: In areas with prevailing strong winds, orient your corner braces so the diagonal wire runs from the bottom of the brace post to the top of the line post — this counters the direction of wind load rather than working against it.
Drainage and grade management
Standing water at the base of posts accelerates rot in wood and corrosion in metal. Grade the soil away from posts at installation, and avoid setting posts in low spots where water collects after rain. For fence lines that cross drainage channels, use culverts or leave deliberate gaps in the bottom wire rather than running the fence tight to the ground, which traps debris and holds moisture.
Hardware choices
Every piece of hardware on a farm fence is a potential corrosion point. Use hot-dip galvanized or stainless steel staples, clips, and tensioners throughout. For electric fence insulators, UV-stabilized polypropylene holds up far longer than standard plastic in full-sun environments. Ferrules and crimps on high-tensile wire should match the wire’s zinc coating grade. You can find more fence stability techniques that cover anchoring and hardware selection in detail.
Installation checklist:
- Confirm local frost line depth before digging
- Set corner and brace posts first; check plumb before backfilling
- Compact backfill in 6-inch lifts around posts
- Grade soil away from post bases
- Use corrosion-resistant hardware throughout
- Tension wire to manufacturer spec; over-tensioning causes post lean
What does a good farm fence inspection and maintenance schedule look like?
Consistent inspection is what separates a 15-year fence from a 30-year fence. The goal is catching small problems before a storm turns them into a full section replacement.
Inspection cadence
Walk every fence line at least twice a year: once in early spring after the ground thaws (to catch frost heave, post movement, and winter damage) and once in late summer or early fall before storm season. After any significant storm, do a targeted walk of the lines most exposed to wind and falling debris.
Regularly inspect low-traffic fence lines and trim dead or weak tree limbs near the perimeter. Fallen debris is a primary cause of fence failure during storms, and it’s the kind of damage that builds up invisibly on lines you don’t walk often.
What to inspect
- Post integrity: Check for lean, rot at the base, and frost heave. A post that moves more than an inch at the top needs immediate attention.
- Wire tension: Sagging wire catches debris, lets animals push through, and accelerates corrosion at contact points.
- Corrosion points: Look for rust on wire, clips, staples, and connectors. Surface rust is manageable; deep pitting means replacement.
- Coating condition: Check wood for peeling stain, bare spots, or gray weathering. Check metal for scratches that expose bare steel.
- Vegetation contact: Grass, vines, and brush holding against the fence trap moisture and accelerate rot and rust. Clear a 6-inch buffer on both sides.
- Hardware and insulators: Check that staples are seated, insulators are uncracked, and tensioners haven’t loosened.
Pro Tip: Focus your most thorough inspections on low-traffic lines and fence sections under or near trees. These are the spots that go longest without eyes on them and where debris damage accumulates fastest.
Maintenance frequencies
| Task | Frequency |
|---|---|
| Walk all fence lines | Twice yearly + after storms |
| Re-tension wire | Annually or when sag is visible |
| Reapply wood stain/sealer | Every 2–3 years |
| Clear vegetation from fence base | Spring and fall |
| Inspect and replace hardware | Annually |
| Check electric fence voltage | Monthly during grazing season |
For a deeper look at keeping fences performing year after year, Fencefast’s guide on fence longevity tips covers maintenance priorities by material type.
How do weatherproofing choices affect animal safety for horses, cattle, sheep, and pigs?
Weather resistance and animal safety aren’t always the same goal. A choice that extends fence life can create new hazards if it’s not matched to the species it contains.
Horses
Horses need highly visible fences to avoid injury. A horse that can’t see a wire fence clearly will run through it, and the resulting lacerations from barbed wire or high-tensile wire can be severe. For horse paddocks and pastures, wood board fencing, vinyl rail, or wide poly tape on electric strands are the right choices. Avoid barbed wire entirely for horses. If you use high-tensile wire, add a visible top rail or poly tape strand at chest height.
Electric fence behavior in wet weather is worth understanding for any species, but especially horses. Electric fence performance drops in wet conditions due to voltage leakage across wet vegetation. The best mitigations are raising the bottom wire off the ground, installing a bottom-wire disconnect switch for heavy rain events, and using a low-impedance energizer that maintains output under load. For horses, a fence that loses its charge unpredictably is more dangerous than one that’s consistently off, because it trains horses to test the wire.
For more on winterizing electric fences and wet-weather performance, Fencefast has detailed guidance specific to cold and wet conditions.
Cattle
Cattle fences should be at least 54 inches tall for reliable containment. Cattle push hard against fences, especially near feed or water, so post depth and brace integrity matter more here than for smaller animals. Woven wire with a top high-tensile strand handles the combination of containment and weather resistance well. Barbed wire is acceptable for cattle but adds a corrosion-maintenance obligation at every barb. For cattle-specific fencing recommendations, Fencefast’s cattle fencing best practices guide covers height, spacing, and material choices in detail.
Sheep and pigs
Sheep require tighter wire spacing than cattle to prevent head entrapment. Woven wire with 4-inch or smaller openings is standard. Pigs are low to the ground and strong; a bottom strand of electric wire or a buried apron of wire mesh prevents rooting under the fence. For both species, check for sharp wire ends and protruding staples after any storm repair, since these animals are more likely to contact the lower sections of a fence.
Species-specific rules of thumb:
- Horses: visible top rail or poly tape; no barbed wire; low-impedance energizer for electric strands
- Cattle: minimum 54 inches tall; heavy-gauge woven wire or high-tensile; strong corner braces
- Sheep: 4-inch or smaller mesh openings; check for head-entrapment gaps after frost heave
- Pigs: electric bottom strand or buried wire apron; inspect for rooting damage weekly
What do weatherproof fencing materials cost, and how long do they last?
Higher upfront cost usually means lower lifetime cost, but the math depends on your climate and how consistently you maintain the fence. The table below uses conservative ranges; actual costs vary by region, supplier, and installation method.
| Material | Approx. Cost per Linear Foot (installed) | Lifespan Without Treatment | Lifespan With Treatment/Coating |
|---|---|---|---|
| Pressure-treated wood | $8–$20 | 7–10 years | Up to 20 years |
| Galvanized steel wire | $2–$6 | 20–30 years | 30–50 years (hot-dip) |
| High-tensile wire | $1–$4 | 15 years | up to around 20 years (galvanized) |
| Vinyl/PVC | $15–$30 | 20–30 years (no treatment needed) | Same |
| Composite | $20 | 20–30 years | Same |
| Polypropylene mesh | $2 | 5–10 years | 5–10 years |
Where the ROI math actually works
The clearest return on investment comes from upgrading post quality and coating grade at initial installation. Replacing a failed post mid-fence-life costs far more in labor than the difference between a standard post and a properly treated or metal post at the start. Similarly, the price gap between basic zinc-coated wire and hot-dip galvanized wire is small per linear foot, but the difference in service life in wet climates is substantial.
Wood fencing is the most maintenance-sensitive option. The cost of staining and sealing every 2–3 years adds up, but it’s still cheaper than replacing an entire fence run that failed at year eight because it was never treated. Vinyl and composite carry higher upfront costs but essentially zero treatment costs over their lifespan, which makes them competitive on a 20-year total cost basis.
- Best value for high-moisture climates: Hot-dip galvanized steel wire with metal posts.
- Best value for horse operations: Wood or vinyl top rail with galvanized wire lower sections.
- Best value for tight budgets: Pressure-treated wood posts with galvanized wire, maintained on a 2–3 year staining schedule.
For more on durable fencing solutions and how material choices play out over time, Fencefast’s resource library covers cost comparisons by climate zone.
How do you prepare for and recover from severe weather events?
Storm prep is not complicated, but it has to happen before the storm, not during it. A fence that’s 80% ready is not 80% safe for your animals.
Before a storm
- Walk the full perimeter and identify any post that leans, any wire that sags, and any section where a tree limb hangs over the fence line.
- Trim or remove dead limbs within falling distance of the fence. This is the single highest-impact pre-storm action.
- Tighten loose wire and re-seat any staples that have pulled out.
- Secure loose panels, gates, and temporary sections with additional clips or wire ties.
- Move vulnerable animals (horses, young stock) to interior paddocks or shelters away from fence lines exposed to prevailing wind.
- Disconnect the bottom wire on electric fences if heavy rain is forecast, to prevent voltage drain across wet ground.
Pro Tip: Keep a pre-loaded storm kit in your barn or truck: a roll of high-tensile wire, a bag of T-post clips, a fence stretcher, a pair of fencing pliers, and several temporary step-in posts. When a section goes down at 6 AM after a storm, you want to be able to restore containment in 20 minutes, not drive to town.
After a storm
Prioritize animal containment above everything else. Before you assess damage, confirm that all animals are accounted for and that any breached sections are temporarily closed.
- Check the highest-risk sections first: corners, gates, sections near trees, and any low-lying areas that may have flooded.
- Use temporary step-in posts and wire to restore containment on breached sections before making permanent repairs.
- Document all damage with photos before you start repairs. Insurance claims for storm damage require evidence, and photos taken before cleanup are far more useful than after.
- Replace any post that has snapped at the base or been pushed more than 2 inches out of plumb. Temporary bracing is a short-term fix only.
For step-by-step repair guidance, Fencefast’s fence repair guide covers both temporary and permanent fixes.
How do you choose the right weatherproofing strategy for your farm?
The right strategy depends on four variables: climate risk, livestock species, terrain, and maintenance capacity. Work through these questions before buying materials or planning an upgrade.
Decision flow
- What is your primary climate risk? Freeze-thaw cycles demand deep posts and oil-based wood treatments. High humidity and salt air demand hot-dip galvanized metal throughout. High UV exposure (desert Southwest) demands UV-stable coatings on synthetics and regular wood treatment.
- What species are you containing? Horses require visibility. Cattle require height and strength. Sheep and pigs require tight mesh and ground-level security.
- What is your soil type and frost line depth? Sandy soils require deeper posts or concrete footings. Clay soils hold moisture and accelerate post rot. Check USDA frost maps for your county.
- What is your maintenance capacity? If you can commit to a 2–3 year staining schedule, pressure-treated wood is cost-effective. If you can’t, invest more upfront in galvanized steel or vinyl.
Recommended material and coating combinations by farm profile
| Farm Profile | Recommended Material | Coating/Treatment | Key Installation Note |
|---|---|---|---|
| Northern cattle operation | High-tensile galvanized wire | Hot-dip galvanized hardware | Posts below frost line; H-brace corners |
| Horse farm, humid climate | Wood top rail + galvanized wire | Oil-based stain every 2–3 years | Visible top rail; no barbed wire |
| Sheep/goat operation, high wind | Woven wire + T-posts | Hot-dip galvanized wire | 8-foot T-post spacing; tight bottom wire |
| Coastal property, salt air | Vinyl or hot-dip galvanized steel | UV-stable; stainless hardware | Inspect hardware annually |
| Budget-limited mixed livestock | Pressure-treated wood posts + galvanized wire | Oil-based stain; zinc hardware | Prioritize corner post depth |
Questions to ask before buying or upgrading
- What is the frost line depth in my county?
- Is my soil sandy, clay, or rocky? Does it drain well?
- What is my stocking density, and where do animals congregate and push hardest?
- Am I in a coastal, high-humidity, or high-UV environment?
- How many hours per year can I realistically commit to fence maintenance?
For a broader look at matching materials to your operation, Fencefast’s smart livestock fencing ideas covers practical combinations for common U.S. farm types.
What does a field-tested farm fence inspection checklist look like?
An experienced fencing supplier walking your property would look at more than just the obvious. Here’s a prioritized checklist that covers the failure points most farmers miss.
Structural and post integrity
- Post plumb check: Use a level or plumb bob on every corner and brace post. A post that’s more than 1 inch out of plumb at the top is under stress and will fail faster under load.
- Post base inspection: Probe the base of every wood post with a screwdriver or spike. If it sinks more than half an inch with hand pressure, the post has hidden rot and needs replacement.
- Frost heave indicators: Look for posts that have risen above their original set depth, or that rock when pushed. This is most visible in spring after the first thaw.
- Concrete footing cracks: Cracks in concrete footings allow water infiltration, which accelerates freeze-thaw damage. Fill with hydraulic cement or plan for replacement.
Wire, hardware, and tension
- Check wire tension by pressing the center of each span. Wire that deflects more than 3–4 inches under moderate hand pressure needs re-tensioning.
- Inspect every staple, clip, and ferrule for rust. Surface rust is a warning; deep pitting or crumbling means the hardware has lost structural integrity.
- Look for hardware fatigue at tension points, particularly where high-tensile wire wraps around corner posts or through tensioners. This is where wire breaks most often.
- Check electric fence insulators for cracks, UV yellowing, or physical damage. A cracked insulator grounds the fence and kills voltage.
Vegetation and ground movement
- Clear any grass, vines, or brush growing against the fence. Vegetation contact holds moisture against wood and metal, and it shorts out electric strands.
- Look for erosion or soil movement at the fence base, particularly on slopes. Exposed post bases are vulnerable to rot and frost damage.
- Check for animal-created depressions at gates and high-traffic corners. These collect water and accelerate post rot.
Pro Tip: Carry a 6-foot tape measure during inspections. Check that electric strand heights match your original spec (they drop as posts lean or wire stretches), and verify that the bottom wire is still high enough to prevent grounding on wet grass. A strand that’s dropped 3 inches can be the difference between a working fence and a dead one.
Triage: fix now vs. schedule
Fix immediately: any post that has snapped, any section where animals can breach, any electric insulator that is cracked or missing, and any wire that has broken or lost tension entirely.
Schedule within 30 days: posts with early-stage rot, wire with surface rust, coating failures on wood, and vegetation that hasn’t yet contacted the fence.
Document and monitor: minor post lean that hasn’t worsened, surface rust on hardware that is not yet pitting, and areas where drainage is slow but not causing active damage.
Key Takeaways
Weatherproofing farm fencing delivers the best long-term return when you combine the right material, a corrosion-resistant coating, correct post depth below the frost line, and a consistent twice-yearly inspection routine.
| Point | Details |
|---|---|
| Material choice is the foundation | Galvanized steel and vinyl/PVC outlast untreated wood by decades in wet or freeze-thaw climates. |
| Coatings extend lifespan significantly | Hot-dip galvanized wire lasts 30–50 years; treated wood lasts up to 20 years vs. 7–10 untreated. |
| Post depth prevents frost failure | Frost heave can lift posts 1–4 inches per season; set posts below the local frost line to prevent it. |
| Twice-yearly inspection catches failures early | Walk fence lines in early spring and before fall storm season; focus on low-traffic lines and tree-adjacent sections. |
| Fencefast supports the full project | Fencefast carries galvanized wire, electric fencing components, and hardware, with design consulting and nationwide shipping. |
What farms consistently get wrong about weatherproofing
The most common mistake isn’t choosing the wrong material. It’s underestimating how much the installation and maintenance details matter relative to the material itself. A hot-dip galvanized wire fence set in shallow posts, with no brace assembly and no vegetation management, will fail faster than a basic galvanized wire fence installed correctly and walked twice a year.
Post depth is the most skipped specification. Farmers in northern states routinely set posts at 24–30 inches because that’s what the post driver makes easy, not because it’s below the frost line. The result is a fence that heaves visibly every spring and loses tension incrementally until a single storm takes down a whole section.
Coating quality is the second most common shortcut. Basic zinc-coated wire is cheaper per roll, but in high-humidity or coastal environments, the difference in service life between basic zinc and hot-dip galvanized is often 15–20 years. That’s a fence replacement versus a fence that outlasts the mortgage.
Vegetation management is the most overlooked maintenance task. Grass and brush growing against a fence line don’t just short out electric strands; they hold moisture against wood and metal, accelerate rot and rust, and make it impossible to see early corrosion or post movement during inspections. Clearing a 6-inch buffer twice a year costs almost nothing and prevents a disproportionate share of weather-related failures.
Corrective checklist:
- Verify post depth against your county frost line before driving a single post
- Specify hot-dip galvanized wire and hardware for any fence in a wet, coastal, or freeze-thaw climate
- Clear vegetation from the fence base every spring and fall
- Inspect post bases with a probe, not just your eyes
- Call a professional fencing contractor when corner assemblies need rebuilding or when a section has failed repeatedly in the same location
Fencefast has the materials and expertise for your weatherproofing project
Replacing a fence that failed too soon is one of the most avoidable costs on a farm. Fencefast stocks the full range of materials that make the difference: hot-dip galvanized wire, high-tensile fencing components, UV-stable electric fence insulators, corrosion-resistant hardware, and the electric fencing systems that keep working through wet weather. Every order ships nationwide, and the team offers design consulting to help you match materials to your climate, livestock, and terrain before you buy.

Whether you’re building new, upgrading an aging fence line, or preparing for storm season, Fencefast gives you access to the right products and the expertise to use them correctly. Visit Fencefast to browse materials, request a consultation, or get a quote for your next fencing project.
Useful sources
The following resources were used to build this guide. They’re worth bookmarking for ongoing reference.
- Farm Bureau Financial Services: Protect Your Fence from Weather Damage — Practical maintenance and inspection advice, including the importance of trimming tree limbs near fence lines and inspecting low-traffic sections.
- Lowe’s: How to Protect a Wood Fence — Guidance on water-based vs. oil-based stains, reapplication intervals, and realistic lifespan estimates for treated wood fencing.
- Lowe’s: Farm Fence Buying Guide — Species-specific height and visibility requirements, including the 54-inch minimum for cattle containment and visibility needs for horses.
- Livestock Fencing Hub: Climate and Weather Factors Guide — Frost heave data (1–4 inches per season in severe cases) and post-depth recommendations tied to USDA frost-line maps.
- EmaxGrow: Can Rain Affect Electric Fence Performance? — Wet-weather electric fence management, including bottom-wire disconnect strategies and low-impedance energizer selection.
- Pacific Fence and Wire: The Best Way to Fence a Farm — Corrosion-resistance hierarchy for metal fencing and polypropylene mesh trade-offs.
- Ready Seal: How to Stain and Protect Your Fence from Weather Damage — Oil-based stain application for freeze-thaw protection and moisture infiltration reduction.
- USDA Frost Line Maps and County Extension Offices — The authoritative source for local frost-line depth. Search your state’s land-grant university extension service for county-specific maps and soil type guidance.
- Fencefast Resource Library — Practical guides on fence longevity, repair, livestock safety, and electric fence winterization, written for agricultural and rural customers.

