
Over half of all livestock escapes on Canadian farms trace back to a single critical failure: poor electric fence grounding. When your ground rod system underperforms, animals slip through containment boundaries despite functioning energizers and intact wires. This guide walks you through selecting materials, choosing optimal locations, installing rods to the correct depth, securing connections, and testing your system to achieve grounding resistance below 25 ohms and reduce fence failures by up to 40%.
Table of Contents
- Prerequisites: What You Need Before Installing Ground Rods
- Step 1: Selecting The Right Ground Rod Location
- Step 2: Installing Ground Rods To Optimal Depth
- Step 3: Securing Reliable Wire Connections
- Step 4: Testing And Troubleshooting Grounding Effectiveness
- Common Mistakes And How To Fix Them
- Expected Outcomes And Performance Benchmarks
- Optimize Your Electric Fence Installation With Fencefast Tools
- Frequently Asked Questions About Electric Fence Ground Rods
Key takeaways
| Point | Details |
|---|---|
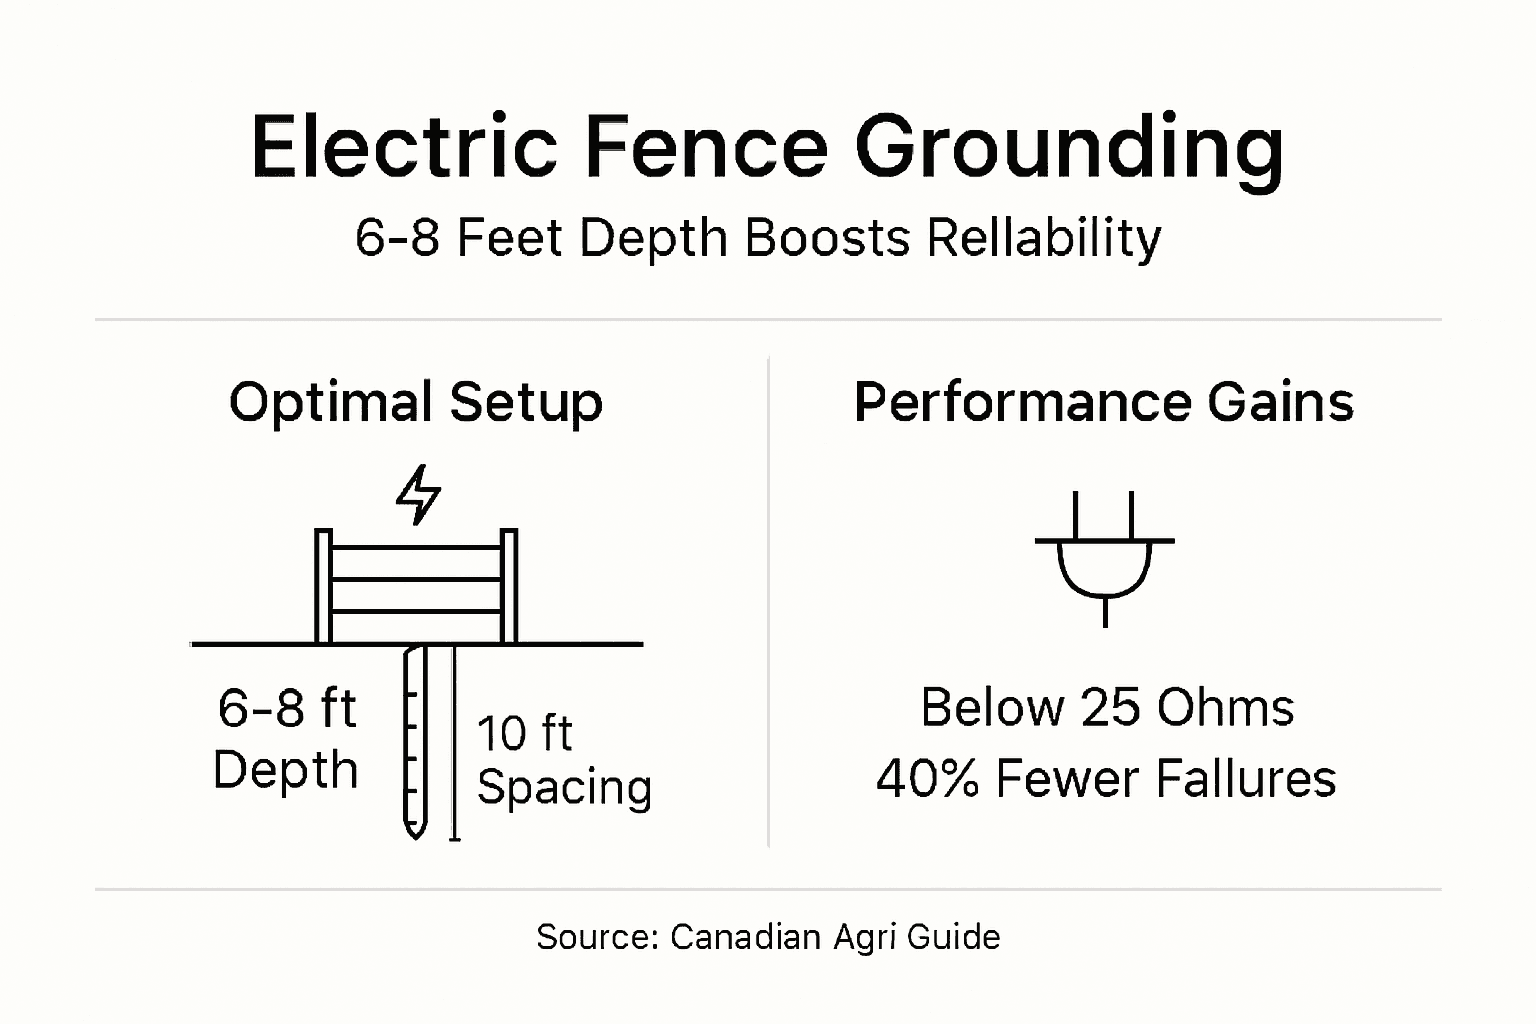
| Optimal depth | Drive ground rods 6 to 8 feet deep in moist soil for reliable conductivity and shock delivery. |
| Material choice | Galvanized steel rods outlast copper in Canadian climates, resisting corrosion and weathering better. |
| Rod spacing | Use at least three rods spaced 10 feet apart for energizers rated up to 15 joules. |
| Resistance target | Test grounding resistance to ensure it stays below 25 ohms for effective fence operation. |
| Failure reduction | Correct installation cuts electric fence failures by approximately 40 percent. |
Prerequisites: What you need before installing ground rods
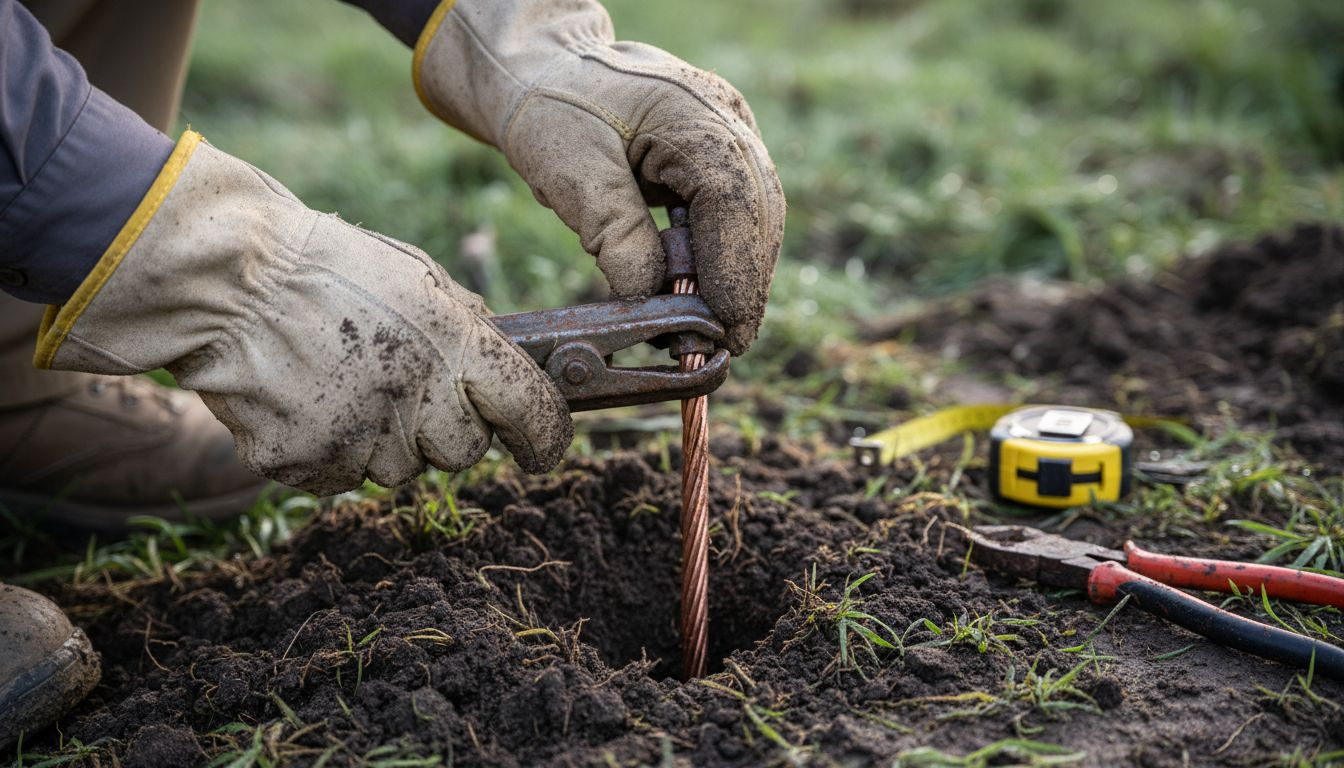
Before driving your first ground rod, assemble the right materials and tools to avoid delays and safety hazards. You need galvanized steel or copper rods 6 to 8 feet long, insulated ground wire rated 10 to 14 gauge, and proper installation tools including a heavy sledgehammer or post driver.
Galvanized steel rods offer superior corrosion resistance in Canadian freeze and thaw cycles compared to copper alternatives. Choose rods with sufficient diameter, typically 5/8 inch, to handle energizer load without bending during installation. Insulated wire prevents current leakage and maintains system integrity over years of exposure to weather and livestock contact.
Your tool kit should include wire cutters, electrical pliers, waterproof grounding clamps, safety glasses, and heavy duty work gloves. A post driver accelerates installation and reduces fatigue when installing multiple rods across large properties. Check local utility maps before digging to avoid underground power, water, or gas lines.
Essential materials checklist:
- Galvanized steel ground rods, 6 to 8 feet long, 5/8 inch diameter
- Insulated copper ground wire, 10 to 14 gauge, corrosion resistant coating
- Waterproof grounding clamps designed for rod connections
- Heavy sledgehammer or pneumatic post driver for driving rods
- Wire cutters, electrical pliers, multimeter for testing
- Safety glasses, work gloves, utility location map
| Material | Specification | Purpose |
|---|---|---|
| Ground rod | Galvanized steel, 6-8 ft | Conducts charge into soil |
| Ground wire | 10-14 gauge, insulated | Connects rods to energizer |
| Clamps | Corrosion resistant | Secures wire to rod |
| Post driver | Heavy duty | Drives rod to depth |
Pro Tip: Test soil moisture before purchasing materials by digging a small test hole. Sandy or rocky soil may require additional rods or chemical treatment to achieve target resistance levels, so plan your budget accordingly.
Reviewing a step-by-step ground rod setup helps visualize the process before starting physical work. Understanding ground rod installation tools and materials ensures you order the right components the first time and avoid project delays.
Step 1: Selecting the right ground rod location
Location determines whether your grounding system performs reliably or fails under load. Start by identifying areas with consistently moist soil, as water content dramatically improves electrical conductivity and shock strength. Avoid rocky terrain, frozen ground, and dry sandy patches that raise resistance and weaken fence effectiveness.
Ground rods must be installed at least 10 feet away from buildings, utilities, and other grounding systems to prevent interference and safety hazards. Maintaining this clearance protects building electrical systems and ensures your fence ground operates independently. Installing too close to structures can create dangerous fault currents during lightning strikes or energizer malfunctions.
When planning multiple rod installations, space them approximately 10 feet apart in a straight line extending from the energizer. This spacing prevents electromagnetic interference between rods and allows each rod to access fresh conductive soil. Closer spacing reduces overall system effectiveness because rods compete for the same soil volume.
Canadian farms face seasonal soil moisture swings from spring thaw through winter freeze. Choose locations that retain moisture year round, such as low lying areas, drainage paths, or spots near livestock watering stations. Avoid hilltops, exposed ridges, and areas with shallow bedrock that dry out quickly.
Location selection criteria:
- Consistently moist soil with high clay or loam content for conductivity
- Minimum 10 feet clearance from buildings, power lines, water pipes, gas lines
- Accessible area allowing 10 foot spacing between multiple rods
- Low lying terrain retaining moisture through seasonal weather changes
- Clear of large rocks, tree roots, and underground obstacles
Consult ground rod location guidance tailored to Canadian soil conditions and climate patterns. Reference official guidance on ground rod placement from agricultural authorities to ensure code compliance and safety.
Step 2: Installing ground rods to optimal depth
Depth directly controls grounding performance because deeper rods reach soil layers with stable moisture content and lower electrical resistance. Drive rods vertically at least 6 to 8 feet deep, leaving a few inches above ground for clamp attachment to access conductive zones and maintain long term reliability.
Begin installation by marking the rod position and clearing surface debris. Position the rod vertically and strike the top firmly with a heavy sledgehammer using controlled swings. Maintain vertical alignment as you drive to prevent bending or breaking the rod. A pneumatic post driver speeds installation and reduces physical strain on large properties with multiple rod sites.
Leave 2 to 4 inches of rod extending above ground level for wire clamp attachment. This height allows easy connection access while protecting the clamp from soil contact and corrosion. Driving the rod flush or below grade complicates wiring and exposes connections to moisture damage.
Hard or dry soil resists rod penetration and increases installation difficulty. Pour water around the rod position to soften compacted earth before driving. This technique reduces rod bending risk and allows deeper penetration into resistant soil layers. In extremely rocky conditions, consider relocating to softer ground rather than accepting shallow installation.
Installation sequence:
- Mark rod location maintaining 10 foot spacing from other rods and structures
- Clear surface debris and vegetation from immediate installation area
- Position rod vertically and begin driving with controlled sledgehammer strikes
- Check vertical alignment frequently, correcting drift before rod reaches depth
- Drive to 6-8 foot depth, leaving 2-4 inches exposed above grade
- Verify rod stability by gently testing for movement or lean
Pro Tip: Mark your sledgehammer handle at 6 and 8 foot intervals to track installation depth without constant measurement. This visual reference speeds work and ensures consistent depth across multiple rod installations.
Review detailed specifications for ground rod installation depth requirements based on energizer output and soil conditions. Study ground rod installation best practices covering depth, spacing, and technique for Canadian agricultural applications.
Step 3: Securing reliable wire connections
Electrical connections determine whether current flows efficiently from your energizer through the ground rods into the soil. Use corrosion-resistant clamps and insulated 10-14 gauge wire to optimize conductivity and durability in harsh agricultural environments. Poor connections create resistance hotspots that weaken shock strength and allow livestock escapes.
Start by stripping 1/2 inch of insulation from wire ends using wire strippers, exposing clean copper conductor. Avoid excessive stripping that leaves bare wire exposed to weather and corrosion. Attach waterproof grounding clamps designed specifically for ground rod applications, tightening firmly to create solid metal-to-metal contact.
Connect multiple ground rods in series using continuous wire runs without splices or joints. Run wire from the energizer ground terminal to the first rod, then continue to subsequent rods maintaining firm clamp connections at each point. Lay wire flat along the ground or secure it to fence posts, avoiding sharp bends that stress conductors and create weak points.
Test each connection with a multimeter set to continuity mode before energizing the system. Touch probes to the energizer ground terminal and the furthest ground rod to verify complete circuit integrity. Zero or very low resistance readings confirm solid connections, while high resistance indicates loose clamps or damaged wire requiring correction.
Connection best practices:
- Strip wire ends cleanly without nicking or fraying copper strands
- Use clamps rated for outdoor exposure and designed for ground rod diameter
- Tighten clamp bolts firmly using appropriate wrench or driver
- Run wire in straight paths, securing to posts every 6-10 feet
- Test continuity across entire ground system before energizing fence
Explore comprehensive details on ground wire connections covering wire gauge selection, clamp types, and installation techniques. Learn wire connection best practices to ensure reliable current flow and minimize maintenance requirements.
Step 4: Testing and troubleshooting grounding effectiveness
Testing verifies whether your installation meets performance targets and identifies problems before they cause livestock escapes. Aim for ground resistance below 25 ohms; add rods or relocate if resistance is high to ensure adequate shock delivery. Proper installation reduces electric fence failures by up to 40% compared to inadequate grounding systems.
Measure ground resistance using a dedicated ground resistance tester or multimeter with earth ground testing capability. Connect test leads according to manufacturer instructions, placing auxiliary probes at specified distances from your ground rod array. Record readings under normal soil moisture conditions to establish baseline performance.
High resistance readings above 25 ohms indicate insufficient grounding requiring corrective action. Common causes include shallow rod depth, dry soil, poor wire connections, or corroded components. Inspect each connection point for tightness and corrosion, clean or replace damaged clamps, and verify rods reach full 6-8 foot depth.
Environmental factors like drought or frozen ground temporarily increase resistance and reduce shock effectiveness. During dry periods, water the soil around ground rods to restore conductivity. In winter, deep frozen soil may require additional rods or temporary grounding system modifications to maintain performance.
Troubleshooting high resistance:
- Add additional ground rods spaced 10 feet apart to increase soil contact area
- Verify all rods reach 6-8 foot depth in conductive soil layers
- Replace corroded clamps or damaged wire sections causing connection failures
- Water dry soil around rods to improve seasonal conductivity
- Relocate rods to moister soil if site remains consistently dry
| Problem | Cause | Solution |
|---|---|---|
| Resistance over 25 ohms | Insufficient rods | Add rods spaced 10 ft apart |
| Weak shock | Shallow installation | Drive rods to 6-8 ft depth |
| Intermittent operation | Loose connections | Tighten or replace clamps |
| Seasonal failures | Dry or frozen soil | Water ground or add rods |
Pro Tip: Test your grounding system twice yearly, once in spring after thaw and again in late summer during dry periods. Seasonal testing reveals performance variations and allows proactive corrections before livestock escape incidents occur.
Access detailed procedures for electric fence troubleshooting covering grounding, energizer, and wire problems. Solve common issues using the fence not working troubleshooting resource. Consult official ground resistance testing guidelines and review common grounding mistakes and fixes to improve system reliability.
Common mistakes and how to fix them
Avoiding installation errors saves time, money, and prevents livestock escapes caused by grounding system failures. Up to 40% reduction in fence failure comes from addressing common grounding mistakes that compromise electrical performance and safety.
Insufficient rod depth ranks as the most frequent error, with rods driven only 3-4 feet into soil instead of the required 6-8 feet. Shallow installation fails to reach moist conductive soil layers, creating high resistance and weak shocks. Fix this by pulling shallow rods and reinstalling to proper depth, or adding supplemental rods reaching target depth.
Poor quality clamps or loose connections cause intermittent grounding failures that puzzle farmers troubleshooting fence problems. Clamps corrode in weather exposure, oxidize, and lose electrical contact over months or years. Replace standard clamps with corrosion resistant models designed for permanent outdoor installation, and tighten all connections annually during maintenance.
Placing rods too close together wastes materials and reduces overall system effectiveness. Rods spaced less than 10 feet apart compete for the same soil volume and fail to expand the grounding footprint. Correct spacing errors by relocating rods to proper 10 foot intervals or removing excess rods and redistributing them across the fence line.
Ignoring soil moisture leads to grounding systems that perform well in spring but fail during summer drought. Selecting installation sites based only on convenience rather than year round moisture availability creates seasonal reliability problems. Fix moisture issues by relocating rods to consistently damp areas or implementing irrigation around ground rod sites during dry months.
Common errors and corrections:
- Shallow rods (under 6 feet): Pull and reinstall to 6-8 foot depth or add deeper supplemental rods
- Corroded clamps: Replace with waterproof corrosion resistant models rated for outdoor use
- Close rod spacing (under 10 feet): Relocate rods to proper 10 foot intervals for independent soil contact
- Dry soil locations: Move rods to moister areas or water ground during drought periods
- Untested systems: Measure resistance with proper testing equipment and correct high readings
Learn how to fix ground rod installation errors with detailed correction procedures for Canadian farms. Study common grounding mistakes and fixes to avoid expensive reinstallation and livestock containment failures.
Expected outcomes and performance benchmarks
Proper installation delivers measurable improvements in fence reliability, animal containment, and maintenance requirements. Three rods spaced 10 feet apart support energizers up to 15 joules with resistance below 25 ohms for consistent shock delivery across fence lines up to several miles long.
You should achieve ground resistance readings between 10-25 ohms after completing installation in typical agricultural soil conditions. Lower resistance produces stronger shocks that deter livestock more effectively and reduce escape attempts. Higher readings indicate the need for additional rods or site improvements to reach performance targets.
Complete installation of a three rod grounding system typically requires 2 to 4 hours including site selection, rod driving, wiring, and testing. Experienced installers working with proper equipment complete systems faster, while first time installations or difficult soil conditions extend project duration. Budget additional time for testing, troubleshooting, and corrective work.
Proper grounding reduces fence failures by up to 40% compared to inadequate installations, translating directly to fewer livestock escapes and lower repair costs. Effective grounding maintains consistent shock strength regardless of fence wire condition, vegetation contact, or weather variations that affect above ground components.
Long term benefits include reduced maintenance frequency, extended energizer lifespan, and improved animal respect for fence boundaries. Animals learn to avoid properly grounded fences after one or two correction shocks, reducing ongoing containment problems and property damage from escapes.
| Metric | Target | Benefit |
|---|---|---|
| Ground resistance | Below 25 ohms | Consistent shock delivery |
| Rod depth | 6-8 feet | Reliable soil contact |
| Rod spacing | 10 feet minimum | Independent grounding zones |
| Installation time | 2-4 hours | Quick system deployment |
| Failure reduction | Up to 40% | Fewer livestock escapes |
Review detailed performance benchmarks for ground rods tailored to Canadian agricultural conditions and livestock types. Reference ground rod performance and spacing guidelines to optimize system design for your specific energizer and fence configuration.
Optimize your electric fence installation with FenceFast tools
Equipping your farm with quality grounding materials ensures reliable livestock containment for years. FenceFast offers specialized tools and components designed for Canadian agricultural conditions, from corrosion resistant ground rods to waterproof clamps and heavy duty insulated wire.

Our expert guides walk you through every installation step, helping you avoid common mistakes and achieve professional results. Whether you need fence installation equipment for large scale projects or specific items for grounding system upgrades, FenceFast stocks the materials Canadian farmers trust.
Explore our comprehensive fence installation tools guide covering ground rods, post drivers, wire, and testing equipment. Learn electric fencing basics to maximize your investment in livestock security and farm infrastructure.
Frequently asked questions about electric fence ground rods
Are copper or galvanized rods better for Canadian farms?
Galvanized steel rods outperform copper in freeze-thaw cycles common across Canadian agricultural regions. Steel resists corrosion better and costs less while delivering equivalent electrical performance. Choose galvanized rods unless local soil chemistry specifically favors copper.
How many ground rods do I need for an energizer over 15 joules?
Energizers above 15 joules typically require four or more rods spaced 10 feet apart to handle increased current load. Test resistance after installing three rods, then add additional rods until resistance drops below 25 ohms. High output energizers demand more extensive grounding for reliable operation.
Why is soil moisture so important for ground rod performance?
Water conducts electricity far better than dry soil, dramatically reducing ground resistance and improving shock strength. Moist soil allows efficient current flow from rods into the earth, completing the circuit that delivers correction shocks to livestock. Dry soil creates high resistance that weakens or blocks current flow.
How often should I test my grounding system?
Test resistance at least twice yearly, in spring after soil thaws and late summer during dry periods. Additional testing after lightning strikes, equipment changes, or fence failures helps identify developing problems. Regular testing catches degraded connections and soil condition changes before livestock escapes occur.
What safety distances are required near buildings and utilities?
Maintain minimum 10 foot clearance between ground rods and buildings, power lines, water pipes, gas lines, or other grounding systems. This separation prevents dangerous fault currents during lightning events and keeps fence grounding independent from structure electrical systems. Call utility location services before digging to avoid underground hazards.

